Introduction to Christmas Fudge
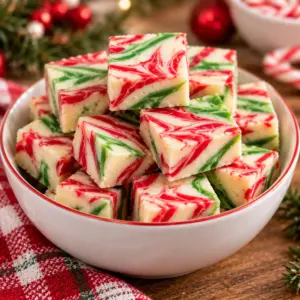
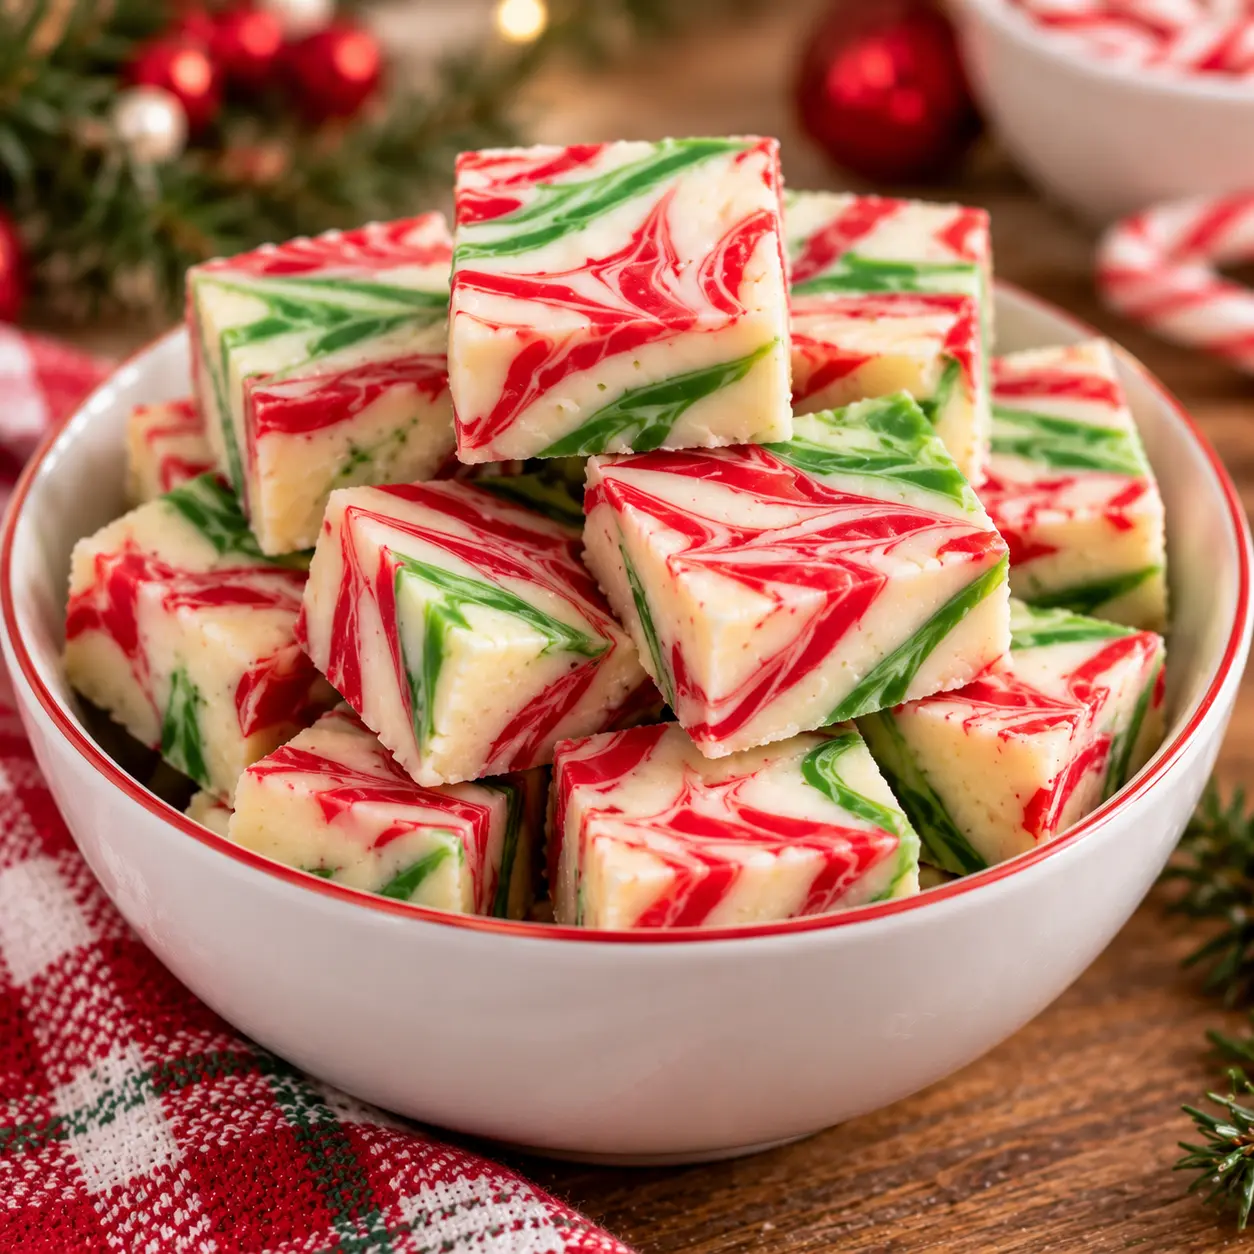
Christmas fudge is one of those holiday sweets that looks special without requiring complicated candy-making skills. This version uses white chocolate chips, sweetened condensed milk, butter, and gel food coloring to create creamy red and green squares with a smooth, firm texture.
The fudge comes together in one saucepan and does not require a candy thermometer. Melt the base gently, divide it between bowls, tint each portion, and layer the colors in a lined pan. After chilling, it is ready to cut into neat pieces for a cookie tray, dessert table, or homemade gift box.
Why You'll Love This Christmas Fudge
- This recipe uses five ingredients and simple stovetop steps, so it is approachable for a busy holiday kitchen.
- The white chocolate base sets into soft, creamy squares that are easy to slice and serve.
- Red and green gel food coloring gives the fudge a classic Christmas look without adding extra liquid.
- You can prepare the fudge ahead of time and keep it chilled until you are ready to serve it.
- The finished squares pack neatly into tins, making them useful for holiday trays and edible gifts.
Ingredients for Christmas Fudge
- 22 oz white chocolate chips
- 14 oz can sweetened condensed milk
- 4 tbsp unsalted butter
- 1/4–1/2 tsp red gel food coloring
- 1/4–1/2 tsp green gel food coloring
Use gel food coloring rather than liquid coloring because gel gives stronger color without adding enough moisture to affect the fudge texture. Add the coloring a little at a time, especially if you want softer pastel shades.
How to Make Christmas Fudge
Step 1: Prepare the Pan
Line an 8-inch square baking pan with parchment paper, leaving enough paper over two sides to act as handles. Lightly grease the parchment if desired. Set the pan aside on a level surface, and have two medium heatproof bowls ready for dividing the fudge.
Step 2: Melt the Fudge Base
Add the white chocolate chips, sweetened condensed milk, and unsalted butter to a medium heavy-bottomed saucepan. Warm the mixture over low heat, stirring often with a silicone spatula, until the chips are almost completely melted and the mixture is smooth. Remove the pan from the heat as soon as the last small pieces melt from the residual warmth. Do not let the mixture boil, since overheating can make white chocolate seize or turn grainy.
Step 3: Divide and Tint
Immediately divide the warm fudge mixture evenly between the two prepared bowls. Stir 1/4 teaspoon red gel food coloring into one bowl and 1/4 teaspoon green gel food coloring into the other. Add more of either color, up to 1/2 teaspoon total for that color, if a deeper shade is wanted. Stir each portion until the color is evenly distributed.
Step 4: Layer the Colors
Spoon alternating portions of the red and green fudge into the parchment-lined pan. Use the back of a spoon or a small offset spatula to spread the mixture into an even layer. For a marbled look, drag a butter knife lightly through the colors a few times, taking care not to overmix them.
Step 5: Chill Until Firm
Refrigerate the uncovered pan until the fudge is firm, which usually takes about 2 hours. Once set, cover the pan or transfer the fudge to an airtight container. Keep it refrigerated while it is being stored, and do not leave it at room temperature for more than 2 hours during serving.
Step 6: Cut and Serve
Lift the chilled fudge from the pan using the parchment handles and place it on a cutting board. Use a sharp knife to cut it into 32 small squares, wiping the blade between cuts for cleaner edges. Let the pieces stand at room temperature for about 10 minutes before serving for the best texture.
Tips for Success
- Use a heavy-bottomed saucepan and low heat to help the white chocolate melt evenly without scorching.
- If the fudge mixture becomes thick before you finish coloring it, work quickly and spread it into the pan while it is still warm.
- For cleaner slices, chill the fudge fully and use a large sharp knife warmed under hot water and dried before each cut.
- Do not add extra milk, water, or flavoring unless you have tested the recipe, because additional liquid can keep the fudge from setting properly.
- Store the fudge in an airtight container with parchment between layers in the refrigerator for up to 2 weeks.
Equipment Needed
- 8-inch square baking pan
- Medium heavy-bottomed saucepan
- Two medium heatproof bowls
Variations
- For a peppermint version, stir a small amount of peppermint extract into the warm base if you are comfortable adjusting the texture and flavor, then use the red and green coloring as directed.
- For a simple two-tone design, spread the green fudge into the pan first and the red fudge over it instead of marbling the colors.
- For a softer holiday palette, use only 1/4 teaspoon of each gel color and avoid swirling the portions together.
- For gift boxes, cut the set fudge into smaller bite-size pieces and place parchment between each layer.
- For a different finish, keep the colors separate and spoon them into the pan in alternating rows for a striped look.
Serving Suggestions
Serve the fudge chilled or let it sit at room temperature for about 10 minutes before serving. Arrange the squares on a dessert platter with cookies, chocolate truffles, or other holiday candies. For gifting, place the pieces in a parchment-lined tin or food-safe box and keep the container cool until delivery.
FAQs about Christmas Fudge
Can I make Christmas fudge without a candy thermometer? Yes. This recipe does not require a candy thermometer because the white chocolate, condensed milk, and butter are melted together rather than cooked to a specific sugar temperature. Warm the mixture gently and remove it from the heat as soon as it is smooth.
Why did my white chocolate fudge turn grainy? White chocolate can become grainy if it is overheated or exposed to moisture. Use low heat, stir often, and avoid letting steam or water get into the saucepan or bowls. Remove the pan from the heat when only a few small chips remain and let residual heat finish the melting.
How long does Christmas fudge last? Stored in an airtight container in the refrigerator, the fudge keeps well for up to 2 weeks. Separate layers with parchment so the pieces do not stick together. Discard it if it develops an off smell, unusual moisture, or mold.
Can I freeze this fudge? Yes. Wrap the fully set fudge tightly, place it in a freezer-safe airtight container, and freeze it for up to 2 months. Thaw it in the refrigerator while still wrapped to reduce condensation, then cut or serve it once chilled.
How can I get clean, even fudge squares? Chill the fudge until completely firm, then lift it from the pan and use a sharp knife. Warm and dry the knife between cuts, and trim the outer edges first if you want every piece to have straight sides.
Final Thoughts
This Christmas fudge is a practical holiday recipe with a festive finish and a short ingredient list. Make it a day or two ahead, keep it chilled, and cut it into small squares when you are ready to share it.
Looking for more? This recipe is part of our roundup of 6 Best Christmas Fudge Recipes for Easy Holiday Treat Trays.
Christmas Fudge
Ingredients
Equipment
Method
- Melt the white chocolate chips, sweetened condensed milk, and unsalted butter together in a saucepan over low heat, stirring until smooth without boiling.
- Divide the mixture between two bowls, tint one red and one green, layer or swirl the colors in a parchment-lined 8-inch pan, and refrigerate for about 2 hours before cutting.
Nutrition
Notes
- Keep the heat low because white chocolate can scorch or become grainy.
- Store the set fudge in an airtight container in the refrigerator for up to 2 weeks.
- For food safety, do not leave the fudge at room temperature for more than 2 hours.