Introduction to Peanut Butter Marshmallow Cups
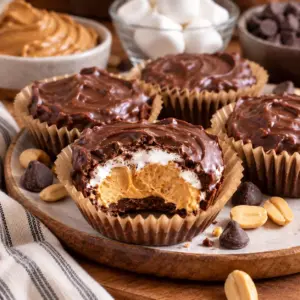
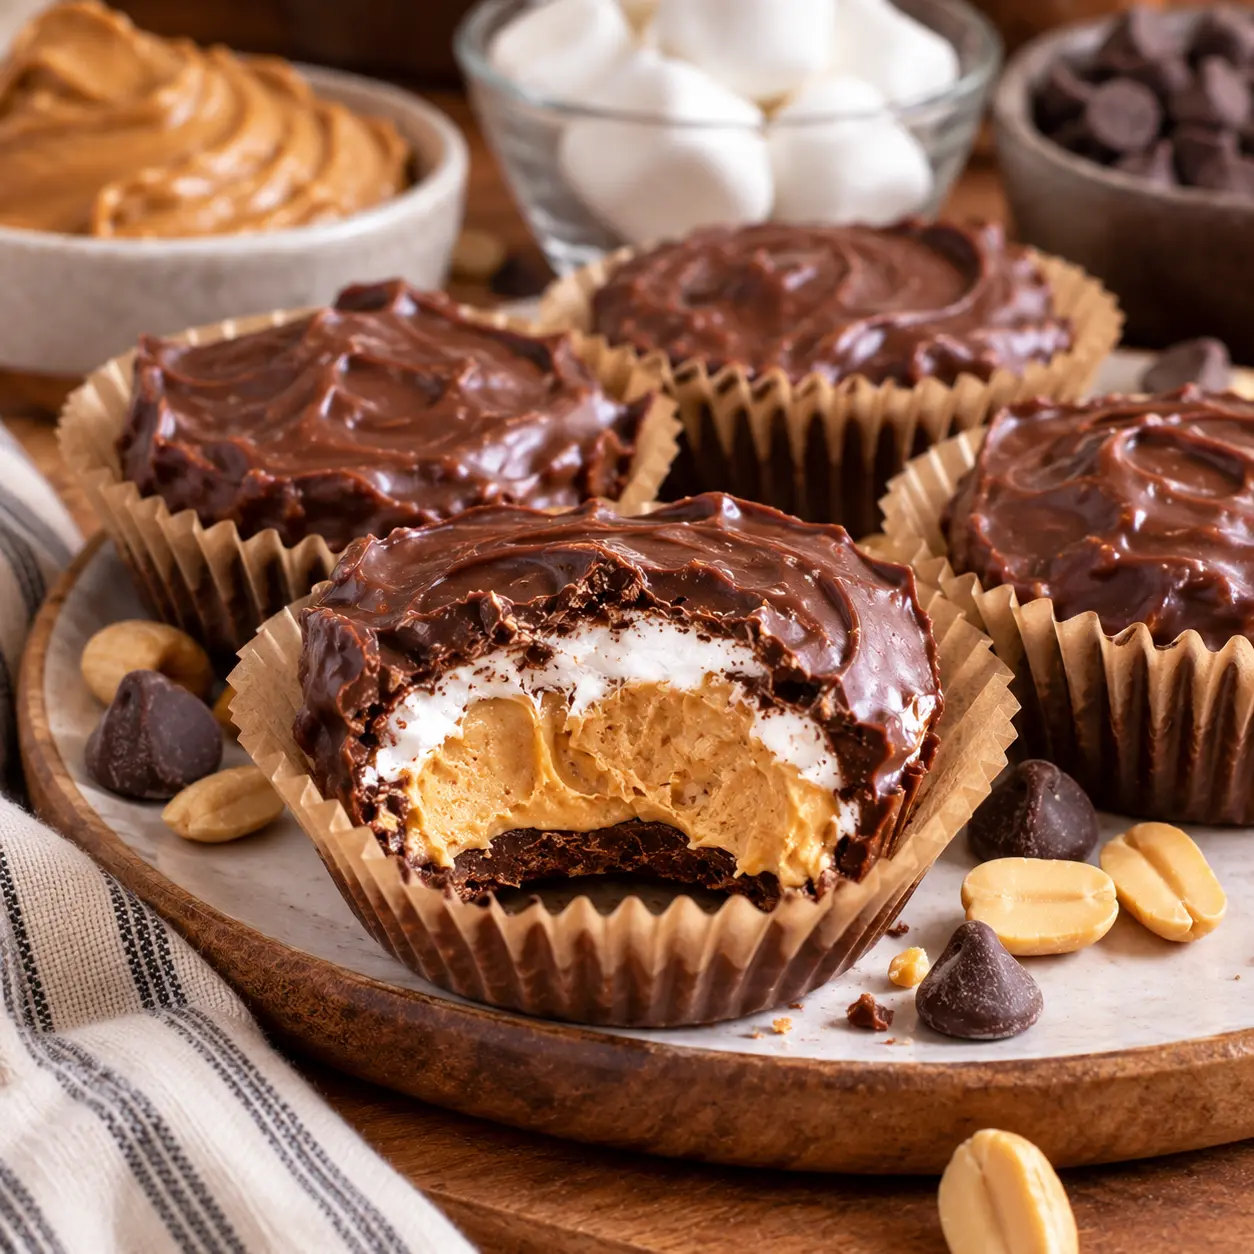
These Peanut Butter Marshmallow Cups combine a crisp chocolate shell with a soft peanut butter center and a sweet layer of marshmallow creme. They look like a small confection from a candy shop, but the method is simple enough for a first-time candy maker.
The recipe makes eight generous cups in a standard muffin pan. You will melt the chocolate gently, mix a smooth peanut butter filling, and chill the layers until firm. Because the filling includes butter, store the finished cups in the refrigerator and let them stand briefly before serving.
Why You'll Love This Peanut Butter Marshmallow Cups
- The recipe uses only five ingredients and does not require a candy thermometer.
- The chocolate shell gives each cup a clean snap while the filling stays soft and creamy.
- Marshmallow creme adds a light, stretchy layer without requiring homemade marshmallows.
- A muffin pan keeps the portions even and makes shaping the cups straightforward.
- The finished candy can be made ahead and stored in the refrigerator for several days.
Ingredients for Peanut Butter Marshmallow Cups
- 1¾ cups semi-sweet chocolate chips
- ½ cup creamy peanut butter
- 6 tbsp powdered sugar
- 1½ tbsp unsalted butter
- 4 tbsp marshmallow creme
Use regular creamy peanut butter rather than a very runny natural style if possible. If your peanut butter has separated, stir it thoroughly before measuring so the filling has a consistent texture. Let the unsalted butter soften slightly before mixing, or warm it only until melted and cool enough to combine without making the peanut butter oily.
How to Make Peanut Butter Marshmallow Cups
Step 1: Prepare the Pan
Line eight wells of a standard muffin pan with paper or foil liners. Set the pan on a level surface that will fit in your refrigerator. Have a small spoon or pastry brush ready for spreading the chocolate up the sides of the liners.
Step 2: Melt the Chocolate
Place the 1¾ cups semi-sweet chocolate chips in a microwave-safe bowl. Microwave at 50 percent power for 30 seconds, stir well, and continue in 15-second intervals until the chips are nearly melted. Stir until smooth, using the residual heat to finish the job. Do not let water contact the chocolate, and do not overheat it, or it may become thick and grainy.
Step 3: Form the Chocolate Shells
Spoon about 1½ tablespoons of melted chocolate into each liner. Use the back of the spoon or a small pastry brush to coat the bottom and push the chocolate about 1 inch up the sides. Keep the layer fairly even, then place the pan in the refrigerator for 10 minutes, or until the shells feel firm when lightly touched.
Step 4: Mix the Peanut Butter Filling
Stir together the ½ cup creamy peanut butter, 6 tbsp powdered sugar, and 1½ tbsp unsalted butter in a small bowl. If the butter is not soft enough to blend, warm the mixture in the microwave for 10 seconds at a time, stirring after each interval. The filling should be thick and spreadable, not hot or runny.
Step 5: Add the Filling and Marshmallow
Divide the peanut butter mixture among the chilled chocolate shells, using about 1 tablespoon per cup. Gently spread it into an even layer, leaving a little room around the edges. Add 4 tbsp marshmallow creme, dividing it among the cups, and smooth it lightly over the peanut butter. Avoid pressing hard enough to disturb the chocolate shell.
Step 6: Seal and Chill
Spoon the remaining melted chocolate over the marshmallow layer, covering each cup completely and sealing it to the chocolate sides. Refrigerate for 30 to 45 minutes, until the tops are firm. Remove the liners from the pan and let the cups stand at room temperature for 5 to 10 minutes before eating. Keep leftovers refrigerated in a covered container.
Tips for Success
- Melt chocolate slowly and stir often. Chocolate can look solid while already being soft enough to smooth.
- If the chocolate becomes too thick, warm it for 5 to 10 seconds and stir before continuing.
- A small cookie scoop helps divide the peanut butter mixture evenly among the cups.
- Leave a thin chocolate border visible around the filling before adding the top layer so the seal is easier to make.
- For neat serving, chill the cups fully before peeling away the liners, then use a sharp knife warmed under hot water and dried between cuts if you want clean halves.
Equipment Needed
- Standard 12-cup muffin pan
- Eight paper or foil cupcake liners
- Microwave-safe mixing bowl
Variations
- Use milk chocolate chips for a sweeter, softer-tasting chocolate shell, keeping the same quantity.
- Stir ¼ cup finely chopped roasted peanuts into the peanut butter filling for extra crunch.
- Add a small pinch of fine sea salt to the peanut butter mixture to balance its sweetness.
- Replace half of the semi-sweet chocolate chips with dark chocolate chips for a deeper chocolate flavor.
- Make smaller candy bites by using 16 mini muffin liners and dividing each layer into smaller portions; chill times may be slightly shorter.
Serving Suggestions
Serve the cups slightly cool rather than ice-cold, when the chocolate has softened just enough to bite cleanly. They are a good addition to a homemade candy tray alongside chocolate bark, fudge, or simple truffles. For storage, place the cups in a single layer or separate layers with parchment in an airtight container and refrigerate for up to 7 days. Do not leave them at room temperature for more than 2 hours, or 1 hour if the room is above 90°F, because the butter-based filling can soften and spoil more quickly.
FAQs about Peanut Butter Marshmallow Cups
Can I make Peanut Butter Marshmallow Cups without a microwave? Yes. Melt the chocolate and butter separately in heatproof bowls set over saucepans of barely simmering water. Stir frequently and keep the bottoms of the bowls above the water. Remove the bowls from the heat as soon as the ingredients are smooth.
Why did my chocolate shells crack? The shell may have been spread too thin, or the filling may have been pressed into it too firmly. Use enough chocolate to cover the base and sides evenly, chill only until firm, and spread the filling gently.
Can I use natural peanut butter? You can, but it must be thoroughly stirred first. Very loose natural peanut butter can make the filling oily or soft, so add it gradually to the powdered sugar and use a short additional chill if needed.
How far ahead can I make these cups? You can make them up to 7 days ahead when they are kept covered in the refrigerator. Let them sit at room temperature for 5 to 10 minutes before serving for a softer bite.
Can I freeze the finished candy? Yes. Wrap the chilled cups well and freeze them in an airtight container for up to 1 month. Thaw them overnight in the refrigerator, keeping them covered to reduce condensation on the chocolate.
Final Thoughts
These Peanut Butter Marshmallow Cups are a practical homemade candy for holidays, gift boxes, or a small dessert tray. The layers are easy to assemble, and a short chill gives you a firm chocolate coating with a tender center. Keep the cups cold until serving, then give them a few minutes to soften for the best texture.
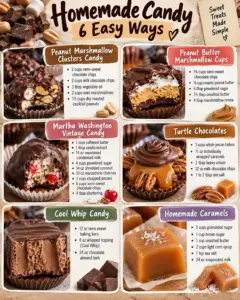
Looking for more? This recipe is part of our roundup of Homemade Candy Recipes: 5 Easy No-Bake Treats to Make.
Peanut Butter Marshmallow Cups
Ingredients
Equipment
Method
- Melt the chocolate chips gently in the microwave, stirring until smooth, then coat eight lined muffin cups and chill until firm.
- Mix the peanut butter, powdered sugar, and butter; divide the filling among the shells, top with marshmallow creme, cover with the remaining chocolate, and chill until set.
Nutrition
Notes
- Use creamy peanut butter and stir it well before measuring.
- Store finished cups covered in the refrigerator for up to 7 days.
- Let refrigerated cups stand for 5 to 10 minutes before serving.