Introduction to Cherry Coconut Jello Balls
Cherry Coconut Jello Balls are a simple, old-fashioned candy made from cherry gelatin, sweetened condensed milk, and shredded coconut. The mixture comes together without a stovetop, then chills until it is firm enough to shape into small, chewy balls.
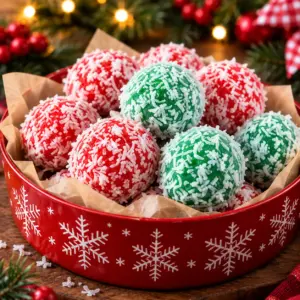
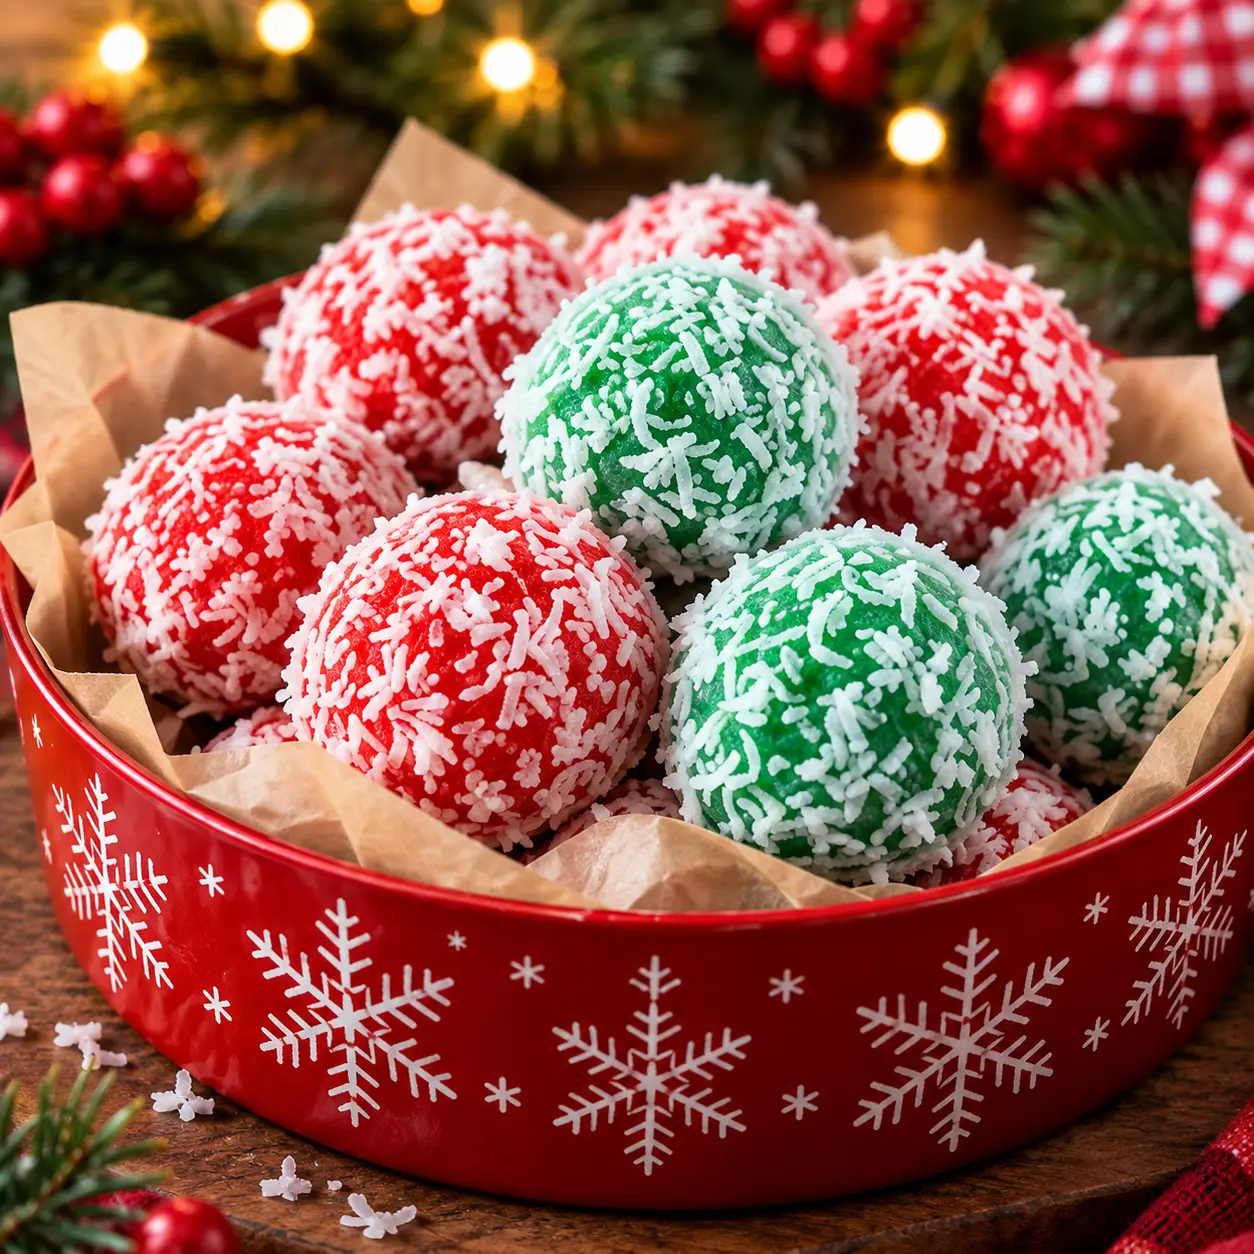
This recipe fits naturally into Holiday Candy Favorites because it is easy to prepare ahead and adds a cheerful red-and-white touch to a cookie tray or candy box. A little green food coloring can give the coconut a festive look, but the candy is just as good without it.
Why You'll Love This Cherry Coconut Jello Balls
- This candy needs no oven, saucepan, or candy thermometer, so it is approachable for beginner cooks.
- The cherry gelatin gives the balls their color and familiar fruit flavor without requiring fresh fruit.
- Sweetened condensed milk helps bind the coconut and gelatin into a soft, chewy mixture.
- The recipe makes small portions that are easy to arrange on a holiday platter or package as gifts.
- You can shape the candy by hand and adjust the colors to suit any holiday gathering.
Ingredients for Cherry Coconut Jello Balls
- 1 (3 oz) cherry gelatin
- 1 can sweetened condensed milk
- 2 cups shredded coconut
- red and green food coloring optional
Use fine or medium unsweetened shredded coconut so the mixture holds together well. Very large coconut shreds can make the balls harder to shape, while sweetened coconut may make the candy overly sweet because the condensed milk already provides plenty of sugar.
How to Make Cherry Coconut Jello Balls
Step 1: Prepare the Work Area
Line a baking sheet or large plate with parchment paper. Set out a medium mixing bowl, a small cookie scoop or tablespoon, and a shallow dish for any extra coconut you want to use for coating. Wash and dry your hands before mixing and shaping the candy.
Step 2: Mix the Dry Ingredients
Add the cherry gelatin and shredded coconut to the mixing bowl. Stir slowly with a sturdy spoon until the gelatin is distributed evenly through the coconut. Breaking up any compacted pockets now will help the finished candy have an even color and flavor.
Step 3: Add the Condensed Milk
Pour the sweetened condensed milk into the bowl and stir until the coconut is fully coated and the mixture forms a thick, sticky dough. Scrape the sides and bottom of the bowl as you mix. The dough will not look dry, but it should be thick enough to hold a mound when pressed together.
Step 4: Add Optional Color
If you want a two-color holiday effect, divide the mixture between two bowls before the dough becomes too firm. Tint one portion with a small amount of red food coloring and the other with a small amount of green food coloring. Stir each portion until the color is even, adding only a drop or two at a time so the dough does not become wetter than necessary.
Step 5: Chill the Mixture
Cover the bowl or bowls and refrigerate the mixture for about 30 minutes. Chilling firms the condensed milk and gives the coconut time to absorb some moisture, making the dough easier to roll. Keep the mixture refrigerated rather than leaving it on the counter while you wait.
Step 6: Shape and Chill the Candy
Scoop about 1 tablespoon of dough for each candy and roll it between clean hands into a compact ball. Place the balls on the lined baking sheet, spacing them so they do not touch. Refrigerate the finished candy for at least 1 hour, or until firm. Store the balls in a covered container in the refrigerator until serving.
Tips for Success
- Use a level tablespoon for evenly sized candy so the batch chills and serves consistently.
- If the mixture sticks to your hands, chill it for another 15 minutes instead of adding a large amount of extra coconut.
- Lightly dampen your fingertips or rub them with a very small amount of neutral oil if rolling becomes difficult.
- For a snowy finish, roll the shaped balls in a little extra shredded coconut before the final chill.
- Keep the candy covered in the refrigerator because the condensed milk makes it soft at room temperature over time.
Equipment Needed
- Medium mixing bowl
- Baking sheet or large plate
- Parchment paper
Variations
- Make all of the candy cherry red for a simple, uniform look instead of dividing the mixture into colors.
- Use red food coloring in half and green food coloring in half, then arrange the finished balls in alternating colors on a platter.
- Press a small indentation into each ball and fill it with a tiny amount of extra shredded coconut for a textured finish.
- Shape the mixture into small squares by pressing it into a parchment-lined pan, chilling it, and cutting it with a sharp knife.
- For a coconut-forward appearance, leave out the food coloring and coat each ball in additional shredded coconut before chilling.
Serving Suggestions
Serve Cherry Coconut Jello Balls cold or slightly chilled on a holiday candy tray. Arrange the red, green, and uncolored pieces together for contrast, or place them in small paper candy cups for easier serving. Because the candy contains sweetened condensed milk, return leftovers to the refrigerator within two hours, or within one hour if the room is above 90°F. Keep them refrigerated at 40°F or below and use them within about one week for the best texture and flavor.
FAQs about Cherry Coconut Jello Balls
Do I need to dissolve the cherry gelatin in hot water? No. This recipe uses the cherry gelatin dry. Stir it directly with the shredded coconut before adding the sweetened condensed milk. Adding water would make the mixture too loose to roll.
How many Cherry Coconut Jello Balls does this recipe make? The batch makes about 24 small balls when each one uses roughly 1 tablespoon of mixture. The exact yield depends on the size of the balls.
Why is my mixture too sticky to roll? The mixture may need more chilling time. Cover it and refrigerate it for another 15 to 30 minutes, then try again. If it is still loose, stir in a small amount of shredded coconut, one tablespoon at a time.
Can I make these candy balls ahead of time? Yes. Shape the balls up to three days ahead and keep them in a covered container in the refrigerator. Separate layers with parchment paper so the pieces do not stick together.
Can I freeze Cherry Coconut Jello Balls? You can freeze them in a tightly sealed container with parchment between the layers for up to one month. Thaw them in the refrigerator, where they may become slightly softer than freshly made candy.
Final Thoughts
Cherry Coconut Jello Balls are a practical addition to a holiday candy spread when you want something colorful and homemade without turning on the oven. The short ingredient list, simple shaping method, and make-ahead storage make this a useful recipe for busy holiday weeks.
Looking for more? This recipe is part of our roundup of 5 Holiday Candy Favorites For Easy Homemade Gift Giving.
Cherry Coconut Jello Balls
Ingredients
Equipment
Method
- Stir the cherry gelatin and shredded coconut together, then mix in the sweetened condensed milk until a thick dough forms.
- Chill the mixture for 30 minutes, roll it into small balls, and refrigerate the finished candy for at least 1 hour before serving.
Nutrition
Notes
- The recipe makes about 24 small balls.
- Keep the finished candy covered and refrigerated at 40°F or below.
- For two colors, divide the mixture before adding the optional food coloring.