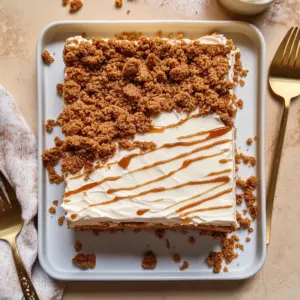
As I stood outside, the warm summer breeze carried the sweet scents of nostalgia, instantly reminding me of my childhood days at the ice cream parlor. That’s when I realized, what better way to celebrate this season than with the ultimate homemade indulgence: Creative Ice Cream Sandwiches? These 26 flavorful recipes create a delightful harmony of chewy cookies paired with rich, creamy ice cream, perfect for summer gatherings or cozy movie nights. Plus, they’re incredibly easy to whip up, making them a hit for both kids and adults alike. Get ready to explore unique flavor combinations that will impress your friends and family, while savoring the refreshing taste of summer in every bite. Ready to uncover the magic of these delicious treats? Let’s dive in!

Why make ice cream sandwiches at home?
Delicious Creativity: Unleash your inner chef with 26 different flavor combinations that allow you to curate unique ice cream sandwiches tailored to your taste buds!
Fun with Family: These easy dessert recipes are perfect for making with kids, turning cooking into a memorable family activity.
Quick to Prepare: With a simple process, you’ll have these delightful treats ready in no time, making them an ideal last-minute summer snack.
Crowd Pleasers: Impress guests at your next BBQ or picnic with a variety of sandwiches that cater to various preferences, from classic to adventurous flavors.
Customizable Options: Swap ingredients, like using gluten-free flour or trying different ice cream flavors, for a personalized touch that matches your dietary needs!
Ice Cream Sandwich Ingredients
Get ready to gather the essentials for your homemade ice cream sandwiches!
For the Cookies
- Flour – The backbone of your cookie base, providing necessary structure; feel free to use gluten-free flour for a delicious alternative.
- Sugar – This ingredient adds sweetness and enhances browning; consider brown sugar for a deeper flavor.
- Butter – Adds richness and moisture; substitute with coconut oil for a dairy-free option.
- Eggs – They bind everything together beautifully; vegan eaters can swap in flaxseed meal mixed with water as a substitute.
For the Ice Cream Filling
- Vanilla Ice Cream – A classic choice that pairs well with almost any cookie; don’t hesitate to use your favorite flavor for a fun twist!
- Specialty Ice Cream Flavors – Options like peach or matcha can elevate your sandwich experience; mix it up with homemade or your go-to brands.
Let your creativity flow, and prepare to savor the delightful bite of these homemade ice cream sandwiches!
Step-by-Step Instructions for 26 Flavorful Ice Cream Sandwich Recipes
Step 1: Preheat the Oven
Start by preheating your oven to 350°F (175°C). This ensures that when your cookie dough is ready, your oven is at the perfect temperature for baking. As the oven warms up, gather your baking sheet and line it with parchment paper for easy cookie removal and cleanup later.
Step 2: Prepare the Cookie Dough
In a large mixing bowl, cream together softened butter and sugar until the mixture is light and fluffy, which should take about 3-5 minutes. Next, add in the eggs one at a time, combining thoroughly. Gradually incorporate the dry ingredients, mixing until everything is fully blended. Your cookie dough for the ice cream sandwiches should be smooth and slightly sticky.
Step 3: Scoop and Shape the Cookies
Using a cookie scoop or spoon, drop rounded portions of the dough onto your prepared baking sheet, leaving sufficient space for spreading. Gently flatten each scoop with your fingers or the back of a spoon. Bake the cookies for 10-15 minutes, or until the edges turn golden brown while the centers remain soft and chewy, which is key for making delicious ice cream sandwiches.
Step 4: Cool the Cookies
Once baked, remove the cookies from the oven and let them cool on the baking sheet for 5 minutes before transferring them to a wire rack. Allow the cookies to cool completely to prevent the ice cream from melting when you assemble your sandwiches. Patience here is essential for achieving the perfect ice cream filling.
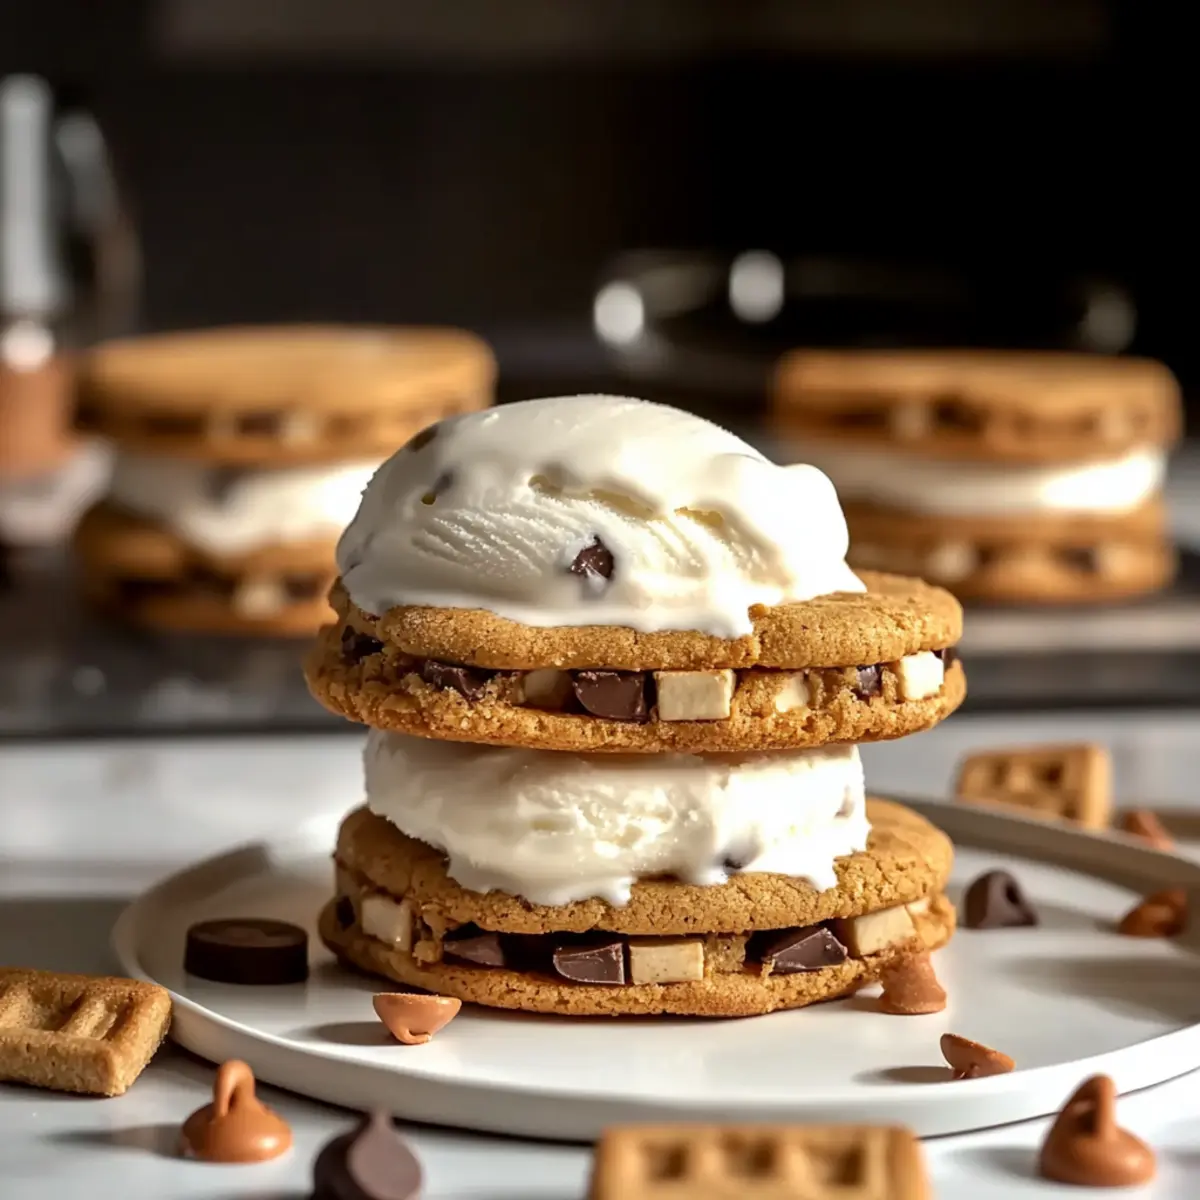
Step 5: Assemble the Ice Cream Sandwiches
Now that your cookies are cool, it’s time to bring the ice cream sandwiches to life! Take one cookie and place a generous scoop of your favorite ice cream on its bottom side. Gently press another cookie on top, creating a delightful sandwich. Repeat this process until all cookies are paired with ice cream, mixing and matching flavors to create unique combinations.
Step 6: Freeze the Sandwiches
To ensure your ice cream sandwiches stay perfectly formed, place the assembled sandwiches on a tray and freeze for at least 30 minutes. This time allows the filling to firm up nicely, making sure every bite is a perfect mix of chewy and creamy. While you wait, consider rolling the edges in sprinkles or crushed nuts for an extra touch of fun!
Step 7: Serve and Enjoy
After the sandwiches have set, take them out of the freezer and serve them right away. Each bite of these flavorful ice cream sandwiches will remind you of summer days filled with laughter and joy. Whether you’re sharing with family or indulging solo, these delightful treats are sure to please everyone’s taste buds!

How to Store and Freeze Ice Cream Sandwiches
Fridge: Store unassembled cookies in an airtight container for up to 3 days to keep them fresh and chewy before adding ice cream.
Freezer: Once assembled, wrap each ice cream sandwich in plastic wrap or place them in a sealed container; they can be frozen for up to 2 weeks without losing flavor or texture.
Serving: For the best experience, let the sandwiches sit at room temperature for about 5 minutes after removing them from the freezer before indulging.
Reheating: If you prefer a warm treat, you can microwave the sandwiches for about 10-15 seconds to soften the cookie slightly, marrying the flavors beautifully. Enjoy your creative ice cream sandwiches!
Expert Tips for Ice Cream Sandwiches
-
Cool Before Filling: Allow the cookies to cool completely before adding ice cream; this prevents melting and keeps your sandwiches intact.
-
Mix Cookie Flavors: Experiment with unique cookie flavors like peanut butter or red velvet to take your ice cream sandwiches to the next level!
-
Parchment Paper Magic: Use parchment paper to line your baking sheets; this makes for easy removal and keeps your cookies beautifully intact.
-
Watch Bake Time: Keep a close eye on your baking time; overcooking will lead to hard cookies, while perfectly baked ones provide a soft, chewy base for your homemade ice cream sandwiches.
-
Add Toppings: For extra fun, roll the sides of your sandwiches in sprinkles or crushed nuts for a delightful crunch and visual appeal.
Creative Ice Cream Sandwich Variations
Customize your ice cream sandwiches with these fun and delicious twists that inspire creativity and joy in the kitchen!
-
Gluten-Free: Use a gluten-free flour blend for your cookie base to make this treat accessible for everyone. Enjoy the same delightful taste without compromise!
-
Dairy-Free Delight: Swap regular ice cream for your favorite dairy-free version made from almond, coconut, or cashew milk, creating a delightful and creamy alternative. The richness remains intact!
-
Nutty Crunch: Add chopped nuts or nut butter to your cookie dough for an irresistible texture boost and an extra layer of flavor. Think peanut butter swirls or chopped pecans for a delightful surprise!
-
Spicy Twist: Infuse your cookie batter with cinnamon or cardamom for a warm, aromatic twist. This subtle kick will elevate the classic flavor profile to something uniquely memorable!
-
Fruity Fun: Instead of traditional ice cream, try fruity sorbets like raspberry or mango. They’ll add a refreshing burst of flavor that’s absolutely perfect for summer gatherings!
-
Mix and Match: Create a fun flavor explosion by mixing two ice cream flavors together in one sandwich. Imagine the joy of chocolate chip cookies with cookies-and-cream ice cream – pure bliss!
-
Specialty Flavors: Explore unique ice cream flavors like pistachio or coconut lime. This twist can surprise and delight your guests with unexpected combinations!
-
Crispy Edges: For an added crunch, roll the edges of your assembled sandwiches in crushed graham crackers or mini chocolate chips. This extra texture makes the treat even more appealing!
Feel free to explore these variations and turn your homemade ice cream sandwiches into a beloved family tradition! And if you’re feeling extra adventurous, why not check out how to incorporate flavors from your favorite summer treats or childhood snacks into these delightful sandwiches? Your creativity is the only limit!
What to Serve with Creative Ice Cream Sandwiches
Elevate your ice cream sandwich experience with these delightful accompaniments that perfectly balance flavor and texture.
- Fresh Fruit Salad: A vibrant mix of berries and melons refreshes your palate between sweet bites, adding a pop of color and health.
- Chocolate Dipping Sauce: Rich and warm, this sauce enhances the indulgence, allowing you to create a unique flavor profile with each sandwich.
- Homemade Whipped Cream: Light and airy, a dollop of this creamy topping adds elegance and a touch of gourmet to your casual dessert.
For a fun family activity, why not have a toppings bar? Set out sprinkles, crushed nuts, and crushed cookies, letting everyone customize their sandwiches freely.
- Iced Coffee or Milkshakes: Pair these sandwiches with a chilled coffee or a thick milkshake; the coolness complements the sweet, chewy treat beautifully.
- Minty Mojito Mocktails: For a refreshing twist, serve with these bubbly, minty beverages that offer a zesty contrast to the creamy sweetness.
- Chocolate Chip Cookies: As a nod to classic desserts, serve a few extra cookies on the side to enrich your dessert table and delight cookie lovers.
Make Ahead Options
These Creative Ice Cream Sandwiches are perfect for meal prep, making your summer gatherings and busy weeknights a breeze! You can prepare the cookie base up to 3 days in advance; simply bake the cookies, allow them to cool completely, and store them in an airtight container in the refrigerator. When you’re ready to assemble, scoop your favorite ice cream between two cookies and press gently. To maintain the quality, freeze the assembled sandwiches for at least 30 minutes before serving, ensuring they are deliciously firm and refreshing. This prep strategy allows you to enjoy these delightful treats at a moment’s notice, with all the homemade goodness intact!
Creative Ice Cream Sandwiches Recipe FAQs
What is the best way to select ripened ingredients for my ice cream sandwiches?
Absolutely! When choosing ingredients, opt for unsalted butter that is soft but not melted, allowing it to blend smoothly with sugar. For flour, make sure it’s fresh and fine, ensuring a tender cookie. When it comes to ice cream, check the expiration date; a rich, creamy texture indicates quality. Specialty flavors like matcha or peach should be vibrant and aromatic to enhance your sandwiches!
How should I store my homemade ice cream sandwiches?
Very good question! Assemble your ice cream sandwiches and wrap each one tightly in plastic wrap or place them in an airtight container. They can be stored in the freezer for up to 2 weeks without losing flavor or texture. For the best experience, let them sit at room temperature for about 5 minutes before enjoying to get that delightful creaminess!
Can I freeze leftover cookie dough?
Absolutely! To freeze leftover cookie dough, scoop it onto a baking sheet lined with parchment paper and flash freeze for about 30 minutes. Once firm, transfer the dough balls into a zip-top bag and store them in the freezer for up to 3 months. When you’re ready to bake, no need to thaw—just add a couple of extra minutes to the baking time!
What should I do if my cookie dough is too sticky?
If your cookie dough is too sticky, don’t worry! Start by chilling the dough in the refrigerator for 20-30 minutes; this will firm it up and make shaping easier. If it’s still problematic, gradually add a tablespoon of flour at a time until you reach the desired consistency. Keeping your hands or utensils dusted with flour while handling the dough can also prevent sticking.
Are there any dietary considerations for my ice cream sandwich ingredients?
Of course! For a gluten-free option, simply substitute regular flour with a high-quality gluten-free blend. If you or your guests have dairy allergies, use coconut oil in place of butter and select a dairy-free ice cream alternative. I often make these adjustments when hosting, adding an extra layer of deliciousness without sacrificing taste!
How can I make these ice cream sandwiches more visually appealing?
Great thinking! After assembling your ice cream sandwiches, consider rolling the edges in colorful sprinkles, crushed nuts, or mini chocolate chips for a beautiful, eye-catching presentation. You can even dust them with a bit of powdered sugar for a snowy look! Just imagine how cute they’ll look at your next summer gathering!

26 Irresistible Ice Cream Sandwich Recipes You'll Love
Ingredients
Equipment
Method
- Preheat your oven to 350°F (175°C) and line a baking sheet with parchment paper.
- Cream together softened butter and sugar until light and fluffy, about 3-5 minutes. Add eggs and mix well.
- Gradually add dry ingredients, mixing until smooth and slightly sticky cookie dough appears.
- Scoop rounded portions onto the prepared baking sheet and flatten slightly. Bake for 10-15 minutes.
- Cool on the baking sheet for 5 minutes, then transfer to a wire rack to cool completely.
- Assemble by placing a scoop of ice cream between two cookies and press gently.
- Freeze the assembled sandwiches for at least 30 minutes to firm up the ice cream.
- Serve immediately after setting and enjoy the flavors!