The aroma of warm plums wafting through the kitchen takes me back to sun-soaked summer afternoons, where friends and family gather around my table, eagerly anticipating a slice of homemade goodness. Enter the rustic Plum Slab Pie—a crowd-pleasing dessert that’s as easy to make as it is to eat! With a flaky crust cradling sweet, juicy plums lightly spiced with cinnamon, this recipe transforms simple ingredients into a sensational treat. Best of all, it’s adaptable; whether you prefer plums, peaches, or blueberries, you can tailor it to your taste. Perfect for potlucks or a cozy family dessert, this pie invites everyone to indulge in its delightful charm. So, are you ready to create some timeless memories around your own table?
Why is This Plum Slab Pie Special?
Rustic Charm: This cake-like pie brings back fond memories of warm family gatherings, making it perfect for sharing with loved ones.
Flexible Ingredients: Swap plums for peaches or blueberries to cater to your taste or what’s in season. The adaptability makes it a year-round favorite!
Easy Preparation: With straightforward steps and just a handful of ingredients, this slab pie is beginner-friendly and quick to whip up.
Crowd-Pleaser: Slice it up and watch it disappear—it’s a dessert that brings smiles and compliments at any gathering, whether a cozy dinner or a festive potluck.
Sweet Aroma: The delightful blend of cinnamon and cherries wafting from the oven will have everyone excited to dig in as its enchanting fragrance fills your home.
Plum Slab Pie Ingredients
For the Pie Crust
• All-Purpose Flour – Essential for structure; can use gluten-free flour for a different twist.
• Cold Butter – Keeps the crust flaky; substitute with margarine or plant-based butter for a dairy-free option.
• Sugar – Enhances sweetness and balances flavors; no need for substitution.
• Salt – Balances the sweetness; you can omit it for a salt-free option.
• Ice Water – Binds the crust without warming the butter; always use cold for best results.
For the Plum Filling
• Ripe Plums – Brings natural sweetness and vibrant flavor to the pie; feel free to replace with peaches or blueberries if desired.
• Sugar – Enhances the sweet, juicy filling; adjust according to your taste.
• Ground Cinnamon – Adds warm spice notes; can substitute with nutmeg for a fun twist.
• Cherry Preserves – Acts as a glaze, enhancing the plums’ tartness; any fruit preserves or jelly can work too.
Step‑by‑Step Instructions for Rustic Plum Slab Pie
Step 1: Prepare the Crust
In a food processor, blend together 2 cups of all-purpose flour, ½ teaspoon of salt, and 2 tablespoons of sugar. Pulse in 1 cup of cold, cubed butter until the mixture resembles coarse crumbs. Gradually add 4-6 tablespoons of ice water, pulsing until the dough just comes together. Divide the dough in half, flatten into disks, wrap in plastic, and chill for about 1 hour.
Step 2: Prepare Fruit Filling
While the dough chills, wash and slice about 4 cups of ripe plums, discarding the pits. In a large bowl, combine the sliced plums with ½ cup of sugar and 1 teaspoon of ground cinnamon. Toss gently to coat, then let the mixture sit for about 20 minutes to allow the plums to release their juices. This delicious filling will enhance the flavor of your Rustic Plum Slab Pie.
Step 3: Assemble the Pie
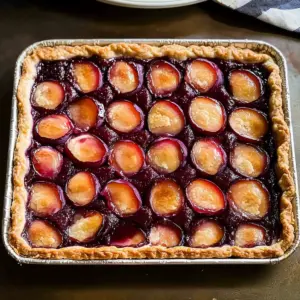
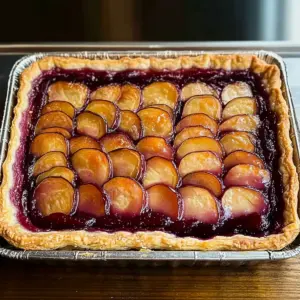
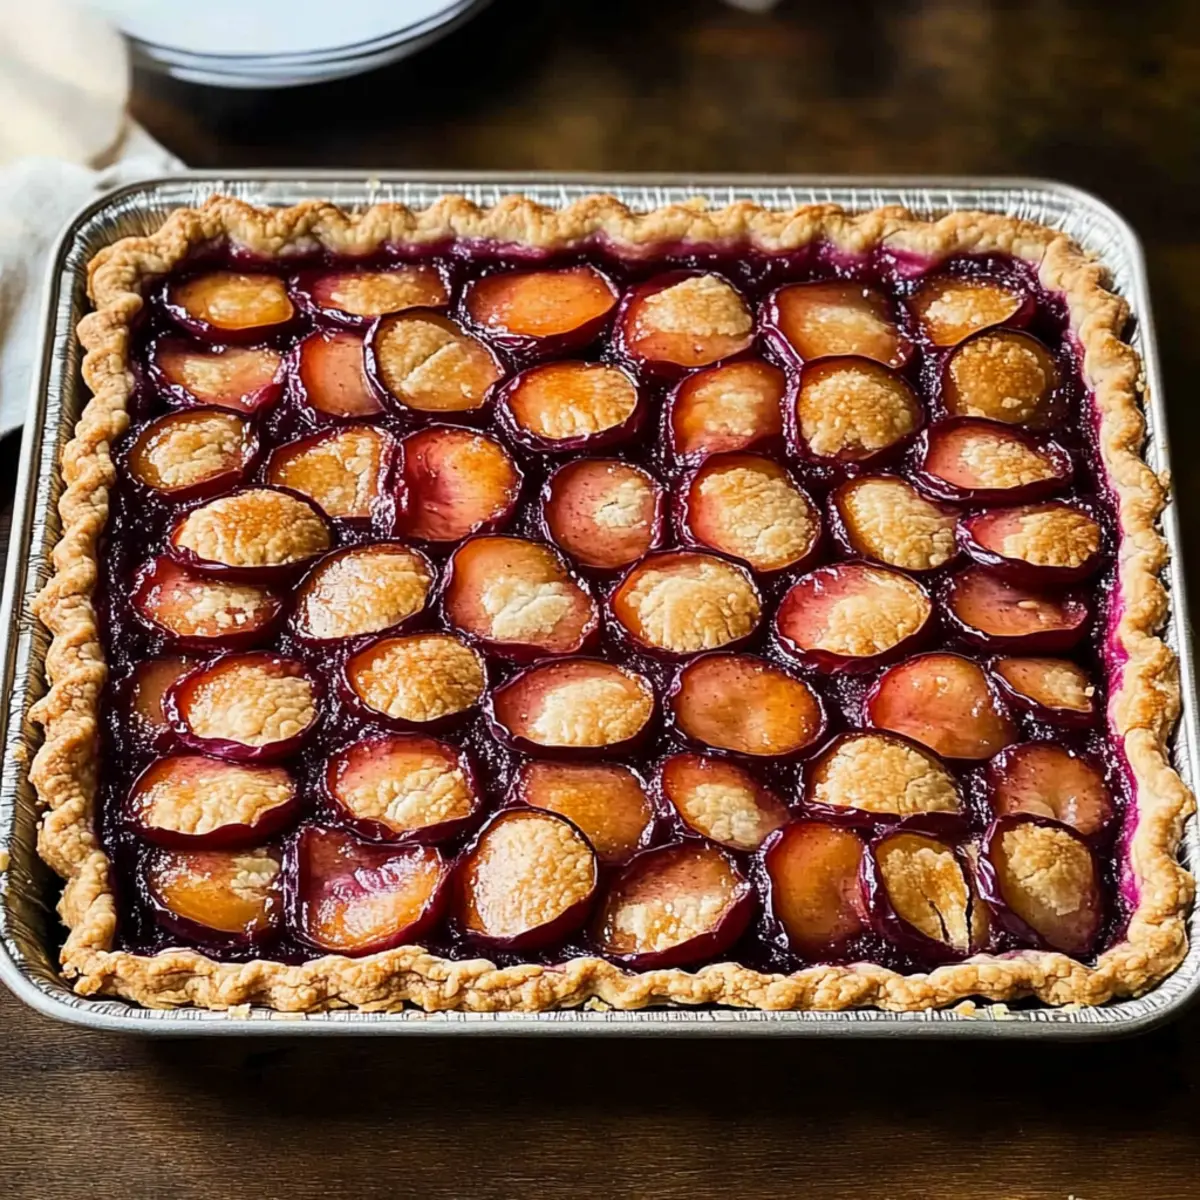
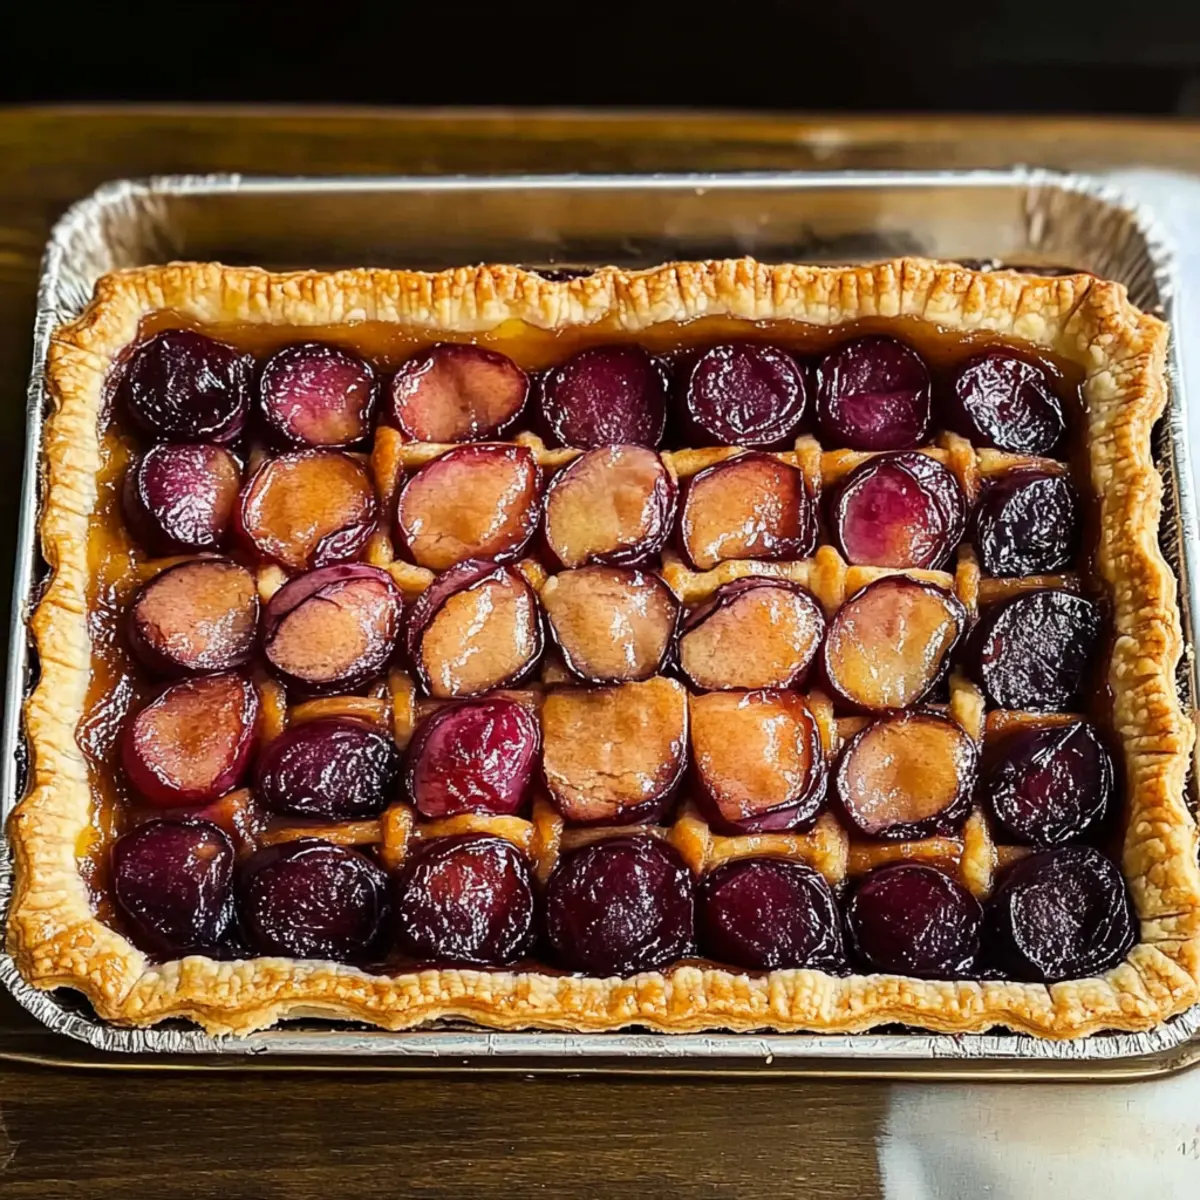
Once chilled, take one disk of pie dough and roll it out on a floured surface to fit a 15×10 inch jelly roll pan. Carefully fit the dough into the pan, and prick the bottom with a fork to prevent bubbling. Spread a layer of cherry preserves evenly over the uncooked crust, followed by the prepared plum filling, making sure to distribute the plums uniformly. Sprinkle with any remaining cinnamon-sugar mixture.
Step 4: Bake
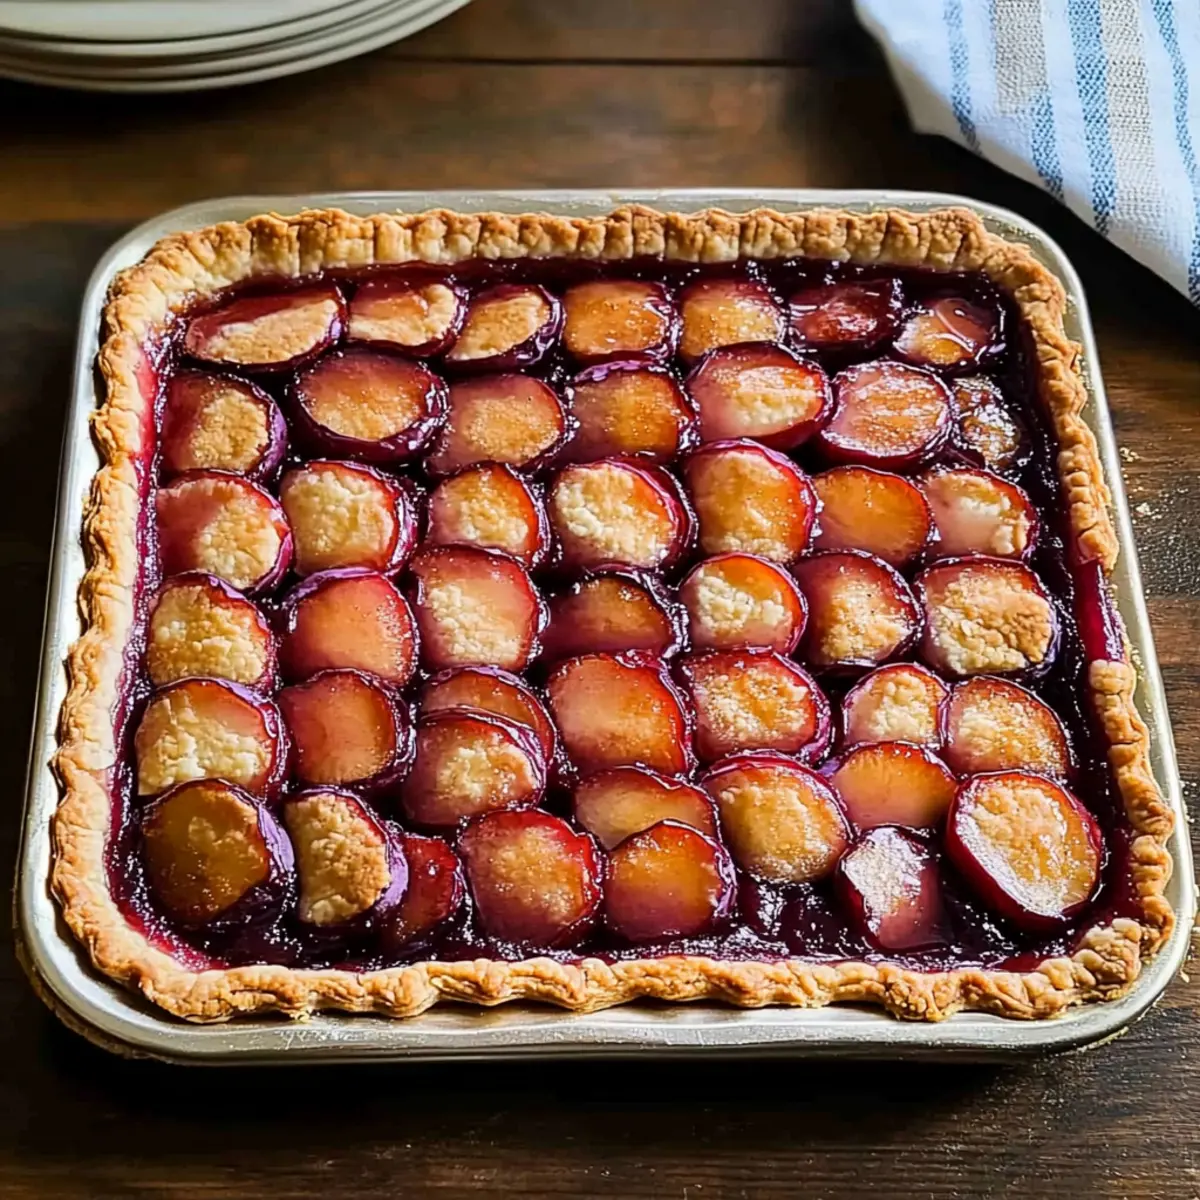
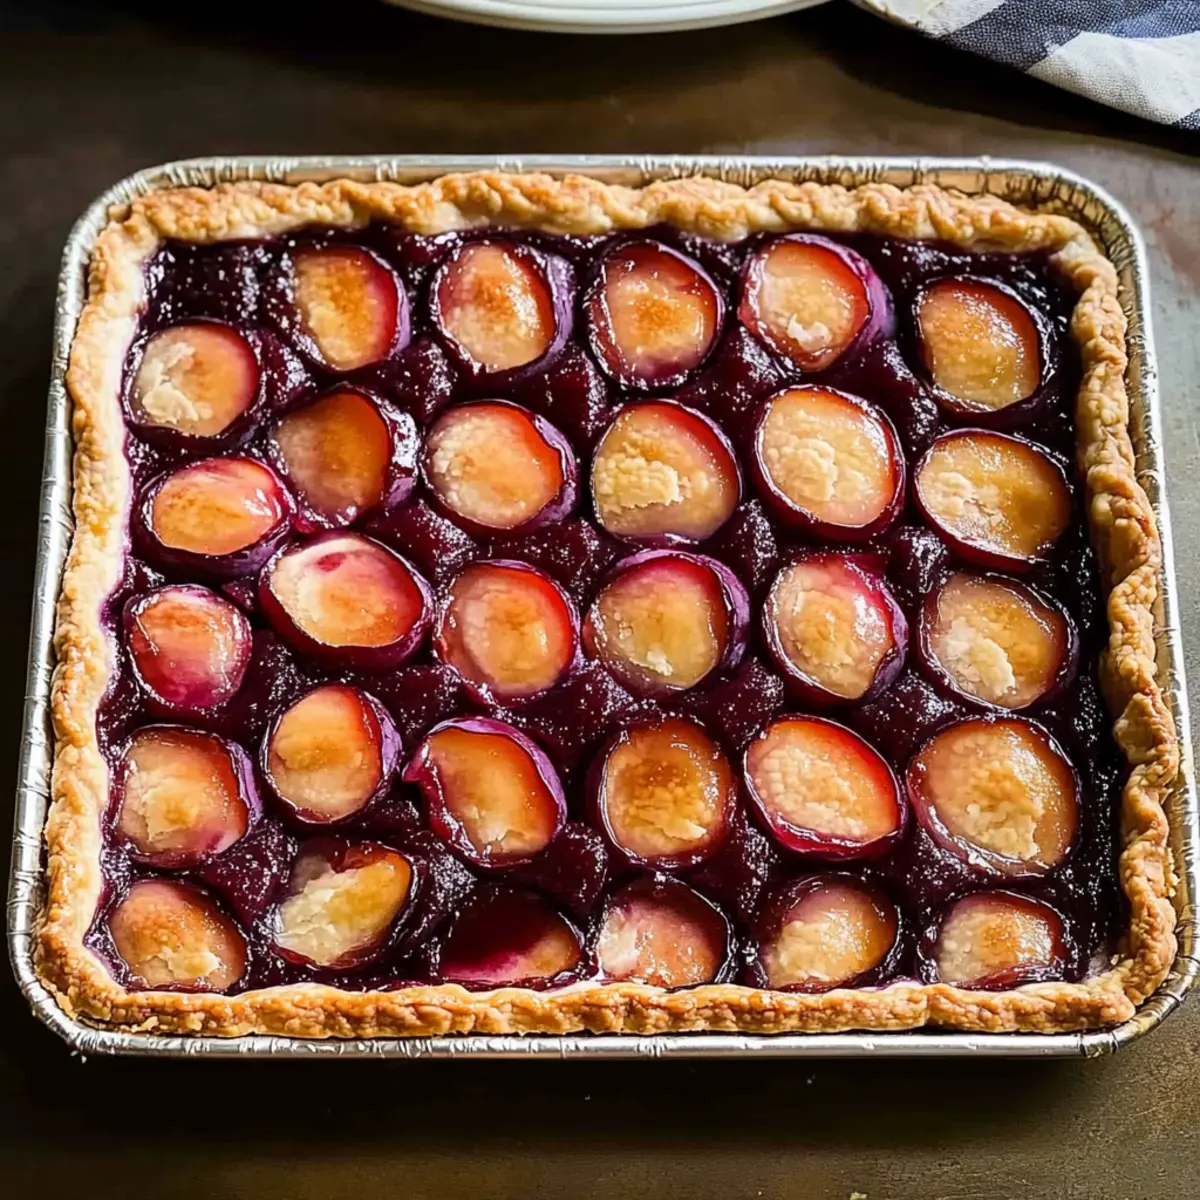
Preheat your oven to 375°F (190°C). Brush the edges of the crust lightly with melted butter for a golden finish. Place the pie in the oven and bake for about 50-60 minutes, or until the crust is golden brown and the fruit is bubbling. Keep an eye on the pie during baking; it should have a beautiful rustic appearance when done.
Step 5: Cool & Serve
Once baked, remove your Rustic Plum Slab Pie from the oven and allow it to cool in the pan on a wire rack for at least 30 minutes. This cooling process helps the filling set a bit, making it easier to slice. Serve slices warm, optionally with a scoop of vanilla ice cream or a dollop of whipped cream for an extra indulgent treat.
Variations & Substitutions for Plum Slab Pie
Invite your creative side to shine through with these delightful variations and substitutions for your Plum Slab Pie, making every bite uniquely yours!
- Peachy Twist: Substitute ripe plums with fresh peaches for a sunny, sweet filling that brightens your pie.
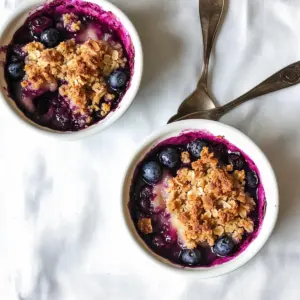
- Berry Medley: Mix in blueberries or raspberries for a colorful berry blend that adds both tartness and vibrant hues.
- Nutty Crunch: Fold in a handful of chopped pecans or walnuts into the filling for an exciting crunch and nuttiness.
- Herbal Infusion: Try adding a touch of fresh basil or thyme to the filling for a fragrant twist that surprises the palate.
- Maple Magic: Replace sugar with maple syrup for a deeper, more complex sweetness that beautifully complements the fruit.
- Spicy Kick: Incorporate a pinch of cayenne or black pepper to add a subtle warmth and intrigue to the pie’s flavor profile.
- Creamy Surprise: Spread a layer of cream cheese or ricotta underneath the fruit layer for a decadent and creamy finish.
- Vegan Option: For a plant-based twist, replace butter with coconut oil and use a non-dairy milk instead of ice water for the crust.
Feel free to experiment with each suggestion and create your perfect version of this rustic delight. If you’re interested in other delightful desserts, check out my Blueberry Slab Pie or Peach Galette for more inspiration!
How to Store and Freeze Plum Slab Pie
Room Temperature: Store leftover pie covered at room temperature for up to 2 days to maintain its delicious flavor and texture.
Fridge: If you want to keep your plum slab pie fresh longer, cover it and refrigerate for up to 1 week. The flavors will deepen as it sits!
Freezer: To freeze, ensure the pie is completely cooled, then wrap it tightly in plastic wrap followed by aluminum foil. It can be frozen for up to 3 months.
Reheating: To serve, thaw overnight in the fridge, then warm in a 350°F oven for about 15-20 minutes to restore its flaky crust before enjoying this delightful rustic dessert!
Expert Tips for Plum Slab Pie
-
Keep Ingredients Cold: Ensure your butter and water are cold to create a flakier crust. Warm ingredients can lead to a tough pie crust.
-
Don’t Overmix: Mix the dough just until combined. Overmixing can activate gluten, resulting in a dense crust instead of the desired flaky texture.
-
Let the Filling Rest: Allow the plum filling to sit for about 20 minutes after mixing with sugar and cinnamon. This step draws out juices and enhances flavor, preventing a soggy bottom.
-
Use a Slotted Spoon: When assembling, use a slotted spoon to transfer the plums to the crust. This helps avoid excess liquid pooling in the pie and keeps it structurally sound.
-
Brush for Shine: Brushing the edges of the crust with melted butter before baking not only adds flavor but also gives your Rustic Plum Slab Pie a beautiful golden color.
-
Experiment with Fruits: Feel free to adapt the recipe by substituting with seasonal fruits like peaches or blueberries for varied flavors and textures!
Make Ahead Options
These Rustic Plum Slab Pies are a fabulous option for busy home cooks who want to save time during hectic weeks! You can prepare the crust up to 24 hours in advance; just roll it out, place it in the pan, cover it tightly with plastic wrap, and refrigerate. The plum filling can also be made ahead; combine and toss your sliced plums with sugar and cinnamon, then store it in an airtight container for up to 3 days in the fridge. When you’re ready to bake, simply spread the cherry preserves over the crust, layer on the prepared filling, and bake as directed. This will ensure your pie is just as delicious and fresh, saving you precious time while still delivering that homemade touch!
What to Serve with Rustic Plum Slab Pie
The perfect accompaniment to your homemade dessert lays the foundation for a cozy gathering, tantalizing the taste buds with delightful contrasts.
-
Vanilla Ice Cream: A classic pairing that enhances the pie’s warmth with creamy coldness, making every slice even more indulgent.
-
Whipped Cream: Light and airy, this topping adds a fluffy texture that complements the pie’s fruitiness. Just a dollop makes a world of difference!
-
Cinnamon Sugar Dusting: A simple sprinkle of cinnamon sugar on top adds a delightful hint of spice, enhancing the complexity of flavors in each bite.
-
Fresh Berries: A side of mixed berries like raspberries and blueberries adds a tart freshness, balancing the sweet plum filling beautifully. The burst of color is a feast for the eyes too.
-
Cheese Board: Pairing it with a selection of sharp cheeses provides an unexpected yet delicious savory contrast to the sweet slab pie. Think aged cheddar or creamy goat cheese!
-
Herbal Tea: A warm cup of chamomile or mint tea underscores the cozy vibes, complementing the pie’s rustic charm while aiding digestion after a sweet treat.
-
Coffee: A rich, dark brew enhances the pie’s flavors while providing a little kick, making this duo perfect for an afternoon gathering or an after-dinner treat.
-
Caramel Sauce: Drizzling some warm caramel provides a luscious, sticky sweetness that pairs remarkably well with the tartness of the plums. It’s an extra indulgence worth savoring!
Plum Slab Pie Recipe FAQs
How do I select ripe plums for this pie?
Absolutely! When selecting plums, look for ones that are slightly soft to the touch and have a vibrant color—no dark spots all over. A perfectly ripe plum will be fragrant and yield gently under pressure, indicating juiciness.
What’s the best way to store leftover Plum Slab Pie?
Very! For best results, cover leftover pie and store it at room temperature for up to 2 days. If you want to keep it longer, refrigerate it for up to a week. Just make sure to cover it well to keep the crust from getting soggy.
Can I freeze Plum Slab Pie, and if so, how?
Sure thing! To freeze the pie, let it cool completely. Wrap it tightly in plastic wrap, followed by a layer of aluminum foil to prevent freezer burn. It can be stored in the freezer for up to 3 months. When you’re ready to enjoy a slice, thaw it overnight in the fridge and reheat it in a 350°F oven for about 15-20 minutes to restore its flaky crust.
What should I do if my pie crust turns out tough?
If your crust ends up tough, it’s likely due to overmixing the dough or using warm ingredients. Next time, ensure your butter and water are cold, and mix the dough just until combined. A flaky crust is all about keeping those ingredients chilly!
Are there any allergy considerations I should be aware of?
Definitely! If you’re preparing this for a gathering, be mindful of allergies. Always check if any guests have gluten or dairy intolerances, as the recipe contains all-purpose flour and butter. You can easily use gluten-free flour and a dairy-free butter alternative to make it accommodating for those with dietary restrictions.
Can pets safely eat any part of this pie?
No worries! While plums in small amounts can be safe for pets, sugar and baked goods are not suitable for them. It’s best to keep this Rustic Plum Slab Pie as a human-only indulgence!
Rustic Plum Slab Pie: A Slice of Sweet Comfort for All
Ingredients
Equipment
Method
- In a food processor, blend together 2 cups of all-purpose flour, ½ teaspoon of salt, and 2 tablespoons of sugar. Pulse in 1 cup of cold, cubed butter until the mixture resembles coarse crumbs. Gradually add 4-6 tablespoons of ice water, pulsing until the dough just comes together. Divide the dough in half, flatten into disks, wrap in plastic, and chill for about 1 hour.
- While the dough chills, wash and slice about 4 cups of ripe plums, discarding the pits. In a large bowl, combine the sliced plums with ½ cup of sugar and 1 teaspoon of ground cinnamon. Toss gently to coat, then let the mixture sit for about 20 minutes.
- Once chilled, take one disk of pie dough and roll it out on a floured surface to fit a 15x10 inch jelly roll pan. Carefully fit the dough into the pan, and prick the bottom with a fork. Spread a layer of cherry preserves evenly over the uncooked crust, followed by the prepared plum filling.
- Preheat your oven to 375°F (190°C). Brush the edges of the crust lightly with melted butter. Place the pie in the oven and bake for about 50-60 minutes, or until golden brown and bubbling.
- Once baked, remove from the oven and cool in the pan for at least 30 minutes. Serve slices warm, optionally with a scoop of vanilla ice cream or whipped cream.