As the aroma of warm, buttery biscuit dough fills the kitchen, my anticipation heightens for the culinary treat about to unfold: Easy Pepperoni Pizza Bombs. These scrumptious bites are the ultimate solution for anyone craving a quick and kid-friendly snack. With a gooey, cheesy center and savory pepperoni, they’re the perfect way to elevate family movie nights or surprise your little ones with something fun for lunch. Best of all, you can whip them up in under 30 minutes, making them a hassle-free option for busy days or last-minute gatherings. Don’t you just love recipes that allow for endless customization? I can’t wait to share how easily you can swap ingredients to match your pantry’s treasures. Are you ready to delve into the delightful world of pizza bombs?
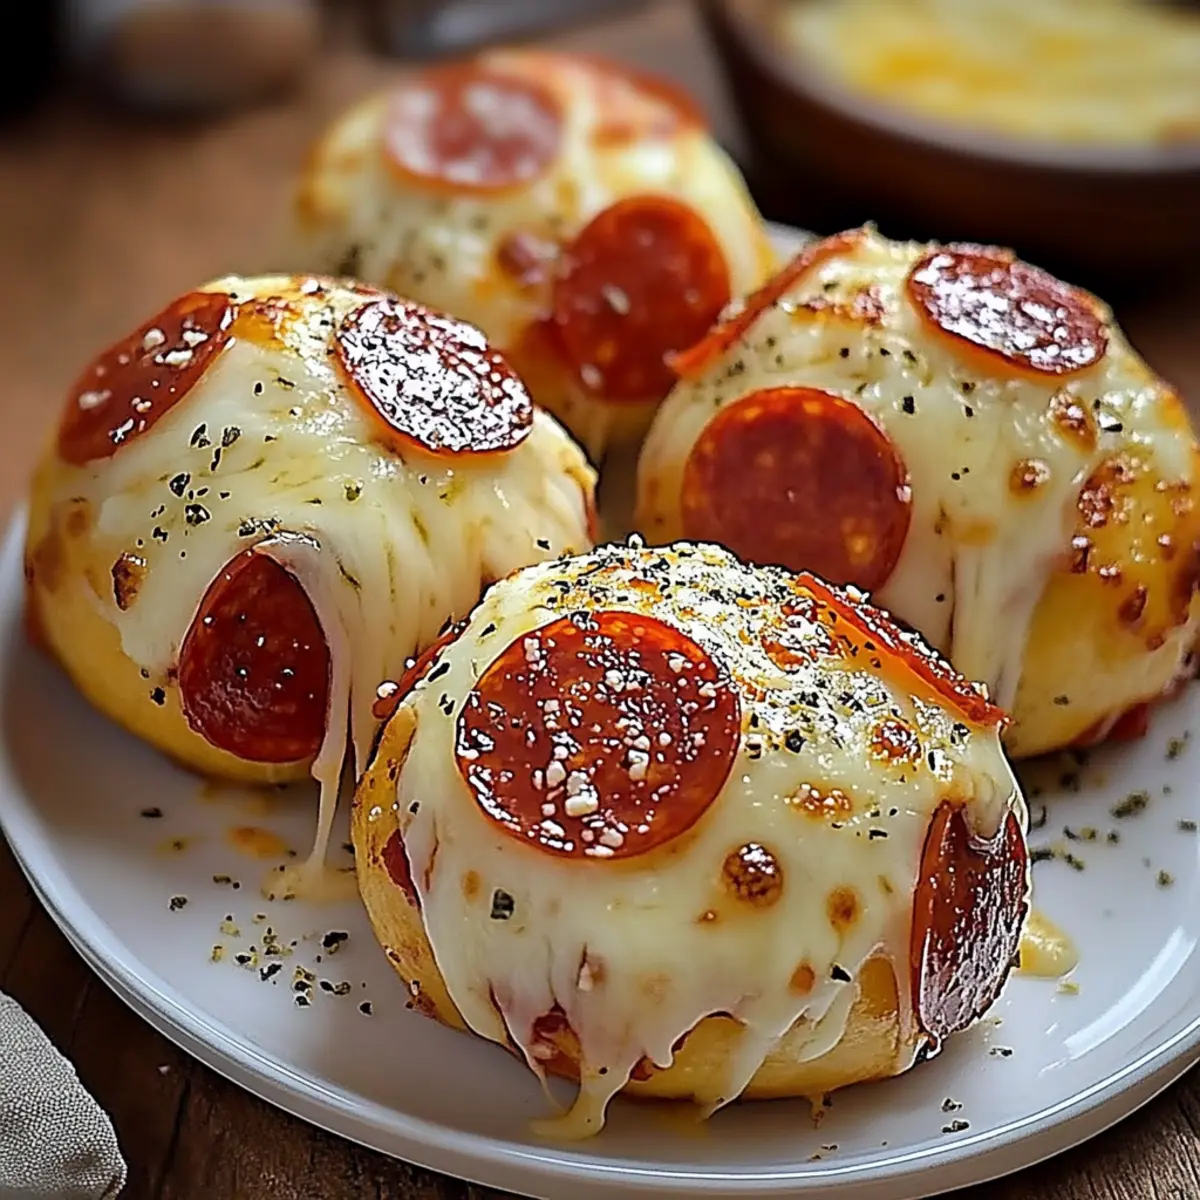
Why are Pepperoni Pizza Bombs a Must-Try?
Quick and Easy: These bites are ready in under 30 minutes, making them perfect for spontaneous snacks or gatherings.
Kid-Friendly: Packed with cheesy goodness and pepperoni, even the pickiest eaters will be begging for more.
Customizable: Swap in your favorite ingredients like olives or veggies to match your family’s taste—there’s no wrong way to make them!
Freezer-Friendly: Make a double batch and stash some for later—you’ll always have a delicious snack on hand!
Irresistible Aroma: The buttery, garlicky scent wafting through your kitchen is sure to bring the whole family to the table.
With so many reasons to love these pizza bombs, they’re bound to become a staple in your household! Try them alongside a fresh salad for a complete meal or whip up some extra dipping sauces. Your next family movie night will never be the same!
Pepperoni Pizza Bomb Ingredients
• Perfect for a quick snack!
For the Dough
• Refrigerated Biscuit Dough (8 oz can) – A time-saver for making delicious pizza bombs. Alternatives: Use crescent roll or pizza dough for a different texture.
For the Filling
• Shredded Mozzarella Cheese (¾ cup) – Provides that heavenly gooeyness everyone loves. Substitutes: Cheddar or provolone can be used for added flavor.
• Mini Pepperoni Slices (½ cup) – Adds a savory punch to your pizza bombs. Alternatives: Regular pepperoni can be chopped, or turkey pepperoni can be used for a leaner option.
For the Topping
• Melted Butter – Gives a beautiful, rich finish to the pizza bombs. Note: Brush some on top after baking for extra shine!
• Garlic Powder – Infuses flavor with every bite. Substitution: Fresh minced garlic will offer a more intense taste.
• Italian Seasoning – Elevates the flavor profile with classic herbs. Tip: Feel free to mix and match your favorite herbs for a personalized twist.
Whether you’re preparing these Pepperoni Pizza Bombs for a family gathering, party, or just a cozy night in, the versatility of ingredients ensures they can cater to every taste bud!
Step‑by‑Step Instructions for Easy Pepperoni Pizza Bombs
Step 1: Preheat Your Oven
Begin by preheating your oven to 375°F (190°C). If using an air fryer, set it to 350°F (175°C). While your appliance warms up, line a baking sheet with parchment paper for easy cleanup. This will help your pizza bombs bake evenly and achieve that perfect golden-brown exterior.
Step 2: Prepare the Seasoned Butter
In a mixing bowl, combine melted butter with garlic powder and Italian seasoning. Stir the mixture until well blended, and set it aside. This deliciously aromatic topping will infuse your Easy Pepperoni Pizza Bombs with flavorful goodness, so make sure to keep it handy for brushing later!
Step 3: Shape the Dough
Open your refrigerated biscuit dough and separate it into individual pieces. Gently flatten each dough round until they are about ¼ inch thick. This slight flattening creates the perfect base for your fillings and will help your pizza bombs bake uniformly.
Step 4: Fill the Dough Rounds
Spoon about a tablespoon of shredded mozzarella cheese onto the center of each flattened dough piece. Next, layer several mini pepperoni slices on top of the cheese. This combination ensures a gooey, flavorful center for your Easy Pepperoni Pizza Bombs that will satisfy everyone’s cravings.
Step 5: Seal the Bombs
Carefully pinch the edges of each dough round together to seal in the cheesy and pepperoni goodness. Roll the filled dough into a ball, ensuring that the seam is on the bottom. Properly sealing the bombs is essential to prevent any leakage during baking, keeping all the delicious flavors tucked inside.
Step 6: Bake to Perfection
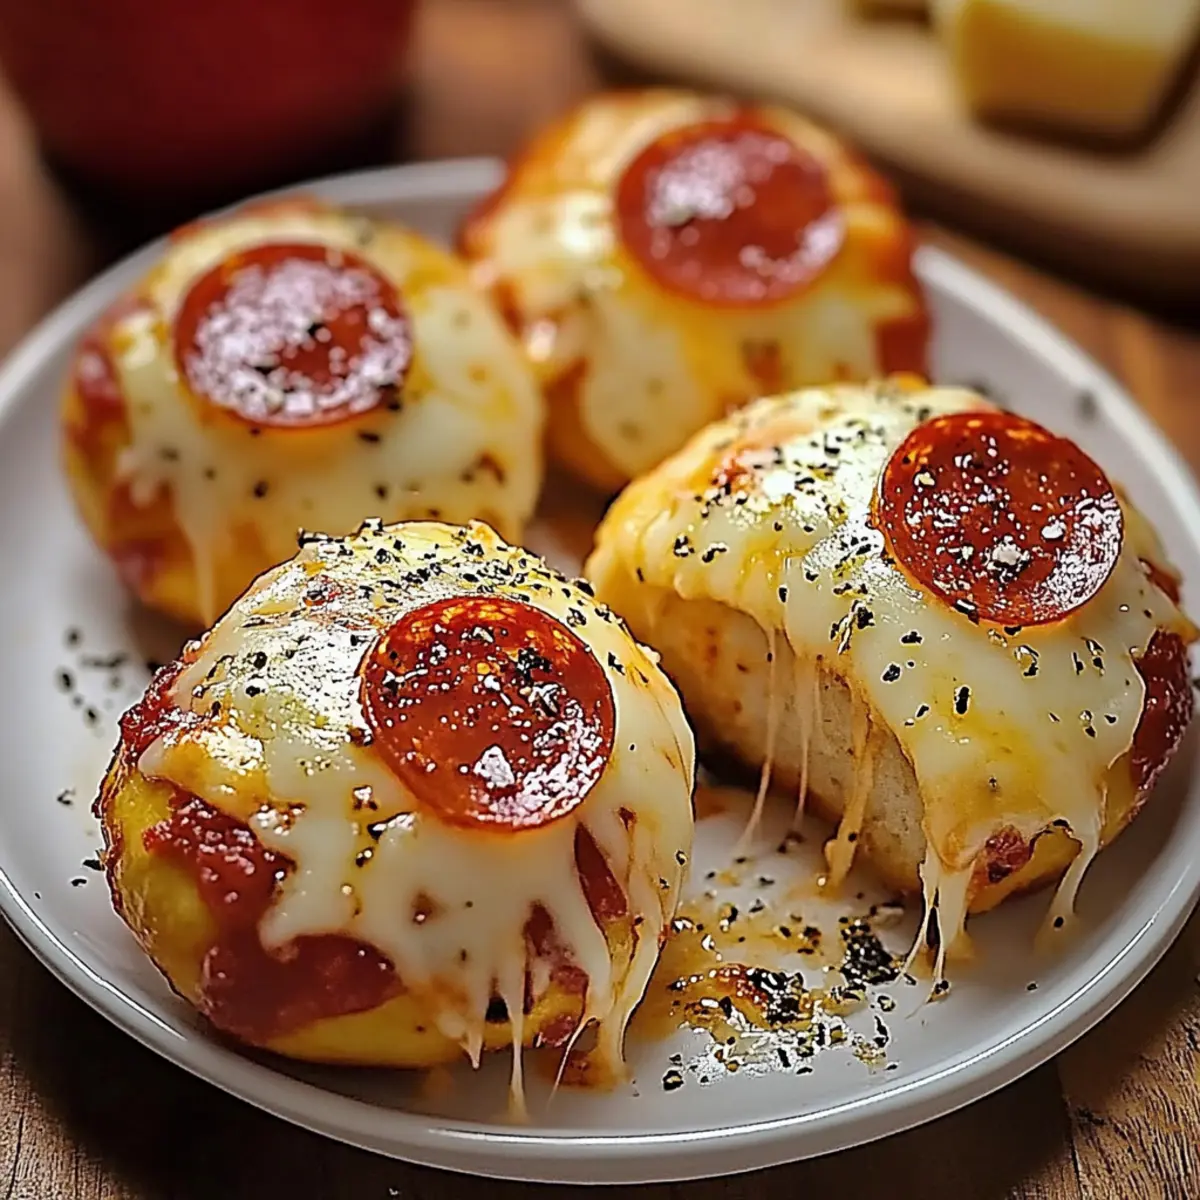
Arrange the dough balls seam-side down on your prepared baking sheet. Generously brush the tops with the seasoned butter mixture you prepared earlier. Bake in your preheated oven for 12-15 minutes, or air fry for about 8 minutes, until they are golden brown and puffed up, filling your kitchen with mouthwatering aromas.
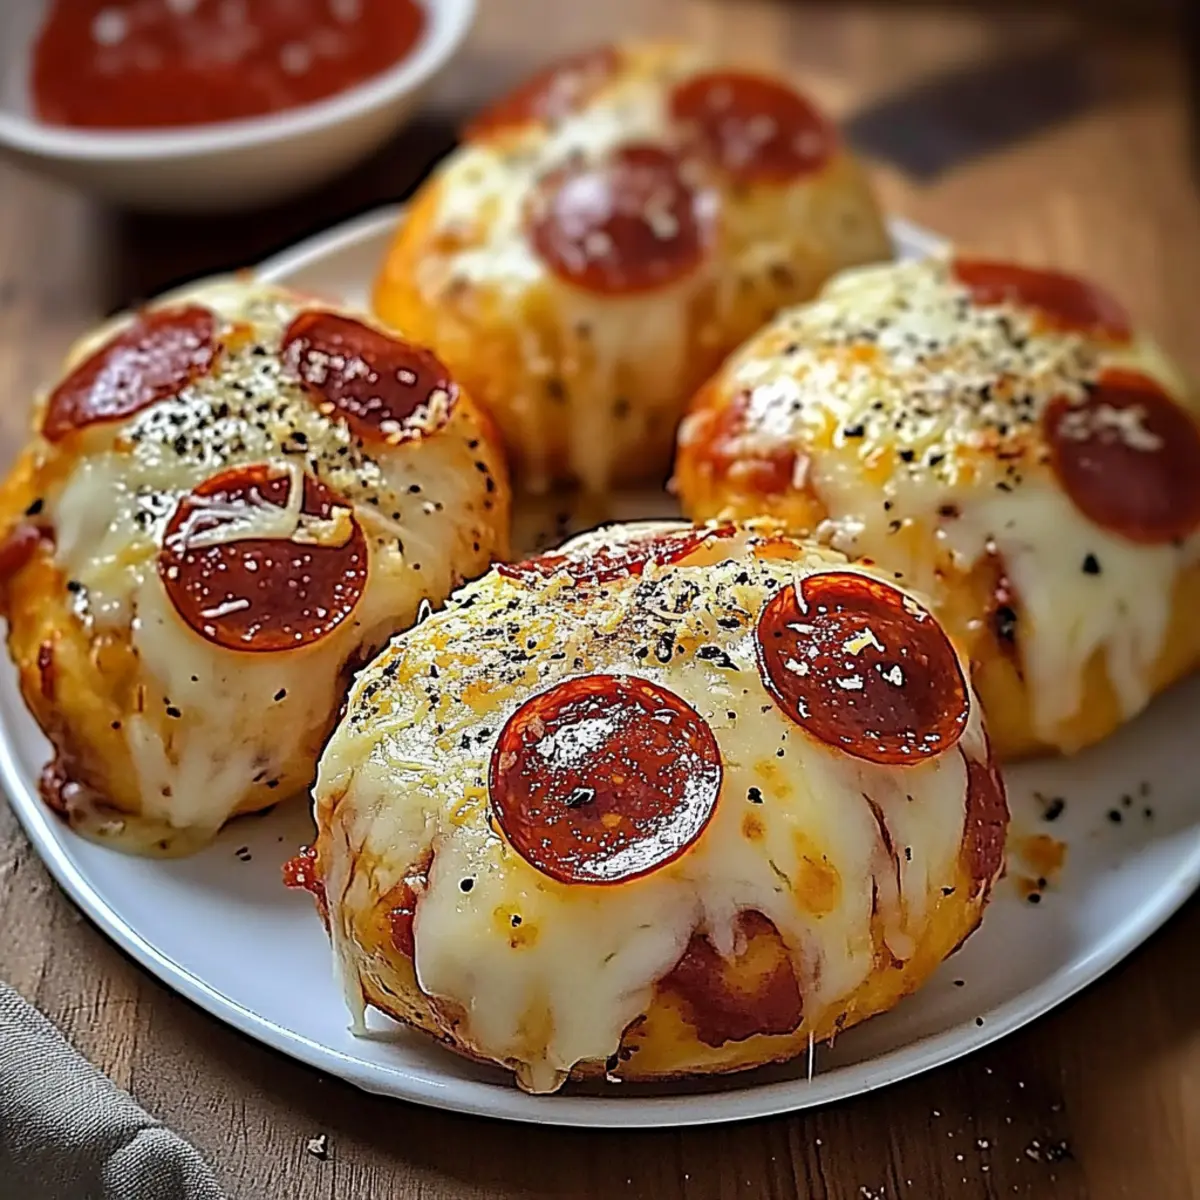
Step 7: Serve and Enjoy
Once baked, remove the Easy Pepperoni Pizza Bombs from the oven and let them cool for a few minutes. They will be steaming hot, so give them a moment before serving. Pair them with marinara sauce or ranch dip for added fun, and prepare for smiles all around as everyone digs into these delightful snacks!
How to Store and Freeze Pepperoni Pizza Bombs
Fridge: Store leftover pizza bombs in an airtight container in the fridge for up to 3 days. This helps maintain their soft texture and flavor.
Freezer: For longer storage, freeze unbaked pizza bombs in a single layer on a baking sheet until solid. Then, transfer them to a freezer bag or airtight container for up to 2 months.
Reheating (Baked): To reheat baked pizza bombs, place them in the oven at 350°F for 10-12 minutes or until warmed through. This keeps them crispy on the outside.
Reheating (Frozen): If frozen, bake directly from the freezer at 375°F for about 15-20 minutes until golden brown and heated through. Enjoy your tasty snack anytime!
What to Serve with Easy Pepperoni Pizza Bombs
These delightful bites are more than just a tasty snack; they can be the centerpiece of a fun family meal or gathering enjoyed alongside vibrant sides and dips.
-
Creamy Ranch Dip: Adds a refreshing contrast to the savory flavors, making every bite even more exciting and flavorful.
-
Zesty Marinara Sauce: Perfect for dipping, this classic combo enhances the pizza flavors and provides the perfect tango of sweetness and acidity.
-
Fresh Garden Salad: A light and crisp salad with mixed greens and ripe tomatoes balances the richness of the pizza bombs, adding a healthy touch.
-
Garlic Breadsticks: With their buttery, cheesy goodness, these breadsticks complement the pizza theme while offering an extra layer of fun with every bite.
-
Vegetable Platter: Serve a colorful array of fresh veggies like carrots, cucumbers, and bell peppers with hummus for a crunchy and healthy accompaniment.
-
Fruit Skewers: Sweet pieces of watermelon, pineapple, and grapes will refresh your palate and bring a burst of color to your table—perfect for lightening up the meal.
-
Sparkling Lemonade: This fizzy, zesty drink is a delightful pairing, bringing a cheerful vibe and refreshing brightness to your gathering.
-
Cheesy Garlic Knots: These flavorful bites offer an irresistible cheese pull that complements the flavors of the pizza bombs without overshadowing them.
-
Potato Wedges: Crispy, seasoned wedges invite you to indulge, pairing perfectly with marinara or ranch as a delicious dipping experience.
Serve up these exciting sides that make your Easy Pepperoni Pizza Bombs the star of your mealtime!
Expert Tips for Pepperoni Pizza Bombs
-
Seal the Edges: Ensure the dough edges are tightly pinched together to avoid any leaks during baking, maintaining the delicious filling intact.
-
Customize Fillings: Feel free to add in ingredients like olives or bell peppers for added taste and nutrition—your customized pepperoni pizza bombs will still shine!
-
Adjust Baking Times: Every oven is different; monitor your bombs closely and adjust baking times as needed to achieve that perfect golden-brown finish.
-
Flavor Boost: For an extra kick, sprinkle crushed red pepper flakes into the filling or on top before baking, enhancing your pepperoni pizza bombs’ flavor profile.
-
Make-Ahead Option: Prepare your pizza bombs ahead of time and store them covered in the fridge for up to a day before baking. You’ll save even more time on busy days!
-
Serve with Dips: Pair these delicious snacks with homemade marinara or ranch dip for an irresistible treat that will keep everyone coming back for more!
Pepperoni Pizza Bombs Variations
Feel free to let your creativity shine by customizing these pizza bombs to suit your taste and dietary needs!
- Vegetarian Delight: Swap mini pepperoni for olives, mushrooms, or bell peppers. They’ll still deliver all the deliciousness without the meat!
- Cheese Lovers: Mix different cheeses like gouda or feta with the mozzarella for a rich twist. A combination of cheeses can really elevate the flavor profile.
- Spicy Kick: Add some crushed red pepper flakes or jalapeños for that extra heat. It’s a fantastic way to satisfy spicy cravings!
- Herbed Bliss: Experiment with fresh herbs like basil or parsley sprinkled in the filling for a refreshing twist. Fresh herbs can really brighten up the flavors!
- Dairy-Free Option: Use vegan cheese and biscuit dough for a dairy-free version. This way, everyone can enjoy the fun without missing out!
- Garlic Lovers: Drizzle extra garlic oil over the dough before baking for a more intense garlic flavor. Let that aroma fill the air as they bake!
- Fun Shape Swap: Instead of round bombs, use a mini muffin tin to create adorable, mini pizza bites. This adds a cute twist to your presentation!
- Savory Surprise: Include chopped spinach or kale in the filling for added nutrition. They’re a sneaky way to get those greens into your snacks!
For even more inspiration, check out our air fryer pizza rolls or discover how to make homemade pizza sauce that pairs perfectly with these flavorsome bites!
Make Ahead Options
These Easy Pepperoni Pizza Bombs are a fantastic choice for meal prep! You can assemble the pizza bombs and refrigerate them for up to 24 hours before baking. Simply follow the instructions to fill and seal the dough, then place the prepared bombs in an airtight container. To maintain their quality, be sure to brush the tops with butter just before baking; this will ensure they come out golden and delicious. When you’re ready to serve, preheat your oven and bake them as directed, and you’ll enjoy fresh, cheesy goodness in no time—perfect for busy days or surprise snack attacks!
Pepperoni Pizza Bombs Recipe FAQs
What is the best way to select ingredient ripeness for my pizza bombs?
Absolutely! When choosing ingredients like pepperoni and cheese, look for high-quality options with bright colors and fresh packaging. Mozzarella should be soft and creamy, while pepperoni should be vibrant without dark spots. For the biscuit dough, ensure the can’s expiration date is valid to guarantee freshness, which is crucial for the overall taste.
How should I store my leftover pizza bombs?
To keep those tasty pizza bombs fresh, store any leftovers in an airtight container in the refrigerator for up to 3 days. This will help maintain their fluffy texture and delicious flavor. Enjoy them for snacks or quick meals throughout the week!
Can I freeze unbaked pizza bombs, and if so, how?
Yes, you can freeze them! Start by arranging the unbaked pizza bombs on a baking sheet lined with parchment paper. Freeze them for about 1-2 hours until solid, then transfer them to a freezer-safe bag or container. They can be stored for up to 3 months. Just remember to label your bag with the date so you know when to enjoy them!
What should I do if my pizza bombs leak during baking?
If your pizza bombs leak, don’t worry! The key is to ensure the dough edges are tightly sealed before baking. If they still leak, you can quickly patch any openings with a bit of extra dough. For next time, consider flattening the edges slightly for better sealing and inspect for any openings before placing them in the oven.
Are these pizza bombs safe for kids with allergies?
Always check the ingredients! These pizza bombs are customizable and can be adjusted for dietary restrictions. If your family has nut allergies, ensure you use nut-free dough. For lactose intolerance, substitute mozzarella with a non-dairy option. Always read labels for any allergens related to processed foods like pepperoni and cheese.
What is the best way to reheat frozen pizza bombs?
To reheat frozen pizza bombs, bake them directly from the freezer at 375°F (190°C) for about 15-20 minutes or until they’re hot and golden brown. You can also microwave them for about 1-2 minutes, but baking provides that nice crispy texture we all love!

Pepperoni Pizza Bombs That Bring Family Fun to Snack Time
Ingredients
Equipment
Method
- Preheat your oven to 375°F (190°C) and line a baking sheet with parchment paper.
- Combine melted butter with garlic powder and Italian seasoning in a mixing bowl and set aside.
- Open the refrigerated biscuit dough and flatten each piece to about ¼ inch thick.
- Place a tablespoon of mozzarella cheese in the center of each dough piece, then add mini pepperoni slices on top.
- Pinch the edges together to seal and roll into a ball with the seam side down.
- Arrange on the baking sheet, brush tops with the seasoned butter, and bake for 12-15 minutes until golden brown.
- Let cool for a few minutes before serving with marinara sauce or ranch dip.