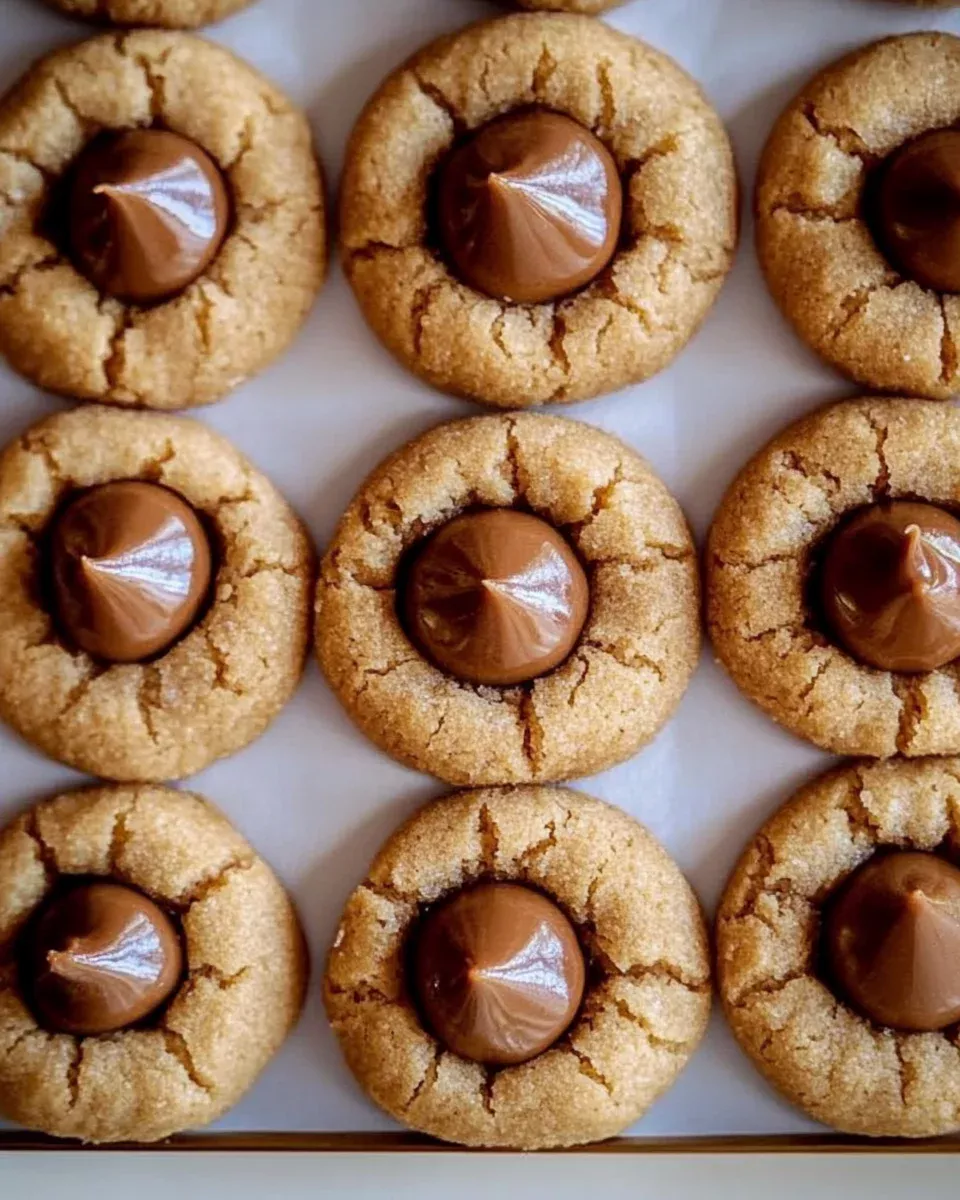
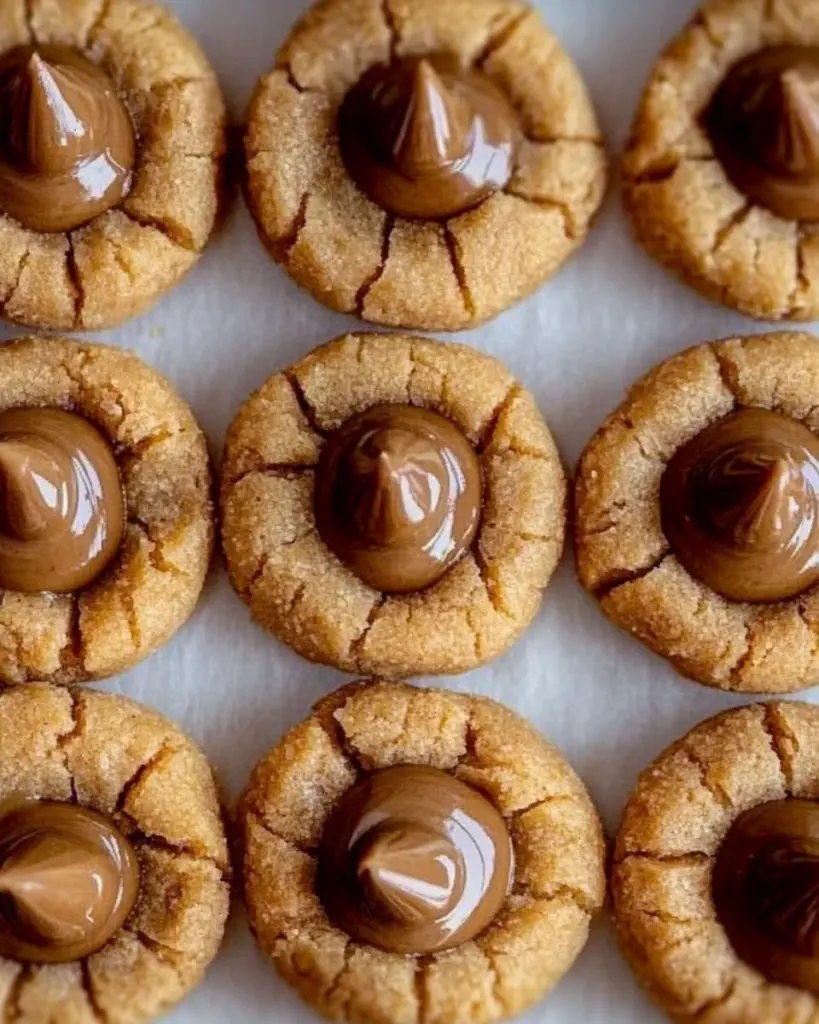
Introduction to Peanut Butter Blossoms
There’s something magical about the aroma of freshly baked cookies wafting through the house. Peanut Butter Blossoms are a delightful treat that brings back memories of family gatherings and holiday celebrations. These cookies are not just delicious; they’re a quick solution for a busy day or a sweet way to impress your loved ones. With creamy peanut butter and a chocolate Hershey’s Kiss on top, they’re a perfect blend of flavors that will make your taste buds dance. Trust me, once you try this recipe, you’ll want to make them again and again!
Why You’ll Love This Peanut Butter Blossoms
Peanut Butter Blossoms are the ultimate cookie for any occasion. They’re incredibly easy to whip up, making them perfect for those last-minute cravings or surprise guests. The combination of creamy peanut butter and rich chocolate is simply irresistible. Plus, they bake in just 10-12 minutes! Whether you’re a seasoned baker or just starting out, these cookies will quickly become a favorite in your kitchen.
Ingredients for Peanut Butter Blossoms
Gathering the right ingredients is the first step to cookie perfection. Here’s what you’ll need for these delightful Peanut Butter Blossoms:
- Creamy Peanut Butter: The star of the show! It adds that rich, nutty flavor and chewy texture.
- Granulated Sugar: This sweetener helps create a crisp exterior while keeping the inside soft.
- Packed Brown Sugar: It brings moisture and a hint of caramel flavor, making the cookies extra delicious.
- Large Eggs: They bind everything together and help the cookies rise.
- Vanilla Extract: A splash of this adds warmth and depth to the flavor profile.
- Baking Soda: This leavening agent gives the cookies a nice lift, making them light and fluffy.
- Salt: Just a pinch enhances all the flavors and balances the sweetness.
- All-Purpose Flour: The base of the dough, providing structure and stability.
- Granulated Sugar for Rolling: This gives the cookies a sweet, sparkly finish.
- Hershey’s Kisses: The iconic chocolate topping that makes these cookies truly special.
For those looking to mix things up, consider substituting half of the peanut butter with Nutella for a chocolate twist. If you need a gluten-free option, a 1:1 gluten-free flour blend works beautifully. You can find all the exact measurements at the bottom of the article, ready for printing!
How to Make Peanut Butter Blossoms
Making Peanut Butter Blossoms is a straightforward process that anyone can master. Follow these simple steps, and you’ll have a batch of delicious cookies in no time!
Step 1: Preheat the Oven
Start by preheating your oven to 350°F. This ensures that your cookies bake evenly and come out perfectly golden. While the oven heats up, you can prepare the dough.
Step 2: Mix the Ingredients
In a large mixing bowl, combine the creamy peanut butter, granulated sugar, brown sugar, eggs, and vanilla extract. Use a sturdy spoon or an electric mixer to mix until everything is well combined. The mixture should be smooth and creamy, with no lumps.
Step 3: Form the Dough
Next, add the baking soda and salt to the mixture. Gradually mix in the all-purpose flour until a dough forms. It should be soft but not sticky. If it feels too sticky, add a little more flour until you reach the right consistency.
Step 4: Roll in Sugar
Now comes the fun part! Scoop out tablespoon-sized portions of dough and roll them into balls. Once you have your dough balls, roll each one in granulated sugar to coat. This gives them a sweet, sparkly finish that’s hard to resist.
Step 5: Bake the Cookies
Place the sugar-coated dough balls on ungreased baking sheets, spacing them about 2 inches apart. Bake in the preheated oven for 10-12 minutes. Keep an eye on them; you want the edges to be lightly golden while the centers remain soft.
Step 6: Add the Hershey’s Kiss
As soon as you take the cookies out of the oven, press a Hershey’s Kiss into the center of each cookie. The heat from the cookie will slightly melt the chocolate, creating a delicious topping. Don’t wait too long; the cookies need to be warm for the kisses to stick!
Step 7: Cool and Enjoy
Let the cookies cool on the baking sheet for about 5 minutes. This allows them to set before transferring them to a wire rack to cool completely. Once they’re cool, grab a glass of milk and enjoy your homemade Peanut Butter Blossoms!

Tips for Success
- Use room temperature ingredients for better mixing and texture.
- Don’t overbake; cookies should be soft in the center when you take them out.
- For a uniform size, use a cookie scoop to portion the dough.
- Chill the dough for 30 minutes if it feels too sticky to handle.
- Experiment with different chocolate toppings for a fun twist!
Equipment Needed
- Mixing Bowl: A large bowl for combining ingredients. A sturdy pot can work in a pinch.
- Electric Mixer: Ideal for mixing, but a wooden spoon will do just fine.
- Baking Sheets: Use ungreased sheets; parchment paper is a great alternative.
- Cookie Scoop: For uniform dough balls, but your hands are perfectly acceptable too!
- Wire Rack: Essential for cooling cookies; a plate can work if you’re in a hurry.
Variations
- Nutella Swirl: Replace half of the peanut butter with Nutella for a rich, chocolatey twist.
- Gluten-Free: Use a 1:1 gluten-free flour blend to make these cookies suitable for gluten-sensitive friends.
- Peanut Butter Chocolate Chip: Add a cup of chocolate chips to the dough for extra chocolatey goodness.
- Maple Peanut Butter: Substitute maple syrup for granulated sugar for a unique flavor profile.
- Oatmeal Peanut Butter Blossoms: Mix in a cup of rolled oats for added texture and heartiness.
Serving Suggestions
- Pair your Peanut Butter Blossoms with a tall glass of cold milk for the ultimate treat.
- Serve them alongside a scoop of vanilla ice cream for a delightful dessert experience.
- For a festive touch, arrange cookies on a decorative platter with colorful sprinkles.
- Consider adding a side of fresh fruit, like strawberries or bananas, for a refreshing contrast.
FAQs about Peanut Butter Blossoms
Can I use crunchy peanut butter instead of creamy?
Absolutely! Crunchy peanut butter will add a delightful texture to your Peanut Butter Blossoms. Just keep in mind that the cookies may have a slightly different consistency, but they’ll still be delicious!
How do I store leftover cookies?
To keep your Peanut Butter Blossoms fresh, store them in an airtight container at room temperature. They’ll stay good for about a week. If you want to keep them longer, consider freezing them!
Can I make the dough ahead of time?
Yes! You can prepare the dough in advance and refrigerate it for up to 3 days. Just let it sit at room temperature for a few minutes before rolling and baking.
What can I use instead of Hershey’s Kisses?
If you’re looking for alternatives, try using chocolate chips, caramel candies, or even a dollop of Nutella in the center. The possibilities are endless!
Are Peanut Butter Blossoms suitable for a gluten-free diet?
Yes! Simply substitute all-purpose flour with a 1:1 gluten-free flour blend. Your cookies will still be soft and delicious, perfect for everyone to enjoy!
Final Thoughts
There’s a certain joy that comes from baking Peanut Butter Blossoms. The process is simple, yet the results are nothing short of magical. Each bite offers a delightful combination of creamy peanut butter and rich chocolate, evoking memories of childhood and family gatherings. Whether you’re baking for a special occasion or just to satisfy a sweet tooth, these cookies are sure to bring smiles. So, roll up your sleeves, gather your ingredients, and let the aroma of freshly baked cookies fill your home. Trust me, your taste buds will thank you, and so will everyone who gets to enjoy them!
Peanut Butter Blossoms: Discover This Irresistible Recipe!
Ingredients
Method
- Preheat your oven to 350°F.
- In a large mixing bowl, combine the peanut butter, granulated sugar, brown sugar, eggs, and vanilla extract. Mix until well combined.
- Add the baking soda and salt, then gradually mix in the flour until a dough forms.
- Scoop out tablespoon-sized portions of dough and roll them into balls.
- Roll each ball in granulated sugar to coat.
- Place the dough balls on ungreased baking sheets, about 2 inches apart.
- Bake in the preheated oven for 10-12 minutes, or until the edges are lightly golden.
- Remove from the oven and immediately press a Hershey’s Kiss into the center of each cookie.
- Allow the cookies to cool on the baking sheet for about 5 minutes before transferring them to a wire rack to cool completely.
Nutrition
Notes
- For a chocolate twist, substitute half of the peanut butter with Nutella.
- To make them gluten-free, use a 1:1 gluten-free flour blend in place of all-purpose flour.