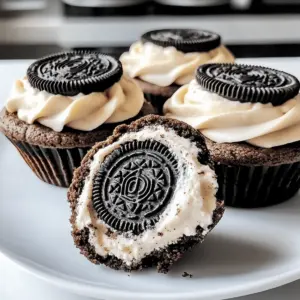
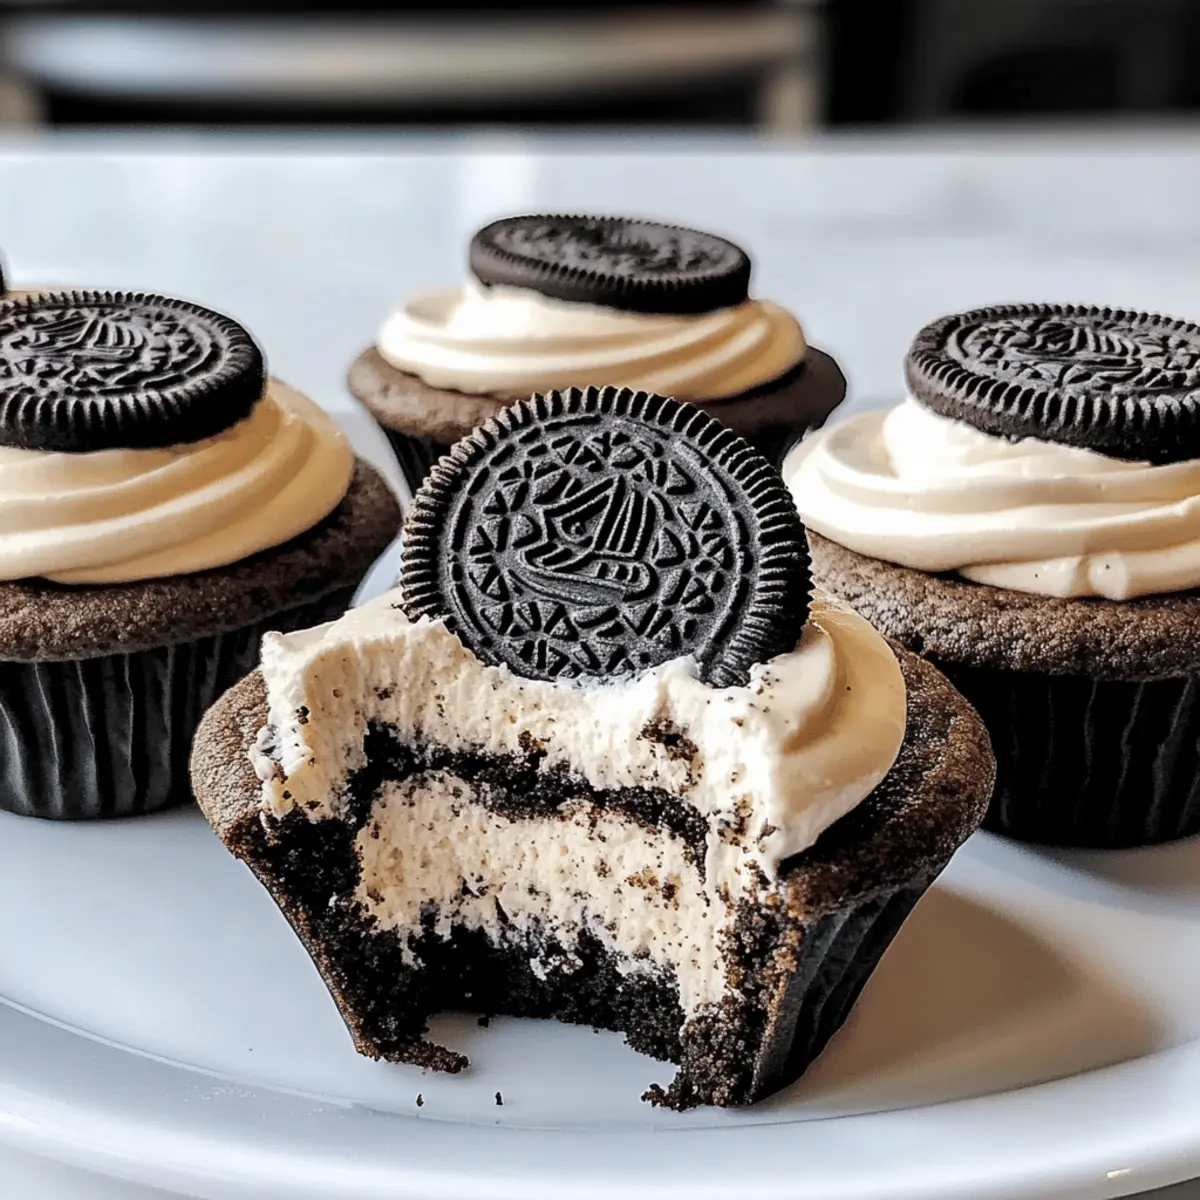
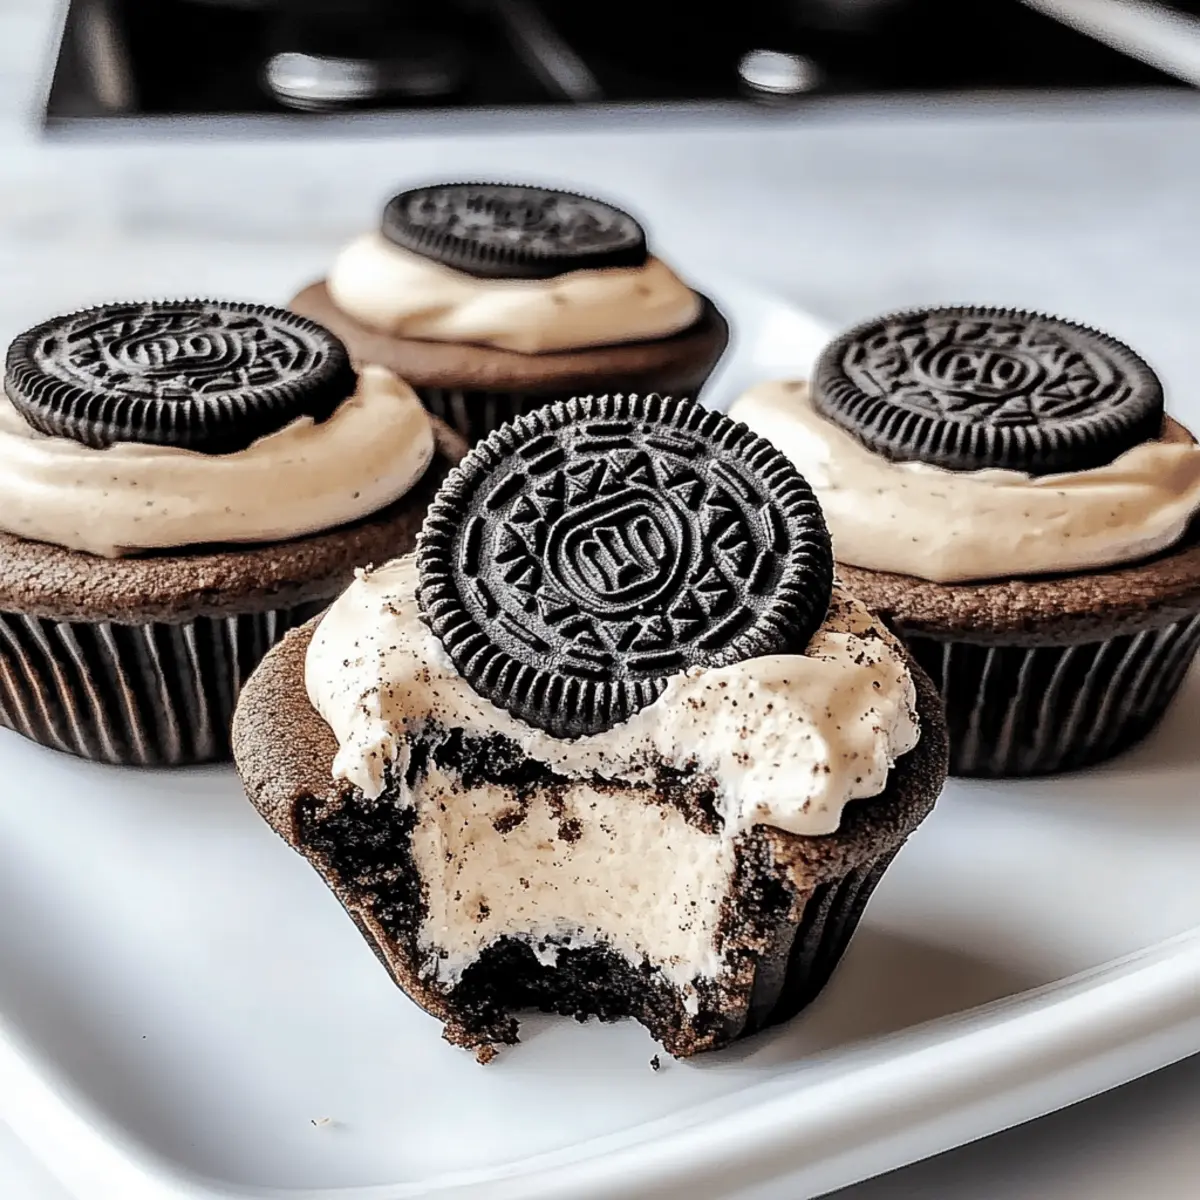
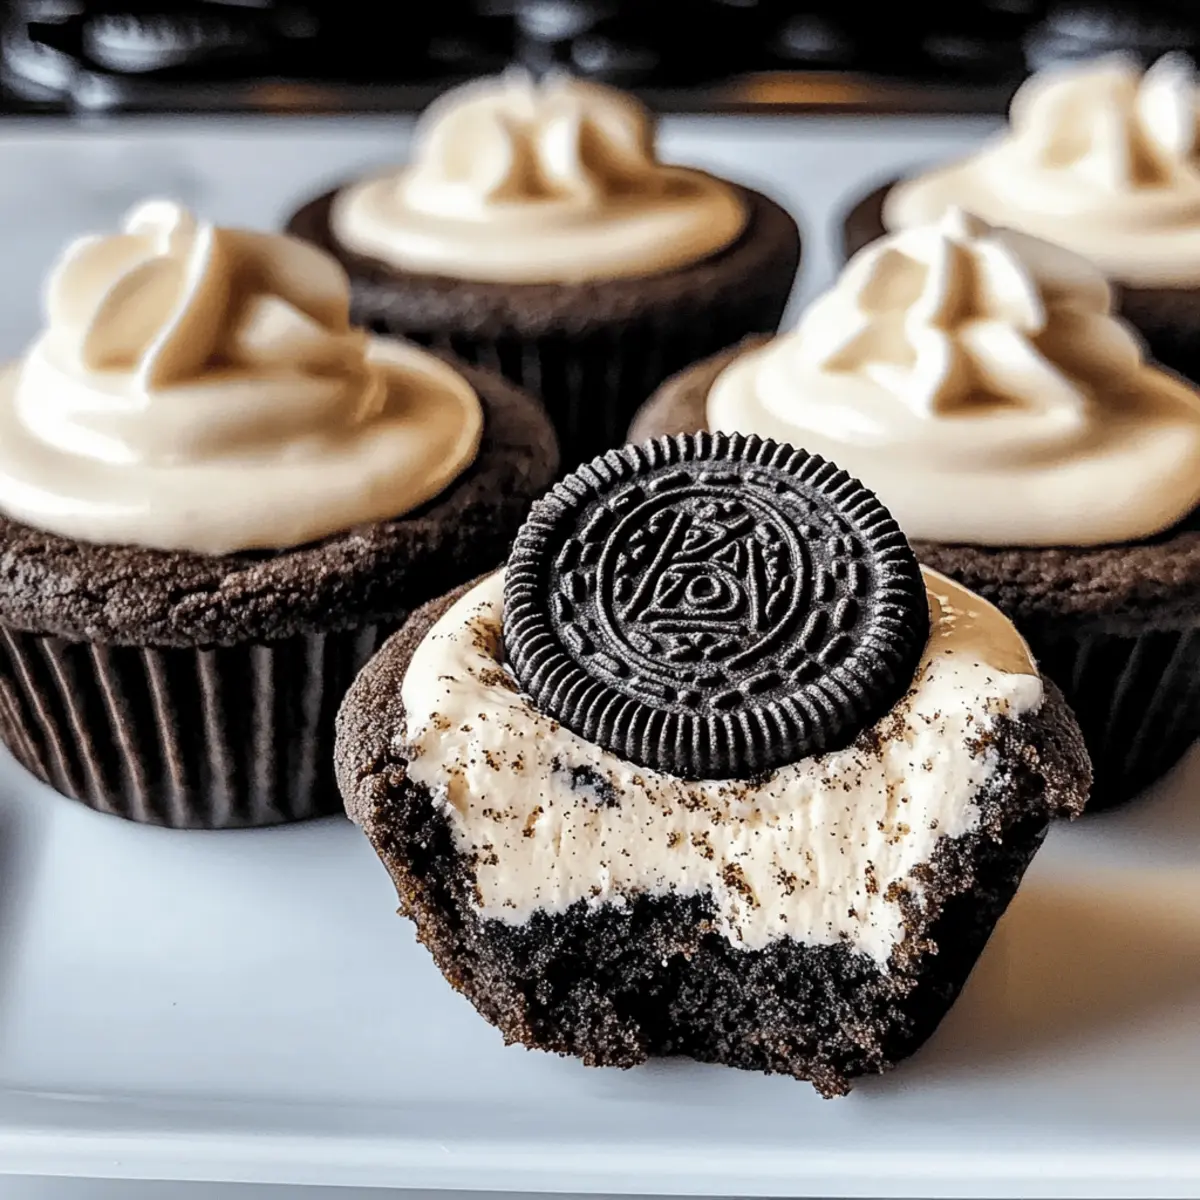
As I was rummaging through my pantry, I stumbled upon a pack of Oreos—the ultimate game-changer for dessert lovers like me! That moment sparked the idea for these delightful Oreo Cheesecake Cookie Cups. This recipe perfectly marries a crunchy Oreo cookie crust with a silky, creamy cheesecake filling that’s simply irresistible. The best part? These treats are quick to whip up and are sure to impress at any gathering, making you the standout dessert hero. With their playful individual servings, they offer a delicious escape from the ordinary, inviting you to indulge without the guilt of extra plates. Intrigued? Let’s dive into how to create these sweet delights!
Why Are Oreo Cheesecake Cookie Cups Irresistible?
Decadent Layers: Each bite offers a perfect blend of crunchy Oreo crust and creamy cheesecake filling that melts in your mouth.
Quick and Easy: No complicated steps here—prepare these delights in under an hour, ideal for impromptu gatherings.
Crowd-Pleaser: These cookie cups are guaranteed to impress guests, making them feel like you spent hours crafting a gourmet dessert.
Versatile Treat: Experiment with flavors—swap Oreos for your favorite cookies or try different toppings like fruit or chocolate sauce.
Perfect Portions: Enjoying dessert has never been easier with these mini portions, allowing guilt-free indulgence without sharing!
Oreo Cheesecake Cookie Cups Ingredients
For the Cookie Crust
• Oreos – These iconic cookies form the base; feel free to experiment with chocolate chip or peanut butter cookies for a unique twist.
• Butter – Acts as the binder for your crust; unsalted butter is preferred for a balanced taste.
For the Cheesecake Filling
• Cream Cheese – The star of the filling; opt for full-fat cream cheese for a creamy, rich flavor.
• Sugar – Sweetens the mixture; adjust according to your sweetness preference for the ultimate cheesecake experience.
• Sour Cream – Adds creaminess and tang; Greek yogurt can be swapped in for a lighter alternative.
• Mini Chocolate Chips (optional) – For chocolate lovers, these enhance the flavor and texture of your creamy filling.
For the Topping
• Whipped Cream – A delightful topping that adds a light finish; you can use store-bought or whip your own for freshness.
• Crushed Oreos – Sprinkle on top for extra crunch and flavor, making your Oreo Cheesecake Cookie Cups even more indulgent!
Step‑by‑Step Instructions for Oreo Cheesecake Cookie Cups
Step 1: Preheat the Oven
Begin by preheating your oven to 350°F (175°C). This ensures the perfect baking environment for your Oreo Cheesecake Cookie Cups. While the oven heats, gather your muffin tin and prepare it for the cookie cups by lining it with cupcake liners, ready to hold your delicious creations.
Step 2: Prepare the Cookie Crust
Crush about 20 Oreos into fine crumbs using a food processor or a zip-top bag and rolling pin. In a medium bowl, combine these crumbs with melted unsalted butter, mixing until every crumb is well-coated and holds together. The mixture should resemble damp sand—this is what will form the crunchy base of your cookie cups!
Step 3: Form the Cookie Cups
Spoon approximately 1 tablespoon of the Oreo mixture into each cupcake liner. Use your fingers or the back of a measuring spoon to firmly press the crumb mixture down to create a sturdy base that reaches up the sides of the liner. The crust should be compact; this will provide a perfect structure for the cheesecake filling and help them hold their shape once baked.
Step 4: Make the Cheesecake Filling
In a large mixing bowl, beat softened full-fat cream cheese with sugar until the mixture is fluffy and smooth, taking about 2 minutes. Then, add in sour cream, mixing until fully incorporated and silky. If desired, gently fold in mini chocolate chips for an extra burst of flavor in your Oreo Cheesecake Cookie Cups.
Step 5: Fill and Bake
Carefully spoon the creamy cheesecake filling over your cookie crusts, filling each nearly to the top. Place the muffin tin in the preheated oven and bake for 15-18 minutes, until the edges are set and the centers are slightly jiggly. This slight wobble is crucial for achieving that luscious texture in your cheesecake filling.
Step 6: Cool
Once baked, remove the muffin tin from the oven and allow the cookie cups to cool completely at room temperature. Once cool, refrigerate the Oreo Cheesecake Cookie Cups for at least an hour to set further and enhance their flavor. The chilling process is essential for the best cheesecake experience!
Step 7: Top & Serve
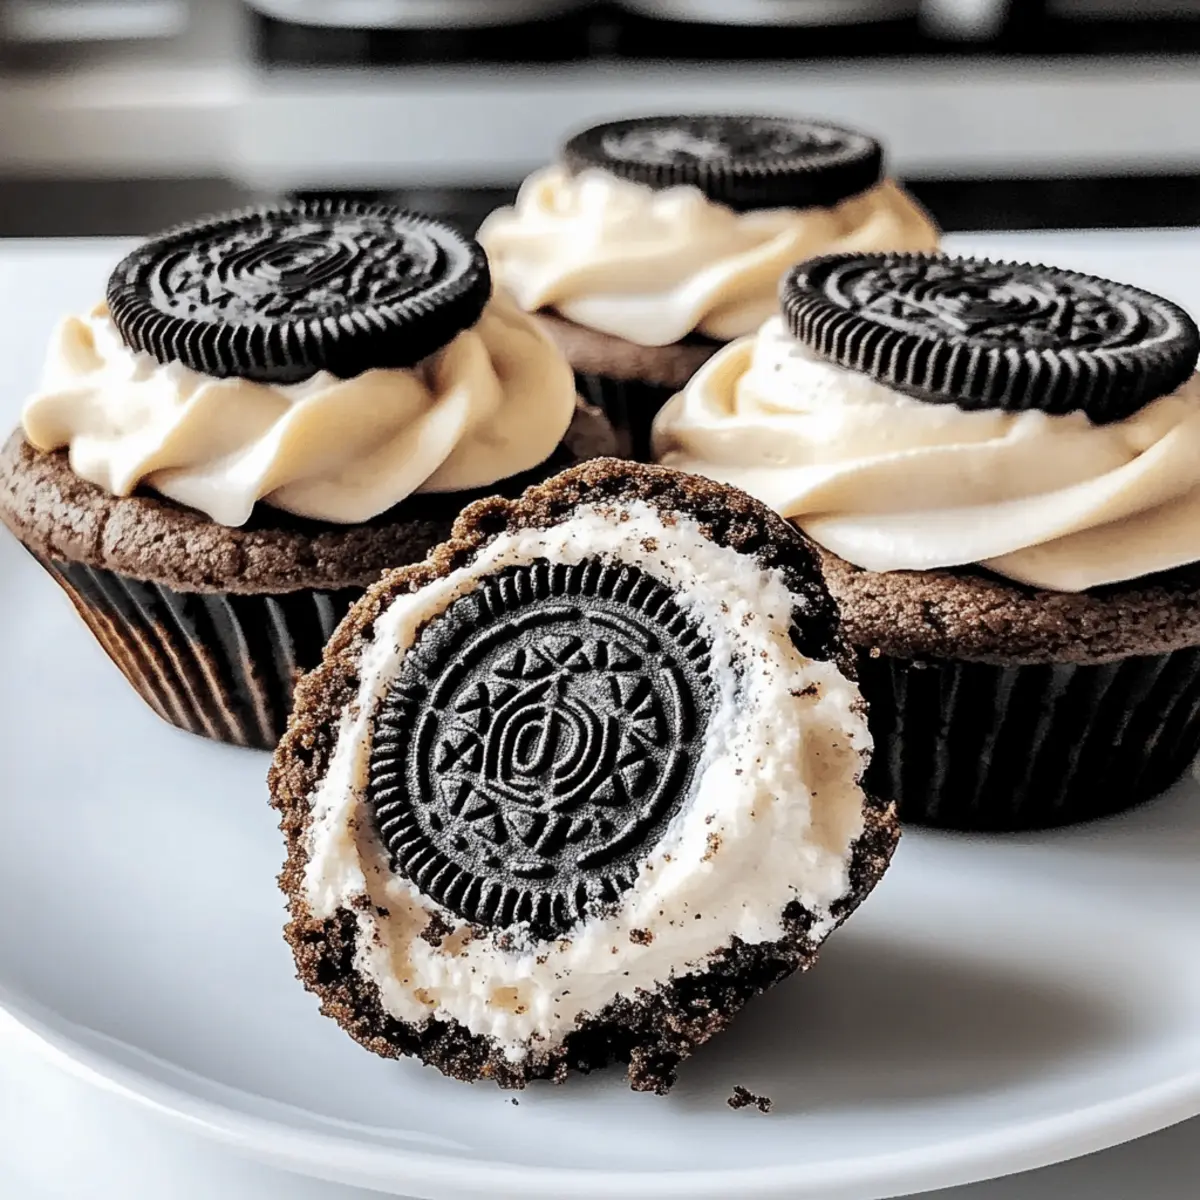
After chilling, remove the cookie cups from the refrigerator. Pipe or dollop your choice of whipped cream on top of each cup, then sprinkle crushed Oreos over the whipped cream for added texture and flair. These Oreo Cheesecake Cookie Cups are now ready to be enjoyed—delightful in every bite!
Oreo Cheesecake Cookie Cups Variations
Feel free to get creative with these variations to make your Oreo Cheesecake Cookie Cups even more delightful!
-
Chocolate Lovers: Add chocolate syrup to the cheesecake filling for extra richness. You can also drizzle it on top for a fancy finish!
-
Nutty Twist: Incorporate finely chopped nuts such as walnuts or almonds into the crust. This provides an exciting crunch that pairs wonderfully with the creamy filling.
-
Fruit Fusion: Top with fresh berries like strawberries or raspberries. The tartness balances the sweetness beautifully, making each bite a refreshing surprise.
-
Spiced Up: Add a teaspoon of cinnamon or nutmeg to the cheesecake filling. This subtle spice kicks the flavor up a notch, perfect for cozy gatherings.
-
Dairy-Free Delight: Replace cream cheese and sour cream with dairy-free alternatives. Coconut cream works wonders, giving a tropical flair to your cheesecakes!
-
Savory Option: For a unique twist, mix in a pinch of sea salt into the filling. This savory note will surprise and delight your taste buds.
-
Minty Fresh: Stir in a few drops of peppermint extract to the cheesecake filling. It offers a refreshing twist, reminiscent of mint chocolate desserts.
-
Caramel Drizzle: Finish with a generous caramel sauce drizzle atop the whipped cream for a decadent touch. It adds a beautiful flavor contrast that everyone will love!
Explore these options and find your perfect match. Whether you’re adding fruits or substitutes, the joy of baking lies in your imagination! Don’t forget to check out how to make the best homemade whipped cream for that perfect topping, or consider serving these delightful treats with a luxuriously rich chocolate sauce for an indulgent experience!
Make Ahead Options
These Oreo Cheesecake Cookie Cups are perfect for meal prep enthusiasts! You can prepare the cookie crust up to 24 hours in advance—just crush the Oreos and mix them with melted butter, then store this mixture in an airtight container in the refrigerator. Additionally, the cheesecake filling can be made ahead and refrigerated for up to 3 days before assembly. To maintain quality, ensure to cover the filling tightly to prevent any chilling odors from seeping in. When you’re ready to serve, simply assemble the cookie cups by pressing the crust into the muffin tin, filling them with the cheesecake mixture, and baking. You’ll have homemade desserts ready in no time, all while saving precious minutes during busy weeknights!
Expert Tips for Oreo Cheesecake Cookie Cups
-
Watch the Bake Time: Keep a close eye on your cookie cups while baking; overbaking can lead to a dry texture. Remove them when the center is still slightly jiggly for best results.
-
Full-Fat Cream Cheese: Use only full-fat cream cheese to achieve the rich, creamy flavor typical of cheesecake. Low-fat options may lead to a less satisfying filling.
-
Chill for Flavors: Always refrigerate your Oreo Cheesecake Cookie Cups after baking. This not only helps them set properly but also enhances the flavors—patience rewards you!
-
Press Firmly: When forming the cookie crust, ensure you press the mixture firmly into the cups. A solid base prevents crumbling when serving and enhances the overall taste experience.
-
Personalize Toppings: Don’t hesitate to get creative with toppings! Adding fresh fruit or a chocolate drizzle can elevate your Oreo Cheesecake Cookie Cups to gourmet status.
What to Serve with Oreo Cheesecake Cookie Cups
Transport your taste buds to a sweet paradise with these beautifully crafted treats, perfect for any dessert lover’s table.
-
Fresh Berries: Juicy strawberries, raspberries, or blueberries add a pop of color and a tart contrast to the rich cheesecakes. These fruits offer a refreshing bite, lightening the overall sweetness of the cookie cups.
-
Chocolate Drizzle: A warm stream of melted chocolate poured over the top elevates the indulgence, bringing an extra layer of decadence to each bite. This pairing marries perfectly with the chocolatey flavors from the Oreos.
-
Coffee or Espresso: A bold cup of coffee complements the sweetness beautifully, creating a delightful harmony of flavors. The bitterness of the coffee enhances the creaminess of the cheesecake, making it an ideal pairing for dessert lovers.
-
Whipped Cream Topping: Serve alongside a bowl of extra whipped cream for guests to add their desired amount on top, boosting the creamy texture every time they indulge. It’s a classic pairing that ensures each bite is as dreamy as the last.
-
Ice Cream: A scoop of vanilla or cookies and cream ice cream provides an indulgent, creamy counterpart to the rich cheesecake cups. Melting ice cream over the cookie base offers delightful balance and textural contrast.
-
Mint Leaves Garnish: A few fresh mint leaves on the side give a vibrant touch and invigorating flavor. This subtle herbal note refreshes the palate, making it even easier to enjoy another cookie cup!
How to Store and Freeze Oreo Cheesecake Cookie Cups
Fridge: Store your leftover Oreo Cheesecake Cookie Cups in an airtight container for up to 5 days. This keeps them fresh and ready to satisfy your sweet cravings!
Freezer: If you want to keep them longer, you can freeze the cookie cups before topping. Wrap them tightly in plastic wrap and store in an airtight container for up to 3 months.
Reheating: When you’re ready to indulge, simply thaw in the fridge overnight. For a quick treat, microwave for 10-15 seconds to warm slightly before enjoying.
Preparation Tip: Make sure the Oreo Cheesecake Cookie Cups are fully cooled before refrigerating or freezing to maintain their delightful texture.
Oreo Cheesecake Cookie Cups Recipe FAQs
How should I select Oreos for the crust?
For the best flavor and texture, choose classic Oreos without any dark or visible imperfections. Check for any cracks or dark spots, as the quality of your cookies influences the final taste of your crust.
What is the best way to store leftover Oreo Cheesecake Cookie Cups?
Store your leftover cookie cups in an airtight container in the fridge for up to 5 days. Make sure they are completely cooled before placing them in the container to maintain their deliciously creamy filling.
Can I freeze Oreo Cheesecake Cookie Cups?
Absolutely! To freeze, wrap each cooled cookie cup tightly with plastic wrap and place them in an airtight container. They can be frozen for up to 3 months. When you’re ready to enjoy, let them thaw in the fridge overnight, and for a quick treat, you can microwave them for 10-15 seconds to slightly warm them.
What should I do if my cheesecake filling doesn’t set properly?
If your cheesecake filling is too runny, it might be due to overmixing or underbaking. Be sure to mix only until ingredients are combined and bake the cups until they’re set but still slightly jiggly in the center. If they still don’t set well, you can refrigerate them longer as cooling helps firm up the filling.
Are these cookie cups safe for pets or individuals with allergies?
No, Oreo Cheesecake Cookie Cups are not safe for pets, especially dogs, due to the chocolate content, which can be toxic. Additionally, those with allergies should be cautious, as this recipe contains common allergens, including dairy (cream cheese, butter) and gluten (Oreos). Consider using gluten-free cookies and dairy alternatives if necessary.
Oreo Cheesecake Cookie Cups That Blissfully Melt in Your Mouth
Ingredients
Equipment
Method
- Preheat your oven to 350°F (175°C) and line a muffin tin with cupcake liners.
- Crush about 20 Oreos into fine crumbs and mix with melted butter until well-coated.
- Spoon the Oreo mixture into each cupcake liner and press down to form a sturdy base.
- Beat softened cream cheese and sugar until fluffy, then mix in sour cream and chocolate chips.
- Spoon the cheesecake filling over the crusts and bake for 15-18 minutes.
- Allow the cookie cups to cool completely at room temperature, then refrigerate for an hour.
- Top with whipped cream and crushed Oreos before serving.