Introduction to No Bake Coconut Cream Dream
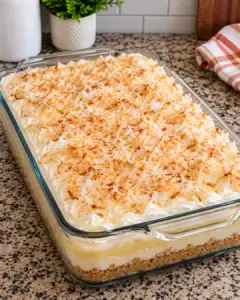
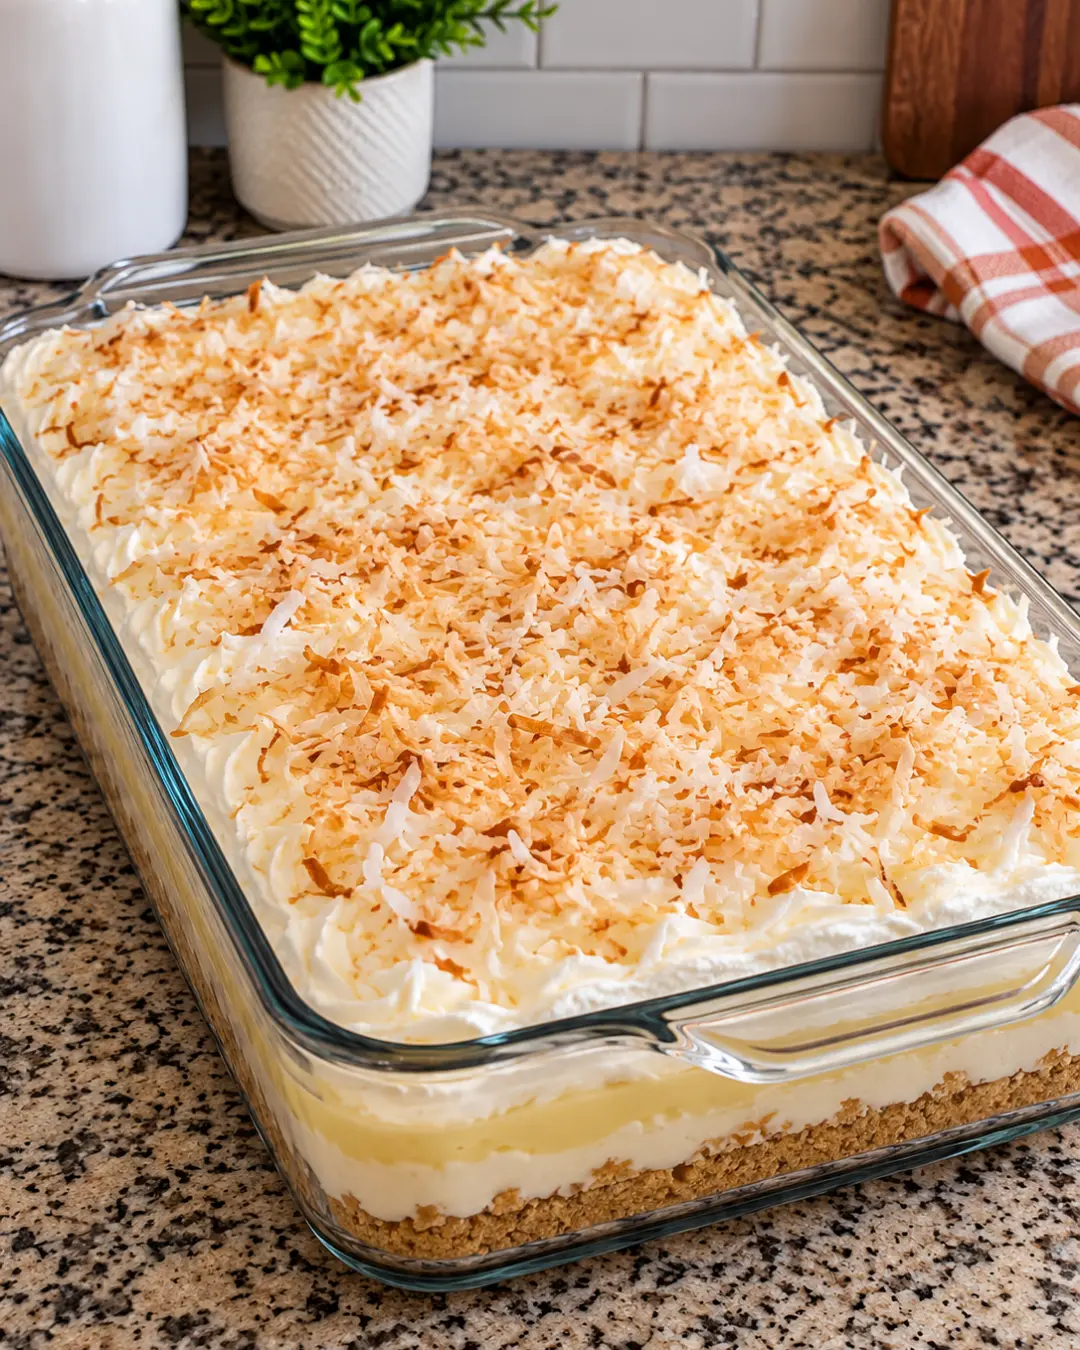
No Bake Coconut Cream Dream is a chilled layered dessert made for days when you want something sweet without turning on the oven. A buttery graham cracker crust supports a smooth cream cheese layer, coconut pudding filling, and a soft topping of whipped cream and toasted coconut.
The dessert needs a little time to chill, but the hands-on work is simple. Make it in a 9-by-13-inch dish for a family gathering, or use a smaller dish for taller layers. For the cleanest slices, chill it overnight and add the toasted coconut just before serving if you want it to stay crisp.
Why You'll Love This No Bake Coconut Cream Dream
- It is a no-bake dessert, so it keeps the kitchen cool.
- The graham cracker crust comes together quickly with melted butter.
- Coconut pudding gives the filling a clear coconut flavor without extra cooking.
- The dessert can be made several hours or a day ahead.
- Toasted coconut adds a lightly crisp finish to the creamy layers.
Ingredients for No Bake Coconut Cream Dream
- 2 and 1 half cups graham cracker crumbs
- 3 quarters cup unsalted butter melted
- 8 ounces cream cheese softened
- 1 cup powdered sugar
- 2 boxes instant coconut cream pudding mix 3 point 4 ounces each
- 3 cups cold whole milk
- 16 ounces whipped topping thawed
- 1 cup sweetened shredded coconut toasted
Use softened cream cheese so it blends smoothly with the powdered sugar, and use cold whole milk for the pudding mixture. Toast the sweetened shredded coconut in a dry skillet over medium-low heat, stirring often, until lightly golden, then cool it completely before using. The exact ingredients are 2 and 1 half cups graham cracker crumbs, 3 quarters cup unsalted butter melted, 8 ounces cream cheese softened, 1 cup powdered sugar, 2 boxes instant coconut cream pudding mix 3 point 4 ounces each, 3 cups cold whole milk, 16 ounces whipped topping thawed, and 1 cup sweetened shredded coconut toasted.
How to Make No Bake Coconut Cream Dream
Step 1: Toast the Coconut
Place the sweetened shredded coconut in a dry skillet over medium-low heat. Cook for about 4 to 7 minutes, stirring every 30 seconds, until most of the coconut is lightly golden. Remove it from the skillet right away and spread it on a plate to cool. Do not leave it in the hot skillet, because it can continue browning after it is off the heat.
Step 2: Make the Graham Cracker Crust
Stir the graham cracker crumbs and melted unsalted butter together in a medium bowl until all of the crumbs are evenly moistened. Press the mixture firmly into the bottom of a 9-by-13-inch baking dish. Use the bottom of a measuring cup or a flat glass to make the crust compact and even. Set the dish aside while you prepare the cream cheese layer.
Step 3: Mix the Cream Cheese Layer
Beat the softened cream cheese and powdered sugar in a large bowl until smooth, scraping the sides of the bowl as needed. Fold in about 1 cup of the thawed whipped topping until the mixture is light and evenly blended. Spread this layer carefully over the graham cracker crust, taking it all the way to the edges.
Step 4: Prepare the Coconut Pudding
Whisk the two boxes of instant coconut cream pudding mix with the cold whole milk for about 2 minutes, or until the mixture thickens. Let it stand for 3 to 5 minutes, then whisk again to remove any loose pockets of mix. Spread the pudding over the cream cheese layer. Cold milk is important because instant pudding depends on it to thicken properly.
Step 5: Add the Topping and Chill
Spread the remaining whipped topping over the pudding layer, making a smooth surface with a spatula. Cover the dish tightly with plastic wrap or a lid and refrigerate for at least 4 hours. The crust and layers will be easier to cut after a longer chill, so overnight is a good option when you are preparing the dessert ahead.
Step 6: Finish and Serve
Sprinkle the cooled toasted coconut evenly over the top just before serving. Cut the dessert into 8 portions with a sharp knife, wiping the blade between cuts for cleaner edges. Keep the dessert refrigerated until serving, and return leftovers to the refrigerator within 2 hours.
Tips for Success
- Let the cream cheese sit at room temperature for about 30 minutes before mixing, but do not leave it out for more than 2 hours.
- Press the crust firmly, especially around the edges, so it holds together when sliced.
- Fold whipped topping gently into the cream cheese to keep the layer light rather than dense.
- If the pudding looks loose after whisking, give it a few more minutes to thicken before spreading it.
- For neater portions, chill the dessert overnight and use a sharp knife warmed briefly under hot water, then dried.
Equipment Needed
- 9-by-13-inch baking dish
- Large mixing bowls
- Medium skillet
Variations
- Replace part of the graham cracker crumbs with crushed vanilla wafer cookies for a softer vanilla note.
- Add a thin layer of sliced banana between the cream cheese and pudding layers, then serve the dessert the same day for the freshest texture.
- Use chocolate graham cracker crumbs for a chocolate-coconut combination.
- Stir 1/2 cup of finely chopped toasted pecans into the graham cracker crust for extra texture.
- Top each serving with a small spoonful of additional whipped topping and a pinch of toasted coconut.
Serving Suggestions
Serve this dessert cold in squares or spoon it into bowls if the layers are too soft to cut cleanly. It pairs well with coffee, black tea, or a glass of cold milk. Keep the dish covered in the refrigerator and use leftovers within 3 to 4 days. Because the recipe contains dairy, do not leave it at room temperature for more than 2 hours, or more than 1 hour if the room is above 90°F.
FAQs about No Bake Coconut Cream Dream
Can I make No Bake Coconut Cream Dream ahead of time? Yes. Assemble the dessert up to 24 hours ahead, cover it tightly, and refrigerate it. Add the toasted coconut shortly before serving if you want the topping to retain more of its texture.
Why is my pudding layer too thin? The milk may not have been cold enough, the mixture may need more standing time, or extra milk may have been added. Whisk the pudding with cold whole milk for about 2 minutes, let it stand for 3 to 5 minutes, and check that it has thickened before spreading it.
Can I use a different size dish? Yes. An 8-by-8-inch or 9-by-9-inch dish will make taller layers, but the dessert will need longer chilling and may be harder to cut into neat portions. A 9-by-13-inch dish gives thinner, easier-to-serve layers.
Can I freeze this dessert? You can freeze it covered for up to 1 month, although the whipped topping and pudding may become slightly softer after thawing. Thaw it in the refrigerator overnight and add the toasted coconut after thawing for the best texture.
How should I store leftovers? Cover the dish and refrigerate leftovers promptly. Use them within 3 to 4 days, and do not leave portions at room temperature for more than 2 hours.
Final Thoughts
No Bake Coconut Cream Dream is a practical make-ahead dessert with familiar ingredients and easy layers. Give it enough refrigerator time to set, cool the toasted coconut before sprinkling it on top, and you will have a creamy coconut dessert that slices or scoops neatly for sharing.
No Bake Coconut Cream Dream
Ingredients
Equipment
Method
- Toast the coconut in a dry skillet over medium-low heat for 4 to 7 minutes, stirring often, then cool completely.
- Combine graham cracker crumbs and melted butter, press into a 9-by-13-inch dish, and set aside.
- Beat softened cream cheese with powdered sugar, fold in 1 cup whipped topping, and spread over the crust.
- Whisk pudding mix with cold milk for 2 minutes, let stand for 3 to 5 minutes, then spread over the cream cheese layer.
- Spread remaining whipped topping over the pudding, cover, and refrigerate for at least 4 hours.
- Top with toasted coconut, cut into 8 portions, and serve cold.
Nutrition
Notes
- Keep the finished dessert refrigerated and do not leave it at room temperature for more than 2 hours.
- For cleaner slices, chill overnight and wipe the knife between cuts.
- Add the toasted coconut just before serving for the best texture.