

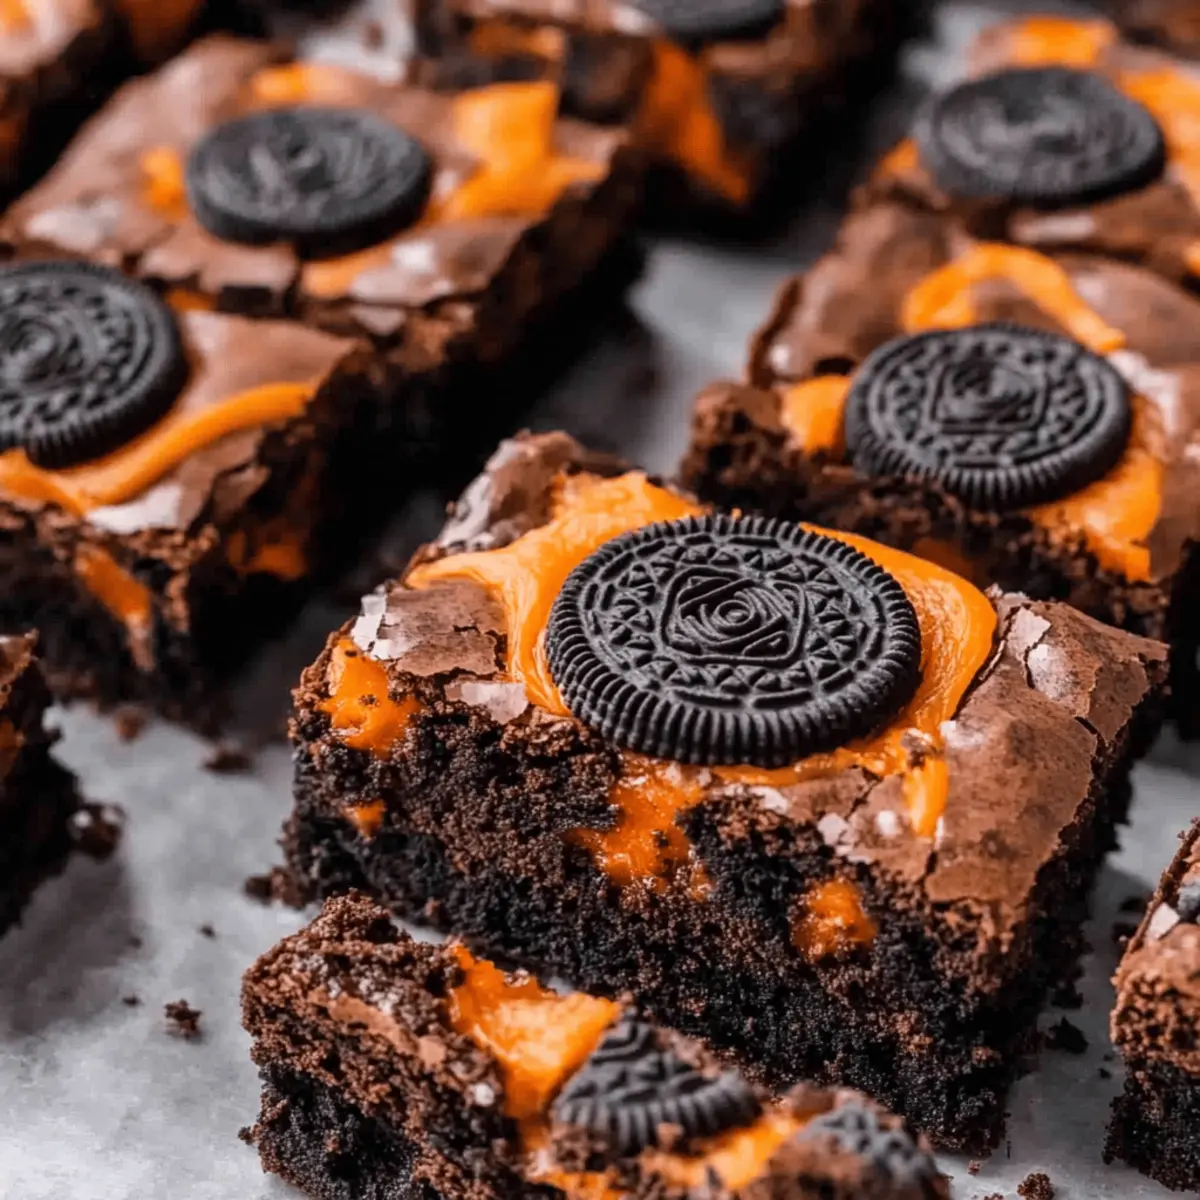
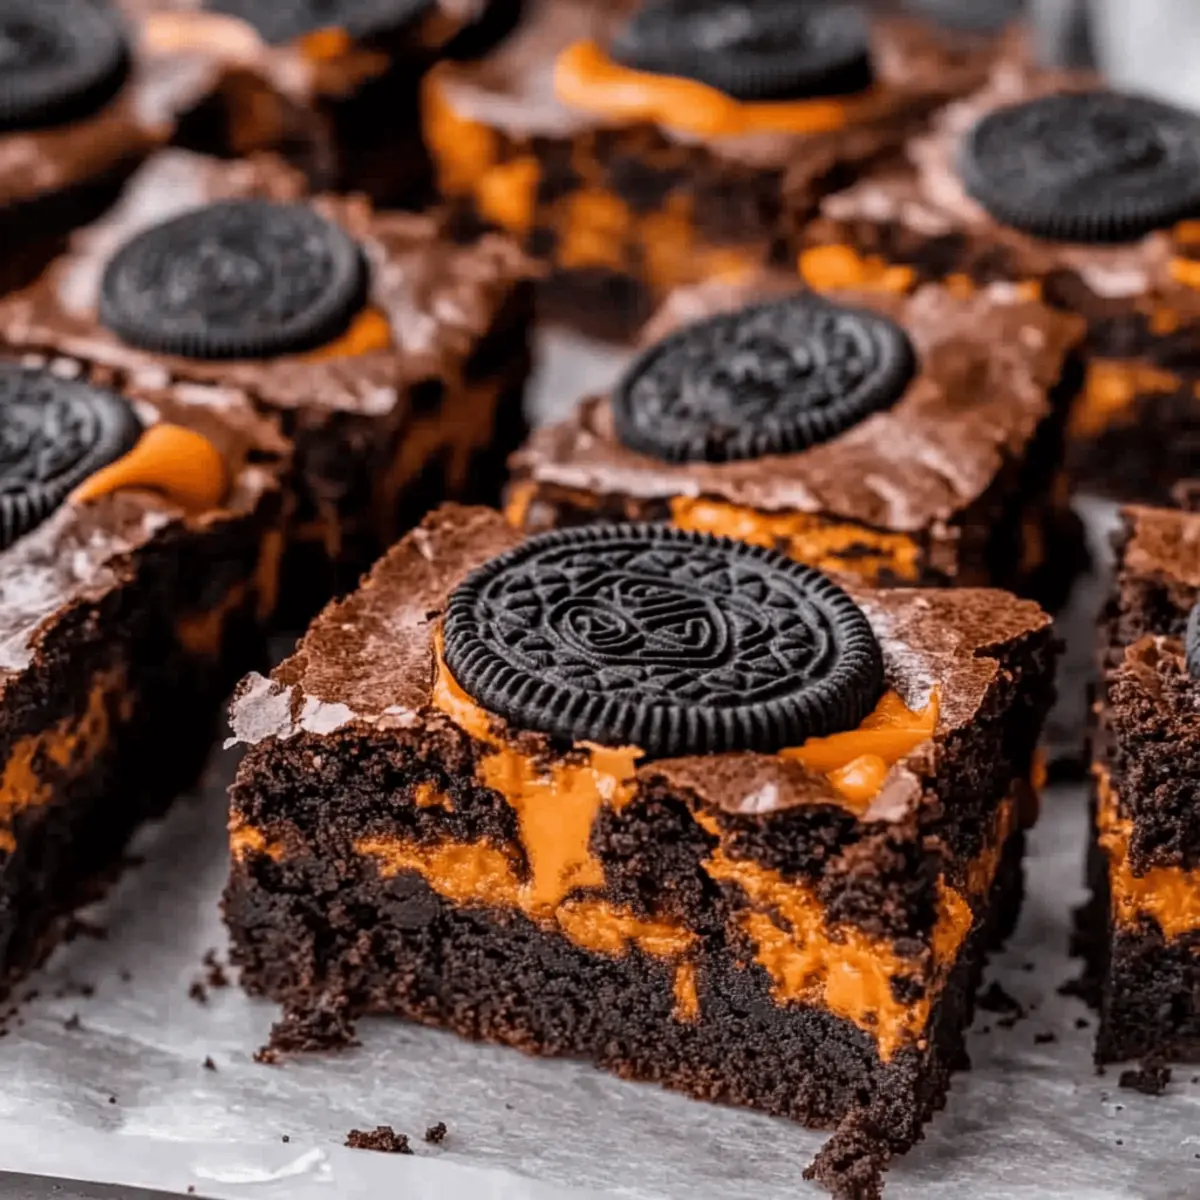
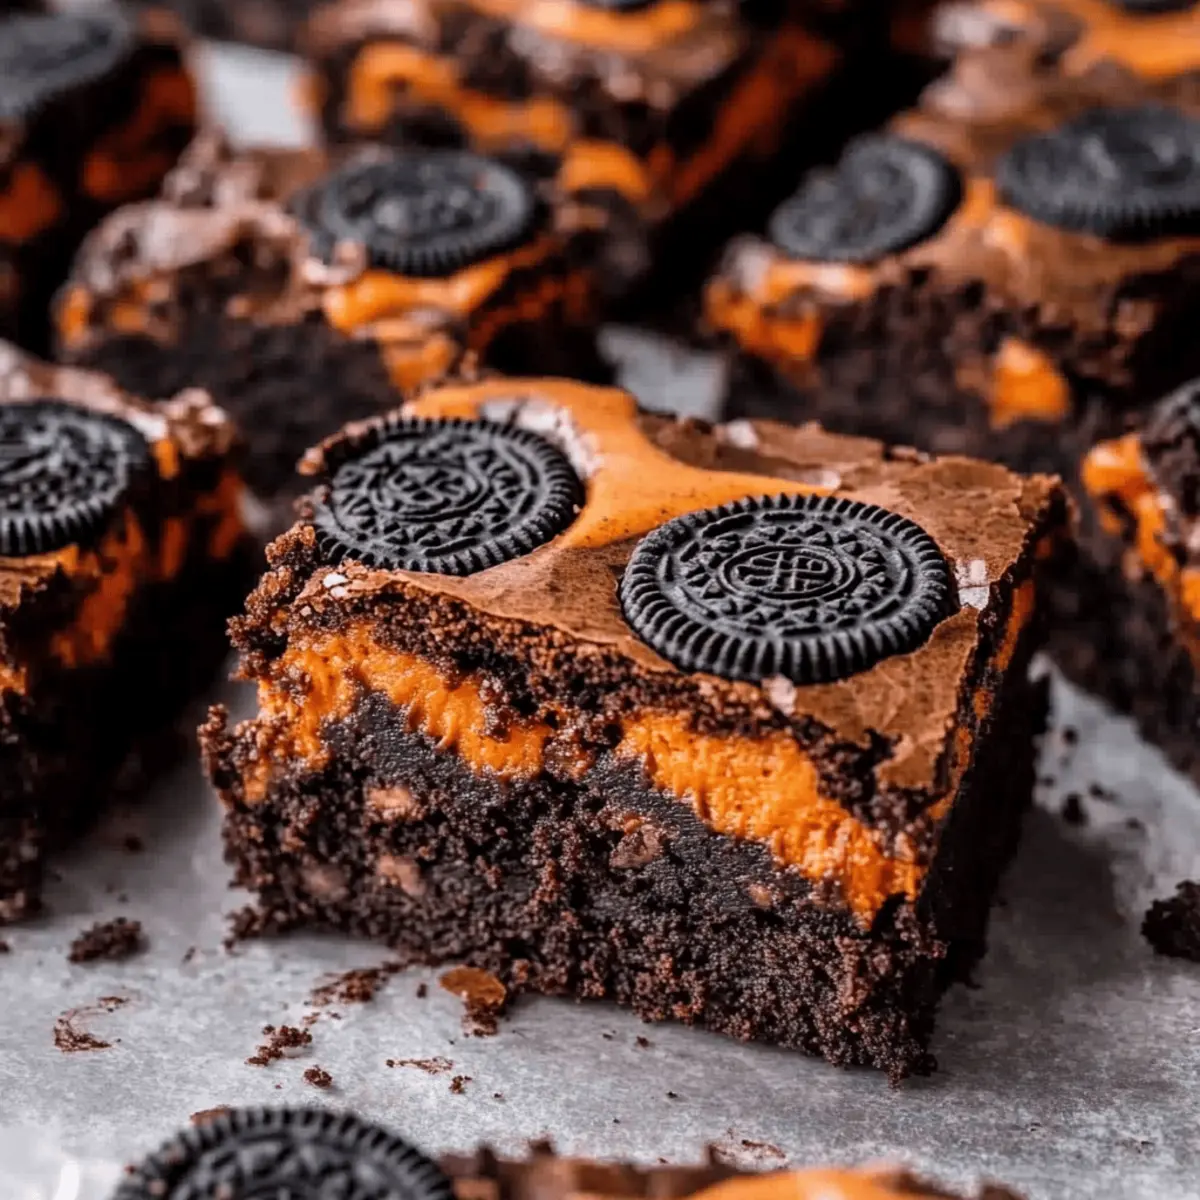
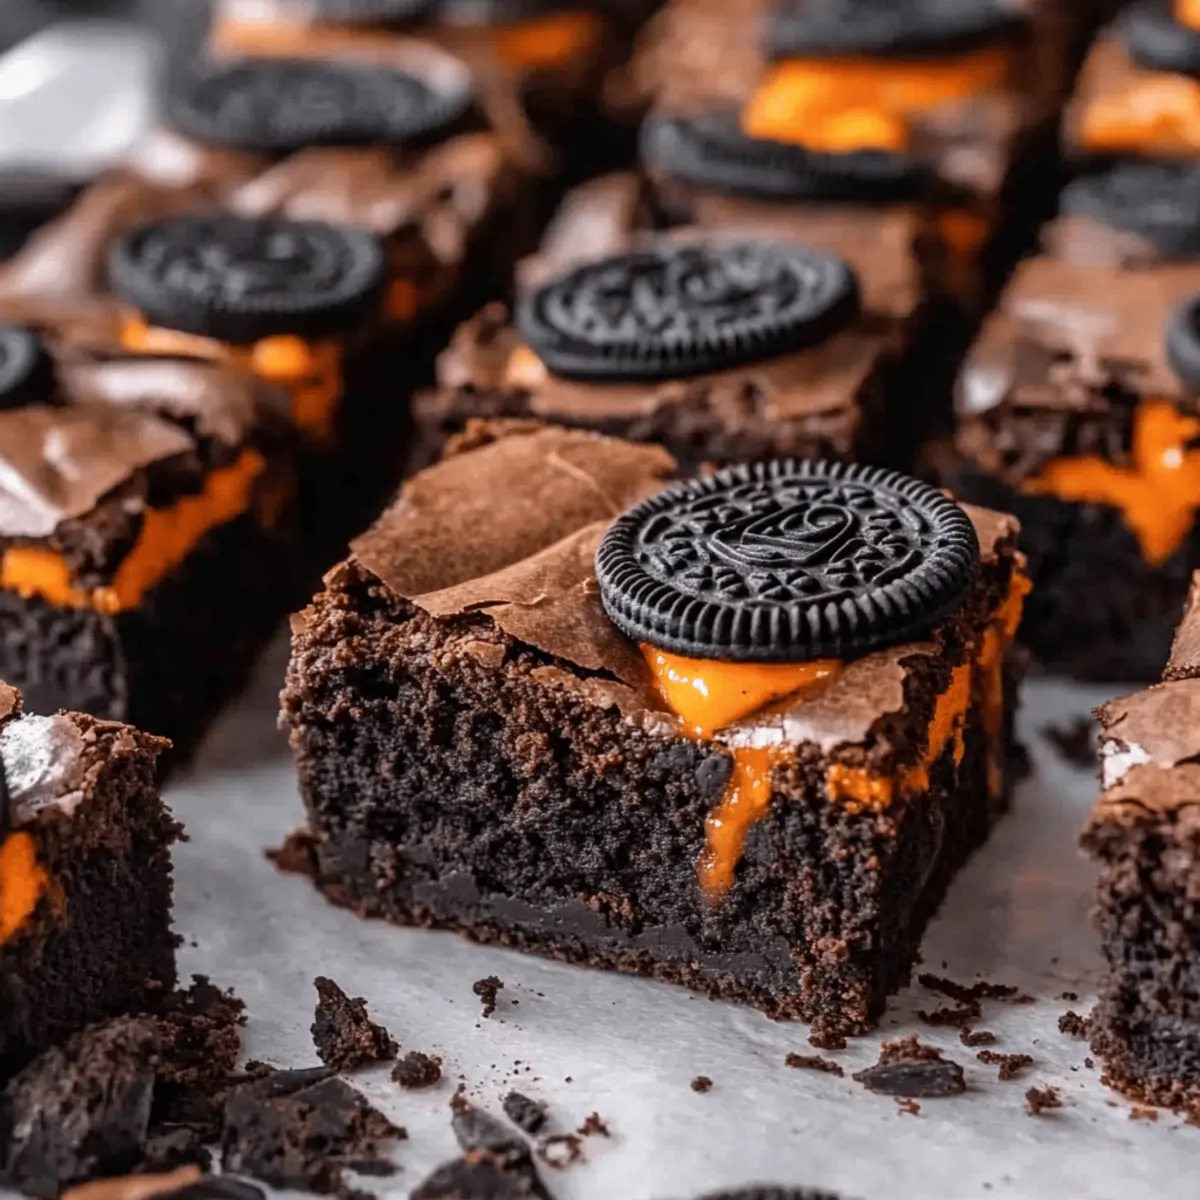
As I scoured my pantry for Halloween treats, I stumbled upon a box of Halloween Oreos, sparking a delightful idea. Why not combine them with fudgy brownies for a crowning dessert that screams “spooky season”? Enter my Fudgy Halloween Oreo Stuffed Brownies, the perfect blend of rich chocolate batter and Oreo goodness. These brownies are not only a visual showstopper, but they also come together in a snap, making them an effortless crowd-pleaser for all your festive gatherings. You’ll love how the creamy Oreo center melts into each bite, creating a delicious surprise that’s sure to impress. Ready to turn your Halloween celebration into a sweet triumph? Let’s dive into this fun recipe that will leave everyone asking for seconds—and thirds!
Why Are These Brownies So Irresistible?
Decadent Flavor: Each bite of these Halloween Oreo brownies delivers an explosion of rich chocolate paired with the nostalgic taste of Oreos, making it a delightful treat for all ages.
Showstopper Appearance: The striking contrast of dark brownie and bright Halloween Oreo colors creates a visually stunning dessert that will grab attention at any gathering.
Easy to Make: With just a few simple steps, you can whip up these fudgy brownies in no time! Perfect for busy schedules or spontaneous Halloween parties.
Versatile Treat: Feel free to mix in your favorite add-ins like chocolate chips or nuts, ensuring this recipe is adaptable to every craving. You’ll also find that these brownies are equally delicious throughout the autumn season!
Crowd-Pleasing Delight: Whether you’re serving them at a Halloween bash or a cozy family night, rest assured these treats will have everyone begging for the recipe or a second helping!
Halloween Oreo Brownies Ingredients
For the Brownie Batter
- Butter – Adds moisture and richness; margarine can be used for a dairy-free version.
- Vegetable Oil – Contributes to the moist texture; coconut oil can be a lighter alternative.
- Granulated Sugar – Sweetens the brownies; no substitute is suggested for the best flavor.
- Brown Sugar – Adds depth and a slight caramel flavor; additional granulated sugar works as a substitute.
- Cocoa Powder – Provides the rich chocolate flavor; using unsweetened cocoa yields the best results.
- Eggs – Binds the ingredients and provides structure; no substitutes are recommended for optimal texture.
- Vanilla Extract – Enhances sweetness and flavor complexity; imitation vanilla can be used in a pinch.
- Salt – Balances sweetness and enhances flavors; no substitutes recommended.
- All-Purpose Flour – Gives structure to the brownies; a gluten-free baking blend can be used instead.
For the Oreo Layer
- Halloween Oreos – Provides a fun and spooky element inside and on top of brownies; any regular Oreos can replace them if the Halloween variety is unavailable.
Make your indulgent Halloween Oreo brownies even more delightful with these essential ingredients that create the perfect treat for your spooky season!
Step‑by‑Step Instructions for Fudgy Halloween Oreo Stuffed Brownies
Step 1: Preheat the Oven
Begin by preheating your oven to 350°F (175°C) and lining an 8×8 inch baking pan with parchment paper. This prepares the pan for the fudgy brownie batter, ensuring easy removal once baked. Smooth out the parchment to fit the corners, guaranteeing every delicious layer of your Halloween Oreo brownies will bake evenly and release effortlessly.
Step 2: Melt the Butters and Sugars
In a microwave-safe bowl, combine butter, vegetable oil, granulated sugar, and brown sugar. Heat this mixture in 30-second intervals, stirring well between each session until fully melted, which usually takes about 1 to 2 minutes. The goal is to create a smooth, glossy mixture where the sugars dissolve completely, leaving no grainy texture.
Step 3: Vigorously Mix the Batter
Once melted, microwave the mixture for an additional minute while stirring vigorously to ensure the sugars dissolve completely. This creates a rich, syrupy base for your brownies. The mixture should be shiny and sticky, indicating that the sugars are properly incorporated, which will contribute to the fudgy texture of your Halloween Oreo brownies.
Step 4: Incorporate Eggs and Vanilla
Next, add eggs to the sugary mixture, whisking in one egg at a time until fully combined. Follow this with the vanilla extract, stirring until the batter is cohesive and smooth. This step adds depth to your brownie batter, enriching the flavors and helping achieve that classic fudgy texture that’s perfect for these Halloween Oreo brownies.
Step 5: Combine Dry Ingredients
Gently fold in the all-purpose flour, cocoa powder, and salt into the wet mixture using a spatula. Be careful not to overmix; simply combine until you see no streaks of flour—this will help keep your brownies soft and chewy. The chocolatey aroma will fill your kitchen, making it hard to resist the enticing fudgy goodness of the batter.
Step 6: Layer the Brownie Batter
Pour half of the brownie batter into the prepared baking pan, using a spatula to spread it evenly across the bottom. This layer forms the base for your treat, and it should be thick enough to support the Oreos without them sinking. The deep, dark chocolate hue is visually appetizing and promises a delicious bite ahead.
Step 7: Add Halloween Oreos
Place your Halloween Oreos in a single layer over the brownie batter, spacing them evenly. This will ensure each brownie piece has a delicious surprise in the middle. Once the Oreos are laid out, carefully spoon the remaining brownie batter on top, spreading it gently to cover the cookies without displacing them.
Step 8: Bake to Perfection
Sprinkle additional crushed Halloween Oreos on top for a festive touch, then transfer the baking pan to the preheated oven. Bake for approximately 30 minutes, or until the edges are set and a toothpick inserted into the center comes out with a few moist crumbs. The brownies will appear slightly puffed and cracked on the surface, signaling they are ready to cool.
Step 9: Cool for Ideal Slicing
Once baked, take the brownies out of the oven and let them cool completely in the pan on a wire rack. For cleaner edges, aim for at least 8 hours of cooling time; this step is crucial for achieving those perfect brownie squares that will showcase the delightful layers of your Halloween Oreo brownies when sliced.
What to Serve with Halloween Oreo Stuffed Brownies
Get ready to elevate your Halloween dessert game with these delightful accompaniments that will transform your dessert table into a spooky feast.
-
Vanilla Ice Cream: Creamy and cool, it perfectly balances the rich, fudgy brownies while the melting scoop creates a delightful contrast.
-
Whipped Cream: Light and airy, this topping adds a sweet fluffiness that pairs beautifully with the dense brownie texture, making each bite heavenly.
-
Chocolate Sauce: Drizzling this over your brownies intensifies the chocolate flavor, creating a luxurious experience that chocolate lovers won’t want to miss.
-
Pumpkin Spice Latte: Spice up your dessert experience with this seasonal drink; its warm, cozy flavors are a comforting partner to the rich brownie.
-
Fresh Berries: Strawberries or raspberries provide a refreshing burst of tartness that cuts through the sweetness, adding a pop of color and a touch of freshness.
-
Salted Caramel: A drizzle of this sweet and salty sauce brings out the brownie’s chocolate richness, offering a decadent twist that will leave your guests craving more.
-
Fall Fruit Salad: A mix of pears, apples, and pomegranates brings a crisp, fruity element that balances the heaviness of the brownies with a refreshing crunch.
-
Pumpkin Cheesecake Bars: Celebrate the season with another festive dessert that complements the chocolate flavor while offering a delightful creamy texture.
-
Ginger Ale: A bubbly, refreshing drink that cuts through the chocolate richness and adds a fun sparkle to your treat experience.
These pairings not only enhance the festivities but also create a memorable dessert tableau perfect for your Halloween gathering.
Make Ahead Options
These Halloween Oreo brownies are perfect for meal prep enthusiasts looking to save time and effort! You can prepare the brownie batter up to 24 hours in advance. Simply mix the wet and dry ingredients as outlined, cover the bowl tightly, and refrigerate. The Halloween Oreos can also be layered in the baking pan and stored, covered, for up to 3 days in the refrigerator before baking. When you’re ready to bake, simply pour the brownie batter over the cookies, add any additional crushed Oreos on top, and bake as per the instructions. This way, you’ll deliver deliciously fudgy brownies with a creamy Oreo surprise, all with minimal hassle on the big day!
Halloween Oreo Brownies Variations
Feel free to put your own spin on these delicious brownies for an even more personal touch!
-
Dairy-Free: Substitute butter with margarine and use almond or coconut milk to keep it creamy while being dairy-free.
For a truly indulgent dessert without the dairy, this simple swap will still give you that rich taste and texture you crave! -
Nutty Crunch: Mix in chopped walnuts or pecans into the brownie batter before baking for added texture.
This delightful addition not only enhances the visual appeal but provides a satisfying crunch in contrast to the fudgy brownie and creamy Oreo center. -
Caramel Drizzle: Drizzle warm caramel sauce on top of the cooled brownies for an extra layer of sweetness.
This caramel addition transforms your Halloween Oreo brownies into a decadent dessert that’s sure to impress your guests with its irresistible flavor. -
Pumpkin Spice Twist: Swap in pumpkin-spice-flavored Oreos for a seasonal flavor boost during autumn.
This flavor twist introduces the warm essence of fall, making your brownies a perfect treat for Halloween gatherings and Thanksgiving alike! -
Chocolate Chip Infusion: Fold in semisweet or white chocolate chips into the brownie batter for added richness.
The melted chips give every bite an extra chocolatey goodness that sweet-tooths will adore—who can resist more chocolate, right? -
Spicy Kick: Add a pinch of cayenne or cinnamon to the brownie batter for an unexpected warm heat.
This subtle spice can elevate your dessert experience by providing an exciting flavor contrast to the sweetness of the brownies and Oreos. -
Gluten-Free Option: Use a gluten-free baking blend in place of all-purpose flour to make these brownies gluten-friendly.
This way, everyone can indulge in the rich fudgy goodness without skipping dessert at your festive gatherings! -
Mini Brownies: Bake the batter in a mini muffin tin for bite-sized Halloween treats that are perfect for a party.
These mini versions add a fun touch to your dessert table, allowing for easy sharing and an adorable serving option that’s sure to be a hit!
By exploring these variations, you can take your Halloween Oreo brownies to new heights, making them a standout creation for any celebration! If you want to learn more about creative desserts, check out my caramel sauce recipe for that extra drizzle or consider delightful seasonal baking ideas to celebrate the autumn season!
Expert Tips for Halloween Oreo Brownies
-
Room Temperature Ingredients: Ensure all ingredients are at room temperature for better mixing results and a smoother batter.
-
Avoid Overmixing: Mix your batter just until combined; overmixing can lead to dense brownies instead of the desired fudgy texture.
-
Cool Before Cutting: Allow brownies to cool fully—ideally for 8 hours—before slicing for cleaner edges and presentation.
-
Use a Sharp Knife: For perfect squares, use a sharp knife dipped in warm water; this will help minimize sticking and create clean cuts.
-
Storage Solutions: Store your Halloween Oreo brownies in an airtight container at room temperature for up to 5 days, or refrigerate for extended freshness.
How to Store and Freeze Halloween Oreo Brownies
Room Temperature: Store your Halloween Oreo brownies in an airtight container at room temperature for up to 5 days. This will keep them fresh and fudgy for your enjoyment.
Fridge: If you prefer, refrigerate the brownies to extend freshness, but be sure to let them come to room temperature before serving for the best texture.
Freezer: To freeze, wrap brownies tightly in plastic wrap and then in aluminum foil; they can be stored for up to 3 months. Thaw in the fridge overnight before indulgence.
Reheating: For a warm treat, reheat individual brownies in the microwave for just a few seconds; this brings back their gooey, fudge-like consistency and makes those Oreo layers melt beautifully.
Halloween Oreo Brownies Recipe FAQs
What type of Halloween Oreos should I use?
You can use any variety of Halloween Oreos for this recipe, which adds a fun and spooky element both inside and on top of the brownies. If you can’t find the Halloween version, regular Oreos work perfectly as a substitute and will still deliver that delightful cookie flavor!
How should I store my Halloween Oreo brownies?
For optimal freshness, store your brownies in an airtight container at room temperature for up to 5 days. If you want to keep them for longer, refrigerating them can extend their shelf life. Just be sure to let them come to room temperature before serving to maintain that fudgy texture.
Can I freeze these brownies?
Absolutely! To freeze your Halloween Oreo brownies, wrap them tightly in plastic wrap and then in aluminum foil. This protects them from freezer burn and keeps them fresh for up to 3 months. When you’re ready to enjoy, simply thaw them in the fridge overnight, or pop them in the microwave for a few seconds to reinvigorate their gooeyness.
What do I do if my brownies turn out too dense?
If your brownies end up denser than expected, it’s often due to overmixing the batter or underbaking them. To avoid this in the future, mix the batter just until the flour is combined, and ensure you’re checking for moist crumbs with the toothpick test before taking them out of the oven. Remember, a few streaks of flour are okay!
Are there any dietary considerations I should keep in mind?
Yes, those with allergies should note that this recipe contains gluten, eggs, and dairy. For a gluten-free version, you can swap all-purpose flour with a gluten-free baking blend. Additionally, if anyone has a dairy allergy, margarine can be used instead of butter. Always check ingredient labels for potential allergens.
How can I ensure my brownies have clean edges when cutting?
For perfectly squared brownies, allow them to cool completely—ideally for about 8 hours—as this firms them up. When cutting, use a sharp knife and dip it in warm water before slicing. This creates smooth cuts without dragging, making for a beautiful presentation of your Halloween Oreo brownies!
Decadent Halloween Oreo Brownies That Steal the Show
Ingredients
Equipment
Method
- Preheat the oven to 350°F (175°C) and line an 8x8 inch baking pan with parchment paper.
- In a microwave-safe bowl, combine butter, vegetable oil, granulated sugar, and brown sugar. Heat in 30-second intervals, stirring until fully melted.
- Stir vigorously to ensure sugars dissolve completely, creating a rich, syrupy mixture.
- Add eggs one at a time to the mixture, whisking until fully combined. Follow with vanilla extract.
- Gently fold in flour, cocoa powder, and salt until no streaks of flour remain.
- Pour half of the brownie batter into the prepared pan and spread evenly.
- Place the Halloween Oreos in a single layer over the batter and pour the remaining brownie batter on top.
- Sprinkle additional crushed Halloween Oreos on top and bake for approximately 30 minutes.
- Let the brownies cool completely in the pan on a wire rack for at least 8 hours.


