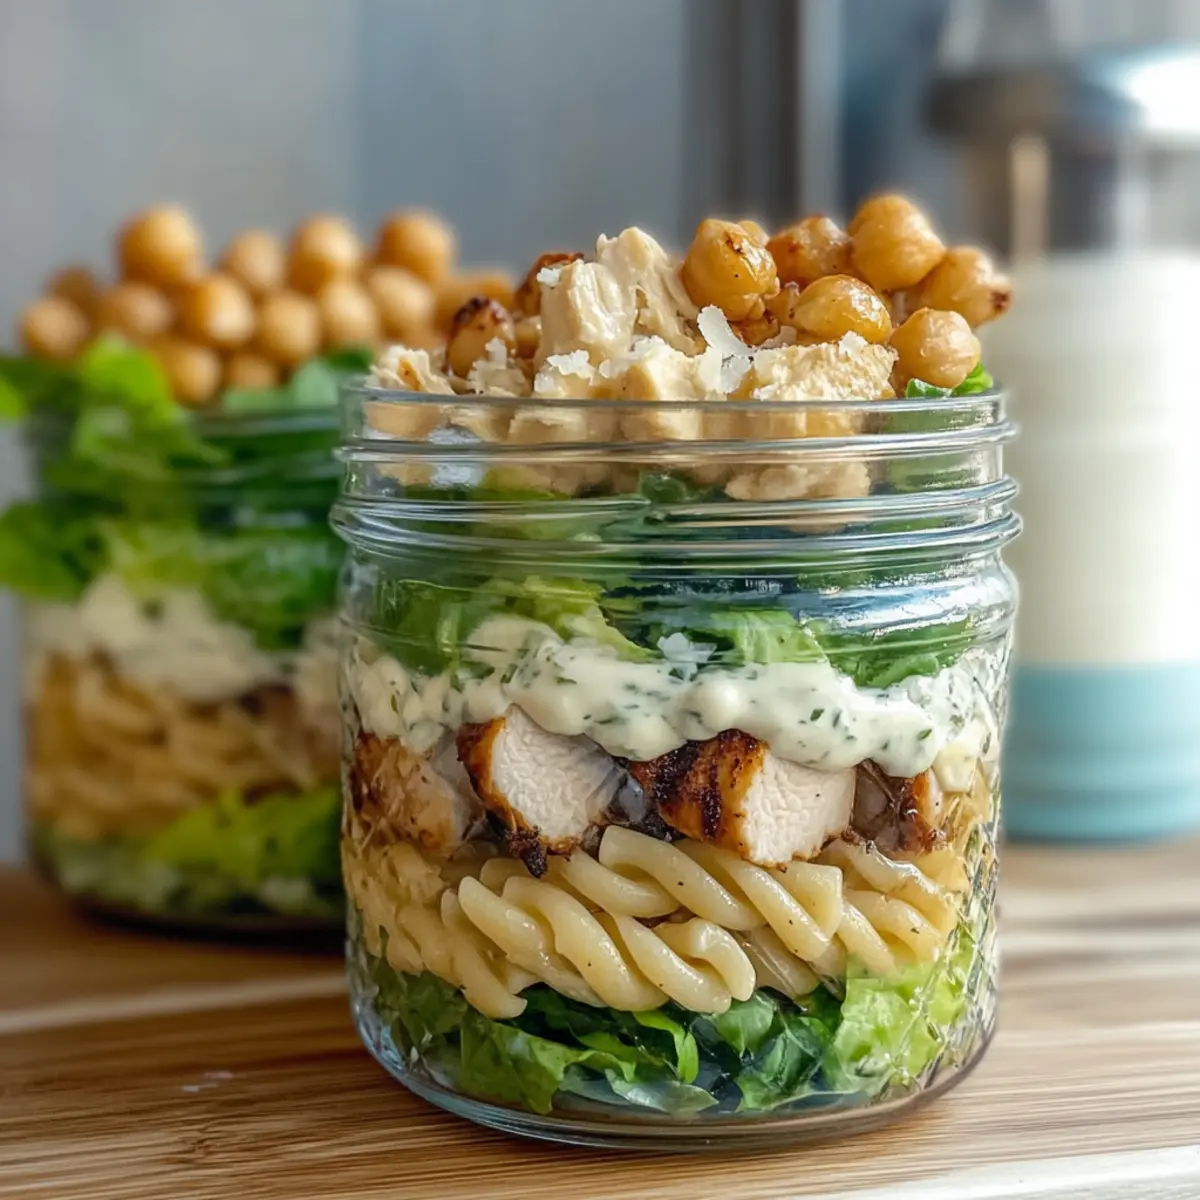
As the sun shines brighter and the days grow warmer, my love for light, fresh meals comes alive. Enter the Grilled Chicken Caesar Pasta Salad Jars, your new go-to for fun, healthy summer lunches! These delightful jars combine tender rotini, juicy grilled chicken, crispy roasted chickpeas, and a creamy Caesar dressing, all layered perfectly for easy transport. Not only are they a breeze to prep, but they also make vibrant, portable meals that are perfect for picnics or busy workdays. With this recipe, you’ll not only embrace meal prep, but you’ll also elevate your summer dining experience—goodbye, fast food! Ready to find out how to create a delicious salad in a jar that’s as beautiful as it is satisfying?
Why is this salad jar a must-try?
Easy Meal Prep: Whip up a week’s worth of lunches in no time with these jars, ready in just 30 minutes!
Healthy & Nutritious: Packed with protein and fiber, each jar ensures a balanced meal that keeps you fueled throughout the day.
Portable Goodness: Perfectly portioned for on-the-go lifestyles, these salads make lunchtime exciting without the fast-food rut.
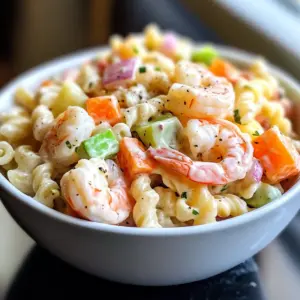
Customizable: Love variety? Swap ingredients based on your preferences—try shrimp or veggies, or play with different dressings!
Vibrant Colors: The beautiful layers not only delight the eyes but also stimulate your taste buds, making every bite a joy.
Find more tips for healthy meal prep ideas to elevate your cooking game!
Grilled Chicken Caesar Pasta Salad Jar Ingredients
For the Dressing
- Caesar Dressing – Adds creaminess and flavor; opt for homemade for a fresh touch or use store-bought for convenience.
For the Pasta
- Cooked Rotini – Perfect for holding the dressing and flavors; substitute with gluten-free or whole grain for a healthier option.
For the Protein
- Grilled Chicken – Provides richness and protein; rotisserie chicken works wonderfully for a quick, easy meal.
For the Toppings
- Shredded Parmesan – Enhances taste and texture; use nutritional yeast for a dairy-free alternative if desired.
- Crispy Chickpeas – Gives crunch and fiber; roasted nuts can be used for a delightful substitute.
For the Base
- Chopped Romaine Lettuce – Adds freshness and crunch; consider spinach or kale for a different flavor profile.
These Grilled Chicken Caesar Pasta Salad Jars are not only a feast for the eyes but also a nutritious option to keep you energized throughout your busy summer days!
Step‑by‑Step Instructions for Grilled Chicken Caesar Pasta Salad Jars
Step 1: Prepare the Pasta
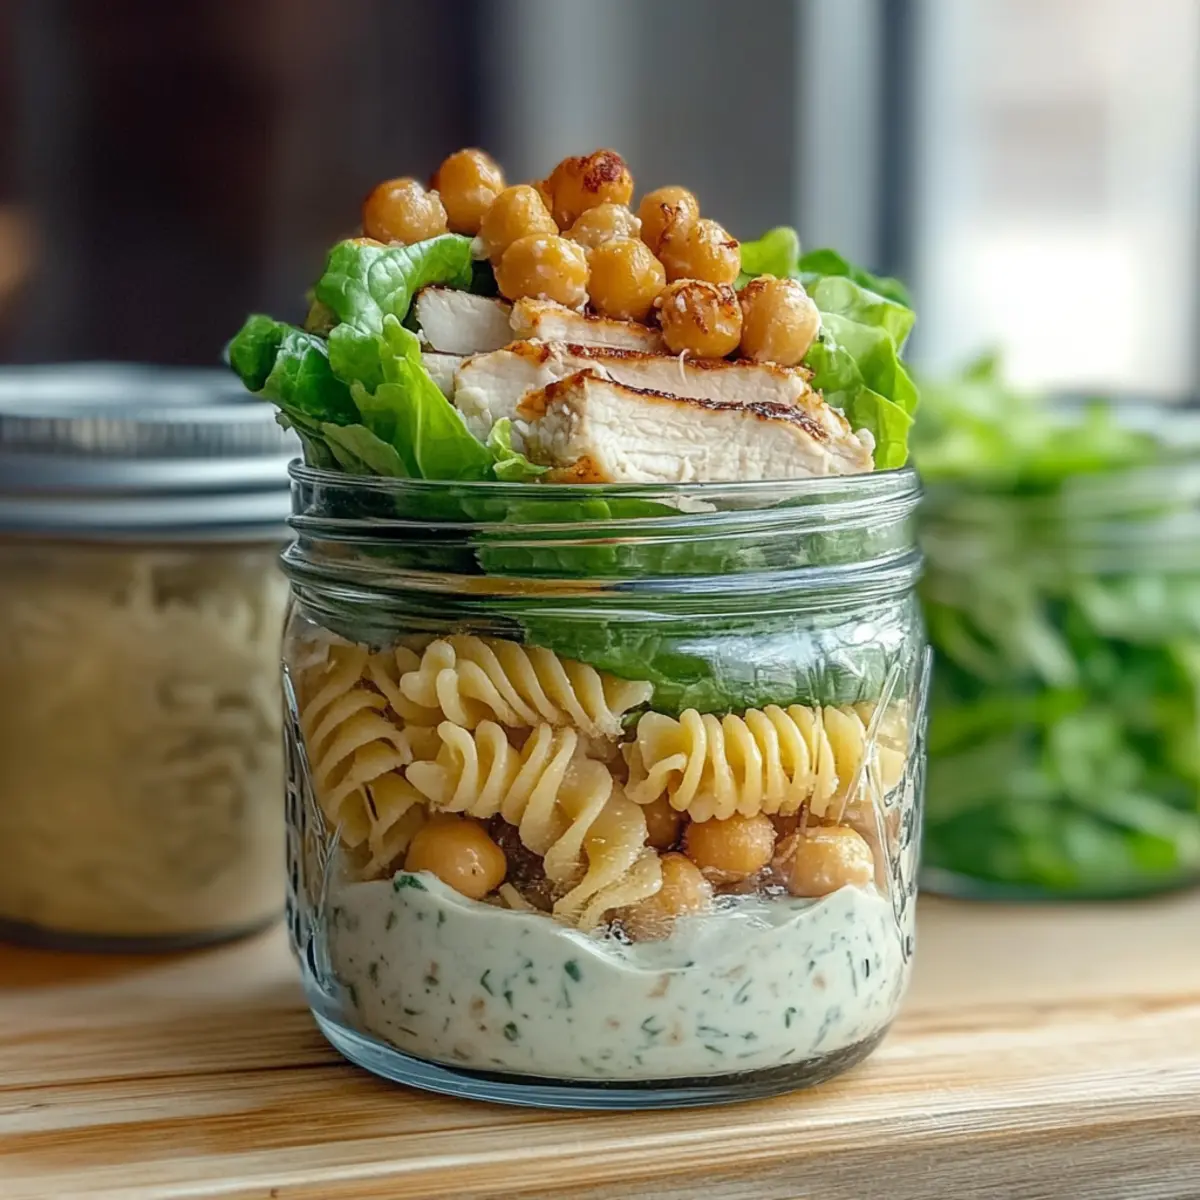
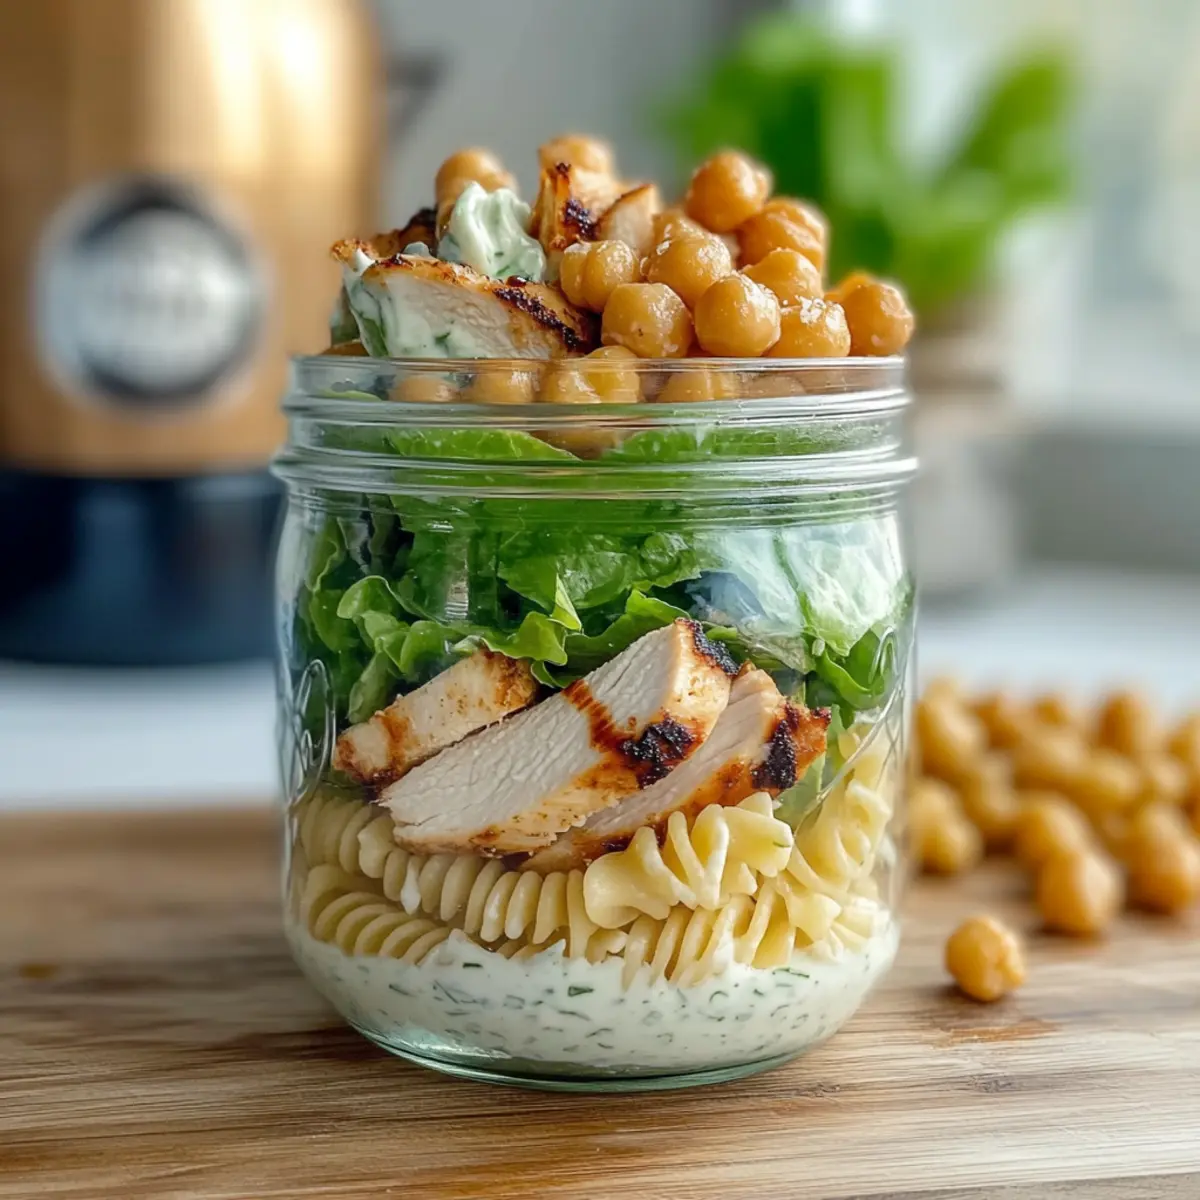
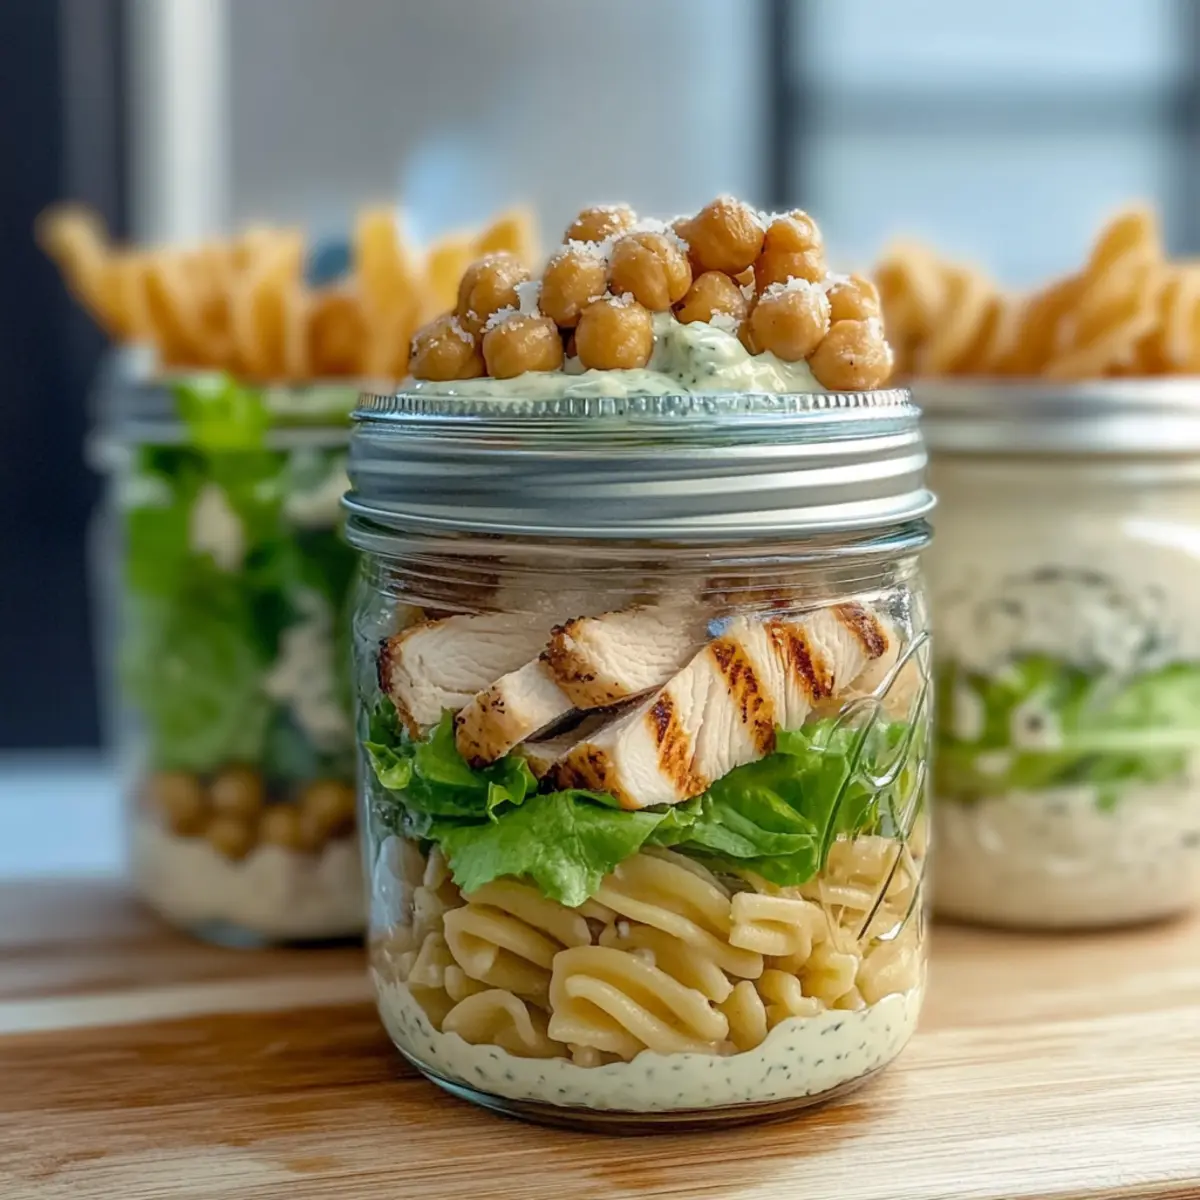
Begin by cooking the rotini pasta according to package instructions, usually around 8-10 minutes until al dente. Once cooked, drain and rinse the pasta under cold water to stop the cooking process and prevent sticking. Allow the pasta to cool completely before layering it into the mason jars for your Grilled Chicken Caesar Pasta Salad.
Step 2: Layer the Salad Ingredients
In a pint-sized mason jar, start layering your ingredients by adding a generous portion of the cooled rotini at the bottom. This hearty base holds the dressing well and ensures structural integrity when it comes to transporting your salad jars. Aim for about a quarter of the jar filled with pasta to set a solid foundation.
Step 3: Add the Greens
Next, gently pack in chopped romaine lettuce on top of the rotini. This crisp base not only introduces a fresh crunch but also acts as a barrier to keep the dressing from soaking the pasta too quickly. Fill the jar with a handful of greens, leaving some space to ensure the salad remains visually appealing and vibrant.
Step 4: Layer Grilled Chicken
Now it’s time for the protein! Slice your grilled chicken and layer it generously over the romaine lettuce. If you’re using leftover rotisserie chicken, aim for even pieces to ensure every jar has balanced flavors. Layering the chicken carefully will create a beautiful presentation as well as add richness to your Grilled Chicken Caesar Pasta Salad.
Step 5: Sprinkle on Toppings
Sprinkle crispy roasted chickpeas and shredded Parmesan cheese on top of the chicken layer. This combination adds a delightful crunch and enhances the overall flavor profile of your salad jar. Make sure to distribute them evenly across the chicken for an enticing look when you open the jar to enjoy your creation.
Step 6: Finish with Dressing
Just before serving, drizzle your creamy Caesar dressing over the top layer of the salad. This final step keeps the ingredients fresh and prevents sogginess. For optimal flavor, consider using a small container to mix the dressing on the side until ready to eat, enhancing the freshness of your Grilled Chicken Caesar Pasta Salad Jar.
Step 7: Seal and Store
Cap each mason jar tightly with its lid to keep your salad fresh. Store the jars upright in the refrigerator, where they can last up to five days. When it’s time to eat, simply shake or gently toss the contents into a bowl for a delightful meal without the fast-food fuss, celebrating the goodness of homemade flavors.
Storage Tips for Grilled Chicken Caesar Pasta Salad Jars
- Fridge: Store your mason jars in the refrigerator for up to 5 days. The layers will keep the ingredients fresh, but keep the dressing separate until you’re ready to enjoy.
- Airtight Sealing: Ensure each jar is sealed tightly with its lid to maintain freshness and prevent any odors from spoiling the delicious flavors of your Grilled Chicken Caesar Pasta Salad.
- Meal Prep Convenience: These jars are perfect for meal prep—prepare them over the weekend for grab-and-go lunches throughout your busy work week.
- Reheating: If you prefer a warm meal, transfer the salad to a bowl, toss to mix, and microwave it for a quick 30 seconds, keeping the dressing on the side to maintain its creaminess.
What to Serve with Grilled Chicken Caesar Pasta Salad Jars
As you prepare these vibrant salad jars, you’ll want to complement their freshness with delicious sides that complete your meal.
-
Garlic Breadsticks: The crispy, buttery delight of garlic breadsticks pairs beautifully with the creamy dressing, enhancing the overall experience.
-
Watermelon Slices: Fresh, juicy watermelon adds a refreshing, sweet contrast and keeps you cool on hot summer days.
-
Caprese Skewers: The combination of ripe tomatoes, fresh basil, and mozzarella offers a burst of flavor and color, making your meal feel special.
-
Chilled White Wine: A glass of chilled Sauvignon Blanc or Pinot Grigio brings out the dish’s flavors, creating a delightful dining experience.
-
Grilled Vegetables: Seasonal grilled veggies like zucchini and bell peppers provide a smoky richness that complements the salad perfectly.
-
Fruit Tart: A light, sweet fruit tart makes for a delightful dessert, balancing the savory elements of your meal with a burst of sweetness.
These pairing suggestions will not only elevate your Grilled Chicken Caesar Pasta Salad Jars but also make every bite a celebration of summer’s bounty!
Make Ahead Options
These Grilled Chicken Caesar Pasta Salad Jars are a fantastic solution for busy weeknights and meal prep enthusiasts! You can prepare the jars up to 5 days in advance, allowing you to enjoy delicious, home-cooked meals without the hassle. Start by cooking the rotini and grilling the chicken, then layer the pasta, lettuce, and chicken in your mason jars. For optimal freshness, store the Caesar dressing separately in a small container, and pour it over the salad just before serving to keep everything crisp. This simple step ensures that your salads taste just as delightful as if they were made fresh on the spot!
Expert Tips for Grilled Chicken Caesar Pasta Salad Jars
-
Layer Smartly: Start with pasta at the bottom to prevent sogginess. The rotini serves as a perfect base to catch dressing flavors without getting mushy.
-
Dress Fresh: For the best experience, keep the Caesar dressing separate until you’re ready to eat. This will maintain that desired crunch and freshness in the salad.
-
Consider Portion Size: Use pint-sized mason jars for manageable, convenient portions. This makes meal prep easy and keeps you from overindulging.
-
Custom Seasoning: Add herbs like oregano or basil to your grilled chicken before cooking. This elevates the flavor profile of your Grilled Chicken Caesar Pasta Salad, making every bite memorable.
-
Mix It Up: Don’t hesitate to swap out ingredients! Use different proteins or veggies to fit your mood or to keep things exciting throughout the week.
Grilled Chicken Caesar Pasta Salad Variations
Feel free to personalize your Grilled Chicken Caesar Pasta Salad Jars, making them uniquely yours with these delicious twists!
-
Pasta Variety: Swap rotini for other pasta shapes like farfalle or penne. Each shape brings a fun texture, making every bite a delightful surprise.
-
Protein Alternatives: Use grilled shrimp or tofu instead of chicken for a refreshing twist. Both options offer unique flavors while keeping your meal light and enticing.
-
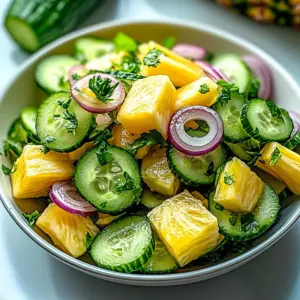
Vegetable Boost: Add seasonal vegetables like cherry tomatoes or cucumbers for extra freshness. A burst of color enhances not just the nutrition but also the visual appeal.
-
Dairy-Free Delight: Replace shredded Parmesan with nutritional yeast for a dairy-free option. This gives your salad a cheesy flavor without the dairy, perfect for vegan friends or lactose-intolerant family.
-
Crunchy Swap: Replace crispy chickpeas with roasted nuts for a different crunch. Almonds or walnuts can add an unexpected richness and flavor profile to your salad jars.
-
Zesty Dressing: Try a lemon vinaigrette or homemade Greek yogurt dressing if you’re feeling adventurous. This adds a zesty kick that elevates the dish into something spectacular.
-
Spice It Up: If you enjoy heat, add a pinch of red pepper flakes or sliced jalapeños to your jar. Just the right amount of spice can transform your salad into a sensational meal.
-
Green Variation: Swap chopped romaine lettuce with spinach or kale for a nutritious change. Each leafy green brings its own robustness and flavor, keeping your salads varied throughout the week.
For more ideas, check out these healthy meal prep tips to keep your kitchen adventures exciting and delicious!
Grilled Chicken Caesar Pasta Salad Jars Recipe FAQs
How do I choose the right ripeness of my ingredients?
Absolutely! For the best flavor and texture, opt for fresh, vibrant ingredients. Your romaine lettuce should be crisp with no dark spots. For chicken, ensure it is thoroughly cooked and juicy. When selecting chickpeas, look for those that are crunchy and not overly soft.
How should I store my Grilled Chicken Caesar Pasta Salad Jars?
These salad jars can be stored in the refrigerator for up to 5 days. It’s crucial to keep the lids sealed tightly to preserve freshness. Just remember to keep your Caesar dressing separate until you’re ready to dig in. This will ensure that your pasta and greens stay crisp longer!
Can I freeze these salad jars?
While it’s not ideal to freeze these as-is due to the fresh lettuce and pasta, you can prep the non-perishable layers (like pasta, chickpeas, and chicken) in advance. To freeze, layer only the pasta and chicken in a freezer-safe container. When you’re ready to enjoy them, just thaw overnight in the fridge, and add fresh greens and dressing before serving.
What if I want to customize the salad for dietary needs?
Very! You can easily swap out elements to cater to different dietary preferences. Use gluten-free pasta for a gluten-free option or grilled tofu for a vegetarian alternative. If you’re avoiding dairy, simply replace Parmesan with nutritional yeast. Always check labels if you’re mindful of allergies!
What if my pasta becomes mushy?
Ah, that can be a common concern! To avoid mushy pasta, make sure to cook it just until al dente and then immediately rinse it under cold water to halt the cooking process. If you’re using rotini, this shape is fantastic for holding sauces without becoming soggy, but keeping it cool is essential!
Grilled Chicken Caesar Pasta Salad Jars for Easy Summer Meals
Ingredients
Equipment
Method
- Begin by cooking the rotini pasta according to package instructions, usually around 8-10 minutes until al dente. Once cooked, drain and rinse the pasta under cold water to stop the cooking process and prevent sticking. Allow the pasta to cool completely before layering it into the mason jars for your Grilled Chicken Caesar Pasta Salad.
- In a pint-sized mason jar, start layering your ingredients by adding a generous portion of the cooled rotini at the bottom. Aim for about a quarter of the jar filled with pasta to set a solid foundation.
- Next, gently pack in chopped romaine lettuce on top of the rotini. Fill the jar with a handful of greens, leaving some space for visual appeal.
- Slice your grilled chicken and layer it generously over the romaine lettuce. This adds richness to your Grilled Chicken Caesar Pasta Salad.
- Sprinkle crispy roasted chickpeas and shredded Parmesan cheese on top of the chicken layer.
- Just before serving, drizzle your creamy Caesar dressing over the top layer of the salad.
- Cap each mason jar tightly with its lid to keep your salad fresh. Store the jars upright in the refrigerator, where they can last up to five days.