

As I stood in my kitchen, the fragrant aroma of sizzling beef blended with the cheesy allure of gooey goodness, I couldn’t help but grin. What if I told you that you could recreate the magic of a Grilled Cheese Burrito at home? This Easy Grilled Cheese Burrito is a delightful Taco Bell copycat that packs a punch, making it a fantastic choice for a busy weeknight or a fun family dinner. Not only does it take less than 30 minutes to whip up, but it also gives you the freedom to customize every bite—be it vegetarian or dairy-free. With layers of seasoned beef, creamy nacho cheese, and a hint of spicy chipotle enveloped in a warm tortilla, you’ll find this recipe is both satisfying and quick to prepare. Your loved ones will cheer when this mouthwatering meal hits the table. Are you ready to upgrade your busy weeknight dinners with a tasty twist?
Why is This Grilled Cheese Burrito a Must-Try?
Irresistible Flavor: With seasoned beef and creamy nacho cheese, this burrito captures the essence of your favorite fast food in a homemade delight.
Quick Preparation: Whip it up in under 30 minutes; perfect for busy evenings or last-minute cravings.
Customizable Options: Whether you’re vegetarian or dairy-free, this recipe allows for various substitutions tailored to your needs—add grilled veggies or swap cheese for a vegan alternative!
Kid-Approved Comfort: Even the pickiest eaters will fall in love with its cheesy goodness, ensuring everyone’s satisfied at dinner time.
Meal Prep Friendly: Assemble ahead and grill before serving, making it a fantastic meal prep option for your week—just like a Cheeseburger Bowl Meal!
Perfectly Gooey Texture: The crispy exterior and melty interior make every bite an indulgent treat, elevating your dinner experience from ordinary to extraordinary!
Grilled Cheese Burrito Ingredients
For the Filling
- Ground Beef – The main protein source; substitute with chicken, beans, or tofu for dietary flexibility.
- Taco Seasoning – Adds bold flavors; try using homemade seasoning for a more personalized taste.
- Cooked White Rice – Provides bulk and texture; quinoa or brown rice is a healthier swap.
- Sour Cream – Contributes creaminess; Greek yogurt or dairy-free alternatives work well for special diets.
- Nacho Cheese Sauce – For that rich cheesiness; you can replace it with a freshly made cheese sauce for a gourmet touch.
- Chipotle Sauce – Introducing spicy notes; consider taco sauce or salsa for a milder flavor.
- Shredded Cheddar and Mozzarella Cheese – Enhances the burrito’s gooeyness; vegan cheese offers a dairy-free option.
For the Wrapping
- Large Flour Tortillas – Holds everything together; use corn tortillas for a gluten-free alternative.
- Butter or Oil – Essential for grilling; non-stick spray can be a lighter option if desired.
Remember, these ingredients come together to create the ultimate Grilled Cheese Burrito that is sure to impress!
Step‑by‑Step Instructions for Grilled Cheese Burrito
Step 1: Cook the Beef
In a large skillet, heat over medium-high heat and add the ground beef. Brown it for 8–10 minutes, breaking it apart as it cooks. Once browned, drain the excess fat before seasoning with taco seasoning and a splash of water. Let it simmer for an additional 5 minutes until fully coated and flavorful; you’ll know it’s done when the water has evaporated, creating a thick mixture.
Step 2: Warm Tortillas
Next, warm your tortillas to make them pliable and easy to fold. You can do this by placing them in a hot skillet for about 30 seconds on each side or microwaving them for 15-20 seconds until soft and flexible. This step is crucial for assembling the Grilled Cheese Burrito without tearing the tortillas, ensuring they hold all the delicious fillings inside.
Step 3: Assemble the Burrito
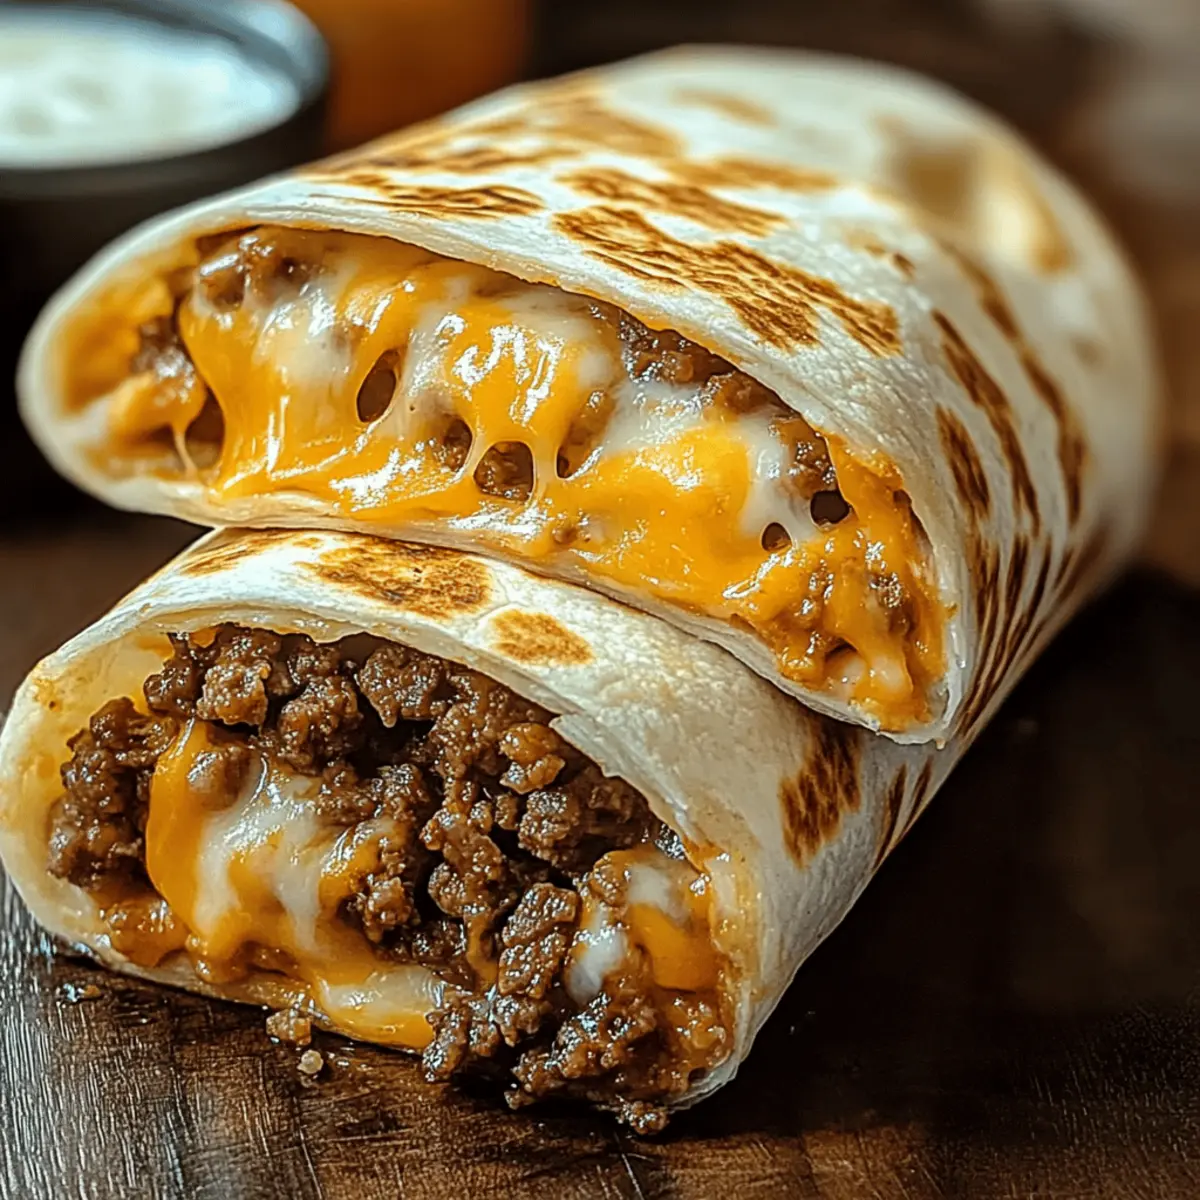
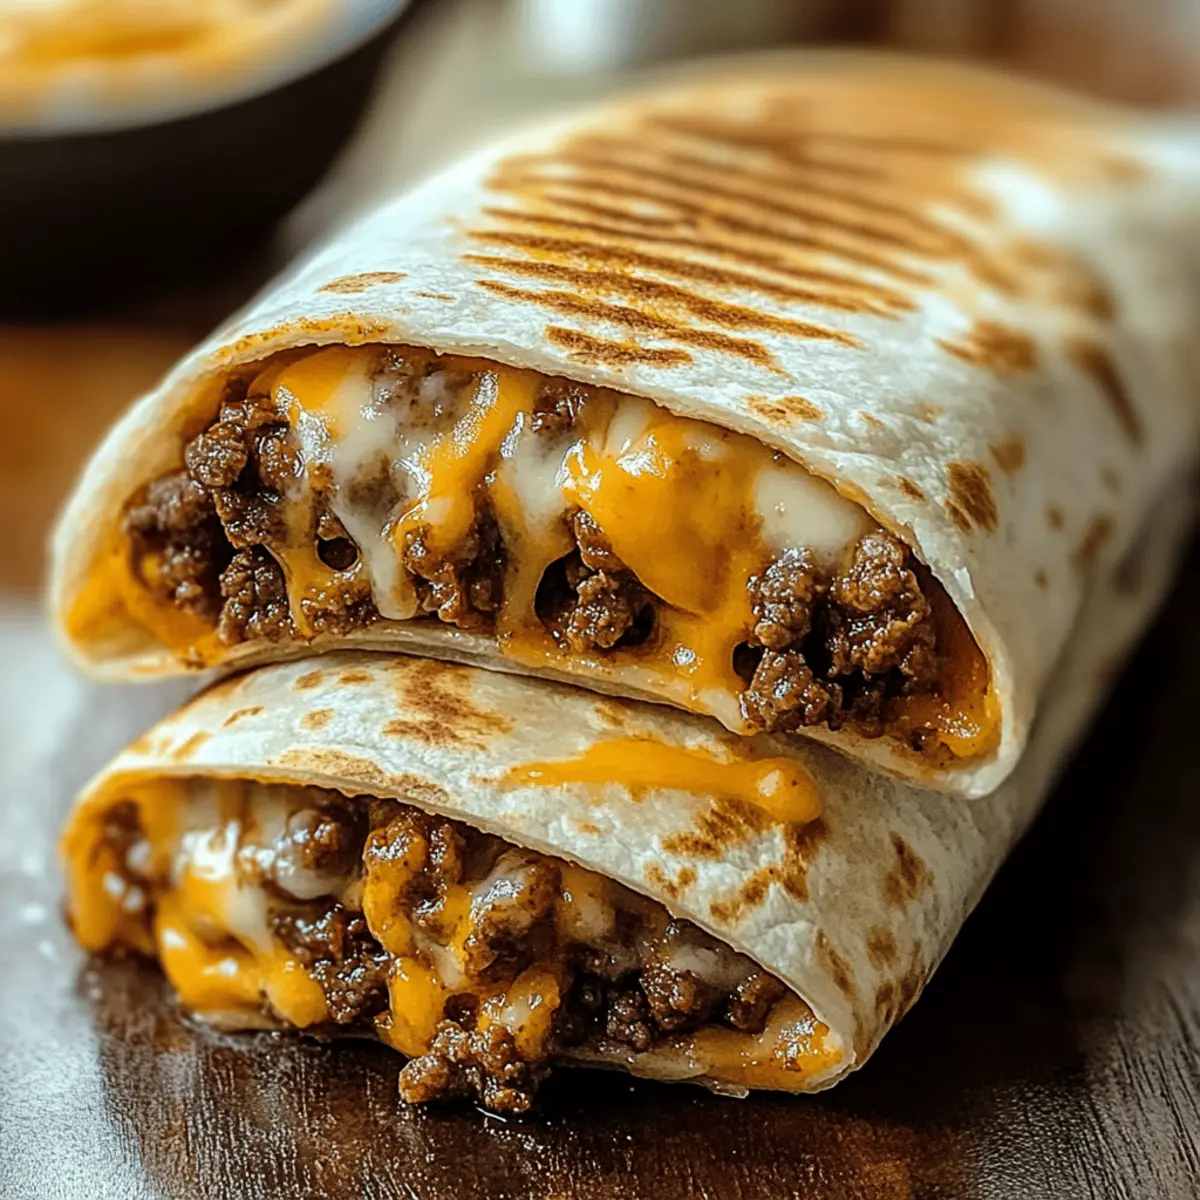
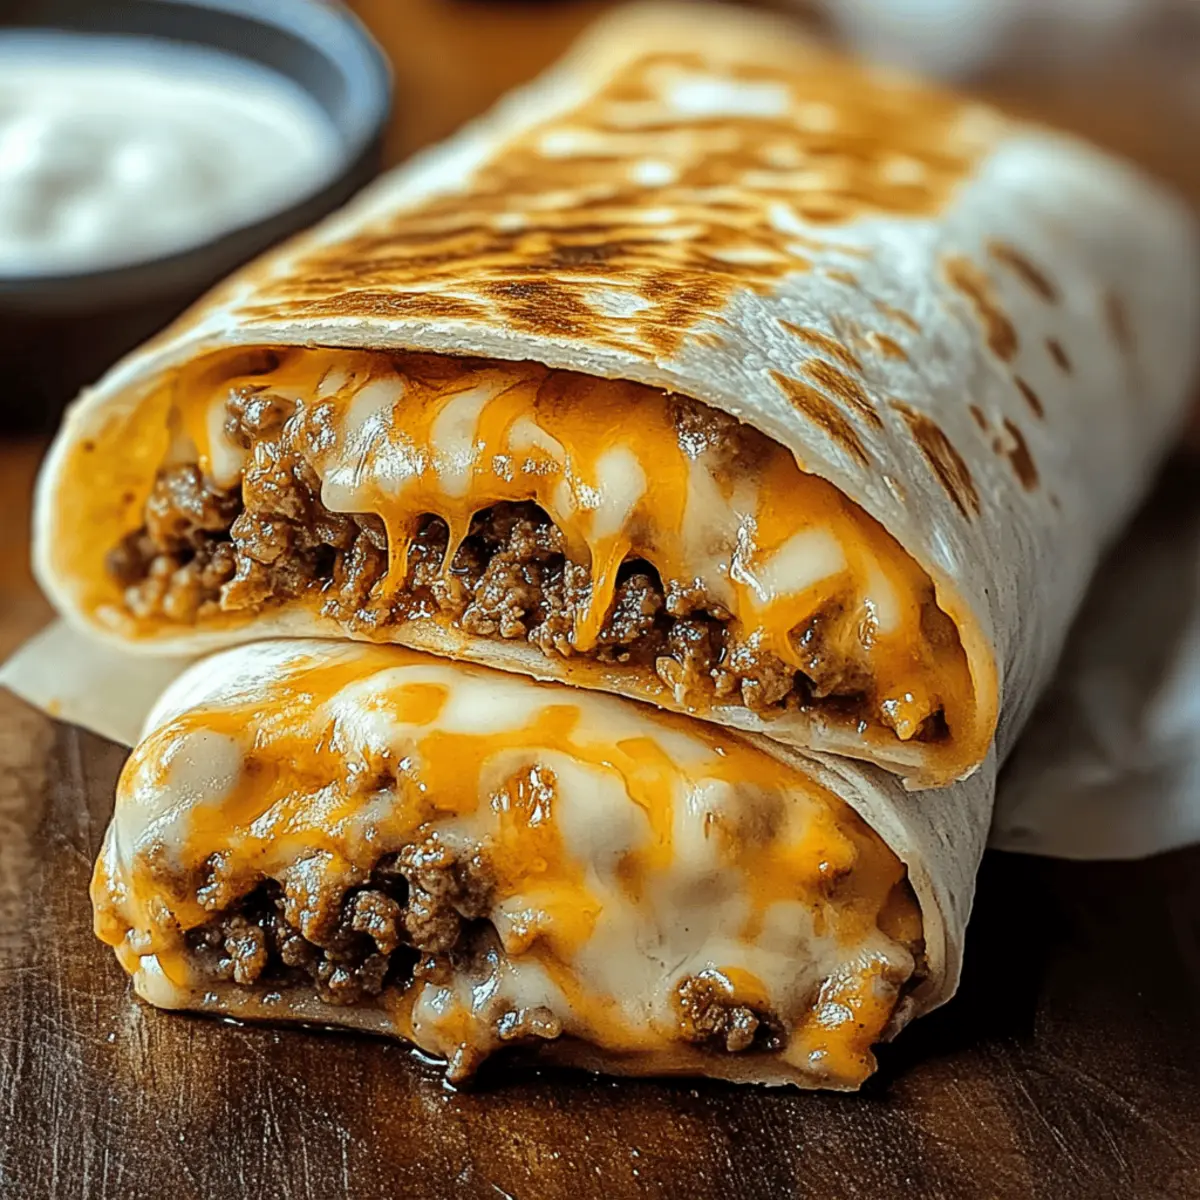
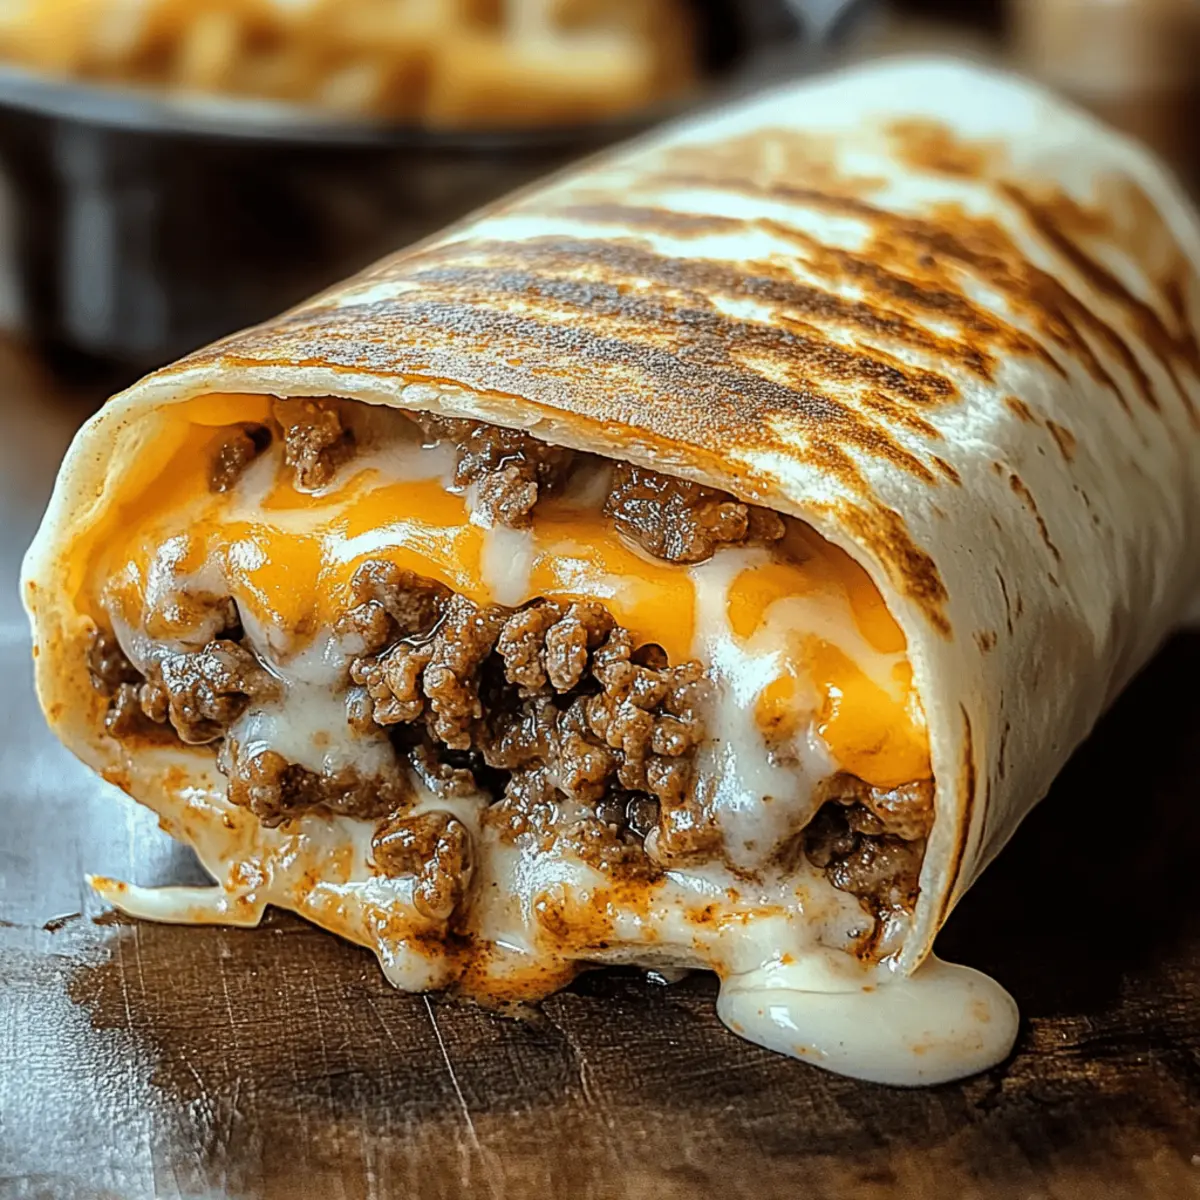
Begin assembling your Grilled Cheese Burrito by laying one warm tortilla flat on a clean surface. Spread a generous layer of cooked rice, followed by a scoop of the seasoned beef mixture. Add spoonfuls of nacho cheese sauce, a drizzle of chipotle sauce, and a dollop of sour cream. Finally, sprinkle with shredded cheddar and mozzarella cheese; remember, it’s all about creating that cheesy goodness!
Step 4: Roll the Burrito
To roll your burrito, fold in the sides of the tortilla over the filling first, then roll it tightly away from you. Make sure to tuck in the ends as you go to secure your filling inside. Once rolled, place the burrito seam-side down on a plate or cutting board.
Step 5: Grill the Burrito
Heat a skillet over medium heat and sprinkle some shredded cheese onto the surface. Place the assembled burrito seam-side down onto the cheese to create a crispy crust. Grill for 3–4 minutes until the cheese is melted and golden brown; then, carefully flip it over and grill the other side for the same duration. You’ll know it’s ready when both sides are beautifully crisp and golden.
Step 6: Serve and Store
Once grilled to perfection, remove the Grilled Cheese Burrito from the skillet and let it cool for a minute before slicing in half. It’s best served warm and can be paired with salsa or guacamole for added flavor. If you have leftovers, store them in an airtight container in the fridge for up to 3 days, reheating on the stovetop or microwave before serving again.
How to Store and Freeze Grilled Cheese Burrito
Fridge: Store leftover Grilled Cheese Burritos in an airtight container for up to 3 days. Make sure they cool down before sealing to maintain freshness.
Freezer: For longer storage, wrap each burrito tightly in plastic wrap or aluminum foil and freeze for up to 3 months. Defrost in the fridge overnight before reheating.
Reheating: To reheat, place the burrito in a skillet over medium heat for about 5–7 minutes, turning occasionally until heated through. Alternatively, you can microwave it for about 1–2 minutes.
Make-Ahead Tip: Assemble your Grilled Cheese Burritos in advance and store them in the fridge. Grill just before serving for the best texture and flavor!
What to Serve with Easy Grilled Cheese Burrito
A hearty burrito deserves tasty companions to round out a delightful meal.
- Fresh Guacamole: Creamy and zesty, it adds a rich flavor that balances the burrito’s spice.
- Tomato Salsa: The bright acidity of salsa adds freshness, making each bite of the burrito pop with flavor.
- Corn Salad: A crunchy, refreshing side that contrasts beautifully with the rich and cheesy filling; it’s a colorful addition to your plate.
- Crispy Tortilla Chips: Perfect for scooping up leftover salsa or guacamole, these add an enjoyable crunch to your meal.
- Classic Mexican Rice: Fluffy and savory, it complements the burrito’s bold flavors, making it a well-rounded dinner option.
- Spicy Pickled Jalapeños: For those who crave extra heat, these tangy bites elevate the flavor and add excitement to the dinner table.
- Cucumber Salad: A light, cool salad made with crisp cucumbers and a splash of lime; it refreshes your palate.
- Limeade or Horchata: A refreshing drink that cuts through the richness of the burrito and adds a fun twist to your meal.
- Chocolate Tres Leches Cake: End your meal on a sweet note with this moist, creamy dessert that contrasts with the savory burrito.
- Mexican Street Corn: Grilled corn topped with cheese and spices enhances the flavor profile, providing a touch of smokiness to your dinner.
Grilled Cheese Burrito Variations & Substitutions
Feel free to mix things up and create your own unique version of this Grilled Cheese Burrito, because who doesn’t love a little culinary adventure?
-
Vegetarian Upgrade: Swap ground beef for black beans or lentils for a hearty plant-based option. This not only adds protein but also delicious, earthy flavors that will excite your taste buds!
-
Dairy-Free Delight: Use dairy-free cheese and substitute sour cream with a coconut or cashew-based alternative to create a creamy texture without any dairy. Enjoy all the gooey goodness, guilt-free!
-
Healthier Grain Choice: Replace white rice with quinoa or brown rice for extra nutrition. These options are packed with nutrients and provide a lovely nutty flavor that complements the filling perfectly.
-
Spicy Twist: Add fresh jalapeños or diced chipotle peppers for additional heat! The extra kick blends nicely with the rich cheese and savory beef, making every bite a flavor explosion.
-
Make It Extra Cheesy: Layer on more cheese, like pepper jack or a blend of your favorites, to take the flavor up a notch. Extra cheese is always a good idea, right?
-
Sauce Swap: Try homemade chipotle sauce or a zesty salsa instead of store-bought options for a fresher taste. A touch of your family’s secret sauce can elevate this burrito to legendary status!
-
Gluten-Free Wrap: Use corn tortillas in place of flour tortillas to keep it gluten-free. Perfect for those with dietary restrictions while maintaining the deliciousness of the burrito experience!
-
Add Some Crunch: Toss in some crunchy vegetables like bell peppers or zucchini right before rolling for a delightful textural contrast. These additions not only enhance flavor but also give a satisfying crunch with each bite.
Your creativity is the limit, so why not also check out my delicious Chicken Parmesan Grilled recipe for another tasty twist on comforting dishes? Now, let’s get cooking!
Expert Tips for the Best Grilled Cheese Burrito
-
Grill with Care: Ensure your skillet is adequately heated and use enough pressure while grilling to promote that delightful cheese crust on the outside of your burrito.
-
Flavorful Fillings: Precook your fillings for maximum flavor integration. Keeping the assembled burritos refrigerated until grilling helps maintain a satisfying texture.
-
Avoid Overstuffing: Resist the temptation to overfill your Grilled Cheese Burrito; this helps prevent tearing during assembly and grilling, guaranteeing a perfectly wrapped delight.
-
Customize Your Sauces: Don’t shy away from personalizing the chipotle sauce or nacho cheese! Experiment with homemade versions to accommodate different dietary needs or flavor preferences.
-
Tortilla Tactics: For optimal flexibility, always warm your tortillas before assembling. This simple step helps ensure that they won’t tear as you roll and grill.
Make Ahead Options
These Easy Grilled Cheese Burritos are perfect for busy home cooks looking to save time throughout the week! You can assemble the burritos up to 24 hours in advance, simply wrapping them tightly in plastic wrap and refrigerating them. By keeping the assembled burritos refrigerated, you preserve their flavors and textures until you’re ready to enjoy them. When it’s time to eat, just grill them as instructed, ensuring the cheese crisps up beautifully. For extra convenience, consider preparing the seasoned beef and rice up to 3 days ahead and storing them in airtight containers. This way, you’ll have a head start on your meal prep, making family dinners a breeze!
Grilled Cheese Burrito Recipe FAQs
How do I choose the right ingredients for my Grilled Cheese Burrito?
Absolutely! Selecting ripe and fresh ingredients is key to a delicious burrito. For your ground beef, look for meat that’s bright red with no dark spots, typically found in the fresh meat section. If using vegetables, pick ones that are firm and colorful; for example, if you’re adding bell peppers, choose ones with a shiny skin and no wrinkles. For the cheeses, ensure they are fresh; you’ll want anything that’s not past its expiration date for the best melting quality.
What’s the best way to store leftover Grilled Cheese Burritos?
You can keep your delicious leftovers in an airtight container in the refrigerator for up to 3 days. Make sure it’s completely cool before sealing, as this helps maintain its texture. When you are ready to enjoy them again, just reheat on the stovetop for an even better experience than microwaving!
Can I freeze Grilled Cheese Burritos? If so, how?
Definitely! To freeze, wrap each Grilled Cheese Burrito tightly in plastic wrap or aluminum foil. This prevents freezer burn and preserves flavor. They can be stored frozen for up to 3 months. When ready to enjoy, let them thaw in the fridge overnight. Then, reheat in a skillet over medium heat for about 5–7 minutes, turning occasionally, until heated through and crispy.
What should I do if my burrito is tearing while I roll it?
Very often, tearing happens because the tortilla isn’t warm enough or the fillings are overstuffed. Make sure to heat your tortillas until they’re pliable—about 30 seconds on each side in a skillet or 15-20 seconds in the microwave works wonders! Also, be mindful of the amount of filling you use; aim for a balanced amount, ensuring it rolls without strain. With these tweaks, you’ll have perfect burritos every time!
Are there any dietary considerations for making Grilled Cheese Burritos?
For sure! When making adjustments for dietary preferences, aim for ground beef alternatives, like black beans or lentils for a vegetarian option. If dairy is a concern, opt for dairy-free cheese substitutes and plain Greek yogurt instead of sour cream. Always check for allergies, especially with sauces that may contain gluten or other allergens. Your burrito can be just as delicious and inclusive with the right swaps!
Grilled Cheese Burrito: The Ultimate Comfort Food Twist
Ingredients
Equipment
Method
- Cook the beef by browning ground beef in a large skillet over medium-high heat for 8–10 minutes. Drain excess fat, season with taco seasoning and a splash of water, and simmer for 5 minutes.
- Warm the tortillas in a hot skillet or microwave for 15-20 seconds until pliable.
- Assemble the burrito by laying a tortilla flat, adding cooked rice, seasoned beef, nacho cheese sauce, chipotle sauce, sour cream, and shredded cheeses.
- Roll the burrito by folding in the sides and rolling tightly away from you.
- Grill the burrito seam-side down in a skillet with cheese until golden brown, about 3-4 minutes on each side.
- Serve warm, optionally with salsa or guacamole, and store leftovers in an airtight container.


