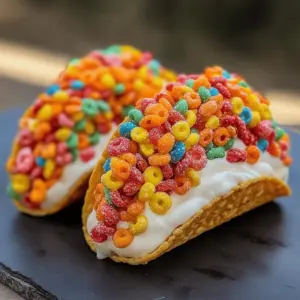
As I flipped through some old recipe books, I stumbled upon a playful gem that transported me straight back to my childhood: Fruity Pebbles Cheesecake Tacos. It’s not just a dessert; it’s a nostalgic experience wrapped in a crunchy taco shell. This recipe is a delightful blend of creamy cheesecake and the colorful crunch of your favorite fruity cereal, making it an instant crowd-pleaser. With its quick prep time and fun presentation, these tacos turn any gathering into a festive celebration. Plus, they’re easily adaptable—try swapping in Cocoa Pebbles or Cinnamon Toast Crunch for a delicious twist! Are you ready to create a dessert that sparks joy?
Why Are Fruity Pebbles Cheesecake Tacos a Must-Try?
Delightful nostalgia: Reminiscing childhood favorites, these tacos bring back sweet memories while tantalizing your taste buds.
Vibrant presentation: Their colorful appearance makes them a visually striking centerpiece for any gathering.
Easy preparation: Minimal cooking skills are required—just mix and assemble for a delectable treat.
Versatile variations: Swap in Cocoa Pebbles or Cinnamon Toast Crunch for exciting twists that cater to everyone’s palate.
Perfect for sharing: Their fun, taco format is ideal for parties, making these desserts a hit among guests, just like these Pulled Chicken Tacos.
Fruity Pebbles Cheesecake Tacos Ingredients
• Get ready to create a sweet masterpiece with these Fruity Pebbles Cheesecake Tacos!
For the Shells
• Fruity Cereal – Adds a colorful crunch that makes these tacos fun and festive.
• Unsalted Butter – Binds the cereal together, ensuring sturdy and delicious shells; melt it for easy mixing.
For the Filling
• Cream Cheese – The creamy base of the cheesecake filling; opt for full-fat for the richest flavor.
• Powdered Sugar – Sweetens the filling and provides a smooth texture; sift it to prevent lumps.
• Pure Vanilla Extract – Elevates the flavor of the cheesecake; choose a high-quality extract for more depth.
• Whipped Cream – Lightens the filling, creating that fluffy texture; be gentle when folding it in for the best results.
For Garnish
• Additional Fruity Cereal – Sprinkle on top for extra crunch and a vibrant finish.
Step‑by‑Step Instructions for Fruity Pebbles Cheesecake Tacos
Step 1: Prepare the Shells
In a large mixing bowl, combine the crushed fruity cereal with melted unsalted butter, mixing until every piece is evenly coated. Press the mixture firmly into taco molds or the cups of a muffin tin to form small taco shapes. Chill in the refrigerator for 30 minutes until the shells are set and firm to the touch, ensuring a sturdy base for your Fruity Pebbles Cheesecake Tacos.
Step 2: Make the Cheesecake Filling
While the shells chill, beat the softened cream cheese in a bowl with an electric mixer for about 2-3 minutes until it becomes light and fluffy. Gradually add the sifted powdered sugar and pure vanilla extract, mixing until the mixture is smooth and free of lumps. Carefully fold in the whipped cream until just combined, maintaining a light and airy texture that’s perfect for filling your taco shells.
Step 3: Assemble the Tacos
Once the cereal shells are chilled and firm, take them out of the refrigerator. Spoon the creamy cheesecake filling generously into each taco shell, filling them to the brim for a delightful presentation. Use a spatula or the back of a spoon to smooth the tops if desired, making each of your Fruity Pebbles Cheesecake Tacos look inviting and delicious.
Step 4: Garnish and Serve
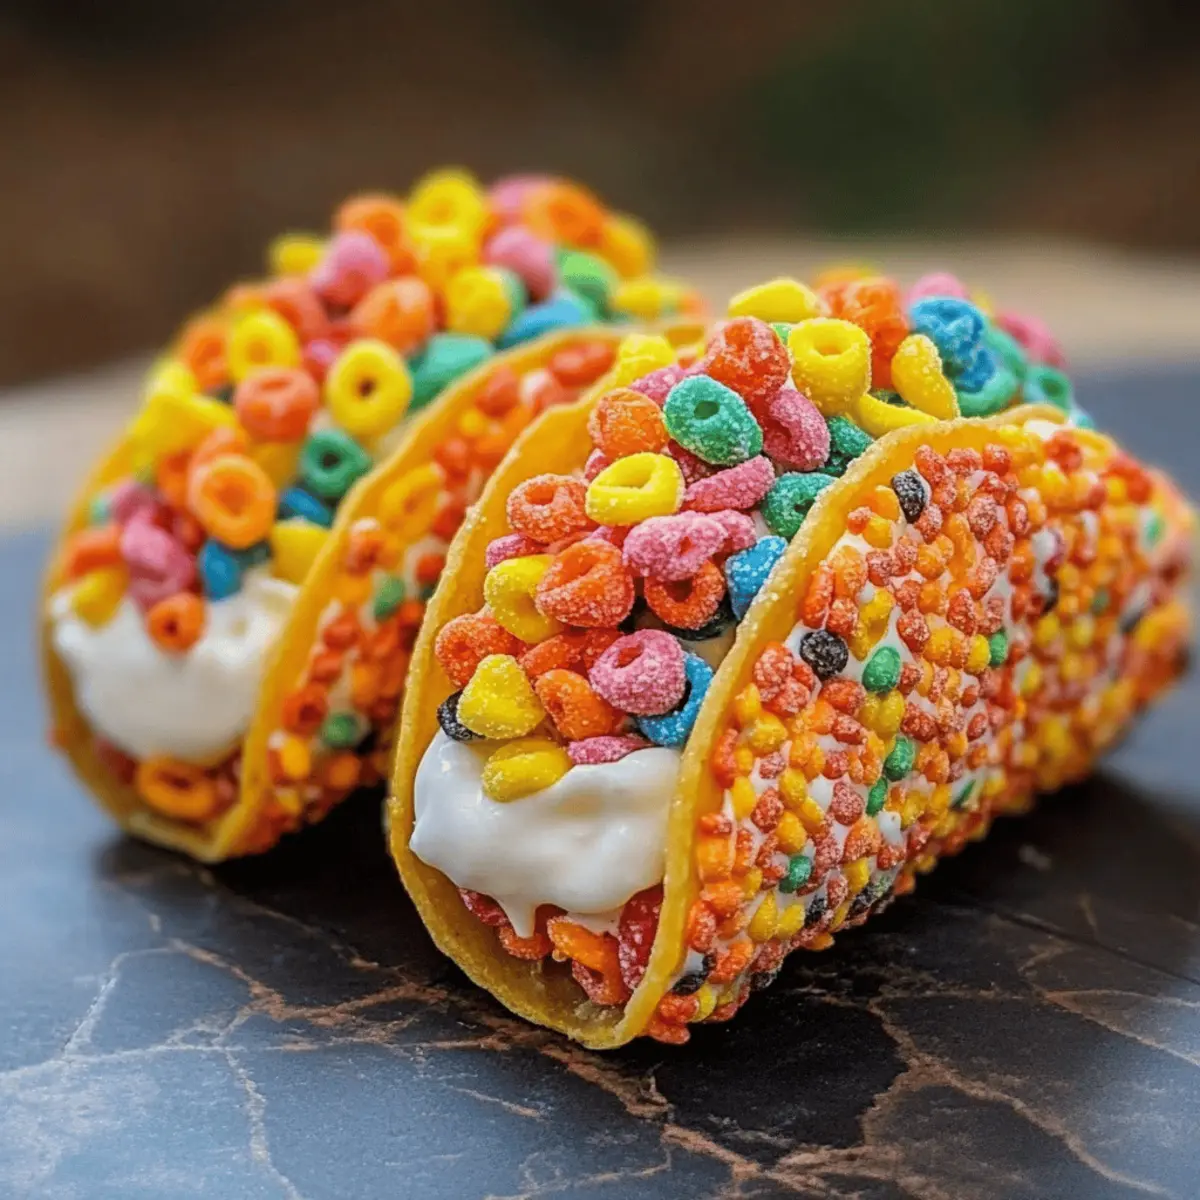
To add the finishing touches, sprinkle additional fruity cereal over the tops of each filled taco, enhancing both the flavor and visual appeal. Serve your Fruity Pebbles Cheesecake Tacos immediately for the best texture, or chill them for a little while longer if you prefer a firmer filling. These playful treats are sure to bring smiles to everyone at your gathering!

Storage Tips for Fruity Pebbles Cheesecake Tacos
Room Temperature: Store assembled tacos at room temperature for no more than 2 hours to maintain their freshness; the filling may soften if left out too long.
Fridge: Unfilled taco shells can be kept in the fridge for up to 2 days in an airtight container. The cheesecake filling lasts 24 hours, covered tightly.
Freezer: For longer storage, freeze the plain taco shells for up to 1 month. Seal them in a freezer bag, and allow to thaw in the fridge before using.
Reheating: Avoid reheating filled tacos as the texture may change; enjoy them chilled or at room temperature for the best experience with these Fruity Pebbles Cheesecake Tacos.
Make Ahead Options
These Fruity Pebbles Cheesecake Tacos are a fantastic option for meal prep, making your life easier on busy weeknights! You can prepare the taco shells up to 2 days in advance by pressing the crushed fruity cereal mixture into molds and storing them in an airtight container. The cheesecake filling can be made up to 24 hours ahead and stored in the refrigerator for optimal flavor. Just remember to fold in the whipped cream gently to maintain that light texture. When you’re ready to serve, spoon the filling into the prepared shells and garnish with additional fruity cereal for a fresh and delightful presentation. With these make-ahead tips, you’ll bring joy to your gathering without the last-minute rush!
What to Serve with Fruity Pebbles Cheesecake Tacos?
Create a festive and playful meal that perfectly complements this vibrant dessert, delighting your guests’ taste buds.
Colorful Fruit Salad: A refreshing mix of seasonal fruits not only adds a burst of flavor but also brightens up your table, enhancing the nostalgia of childhood treats. Serve it in a rainbow pattern for extra fun!
Whipped Cream Topping: Fluffy whipped cream elevates the creaminess of the tacos, creating a smooth and satisfying texture with every bite. It’s a delightful addition that pairs perfectly with the fruity flavor.
Chocolate Dipping Sauce: For a rich twist, drizzle warm chocolate sauce over the tacos, adding an indulgent layer that contrasts beautifully with the fruity and creamy elements.
Milkshakes: Frosty vanilla or strawberry milkshakes play up the playful nature of the dessert. Their creamy texture and sweet flavors create an unforgettable pairing, perfect for a summer gathering.
Sparkling Lemonade: This refreshing, fizzy drink offers a citrusy balance to the sweetness of the cheesecake tacos. Serve them with fresh mint for an aromatic touch.
Mini Cupcakes: Bite-sized cupcakes, topped with colorful frosting, can mirror the taco’s fun aesthetic. They offer a sweet, portable treat that guests can enjoy alongside their fruity dessert.
Gummy Bears: These chewy, fruity candies tie in the playful atmosphere of the tacos, making for a delightful edible decoration and snack option that will excite both kids and adults alike.
Ice Cream Sundae Bar: Set up a sundae bar complete with toppings, allowing guests to create their own sweet adventures. The mixture of textures and flavors will elevate the dessert experience even further.
Expert Tips for Fruity Pebbles Cheesecake Tacos
Texture Secret: Ensure the cream cheese is softened before mixing. This step prevents lumps, making a smoother cheesecake filling for your Fruity Pebbles Cheesecake Tacos.
Chill Time: Allow the cereal shells to set properly in the fridge for at least 30 minutes. This ensures they hold their shape and crunch when filled.
Gentle Folding: When adding the whipped cream, fold gently into the cheesecake mixture to maintain that airy fluffiness—overmixing can deflate the filling.
Storage Know-How: Prepare taco shells ahead of time and store them in an airtight container for up to 2 days. However, fill them no more than 4 hours before serving to keep the shells crisp.
Flavorful Variants: Experiment with different cereals like Cocoa Pebbles for a chocolate twist or Cinnamon Toast Crunch for a spiced experience—adjusting flavors can enhance your dessert adventure!
Fruity Pebbles Cheesecake Tacos Variations
Get ready to unleash your creativity by customizing these Fruity Pebbles Cheesecake Tacos with these delightful alternatives!
Chocolate Crunch: Substitute Cocoa Pebbles for a rich, chocolatey twist that will delight your taste buds.
Cinnamon Spice: Use Cinnamon Toast Crunch in place of fruity cereal for a warm, spiced flavor profile that complements the cheesecake beautifully.
Seasonal Splash: Coordinate your cereal colors to match holidays—think red and green for Christmas or pastel shades for Easter. It’s a fun way to celebrate!
Adult Indulgence: Add a splash of orange liqueur to the cheesecake filling for an adult-friendly version. Top it off with orange zest for that zesty kick!
Nutty Addition: Stir in crushed nuts, like almonds or pecans, into the filling for added texture and nutty goodness that pairs well with the creamy base.
Fruity Twist: Mix in chopped fresh fruits such as strawberries or banana slices into the cheesecake filling for a refreshing burst of flavor.
Whipped Cream Upgrade: Experiment with flavored whipped cream, like coconut or strawberry, to elevate your taco filling further, creating layers of delightful taste.
Dollop of Fun: Top your tacos with a dollop of ice cream for an extra indulgent treat that blends creamy textures with crunchy elements—who could resist that?
Don’t forget to check out other delicious ideas like these Teriyaki Chicken Tacos or Pulled Chicken Tacos for more fun and creative meals!
Fruity Pebbles Cheesecake Tacos Recipe FAQs
How do I choose the right fruity cereal?
Absolutely! When selecting a fruity cereal for your Fruity Pebbles Cheesecake Tacos, look for brands that are vibrant in color and have a good crunch. Avoid cereals that show signs of being stale, such as faded colors or soft texture. The freshest options typically enhance both the flavor and appearance of your tacos, making them visually appealing and delicious.
How should I store leftover tacos?
To maintain the best texture, it’s ideal to store assembled Fruity Pebbles Cheesecake Tacos at room temperature for no more than 2 hours. If you’ll be saving unfilled taco shells, keep them in an airtight container in the fridge for up to 2 days. The cheesecake filling should be tightly covered and kept in the fridge for a maximum of 24 hours.
Can I freeze the taco shells?
Yes, you can! For longer storage, freeze the plain taco shells for up to 1 month. Here’s how: After the shells have set and are completely cooled, place them in a single layer in a freezer bag. Remove as much air as possible before sealing the bag. When you’re ready to use them, allow the shells to thaw in the fridge overnight. Avoid freezing the filled tacos, as the texture won’t hold up.
What should I do if my filling is too runny?
Very! If your cheesecake filling turns out too runny, don’t worry. You can add a small amount of additional sifted powdered sugar to thicken it. Start with 1 tablespoon at a time, mixing gently until you reach your desired consistency. If it’s still too thin, consider chilling it in the fridge for about 15-20 minutes before filling the taco shells to help set the mixture.
Are there any dietary considerations for this recipe?
Yes, these Fruity Pebbles Cheesecake Tacos are primarily vegetarian but be mindful of allergies. The main ingredients include dairy products, which may not be suitable for those with lactose intolerance or a dairy allergy. If needed, you can experiment with plant-based cream cheese and whipped cream alternatives to accommodate different diets. Always double-check cereal labels for any potential allergens, especially if serving to guests.
How long can I make the taco shells ahead of time?
I often make taco shells in advance! They can be prepared up to 2 days ahead of assembly. Simply store them in an airtight container to keep them crispy. When ready to serve your Fruity Pebbles Cheesecake Tacos, just fill them with the cheesecake mixture right before serving for the best combination of texture and flavor.

Fruity Pebbles Cheesecake Tacos for a Colorful Dessert Treat
Ingredients
Equipment
Method
- In a large mixing bowl, combine the crushed fruity cereal with melted unsalted butter, mixing until every piece is evenly coated. Press into taco molds or muffin tin cups to form taco shapes. Chill in the refrigerator for 30 minutes.
- While the shells chill, beat softened cream cheese in a bowl with an electric mixer for 2-3 minutes until light and fluffy. Gradually add sifted powdered sugar and pure vanilla extract, mixing until smooth. Fold in whipped cream gently.
- Once the cereal shells are chilled, spoon the cheesecake filling into each shell, filling them generously. Smooth the tops for a neat presentation.
- Sprinkle additional fruity cereal over the filled tacos, enhancing flavor and presentation. Serve immediately or chill longer for a firmer filling.