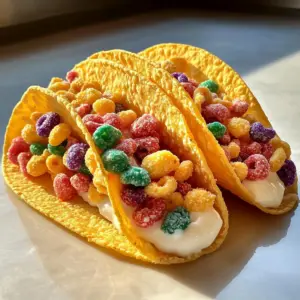
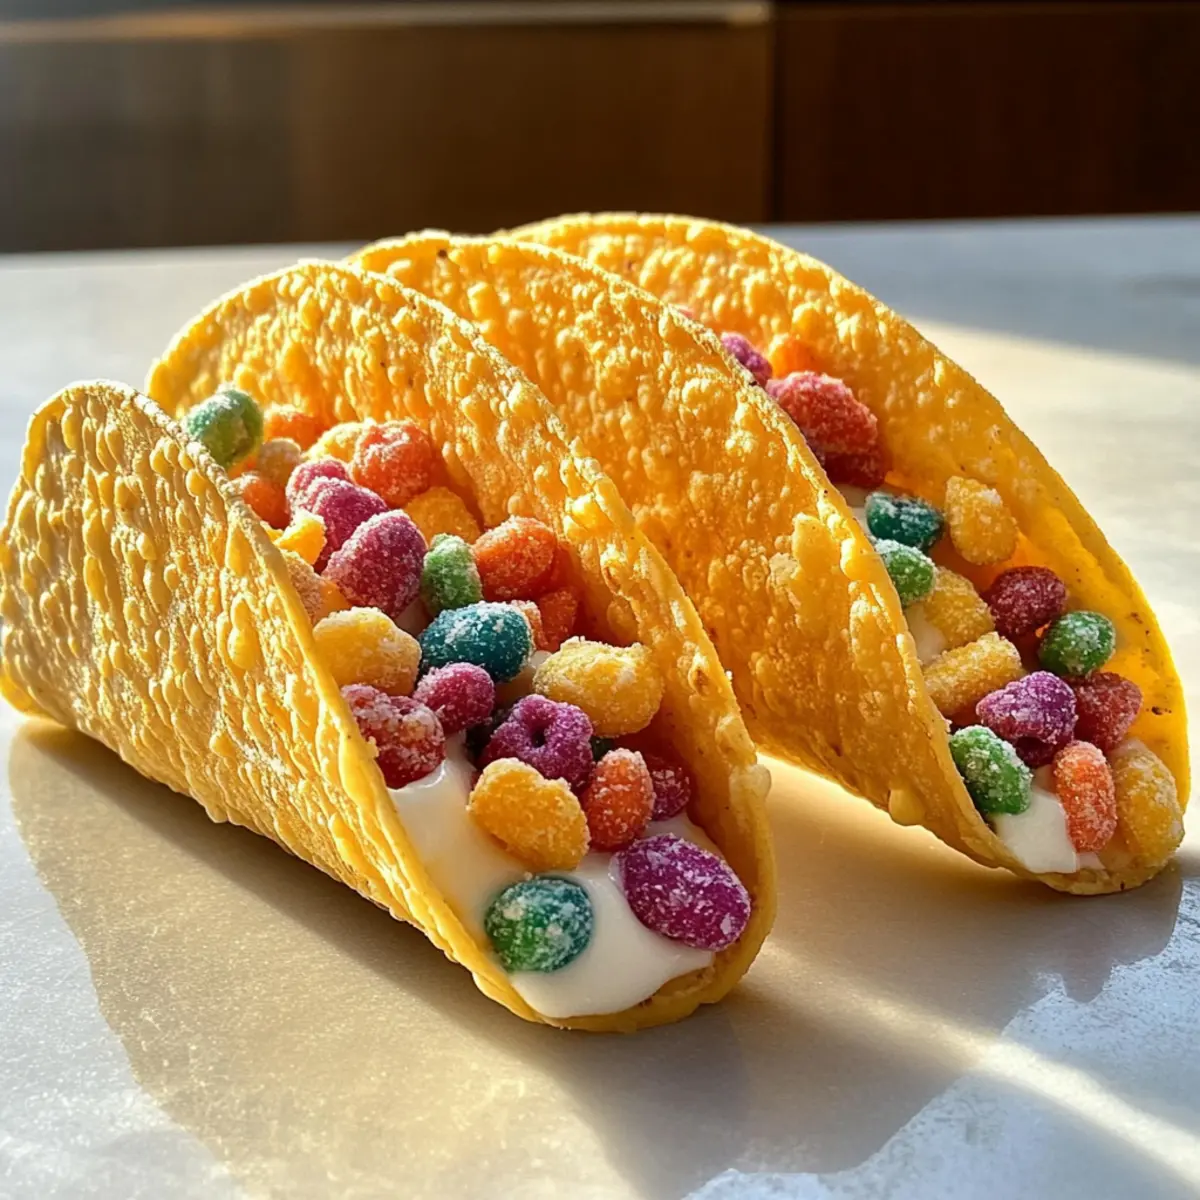
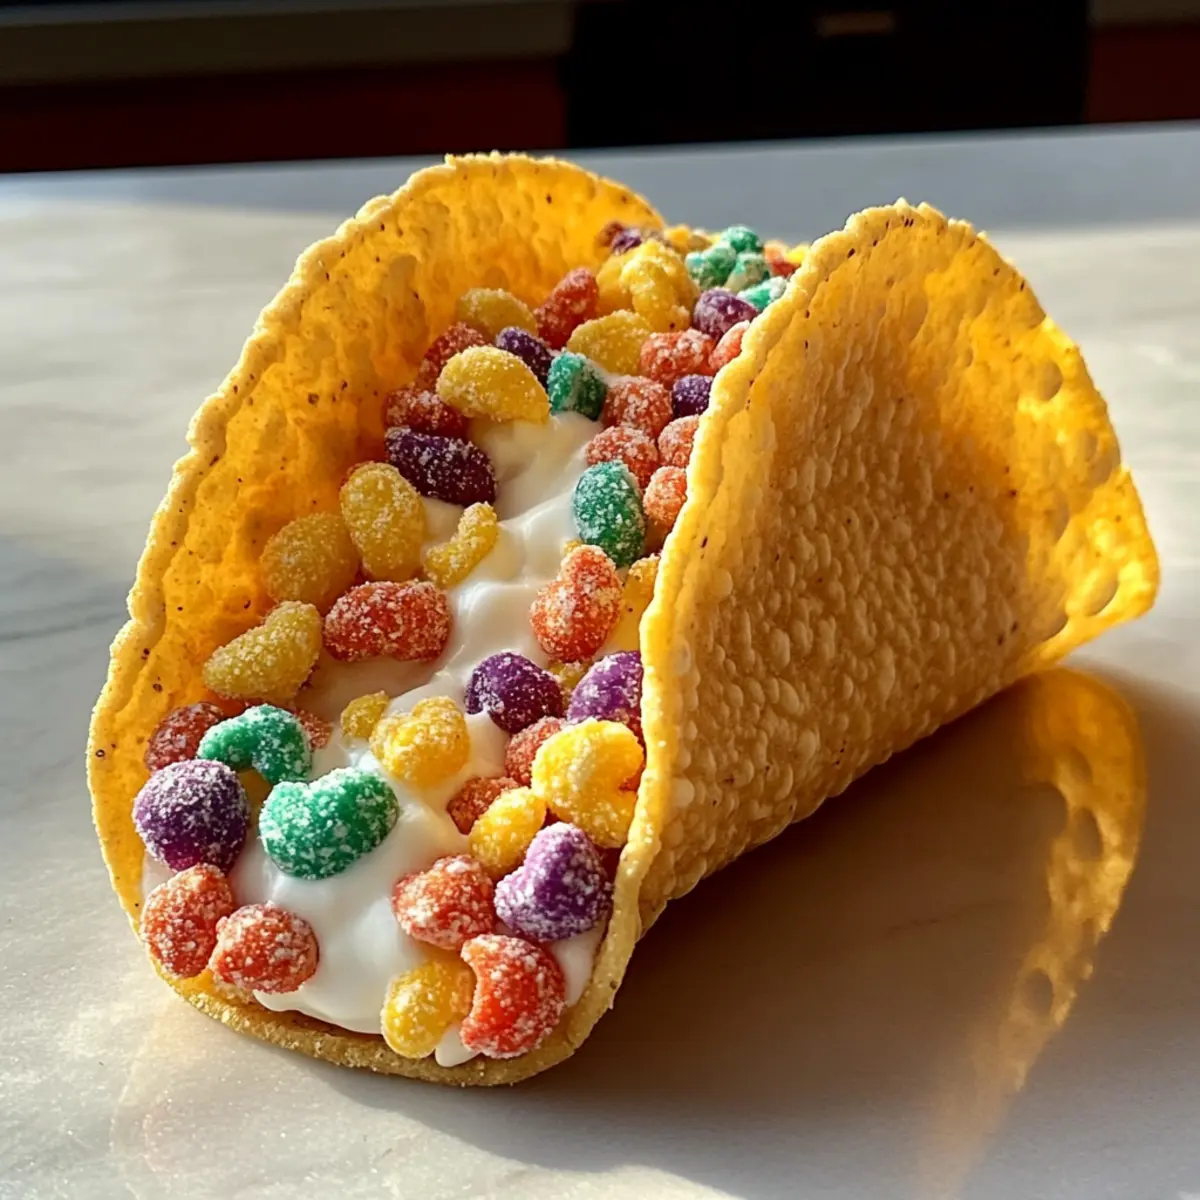
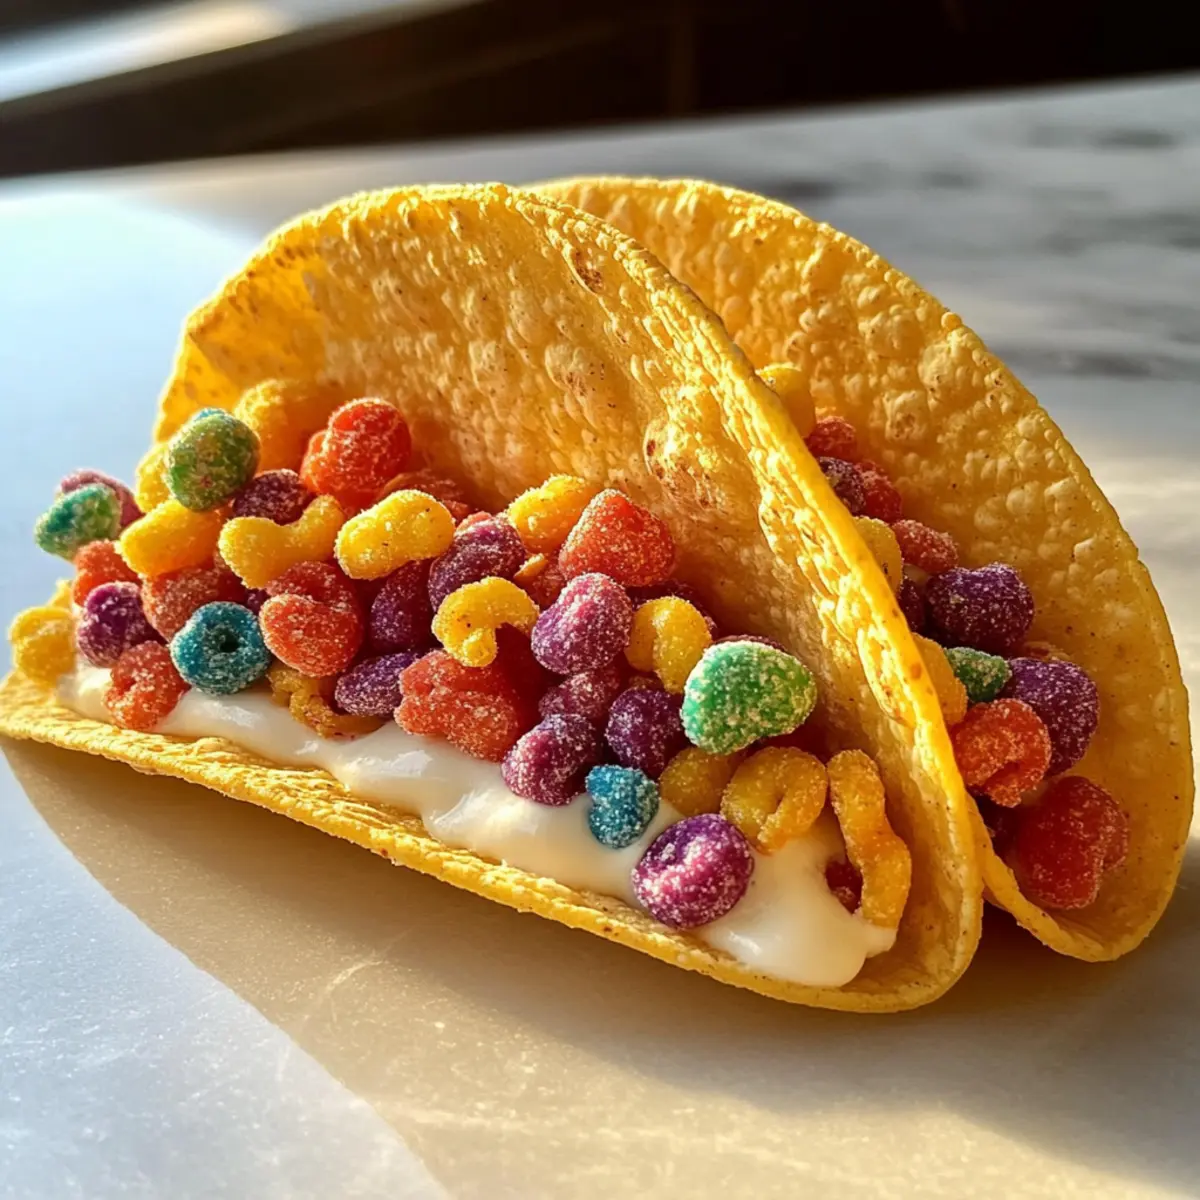
The sound of crunching cereal fills the air as I dive into a world of nostalgia and sweetness. Have you ever thought about turning your favorite dessert into a fun twist? Introducing my Crispy Fruity Pebbles Cheesecake Tacos – a playful take on the classic cheesecake, where creamy filling meets a crispy taco shell coated in colorful Fruity Pebbles. This no-bake dessert is not only quick to whip up but also customizable, making it perfect for impressing a crowd or treating the family to something special. With each bite, you get a vibrant crunch wrapped around luscious, creamy cheesecake that’s truly better than takeout. Curious how to create this delightful treat? Let’s get started!
Why Are Cheesecake Tacos a Game Changer?
Unique Presentation: Imagine serving a dessert that looks as playful and inviting as it tastes! These tacos are sure to draw attention at any gathering.
No-Bake Fun: Say goodbye to complex baking steps; this recipe is easy and enjoyable to prepare.
Customizable Filling: You can make it your own by adding your favorite flavors or fruits, fitting any occasion or preference.
Perfect for Sharing: The individual taco servings make it effortless to share, making them ideal for parties or family gatherings.
Texture Contrast: Each bite combines a crunchy taco shell with smooth, creamy filling, creating a delightful experience for your taste buds.
Try pairing these tacos with fresh berries or a drizzle of chocolate sauce for added flair. You’ll find they’re better than any takeout dessert!
Crispy Fruity Pebbles Cheesecake Taco Ingredients
For the Cheesecake Filling
• Cream Cheese – the star of the filling, providing a rich and tangy flavor.
• Sour Cream – adds a luscious creaminess; Greek yogurt makes a great, lighter substitute.
• Powdered Sugar – sweetens the filling; granulated sugar can be used but may alter texture slightly.
• Vanilla Extract – boosts the flavor; for the best taste, opt for pure vanilla extract.
• Heavy Whipping Cream – whipped to create lightness; coconut cream is a fantastic dairy-free option.
For the Taco Shells
• Fruity Pebbles Cereal – provides that signature crunch and sweetness, crucial for the taco shell coating; feel free to use other fruity cereals for a similar vibe.
• Taco Shells – sturdy shells are essential to maintaining shape and preventing leaks—choose durable ones for the best results.
Get ready to elevate your dessert game with these Crispy Fruity Pebbles Cheesecake Tacos!
Step-by-Step Instructions for Crispy Fruity Pebbles Cheesecake Tacos
Step 1: Prepare the Cheesecake Filling
In a large mixing bowl, blend 8 ounces of softened cream cheese, 1 cup of sour cream, ½ cup of powdered sugar, and 1 teaspoon of vanilla extract using an electric mixer on medium speed for about 2-3 minutes. Aim for a smooth and creamy consistency, scraping down the sides as needed to ensure everything is well combined.
Step 2: Whip the Cream
In a separate bowl, pour 1 cup of heavy whipping cream and whip it with a stand mixer or electric beaters on high speed until stiff peaks form, which should take around 3-5 minutes. Once the cream is fluffy, gently fold it into the cheesecake mixture using a spatula, ensuring a light texture that will fill your Crispy Fruity Pebbles Cheesecake Tacos perfectly.
Step 3: Crush the Fruity Pebbles
Take 2 cups of Fruity Pebbles cereal and place them in a zip-top bag. Using a rolling pin or the back of a glass, crush the cereal into smaller pieces for about 1-2 minutes. This will create a colorful and crunchy coating to envelop the taco shells. Set the crushed cereal aside for later.
Step 4: Coat the Taco Shells
Grab the sturdy taco shells and dip the outer edges into a little water to help the cereal adhere. Then, roll each taco shell in the crushed Fruity Pebbles, ensuring they are well-coated. This will add a fun pop of color and flavor, creating the delightful outer layer for your Crispy Fruity Pebbles Cheesecake Tacos.
Step 5: Assemble the Tacos
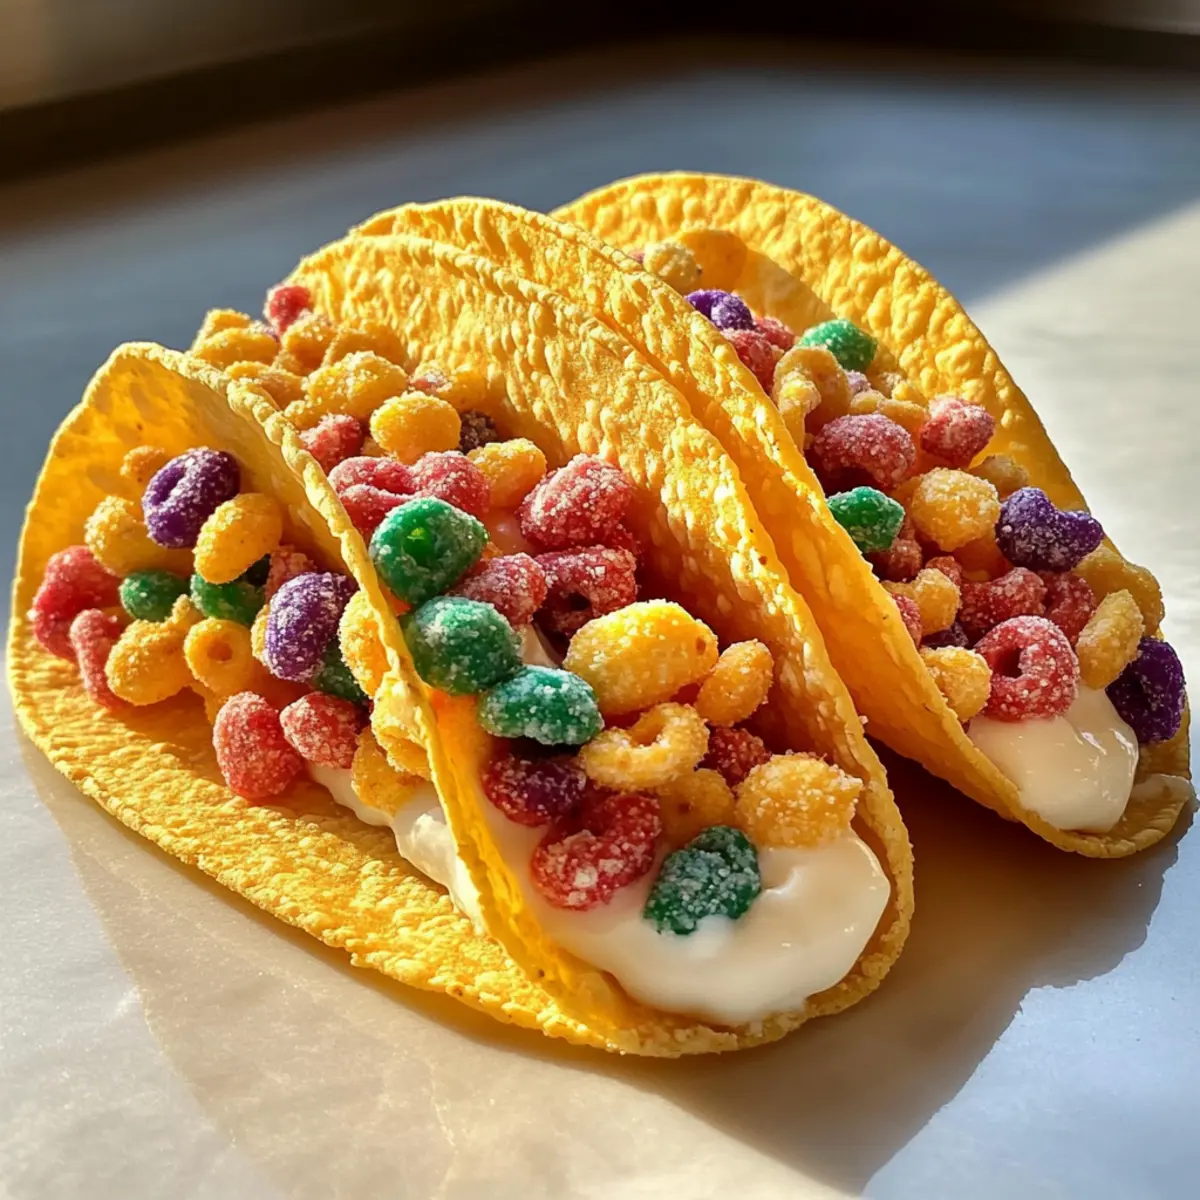
Carefully fill each taco shell with the cheesecake filling using a piping bag or spoon. Fill them just before serving to maintain the crunch of the taco shell. The creamy, dreamy cheesecake should be generously heaped, giving a delightful contrast to the crunchy exterior of your dessert tacos.
Step 6: Serve Immediately
Plate the assembled Crispy Fruity Pebbles Cheesecake Tacos and serve right away for the best texture. Enjoy the vibrant colors and contrasting textures of the crunchy exterior and the creamy filling. Consider garnishing with fresh berries or a drizzle of chocolate sauce for an extra touch of sweetness and presentation!
Crispy Fruity Pebbles Cheesecake Taco Variations
Feel free to get creative with this delightful dessert and let your taste buds run wild!
- Cereal Swap: Use Cap’n Crunch or Trix for a different flavor while maintaining that signature crunch. The brightness of colors will pop just as wonderfully!
- Chocolate Delight: Incorporate cocoa powder into the cheesecake filling for an exciting chocolate twist. Chocolate taco shells can elevate the experience even further!
- Dairy-Free Option: Substitute coconut cream for the heavy whipping cream and use dairy-free cream cheese to make this dessert vegan-friendly. Indulging without any dairy can still be delicious!
- Fruit Infusion: Mix in fresh fruits like diced strawberries or blueberries into the cheesecake filling for an extra burst of freshness. The added juicy notes will complement the creaminess beautifully.
- Nutty Texture: Add a handful of chopped nuts (like walnuts or pecans) in the filling for added crunch and a deeper flavor profile. It creates a delightful contrast in every bite!
- Zesty Kick: For a citrus twist, incorporate some lemon or lime zest into the cheesecake filling. The zesty flavor can brighten the dessert, offering a fresh aftertaste.
- Frozen Treats: Try freezing the filled taco shells for a fun summer treat. The cold, creamy surprise wrapped in crispy shells is refreshing on a hot day.
- Heat It Up: Adding a sprinkle of cayenne pepper or crushed red pepper to the cheesecake filling can introduce a subtle heat, creating an intriguing flavor balance between sweet and spicy.
For more inventive ideas, don’t forget to explore how to make these conversions with other fruity ingredients; your culinary creativity is the only limit! Celebrate flavors that complement your palate by diving into this fun, customizable dessert adventure!
What to Serve with Crispy Fruity Pebbles Cheesecake Tacos
Elevate your dessert experience with delightful accompaniments that enhance the fun and flavor of these playful tacos.
-
Fresh Berries: Juicy strawberries, blueberries, or raspberries add a burst of acidity and freshness, perfectly balancing the sweetness of the cheesecake.
-
Chocolate Drizzle: Melted chocolate drizzled over the tacos not only makes for stunning presentation but also adds a rich, indulgent layer that complements the fruity crunch.
-
Whipped Cream: A dollop of lightly sweetened whipped cream enhances the creamy texture and makes each bite feel even more luxurious.
-
Sweet Fruit Sauce: A vibrant fruit sauce made from strawberries or mango brings an extra fruity note and enhances visual appeal with its luscious color.
-
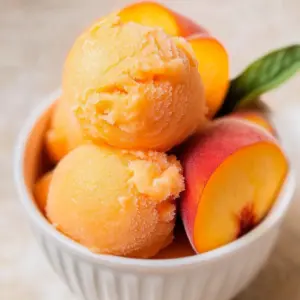
Ice Cream: A scoop of vanilla or strawberry ice cream on the side adds creaminess and is ideal for those who love a cool contrast with their dessert tacos.
-
Sparkling Fruit Beverage: Pairing these tacos with a bubbly fruit soda or sparkling lemonade can brighten the meal with a refreshing fizz that dances on the palate.
Imagine gathering around with family or friends, sharing these vibrant dessert tacos, and letting your creative pairings shine!
How to Store and Freeze Crispy Fruity Pebbles Cheesecake Tacos
Fridge: Store any leftover cheesecake filling in an airtight container for up to 3 days. This keeps it fresh and tasty for snacking or next-day indulgence.
Airtight Container: If you’ve assembled tacos, place them in an airtight container. It’s best to eat them within 3 days to enjoy the crunch of the shells.
Freezer: For long-term storage, freeze the cheesecake filling in an airtight container for up to 1 month. Thaw it in the fridge overnight before assembling.
Reheating: Crispy taco shells won’t hold up well to reheating, so it’s best to prepare and fill right before serving for an optimal texture.
Make Ahead Options
Preparing your Crispy Fruity Pebbles Cheesecake Tacos ahead of time is a fantastic way to save you precious moments during busy weeknights! You can make the cheesecake filling up to 24 hours in advance; simply blend all the filling ingredients and refrigerate it in an airtight container. The taco shells can also be coated with Fruity Pebbles up to 3 days ahead, ensuring they stay crunchy. However, for the best results, fill the taco shells with the cheesecake mixture just before serving to maintain their delightful texture. This method allows the flavors to meld together while ensuring your dessert remains just as delicious and visually appealing!
Expert Tips for Crispy Fruity Pebbles Cheesecake Tacos
- Sturdy Shells: Ensure your taco shells are strong enough to hold the filling without breaking or leaking; it’s key to a successful dessert.
- Assemble Just Before Serving: To keep the taco shells crisp, fill them right before you plan to serve; this prevents any sogginess.
- Mixing Wisdom: Be careful not to overmix your cheesecake filling after adding the whipped cream; a gentle fold is all it needs for a light texture.
- Cereal Control: If substituting with a different fruity cereal, check sweetness levels to ensure your tacos aren’t overly sweet; balance is essential!
- Garnish Lovely: For a vibrant presentation and added flavor, consider garnishing with fresh berries or a drizzle of chocolate sauce right before serving.
- Chill Wisely: If making the cheesecake filling ahead, store it in the fridge for up to a day; this helps the flavors blend beautifully before assembly.
Crispy Fruity Pebbles Cheesecake Tacos Recipe FAQs
What kind of cream cheese should I use?
Absolutely! I recommend using full-fat cream cheese for a richer flavor and smoother texture. Make sure it’s at room temperature for easy blending. Low-fat options work, but they may alter the creaminess slightly.
How should I store leftover cheesecake filling?
Very! Store any leftover cheesecake filling in an airtight container in the fridge for up to 3 days. This keeps it fresh and perfect for snacking on or using in another dessert.
Can I freeze the cheesecake filling?
Definitely! You can freeze the cheesecake filling for up to 1 month. To do this, pour it into an airtight container, making sure to leave some space for expansion. When you’re ready to use it, simply thaw it in the fridge overnight before assembling your tacos.
What if my taco shells get soggy?
If you’re concerned about sogginess, the key is to fill the taco shells just before serving. If they do get soggy, you can try warming them in the oven for about 5 minutes to help them regain some crunch. Just be careful not to overheat them!
Are there any dietary considerations I should be aware of?
Absolutely! If you have pets, keep in mind that dairy products, like cream cheese, aren’t safe for them to consume. Additionally, if you or your guests have allergies, you may want to use gluten-free taco shells and double-check the ingredients in your fruity cereal to avoid any allergens.
Can I use different cereals for this recipe?
Yes! Feel free to experiment with different colorful cereals like Trix or Cap’n Crunch. Just be mindful of the sweetness levels, as some may be sweeter than Fruity Pebbles, which could affect the flavor balance of your cheesecake tacos.
Crispy Fruity Pebbles Cheesecake Tacos That Wow Your Tastebuds
Ingredients
Equipment
Method
- In a large mixing bowl, blend cream cheese, sour cream, powdered sugar, and vanilla extract using an electric mixer for about 2-3 minutes until smooth.
- In a separate bowl, whip the heavy whipping cream until stiff peaks form, about 3-5 minutes. Gently fold it into the cheesecake mixture.
- Crush the Fruity Pebbles in a zip-top bag using a rolling pin or glass for about 1-2 minutes and set aside.
- Dip the outer edges of taco shells in water, then roll each shell in the crushed Fruity Pebbles to coat.
- Fill each taco shell with cheesecake filling using a piping bag or spoon just before serving.
- Serve the assembled tacos immediately for best texture, optionally garnished with fresh berries or chocolate sauce.