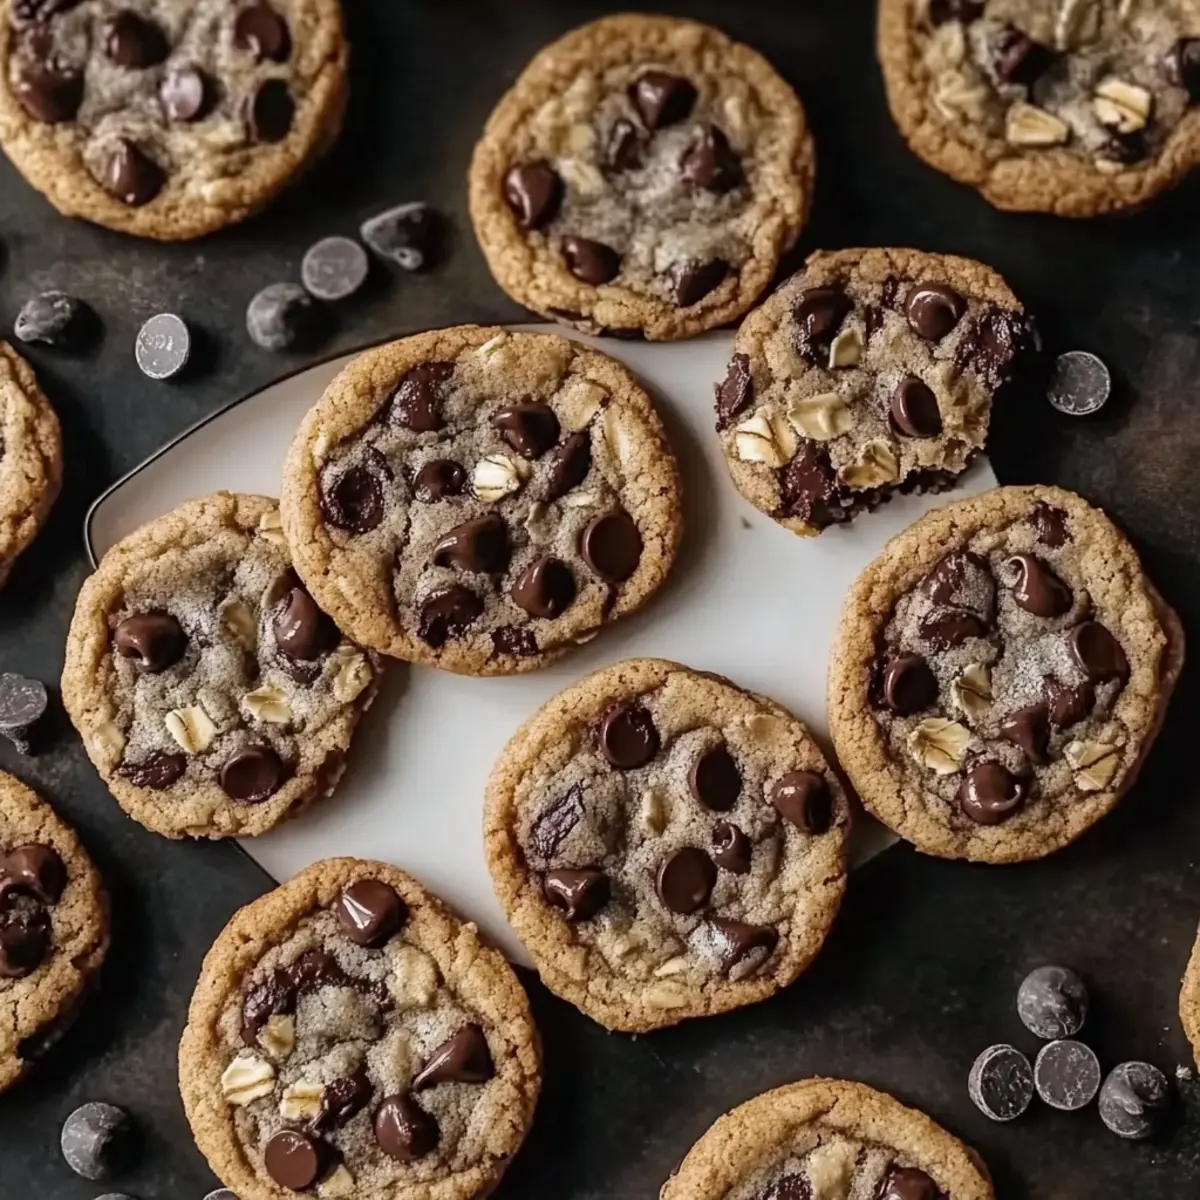
The scent of freshly baked cookies wafting through your kitchen can whisk you away to simpler times, igniting sweet memories with every bite. Today, I’m excited to share my recipe for 4-Ingredient Crispy Chocolate Oat Cookies, a treat that’s as easy to make as it is mouthwateringly delicious. With just four simple ingredients, you can whip up a batch in no time—perfect for those busy days when you crave something homemade but don’t want to fuss. Not only do these cookies satisfy your chocolate cravings, but they’re also gluten-free when using the right oats, making them suitable for many diets. Bake a batch tonight, and let’s see if you can resist the temptation to share!

Why are these cookies a must-try?
Easy to make: With just four ingredients, these Crispy Chocolate Oat Cookies come together in minutes, making them perfect for busy days.
Gluten-free option: Use certified gluten-free oats to create a delightful treat that everyone can enjoy.
Guilt-free indulgence: These cookies provide a good source of fiber and healthy fats while minimizing refined sugars, satisfying your sweet tooth responsibly.
Versatile flavors: Mix in different chocolate varieties or add nuts and fruits for a unique twist each time you bake.
Crowd-pleaser: Whether served warm or with a scoop of ice cream, these cookies are sure to impress friends and family alike!
Crispy Chocolate Oat Cookie Ingredients
For the Cookies
- Oats – Provide structure and a chewy texture; opt for certified gluten-free oats for a gluten-free version.
- Nut Butter (e.g., almond or peanut) – Adds creaminess and rich flavor; substitute with sunflower seed butter for nut-free options.
- Maple Syrup (or Honey) – Acts as a natural sweetener and binding agent; for a lower glycemic option, consider using agave syrup.
- Chocolate Chips – Introduces a delicious chocolate flavor; swap with dark chocolate chips for less sweetness or dairy-free options for vegan cookies.
Get ready to bake a batch of these delightful 4-Ingredient Crispy Chocolate Oat Cookies!
Step‑by‑Step Instructions for 4-Ingredient Crispy Chocolate Oat Cookies
Step 1: Preheat the Oven
Begin by preheating your oven to 350°F (175°C) to create the perfect baking environment for your 4-Ingredient Crispy Chocolate Oat Cookies. While the oven warms up, line a baking sheet with parchment paper, ensuring easy removal and minimal cleanup later on.
Step 2: Mix the Ingredients
In a medium-sized mixing bowl, blend together the oats, nut butter, and maple syrup until they form a cohesive mixture. Use a sturdy spatula or wooden spoon for thorough combining, ensuring the ingredients are well incorporated for optimal flavor and texture. The mixture should be sticky yet firm, perfect for cookie formation.
Step 3: Add the Chocolate Chips
Next, gently fold in the chocolate chips, making sure they are evenly distributed throughout the cookie dough. This step will enhance the chocolatey goodness of your 4-Ingredient Crispy Chocolate Oat Cookies. Take a moment to admire the delightful texture before moving on to the next step.
Step 4: Scoop the Dough
Using a tablespoon or cookie scoop, portion out the cookie dough and place it onto your prepared baking sheet, leaving about 2 inches between each scoop. This spacing is crucial for allowing the cookies to spread as they bake, ensuring a delightful crispy edge.
Step 5: Bake the Cookies
Slide the baking sheet into the preheated oven and bake the cookies for 10-12 minutes. Keep a close eye on the cookies—the edges should turn golden brown while the centers remain slightly soft. This contrast will give your cookies the perfect crispy yet chewy texture.
Step 6: Cool and Enjoy
Once baking is complete, remove the cookies from the oven and let them cool on the baking sheet for 2-3 minutes. This allows them to firm up a bit before transferring them to a wire rack. Allow the cookies to cool completely before diving into your homemade 4-Ingredient Crispy Chocolate Oat Cookies!

What to Serve with 4-Ingredient Crispy Chocolate Oat Cookies
Pair your decadent cookies with delightful accompaniments to enhance your dessert experience. Each suggestion beautifully complements the rich chocolate flavor and satisfying crunch of these cookies.
-
Chilled Milk: The classic pairing that brings back childhood memories. Dipping these cookies into a glass of cold milk makes for a nostalgic treat.
-
Vanilla Ice Cream: A scoop of creamy ice cream elevates your cookies into an indulgent dessert. The combination of warm cookies and cold ice cream is simply irresistible.
-
Fresh Berries: Light and juicy, berries add a refreshing contrast to the rich chocolate. Try strawberries or raspberries for a burst of flavor that complements each bite.
-
Nutty Granola: A sprinkle of nutty granola alongside these cookies offers additional crunch and texture, creating a delightful morning treat or snack.
-
Coffee or Espresso: The bold flavors of coffee enhance the chocolate profile, making this pairing a favorite for afternoon pick-me-ups. Treat yourself to a cozy coffee moment!
-
Caramel Sauce Drizzle: Drizzling cookies with warm caramel sauce adds a sweet, buttery note. It turns an already delicious dessert into a truly decadent experience.
-
Coconut Flakes: For a tropical twist, sprinkle shredded coconut over cookies. The chewy texture and slight sweetness bring a delightful contrast to the rich oat cookies.
-
Fruit Smoothie: Blend your favorite fruits into a smoothie for a refreshing drink that helps balance the sweetness of the cookies, making your dessert experience complete.
-
Herbal Tea: For a lighter finish, serve these cookies with a warm cup of herbal tea; the aromatic notes perfectly complement the chocolatey taste.
-
Chocolate Sauce: For chocoholics, pairing cookies with a side of rich chocolate sauce for dipping is a match made in heaven. Savor each gooey bite!
Crispy Chocolate Oat Cookies Variations
Feel free to bring your personal touch to these delicious cookies, making them even more delightful and tailored to your tastes!
-
Nut-Free: Substitute nut butter with sunflower seed butter for a tasty alternative that retains a creamy texture.
-
Sweetness Level: Adjust the sweetness by using honey instead of maple syrup or switching to agave syrup for a lower glycemic option.
-
Flavor Boost: Mix in a teaspoon of vanilla extract or a pinch of cinnamon to elevate the flavor profile, adding warmth and depth to each bite.
-
Extra Crunch: Toss in a handful of chopped nuts or seeds like walnuts or pumpkin seeds for added crunch. This provides a lovely contrast to the chewy oats!
-
Chewy Dried Fruit: Incorporate some dried fruits, like cranberries or raisins, to infuse a burst of sweetness and chewy texture, creating a more complex flavor experience.
-
Chocolate Variety: Swap dark chocolate chips for milk or white chocolate for a sweeter treat or use dairy-free chocolate chips to keep it vegan.
-
Baking Spice Twist: Experiment with spices like pumpkin pie spice or cardamom to give your cookies a seasonal twist that’s perfect for cozy evenings.
-
Cocoa-Kissed: For a rich chocolate flavor, replace some oats with cocoa powder, creating a chocolatey version that’s heavenly with a hot cup of tea or coffee.
Each of these variations will bring something special to your Crispy Chocolate Oat Cookies, letting you bake with creativity while enjoying a beloved treat. And if you’re looking for more sweet inspiration, don’t miss out on making Peanut Butter Oatmeal Cookies. Happy baking!
Make Ahead Options
These 4-Ingredient Crispy Chocolate Oat Cookies are perfect for meal prep enthusiasts! You can mix the cookie dough up to 24 hours in advance; simply combine the oats, nut butter, and maple syrup, then refrigerate the mixture in an airtight container. When you’re ready to bake, fold in the chocolate chips, scoop the dough onto the baking sheet, and bake as directed. This approach allows for minimal fuss on busy days while ensuring your cookies are just as delicious as freshly made. If you’re looking to enjoy these cookies later in the week, bake them ahead of time and store them in an airtight container for up to 3 days. Just remember to let them cool completely before sealing, to maintain their delightful crispy texture!
Expert Tips for Crispy Chocolate Oat Cookies
-
Nut Butter Consistency: Always use nut butter that is well-stirred but not too runny to maintain the structural integrity of these crispy cookies.
-
Watch the Bake: Keep an eye on your cookies while baking; they should be lightly golden at the edges and soft in the middle for that perfect chewy texture.
-
Cooling Time: Allow cookies to cool completely before storing; they will continue to firm up, ensuring a delightful crunch that complements their chewy inside.
-
Cookie Size Matters: For best results, scoop dough into tablespoon-sized portions to achieve uniform baking and texture, preventing any cookies from overbaking.
-
Ingredient Quality: Use high-quality chocolate chips to elevate the flavor of your crispy chocolate oat cookies, ensuring a rich and satisfying treat that delights the taste buds.
Storage Tips for Crispy Chocolate Oat Cookies
- Room Temperature: Store cookies in an airtight container at room temperature for up to 1 week to maintain freshness and crispiness.
- Freezer: For longer storage, freeze the cookies in a single layer on a baking sheet. Once solid, place them in a freezer bag for up to 3 months.
- Thawing: When ready to enjoy, thaw frozen cookies at room temperature or pop them in the microwave for a few seconds for a quick warm-up.
- Reheating: If you’ve stored the cookies, reheat them in a preheated oven at 350°F (175°C) for 5-7 minutes to regain their delightful crispiness before serving.
Crispy Chocolate Oat Cookies Recipe FAQs
What type of oats should I use for these cookies?
I recommend using rolled oats for the best texture in your Crispy Chocolate Oat Cookies. If you need them to be gluten-free, make sure to choose certified gluten-free oats, as this ensures there are no cross-contamination issues.
How should I store my cookies to keep them fresh?
Store your cookies in an airtight container at room temperature for up to 1 week. This will help maintain their crispiness and keep them delicious. If you’d like them to last longer, you can freeze them!
Can I freeze these cookies, and if so, how?
Absolutely! To freeze your cookies, lay them in a single layer on a baking sheet and place them in the freezer until solid. Then transfer them into a freezer bag. They can last for up to 3 months in the freezer! When you’re ready to enjoy, simply thaw them at room temperature or warm them in the microwave for a few seconds.
What should I do if my cookie dough is too runny?
If your dough seems too runny, it may be because the nut butter you used is too liquid. You can add a bit more oats to the mixture to help absorb some of the moisture. Start with an additional 1-2 tablespoons, mixing until you reach your desired consistency.
Can I substitute the nut butter for a different ingredient?
Yes! If you have nut allergies or are making these for someone who does, you can substitute nut butter with sunflower seed butter, which works wonderfully. Just ensure that the gluten-free oats are still used to keep the entire recipe allergen-friendly.
Are there any allergens I should be aware of?
Yes, these cookies contain oats, which can lead to reactions in those with celiac disease or gluten sensitivity if not certified gluten-free. Additionally, nut butter introduces potential allergens, so always check for allergies among your guests before sharing these delicious cookies.

Crispy Chocolate Oat Cookies in Just 4 Simple Ingredients
Ingredients
Equipment
Method
- Preheat your oven to 350°F (175°C) and line a baking sheet with parchment paper.
- In a medium-sized mixing bowl, blend together the oats, nut butter, and maple syrup until they form a cohesive mixture.
- Gently fold in the chocolate chips, ensuring they are evenly distributed throughout the cookie dough.
- Scoop out the cookie dough and place it onto your prepared baking sheet, leaving about 2 inches between each scoop.
- Bake the cookies for 10-12 minutes until the edges are golden brown and the centers remain slightly soft.
- Let the cookies cool on the baking sheet for 2-3 minutes before transferring them to a wire rack.