Introduction to Classic Apple Pie
Classic apple pie is a dependable dessert for holidays, Sunday dinners, and ordinary afternoons when you want something warm from the oven. This version uses a simple filling of sliced apples, sugar, flour, cinnamon, nutmeg, and lemon juice tucked between two pie crusts.
The recipe keeps the ingredient list short and the method practical. A hot start helps the bottom crust set, while a lower oven temperature lets the apples soften without scorching the pastry. Give the baked pie plenty of time to cool so the filling can thicken and the slices hold together.
Why You'll Love This Classic Apple Pie
- The filling uses everyday ingredients and comes together in one bowl.
- A small amount of flour helps the apple juices form a sliceable sauce.
- Cinnamon and nutmeg give the pie its familiar warm flavor without overpowering the apples.
- The two-crust design keeps the filling moist and gives each slice a crisp, golden top.
- You can assemble the pie ahead of time and bake it when you are ready.
Ingredients for Classic Apple Pie
- 6–7 apples, sliced
- 1 cup sugar
- 1/4 cup all-purpose flour
- 1 tsp cinnamon
- 1/4 tsp nutmeg
- 1 tbsp lemon juice
- 2 pie crusts (top and bottom)
Choose firm, flavorful apples that will hold their shape during baking, such as Granny Smith, Honeycrisp, Braeburn, or a combination. Peel the apples if you prefer a smooth filling, then slice them evenly so they soften at about the same rate. If the apples are especially large, you may need six; smaller apples may require seven to fill the crust.
How to Make Classic Apple Pie
Step 1: Prepare the Apples
Peel the apples if desired, remove the cores, and slice them into pieces about 1/4 inch thick. Put the sliced apples in a large bowl and add the sugar, all-purpose flour, cinnamon, nutmeg, and lemon juice. Toss until the apples are evenly coated. Let the mixture stand for 10 minutes while you prepare the crust so the sugar can begin drawing out the juices.
Step 2: Fit the Bottom Crust
Set an oven rack in the lower-middle position and heat the oven to 425°F. Place one pie crust in a 9-inch pie plate, easing it into the corners without stretching it. Leave the edge hanging slightly over the rim. If using refrigerated crusts, let them sit according to the package directions so they bend without cracking.
Step 3: Fill the Pie
Transfer the apple mixture to the crust, scraping in any sugar and juice left in the bowl. Arrange the apples into an even mound, with a little more filling in the center because it will settle as it bakes. Avoid packing the apples too tightly, which can make the center take longer to soften.
Step 4: Add the Top Crust
Lay the second pie crust over the apples. Trim the edges so about 1/2 inch extends beyond the pie plate, then fold the top and bottom crust edges together and crimp them firmly. Cut five or six small vents in the top crust to let steam escape. If the crust feels very soft, place the assembled pie in the refrigerator for 15 minutes before baking.
Step 5: Bake Until Golden
Place the pie on a rimmed baking sheet to catch any overflow. Bake at 425°F for 15 minutes, then reduce the oven temperature to 375°F without opening the door for long. Continue baking for 40 to 50 minutes, until the crust is deeply golden and the filling is bubbling through the vents. If the rim browns too quickly, cover it loosely with foil.
Step 6: Cool and Serve
Move the pie to a cooling rack and let it cool for at least 2 hours before slicing. The filling will continue to thicken as it cools, so cutting sooner may produce a loose, juicy slice. Serve the pie at room temperature or warm individual slices gently after the pie has cooled. Refrigerate leftovers within 2 hours and use them within 3 to 4 days.
Tips for Success
- Slice the apples evenly so some pieces do not turn soft while thicker pieces remain firm.
- Place the pie on a baking sheet before it goes into the oven. This makes cleanup easier if the filling bubbles over.
- Keep the crust cold when possible. Chilled pastry is less likely to slump and usually bakes up flakier.
- Do not skip the cooling time. A hot pie may look underdone even when the apples are tender.
- If the top crust is browning before the filling bubbles, loosely tent the pie with foil for the rest of the baking time.
Equipment Needed
- 9-inch pie plate
- Large mixing bowl
- Rimmed baking sheet
Variations
- Use a mix of tart Granny Smith apples and sweeter Honeycrisp or Braeburn apples for a balanced filling.
- Add one teaspoon of vanilla extract to the apple mixture if you want a rounder dessert flavor, though it is not part of the required ingredient list.
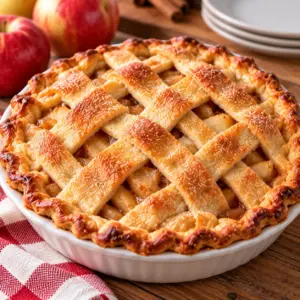
- Replace the full top crust with a lattice made from the second crust for a more open finish and easier steam release.
- Sprinkle the top crust with a little sugar before baking if you like a lightly crisp, sweet surface.
- Bake the pie in a deep-dish pie plate if your apples are particularly small or you prefer a taller filling, adding a few minutes to the baking time if needed.
Serving Suggestions
Serve classic apple pie in generous wedges once it has cooled enough to slice cleanly. It is especially good with vanilla ice cream, whipped cream, or a spoonful of plain yogurt. For a warm slice, reheat it gently in a 325°F oven until warmed through rather than microwaving it for too long, which can soften the crust. Keep the pie at room temperature only for the first 2 hours, then cover and refrigerate any leftovers.
FAQs about Classic Apple Pie
What apples are best for classic apple pie? Firm apples that hold their shape work well. Granny Smith, Honeycrisp, Braeburn, Pink Lady, and Jonagold are good choices, and combining a tart apple with a sweeter variety gives the filling a balanced taste.
Can I make this apple pie ahead of time? Yes. You can bake the pie earlier the same day and let it cool completely before covering it. For the best crust, keep it at room temperature for up to 2 hours, then refrigerate it. You can also assemble it, chill it, and bake it later the same day.
How do I know when apple pie is done? Look for a deeply golden crust and visible bubbling in the filling through the vents. A knife inserted near the center should meet tender apples with only slight resistance. If the crust is dark but the apples are not tender, cover the top loosely with foil and continue baking.
Why is my apple pie filling runny? The pie may have been sliced before it cooled, or the apples may have released more juice than expected. The flour helps thicken the filling, but the pie still needs at least 2 hours of cooling to set. Slicing the apples evenly and baking until the filling bubbles also helps.
How should I store leftover apple pie? Cover the cooled pie and refrigerate it within 2 hours of baking. Store it in the refrigerator for 3 to 4 days. Reheat individual slices gently in a 325°F oven, or serve them cold or at room temperature.
Final Thoughts
Classic apple pie does not need a complicated filling or a long list of ingredients. Evenly sliced apples, a well-chilled crust, and enough cooling time make the difference between a loose dessert and a pie that cuts into neat, tender slices. Keep this recipe on hand for the holidays or whenever a simple homemade dessert is in order.
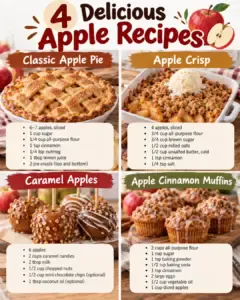
Looking for more? This recipe is part of our roundup of 4 Delicious Apple Recipes For Cozy Baking All Season Long.
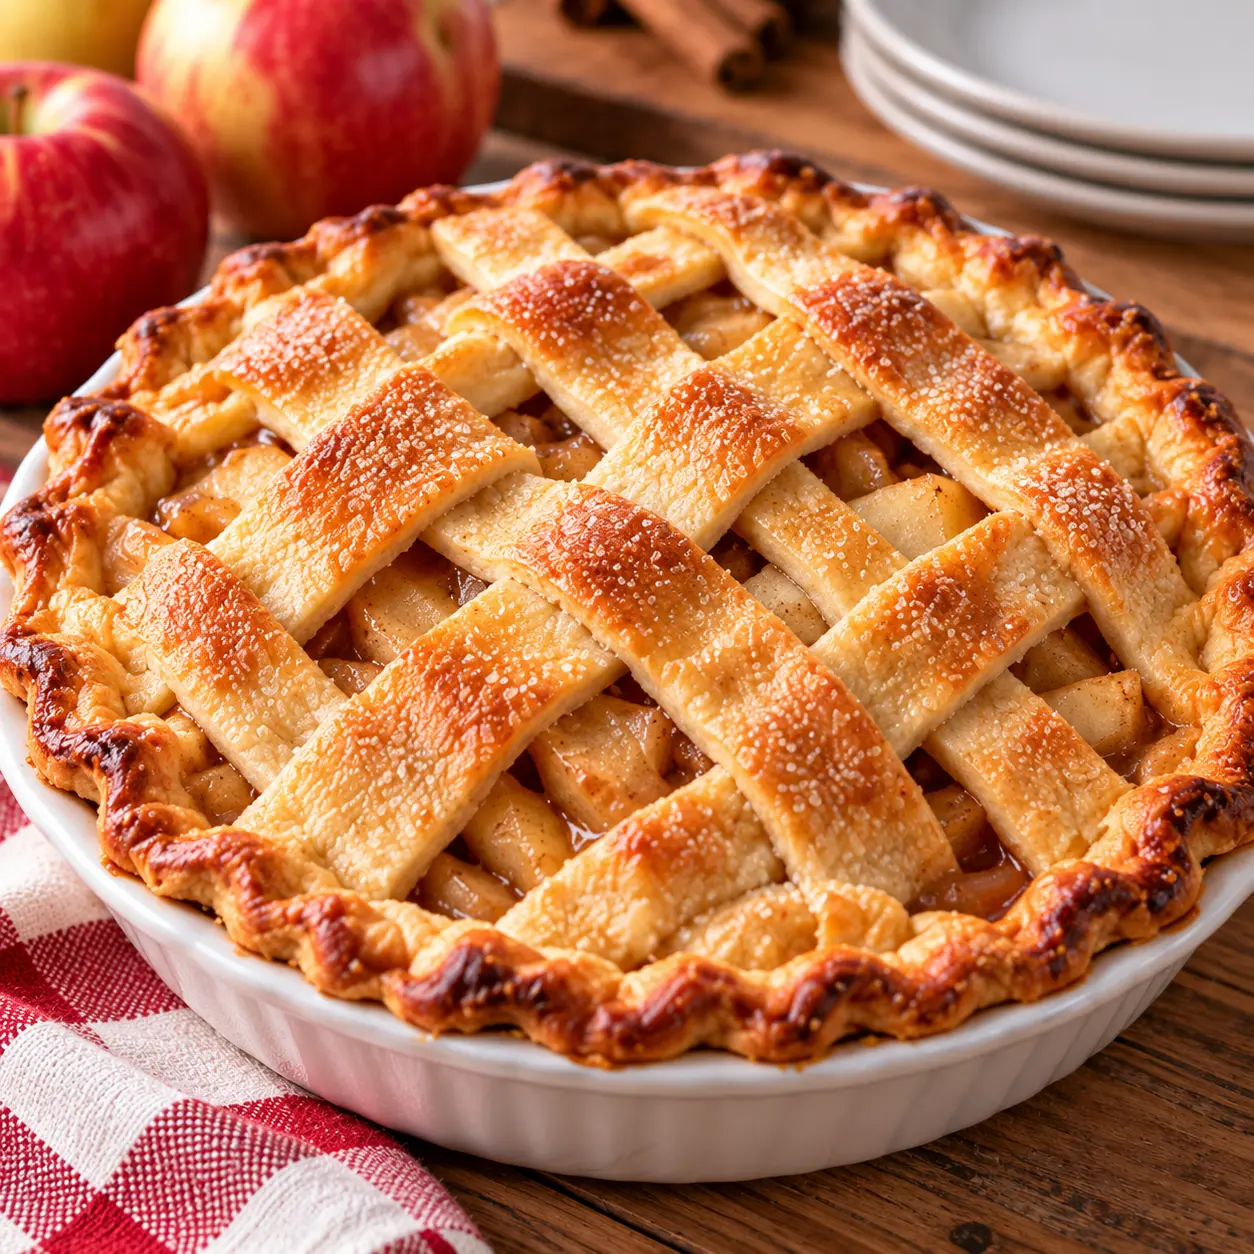
Classic Apple Pie
Ingredients
Equipment
Method
- Toss the sliced apples with the sugar, flour, cinnamon, nutmeg, and lemon juice, then let the mixture stand for 10 minutes.
- Fit one crust into a 9-inch pie plate, add the apple filling, cover with the second crust, seal the edges, and cut vents in the top.
- Bake at 425°F for 15 minutes, reduce the oven to 375°F, and bake for 40 to 50 minutes more until golden and bubbling.
- Cool the pie for at least 2 hours before slicing, then refrigerate leftovers within 2 hours.
Nutrition
Notes
- Use firm apples and slice them evenly for consistent baking.
- Place the pie on a rimmed baking sheet to catch overflow.
- The nutrition information is an estimate and depends on the pie crust and apples used.