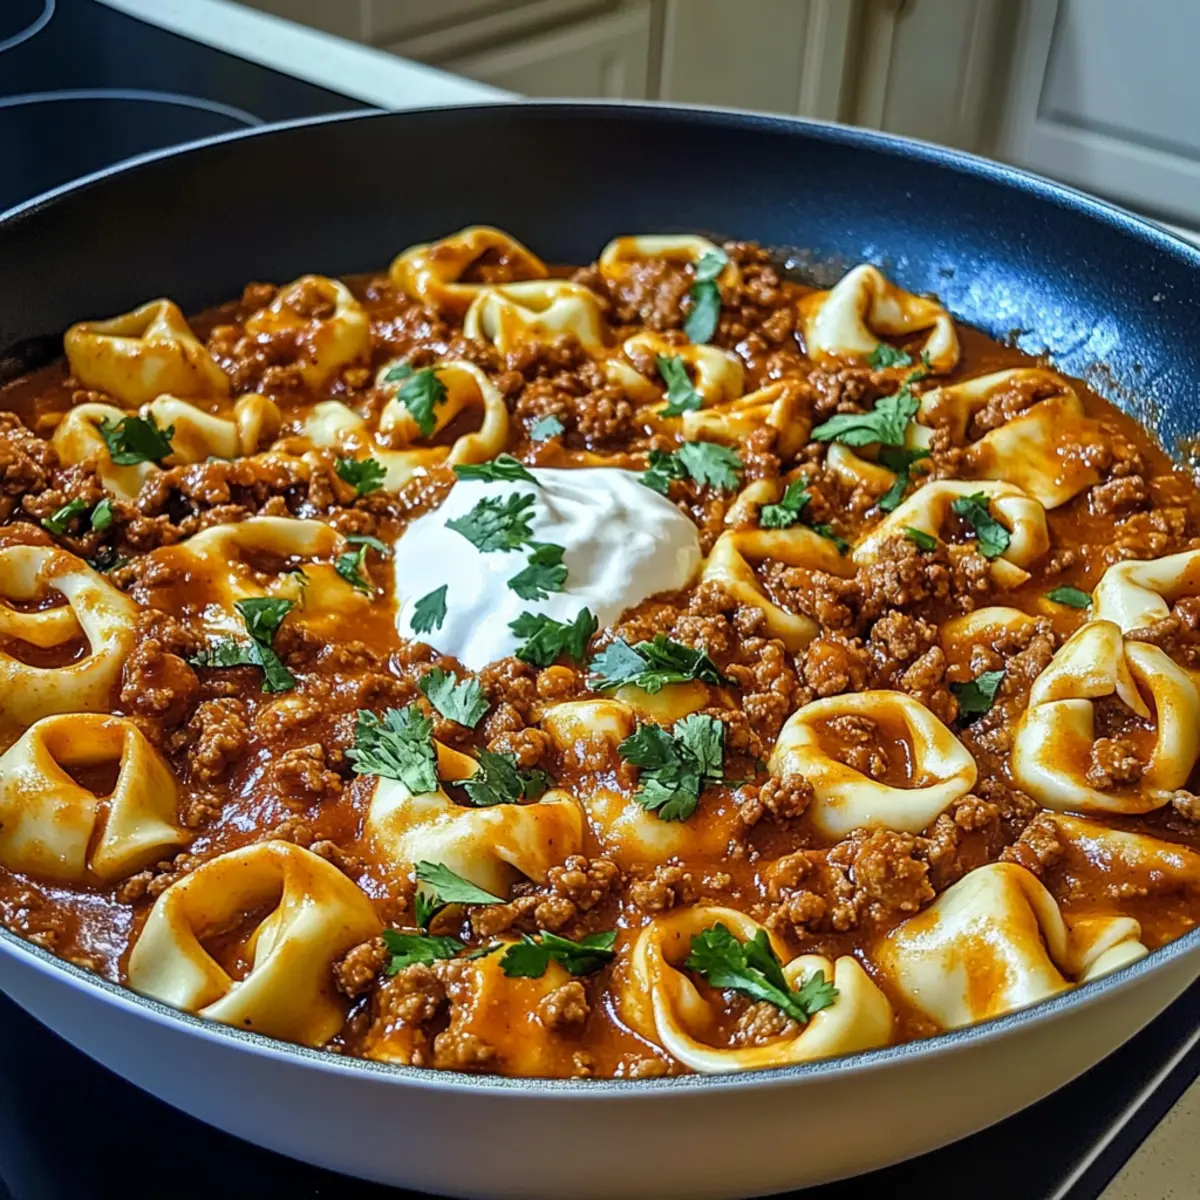
In the hustle of daily life, finding time to whip up a comforting meal can feel like a mini crisis. But fear not! My Cheesy Beef Enchilada Tortellini is here to save the day. This dish marries the bold, zesty flavors of enchiladas with the delightful creaminess of tortellini, all in just over 30 minutes. Not only is it a quick dinner solution for busy evenings, but it also transforms your usual comfort food into something truly special. Whether you’re feeding a family or just treating yourself, this recipe is sure to bring smiles and satisfy those cravings. Are you ready to delight your taste buds with this irresistible twist?
Why is Cheesy Beef Enchilada Tortellini irresistible?
Quick Preparation: This dish comes together in just over 30 minutes, making it perfect for weeknight dinners or impromptu gatherings.
Rich, Flavorful Sauce: With zesty enchilada sauce and creamy cheese, every bite is packed with indulgent flavors that scream comfort.
Versatile Ingredients: Feel free to switch up the proteins with options like ground turkey or even go vegetarian with beans, ensuring everyone can enjoy it.
Crowd-Pleasing Delight: It’s not just a meal; it’s a guaranteed crowd-pleaser that transforms a simple dinner into a feast worthy of compliments.
Comfort Food Innovation: This recipe is an exciting fusion of Mexican and Italian cuisines, delivering a unique dining experience that breaks the monotony of regular meals. Plus, if you’re craving another comforting dish, be sure to check out my Savory Ground Beef for more delicious ideas!
Cheesy Beef Enchilada Tortellini Ingredients
For the Filling
- Ground Beef – Provides protein and flavor; feel free to substitute with lean ground turkey for a lighter option.
- Onion (diced) – Adds sweetness and depth; shallots can be used instead for a slightly different flavor.
- Garlic (minced) – Enhances aroma and flavor; opt for fresh garlic for the best taste, but garlic powder works in a pinch.
For the Sauce
- Red Enchilada Sauce – Brings spiciness and moisture; choose a mild sauce if you prefer a gentler heat.
- Cream Cheese – Adds a luscious creaminess; swap with Neufchâtel cheese for a lower-fat alternative.
For the Pasta
- Refrigerated Cheese Tortellini – The dish’s star, yielding cheesy bites; gluten-free tortellini can be easily substituted here.
For the Topping
- Shredded Mozzarella Cheese – Creates a bubbly, golden crust; consider using cheddar cheese for a unique flavor twist.
For Seasoning
- Spices (salt, pepper, chili powder, cumin) – Enhance the overall flavor; adjust the chili powder for your desired spice level in this Cheesy Beef Enchilada Tortellini dish.
Step‑by‑Step Instructions for Cheesy Beef Enchilada Tortellini
Step 1: Sauté Aromatics
In a large skillet, heat 2 tablespoons of olive oil over medium heat until shimmering. Add the diced onion and sauté for 3-4 minutes until it turns translucent and aromatic. Stir in the minced garlic and sauté for an additional 30 seconds, allowing the garlic to become fragrant. This base will enhance the flavor of your Cheesy Beef Enchilada Tortellini.
Step 2: Cook Beef
Next, add 1 pound of ground beef to the skillet. Break it apart with a spatula while cooking for 5-7 minutes, or until it’s browned and no longer pink. Season the mixture with salt, pepper, chili powder, and cumin to add depth. Once done, drain any excess fat from the skillet, ensuring your filling remains flavorful without being greasy.
Step 3: Add Sauce
Pour in 1 cup of red enchilada sauce, stirring the mixture thoroughly to combine. Reduce the heat to medium-low and let it simmer for 3-5 minutes, stirring occasionally, until the sauce is heated through and fragrant. This step will infuse the ground beef with zesty flavors, perfect for the Cheesy Beef Enchilada Tortellini.
Step 4: Incorporate Cream Cheese
Break 4 ounces of cream cheese into chunks and add it to the simmering skillet. Stir constantly until the cream cheese melts and blends into the enchilada sauce, creating a smooth and creamy consistency throughout. This luscious sauce will elevate the overall texture of your dish, making it incredibly comforting.
Step 5: Mix Tortellini
Gently fold in 12 ounces of refrigerated cheese tortellini into the creamy beef mixture. Continue cooking on medium-low heat for an additional 5-7 minutes, or until the tortellini is heated through and tender. Be careful not to overcook the tortellini, as they should maintain their delightful texture in this Cheesy Beef Enchilada Tortellini.
Step 6: Add Cheese Topping
Sprinkle 1 cup of shredded mozzarella cheese generously over the top of the mixture. Cover the skillet with a lid and let it sit for 2-3 minutes over low heat, allowing the cheese to melt and become bubbly. Alternatively, transfer the skillet to the broiler for a couple of minutes for a crispy and golden topping, but keep a close eye to prevent burning.
Make Ahead Options
Preparing your Cheesy Beef Enchilada Tortellini in advance is a game-changer for busy weeknights! You can cook the beef mixture, including the onions, garlic, and spices, and refrigerate it for up to 3 days. Just be sure to let it cool completely before sealing in an airtight container, which helps maintain its flavor and texture. The cheese tortellini can also be cooked and stored separately, simply reheat them before combining with the beef mixture. When you’re ready to serve, mix everything together, sprinkle with mozzarella, and heat on the stove until warm or broil for that perfect cheese crust. This way, you’ll have a hearty and comforting meal ready with minimal effort!
How to Store and Freeze Cheesy Beef Enchilada Tortellini
Fridge: Store leftover Cheesy Beef Enchilada Tortellini in an airtight container for up to 3 days. This ensures it stays fresh and ready to delight your taste buds.
Freezer: For longer storage, place it in airtight freezer bags or containers for up to 3 months. Make sure to label them with the date for easy reference.
Reheating: To reheat, thaw overnight in the fridge if frozen, then heat in a skillet over medium heat, or microwave until warmed through. You may want to add a splash of water to maintain creaminess.
Airtight Tips: Always ensure the dish is well-covered to prevent freezer burn, keeping those comforting flavors intact for future cravings.
Cheesy Beef Enchilada Tortellini Variations
Feel free to get creative and make this delightful dish your own with these tasty twists!
- Gluten-Free Pasta: Swap in gluten-free tortellini to ensure everyone can enjoy this meal without gluten. It’s just as comforting!
- Turkey or Chicken: Substitute ground beef with ground turkey or shredded chicken for a lighter option that still packs a punch. This twist keeps things deliciously versatile!
- Cheese Variety: Try different cheeses like Monterey Jack or pepper jack for a flavor boost that adds a kick. A little variety can bring new life to your comfort food!
- Extra Veggies: Toss in diced bell peppers or spinach for added nutrition and color. Elevating it with veggies not only enhances the flavor but also boosts your meal’s vibrancy.
- Spice it Up: Add diced jalapeños or a pinch of cayenne pepper to kick up the heat if you’re craving a spicy flare. A little heat can make this dish truly sing!
- Creamy Alternative: Replace cream cheese with a blend of sour cream and Greek yogurt for a tangy twist that still maintains creaminess. This swap adds a delightful richness!
- Casserole Style: Layer the tortellini mixture in a baking dish, top with cheese, and bake to create a cheesy casserole. This method brings different textures and becomes a great party dish!
- Vegetarian Option: Use black beans or lentils instead of beef for a hearty vegetarian alternative that’s still satisfying. It’s a great way to enjoy the flavors while keeping it plant-based!
If you’re itching for more comforting dishes, be sure to check out my Savory Braised Beef or try the delicious Cheesy Chicken Enchilada for yet another family favorite. Happy cooking!
Expert Tips for Cheesy Beef Enchilada Tortellini
-
Perfect Browning: Ensure you don’t overcrowd the skillet when cooking the beef to achieve a nice golden color without steaming the meat.
-
Season Wisely: Taste your sauce before adding more seasoning; adjust the chili powder level to match your preferred heat in this Cheesy Beef Enchilada Tortellini.
-
Creamy Texture: For a smoother sauce, whisk the cream cheese into the enchilada sauce instead of just stirring; it will blend better and be creamier.
-
Avoid Overcooking: Monitor the tortellini closely as they heat; overcooking can lead to mushy pasta, so aim for al dente.
-
Broiler Caution: If broiling for a crispy top, stay close and keep an eye on it; cheese can burn quickly, which can ruin your beautiful dish.
What to Serve with Cheesy Beef Enchilada Tortellini
Transform your meal into a delightful feast by pairing delicious sides that complement the rich and creamy flavors of this hearty dish.
-
Fresh Garden Salad: A crisp salad with mixed greens, cherry tomatoes, and a tangy vinaigrette cuts through the creaminess, refreshing your palate after each bite.
-
Tortilla Chips: Crunchy tortilla chips offer a satisfying texture contrast and are perfect for scooping up any leftover sauce, adding a delightful crunch to your meal.
-
Refried Beans: Creamy refried beans provide a hearty, protein-packed side, making your dinner feel like a complete Mexican feast that satisfies everyone.
-
Mexican Street Corn: This sweet and savory side with cotija cheese and lime adds brightness, balancing the rich flavors of the Cheesy Beef Enchilada Tortellini.
-
Sautéed Zucchini: Lightly seasoned sautéed zucchini brings a fresh and healthy element to your plate, offering a tender bite that complements the cheesy pasta beautifully.
-
Margaritas: A refreshing margarita enhances the overall dining experience, pairing zestily with the enchilada flavors and offering a fun, festive touch to your meal.
-
Churros: For dessert, serve warm churros dusted with cinnamon sugar. They provide a sweet end to the meal, contrasting perfectly with the savory main dish’s richness.
Cheesy Beef Enchilada Tortellini Recipe FAQs
What is the best way to select ripened ingredients for my Cheesy Beef Enchilada Tortellini?
Absolutely! When choosing onions, look for those that are firm and free of dark spots. For garlic, pick bulbs that are plump with tightly packed skins. As for the cheese tortellini, opt for fresh ones that have a consistent dough shape without any cracks or dryness.
How should I store leftovers of Cheesy Beef Enchilada Tortellini?
Store your leftovers in an airtight container in the refrigerator for up to 3 days. This keeps the dish fresh and ready for a quick meal. If you want to keep it longer, transfer to an airtight freezer bag and store for up to 3 months; just be sure to label it with the date!
Can I freeze Cheesy Beef Enchilada Tortellini? If so, how?
Yes, you can! To freeze, allow the dish to cool completely. Then, transfer it into airtight freezer bags, removing as much air as possible to prevent freezer burn. Lay the bags flat in your freezer. When ready to eat, simply thaw overnight in the fridge and reheat in a skillet or microwave.
What should I do if my sauce seems too thick when making Cheesy Beef Enchilada Tortellini?
No problem! If your sauce is too thick, you can add a small amount of water or broth, one tablespoon at a time, and stir until you reach your desired consistency. Alternatively, adding a splash of heavy cream can enhance the creaminess while also thinning the sauce.
Are there any dietary considerations I need to keep in mind when making Cheesy Beef Enchilada Tortellini?
Certainly! For gluten-free options, you can easily substitute regular tortellini with a gluten-free variety. If you have allergies, be mindful of the cheese and cream cheese included; consider nut-based or dairy-free alternatives for those with lactose intolerance or dairy allergies. Always check package labels to ensure the chosen ingredients meet your dietary needs.
Cheesy Beef Enchilada Tortellini: Comfort Food in 30 Minutes
Ingredients
Equipment
Method
- In a large skillet, heat 2 tablespoons of olive oil over medium heat until shimmering. Add the diced onion and sauté for 3-4 minutes until translucent. Stir in minced garlic and sauté for 30 seconds.
- Add 1 pound of ground beef to the skillet. Cook for 5-7 minutes until browned, seasoning with salt, pepper, chili powder, and cumin. Drain excess fat.
- Pour in 1 cup of red enchilada sauce and stir thoroughly. Let it simmer for 3-5 minutes.
- Break 4 ounces of cream cheese into chunks and add to the skillet. Stir until melted and blended into the sauce.
- Gently fold in 12 ounces of refrigerated cheese tortellini and cook for 5-7 minutes until heated through.
- Sprinkle 1 cup of shredded mozzarella cheese on top, cover, and cook for 2-3 minutes until melted.