Introduction to BUTTERSCOTCH
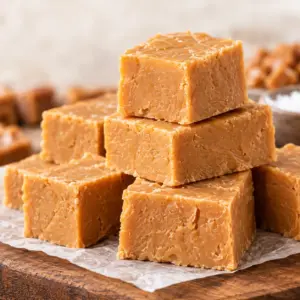
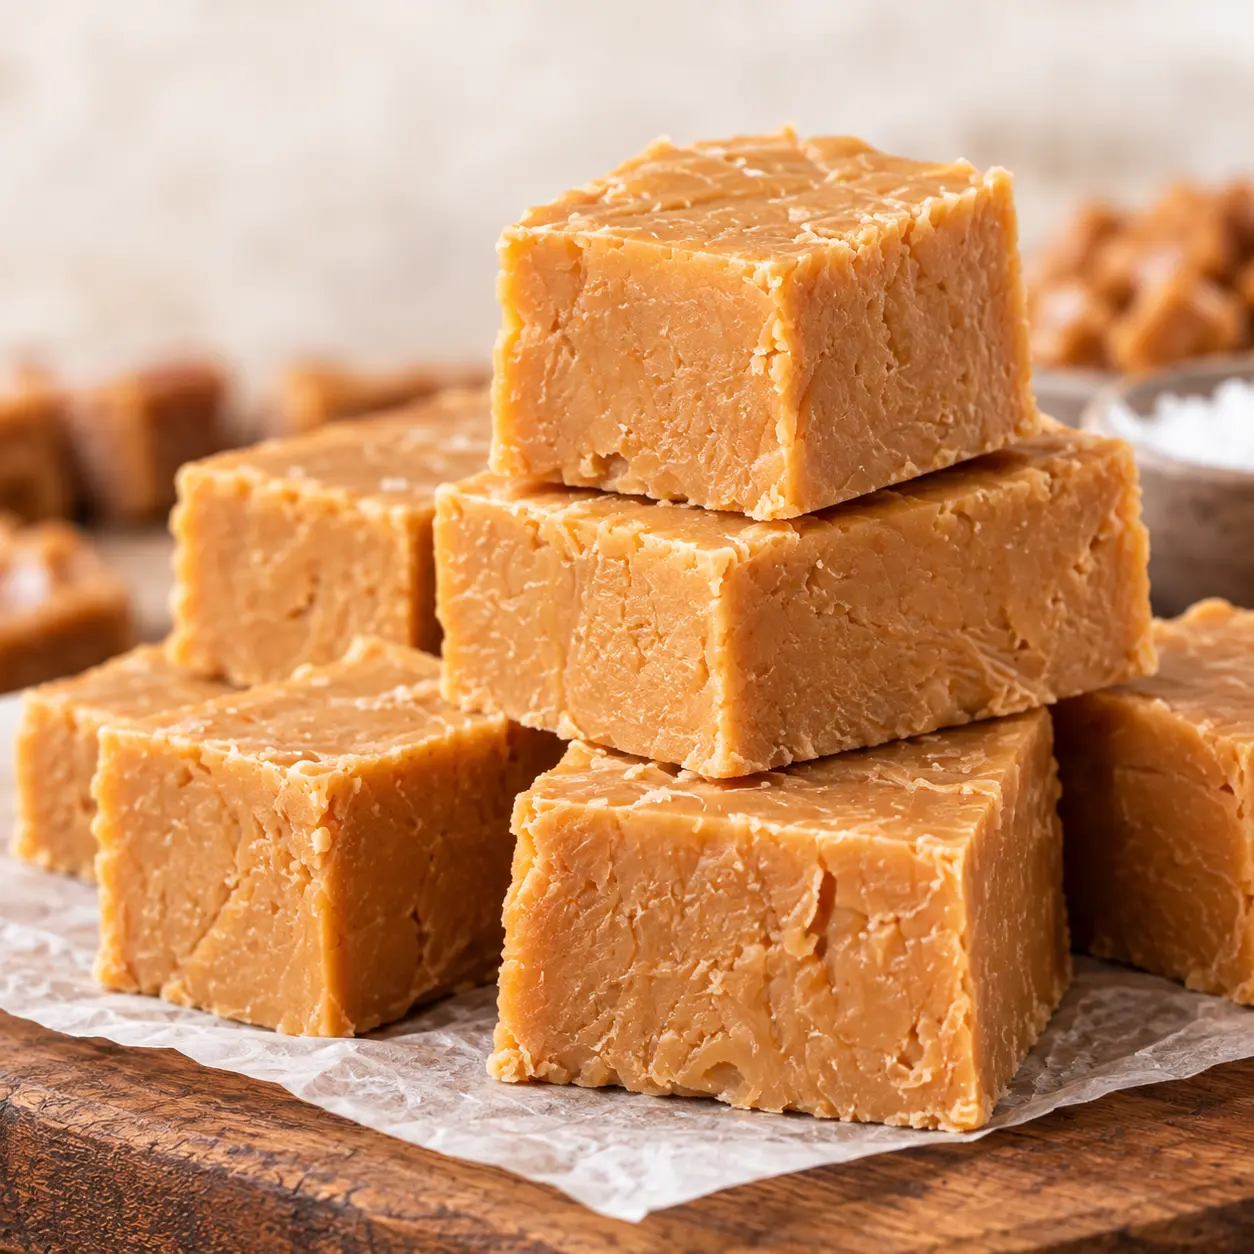
This butterscotch fudge is a simple three-ingredient recipe with a soft, creamy texture and a clear butterscotch flavor. The mixture comes together on the stovetop or in the microwave, then sets in the refrigerator while you get on with the rest of your day.
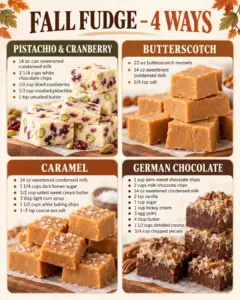
It is part of the FALL FUDGE – 4 WAYS collection, where each recipe starts with a dependable sweetened condensed milk base. For this version, butterscotch morsels do all the flavoring, while a small amount of salt keeps the sweetness in balance. Cut the chilled fudge into small squares for a fall dessert tray, a homemade gift, or an afternoon treat with coffee.
Why You'll Love This BUTTERSCOTCH
- You need only three ingredients, and each one is easy to find at a standard grocery store.
- The fudge does not require an oven, candy thermometer, or complicated sugar work.
- The recipe makes a smooth, sliceable confection with very little hands-on preparation.
- A short chill in the refrigerator gives the fudge a firm but creamy bite.
- The squares keep well in the refrigerator, so you can make them ahead for sharing or gifting.
Ingredients for BUTTERSCOTCH
- 22 oz butterscotch morsels
- 14 oz sweetened condensed milk
- 1/4 tsp salt
Use fresh butterscotch morsels that have been stored at room temperature, since older or overheated morsels may melt unevenly. The sweetened condensed milk should be the regular full-sugar kind, not evaporated milk or a reduced-sugar substitute. Measure the salt carefully because the morsels and condensed milk are already sweet.
How to Make BUTTERSCOTCH
Step 1: Prepare the Pan
Line an 8-inch square baking pan with parchment paper, leaving enough paper hanging over two opposite sides to act as handles. Lightly pressing the parchment into the corners helps it stay in place. This size pan gives the fudge a sturdy height and produces about 8 generous servings or more small squares. Set the prepared pan aside while you melt the mixture.
Step 2: Combine the Ingredients
Place the 22 oz butterscotch morsels, 14 oz sweetened condensed milk, and 1/4 tsp salt in a medium, heavy-bottomed saucepan. Stir the ingredients together before turning on the heat so the salt is distributed and the condensed milk coats the morsels. A heavy pan helps prevent hot spots while the morsels soften.
Step 3: Melt Gently
Warm the mixture over low heat, stirring often with a heatproof spatula. Continue for about 5 to 8 minutes, or until the morsels are almost completely melted and the mixture looks thick and glossy. Remove the pan from the heat as soon as the last small pieces soften, then keep stirring until completely smooth. Do not let the mixture boil, since excessive heat can make the fudge greasy, stiff, or grainy.
Step 4: Fill the Pan
Scrape the warm fudge mixture into the lined pan and spread it into an even layer with the spatula. Work steadily because the mixture begins to thicken as it cools. Gently tap the pan on the counter once or twice to settle the fudge and remove large air pockets, but avoid tapping hard enough to shift the parchment.
Step 5: Chill Until Firm
Place the pan in the refrigerator for at least 2 hours, or until the center feels firm when lightly pressed. For the cleanest cuts, chill it for 3 to 4 hours or leave it covered in the refrigerator overnight. Once the fudge has cooled fully, cover it so it does not absorb refrigerator odors or collect moisture on its surface.
Step 6: Cut and Serve
Lift the chilled fudge from the pan using the parchment handles and place it on a cutting board. Peel away the parchment, then use a sharp knife to cut the slab into squares. For neater edges, warm the knife under hot water, dry it completely, and make one cut before repeating. Store the cut fudge in a tightly covered container in the refrigerator.
Tips for Success
- Keep the heat low from the beginning. Butterscotch morsels can scorch or separate if they are heated too aggressively.
- Stir continuously during the final minute of melting so the mixture becomes smooth without staying over the heat longer than necessary.
- If the fudge looks slightly streaky after the pan comes off the heat, keep stirring for another 30 seconds. It often smooths out as the remaining morsels melt.
- Use parchment rather than wax paper because parchment is more reliable with a warm mixture and releases the chilled fudge easily.
- Let the fudge cool completely before stacking the pieces. Separate layers with parchment so the squares do not stick together.
- For small dessert portions, cut the chilled slab into 16 or 24 pieces instead of 8. Keep the listed serving count in mind when planning nutrition or storage.
Equipment Needed
- 8-inch square baking pan
- Medium heavy-bottomed saucepan
- Heatproof spatula
Variations
- For a slightly softer texture, chill the fudge for the minimum 2 hours and serve it cold rather than leaving it at room temperature for a long time.
- Cut the finished fudge into narrow rectangles for a neat candy-shop look, or use small squares for a dessert platter.
- For gift giving, place fully chilled pieces in small paper candy cups before packing them in a food-safe tin.
- Make a marbled appearance by spreading the warm mixture quickly and lightly dragging the tip of a knife across the surface before chilling.
- For the cleanest presentation, trim a very thin strip from each outside edge before cutting the remaining slab into even squares.
Serving Suggestions
Serve the fudge chilled or let it stand at room temperature for about 10 to 15 minutes before eating. The texture will soften slightly as it warms. Arrange the pieces on a small dessert plate with coffee, tea, or a glass of cold milk. Because this is a rich confection, small squares are usually enough for a serving. Keep any uneaten pieces covered and refrigerated, and do not leave the fudge at room temperature for more than 2 hours, or 1 hour if the room is above 90°F.
FAQs about BUTTERSCOTCH
Can I make butterscotch fudge in the microwave? Yes. Combine all three ingredients in a large microwave-safe bowl and heat at 50 percent power in 30-second intervals, stirring thoroughly after each interval. Stop when only a few morsels remain, then stir until smooth. Microwave ovens vary, so avoid overheating the mixture or allowing it to boil.
Why did my butterscotch fudge turn grainy? Graininess usually comes from overheating, uneven melting, or allowing the mixture to cool while it still contains unmelted morsels. Use low heat, stir often, and remove the pan as soon as the morsels are nearly melted. Finish smoothing the mixture off the heat.
How long does homemade butterscotch fudge last? When tightly covered and refrigerated, the fudge is best within about 1 week. Keep it in a clean, airtight container and separate layers with parchment. Discard it if it develops an unusual odor, visible mold, or a wet, spoiled appearance.
Can I freeze this fudge? Yes. Wrap fully chilled pieces tightly, place them in a freezer-safe container, and freeze for up to 2 months for the best texture. Thaw the container in the refrigerator before opening it, then serve the fudge chilled or let it stand briefly at room temperature.
How do I cut fudge without ragged edges? Chill the fudge until firm and use a large sharp knife. Warm and dry the blade between cuts, or lightly coat it with a neutral, flavorless oil if it sticks. Make firm downward cuts rather than sawing back and forth.
Final Thoughts
This butterscotch fudge keeps the method straightforward while still giving you a polished homemade treat. Melt the morsels gently, chill the mixture fully, and cut it into the size that suits your table. With only three ingredients, it is an easy recipe to keep on hand whenever you need a make-ahead fall dessert.
Looking for more? This recipe is part of our roundup of 4 Fall Fudge Recipes For Easy Dessert Trays And Gifting.
BUTTERSCOTCH
Ingredients
Equipment
Method
- Line an 8-inch square pan with parchment, leaving overhang on two sides.
- Combine the 22 oz butterscotch morsels, 14 oz sweetened condensed milk, and 1/4 tsp salt in a heavy saucepan.
- Melt over low heat for 5 to 8 minutes, stirring often, until nearly smooth.
- Remove from the heat and stir until completely smooth, then spread the mixture in the prepared pan.
- Refrigerate for at least 2 hours, or until firm.
- Lift out, cut into squares, and store covered in the refrigerator.
Nutrition
Notes
- Do not let the mixture boil; excessive heat can cause a greasy or grainy texture.
- For clean cuts, warm and dry the knife between slices.
- Keep the finished fudge covered and refrigerated, and do not leave it at room temperature for more than 2 hours.