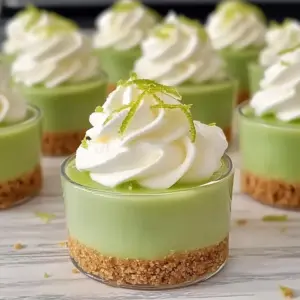
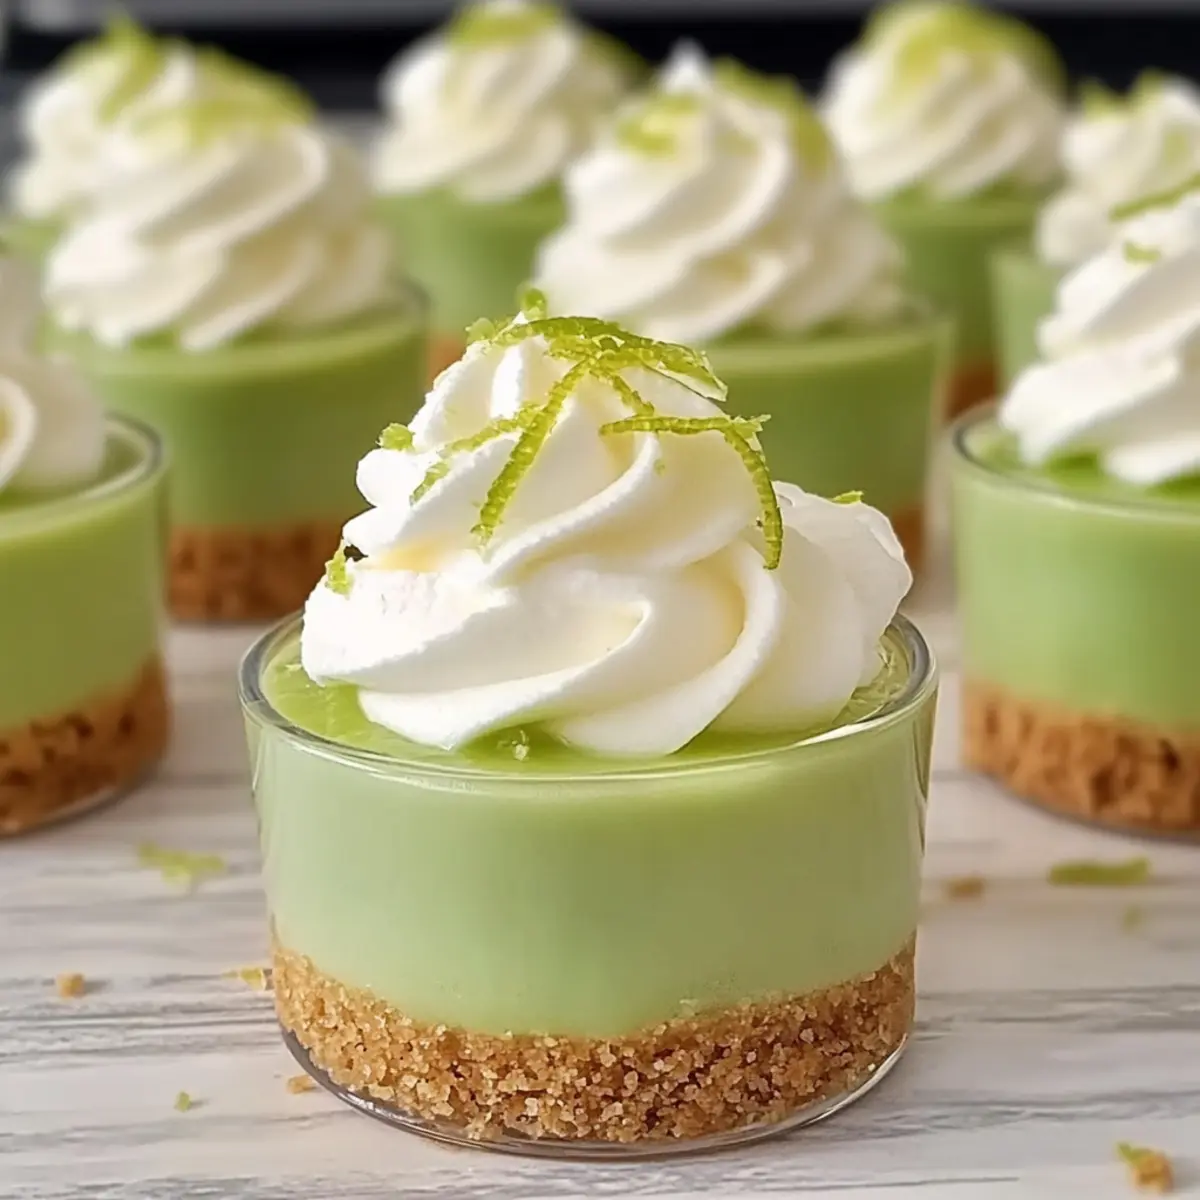
“With a rush of zesty freshness that dances on your taste buds, these No-Bake Key Lime Cheesecake Cups are an absolute delight! This recipe is a game-changer for anyone wanting a quick, no-fuss dessert that brings the bright flavors of citrusy goodness to your table. Each cup features a creamy, tangy filling layered over a buttery graham cracker crust, making it irresistibly delicious. Not only are they incredibly easy to whip up, but they’re also perfectly portioned for any gathering—ideal for impressing guests or treating yourself on a warm evening. Plus, you can customize these little beauties with your favorite toppings or citrus variations. Ready to take your taste buds on a tropical vacation? Let’s dive into this fun, no-bake adventure!”
Why are No-Bake Cheesecake Cups a Must-Try?
Effortless Preparation: These delightful No-Bake Key Lime Cheesecake Cups come together in no time, perfect for busy schedules or spontaneous gatherings.
Bursting with Flavor: The tangy key lime filling paired with a buttery graham cracker crust delivers a refreshing experience that will keep everyone coming back for more.
Versatile Options: Customize your dessert by swapping the key lime for lemon or orange juice or topping with fresh berries—there’s a delicious twist for everyone!
Perfectly Portioned: Individual servings mean no fuss with slicing and serving, allowing you to enjoy your treat just as you like it.
Crowd-Pleasing Appeal: These desserts are sure to impress at any event, from summer picnics to birthday parties—everyone will love the vibrant citrus flavor!
Check out these tips for making the most of your desserts with easy substitutions that suit any dietary preference.
No-Bake Key Lime Cheesecake Cup Ingredients
• For the Crust
- Graham Cracker Crumbs – Provides the crust structure and a sweet, crunchy texture. Substitution: Can use crushed digestive biscuits or cookie crumbs.
- Granulated Sugar – Sweetens the crust. Substitution: Use a sugar substitute for a lower-calorie option.
- Melted Butter – Binds the crust ingredients together. Substitution: Coconut oil can be used for a dairy-free version.
• For the Filling
- Cream Cheese – Forms the base of the cheesecake filling, providing creaminess. Substitution: Use ricotta cheese or a vegan cream cheese alternative for a lighter or dairy-free version.
- Powdered Sugar – Sweetens the cheesecake filling and helps maintain a smooth texture. No substitution necessary for the desired creaminess.
- Key Lime Juice – Key flavoring ingredient; offers a tangy citrus taste. Substitution: Regular lime juice can be used, but the flavor will differ slightly.
- Lime Zest – Adds an extra burst of citrus aroma and flavor. Optional ingredient; can omit if desired.
- Whipped Topping – Adds lightness and creaminess to the filling. Substitution: Homemade whipped cream or a dairy-free whipped topping works well.
These No-Bake Key Lime Cheesecake Cup ingredients set the stage for delightful flavors that everyone will savor!
Step‑by‑Step Instructions for No-Bake Key Lime Cheesecake Cups
Step 1: Prepare the Crust
In a medium bowl, combine graham cracker crumbs, granulated sugar, and melted butter. Mix them together thoroughly until the crumbs are evenly coated and the mixture resembles wet sand. Spoon this mixture into individual serving cups, pressing it firmly into the bottom to create a solid crust. Chill in the refrigerator while you prepare the filling.
Step 2: Make the Filling
In a large mixing bowl, beat the softened cream cheese with an electric mixer on medium speed until smooth and creamy, about 2-3 minutes. Gradually add in the powdered sugar, mixing until fully incorporated. Next, pour in the key lime juice and lime zest, continuing to mix until well combined and the filling is silky.
Step 3: Add Whipped Topping
Gently fold in the whipped topping using a spatula, taking care to combine the ingredients without deflating the mixture. The goal is to achieve a light and fluffy consistency while fully mixing the cream cheese filling. This delightful mixture is what makes the No-Bake Key Lime Cheesecake Cups so creamy and refreshing!
Step 4: Assemble
Retrieve your prepared crusts from the refrigerator and scoop the key lime filling into each cup, smoothing the tops with a spatula for an attractive finish. Cover the cups with plastic wrap and place them back in the refrigerator to chill for at least 2 hours, allowing the filling to firm up beautifully.
Step 5: Serve
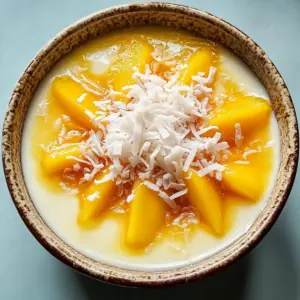
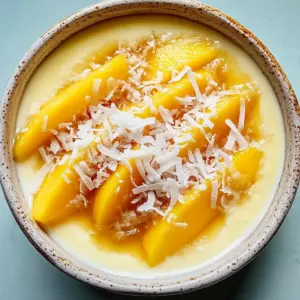
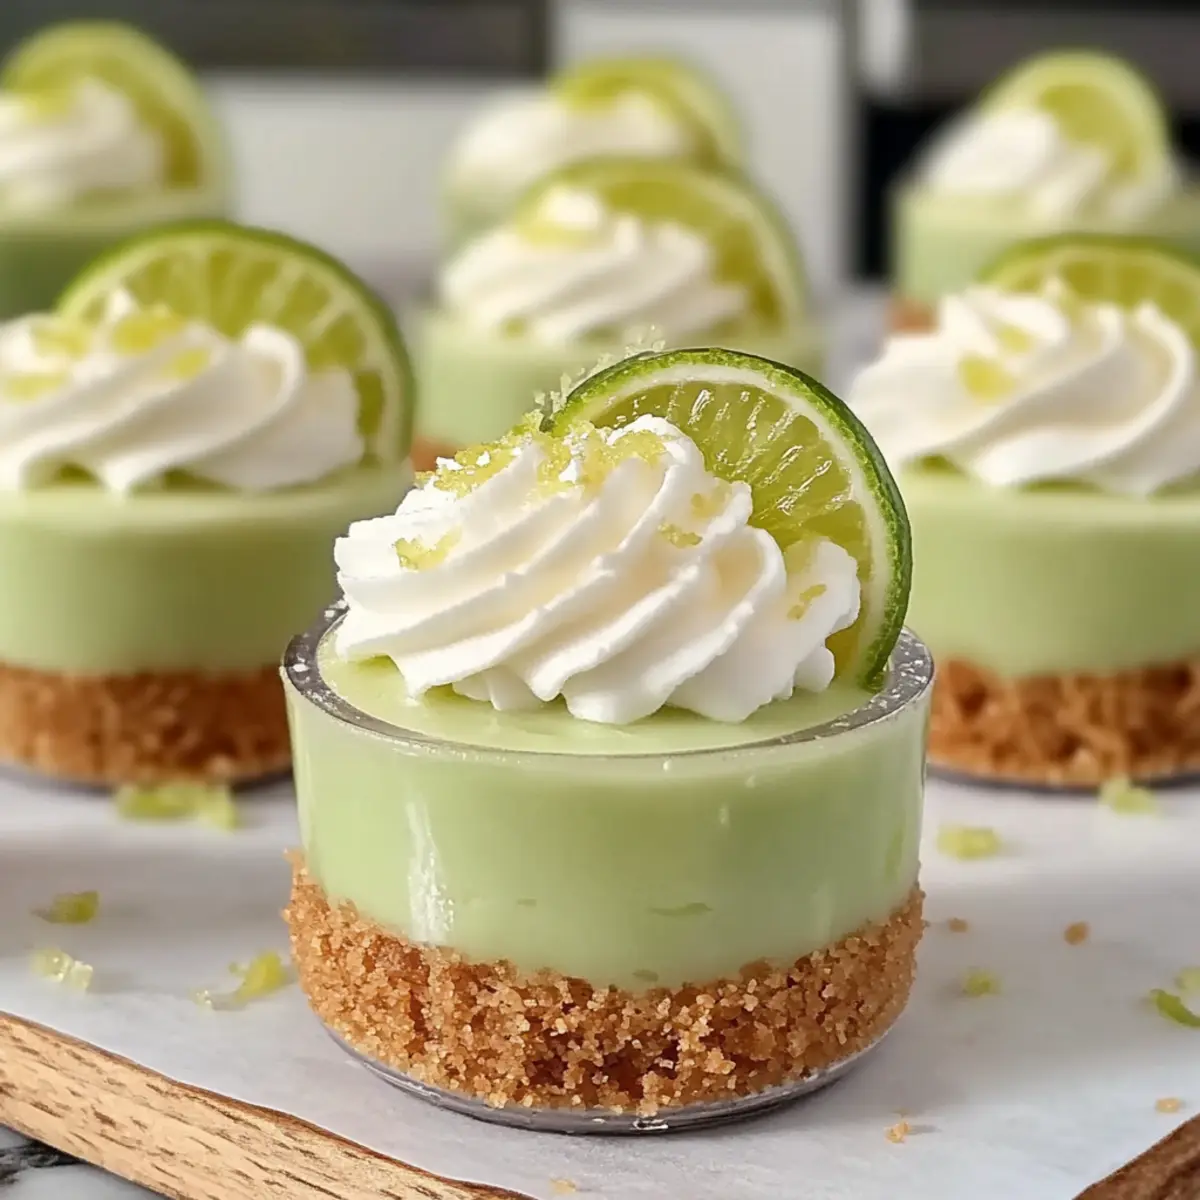
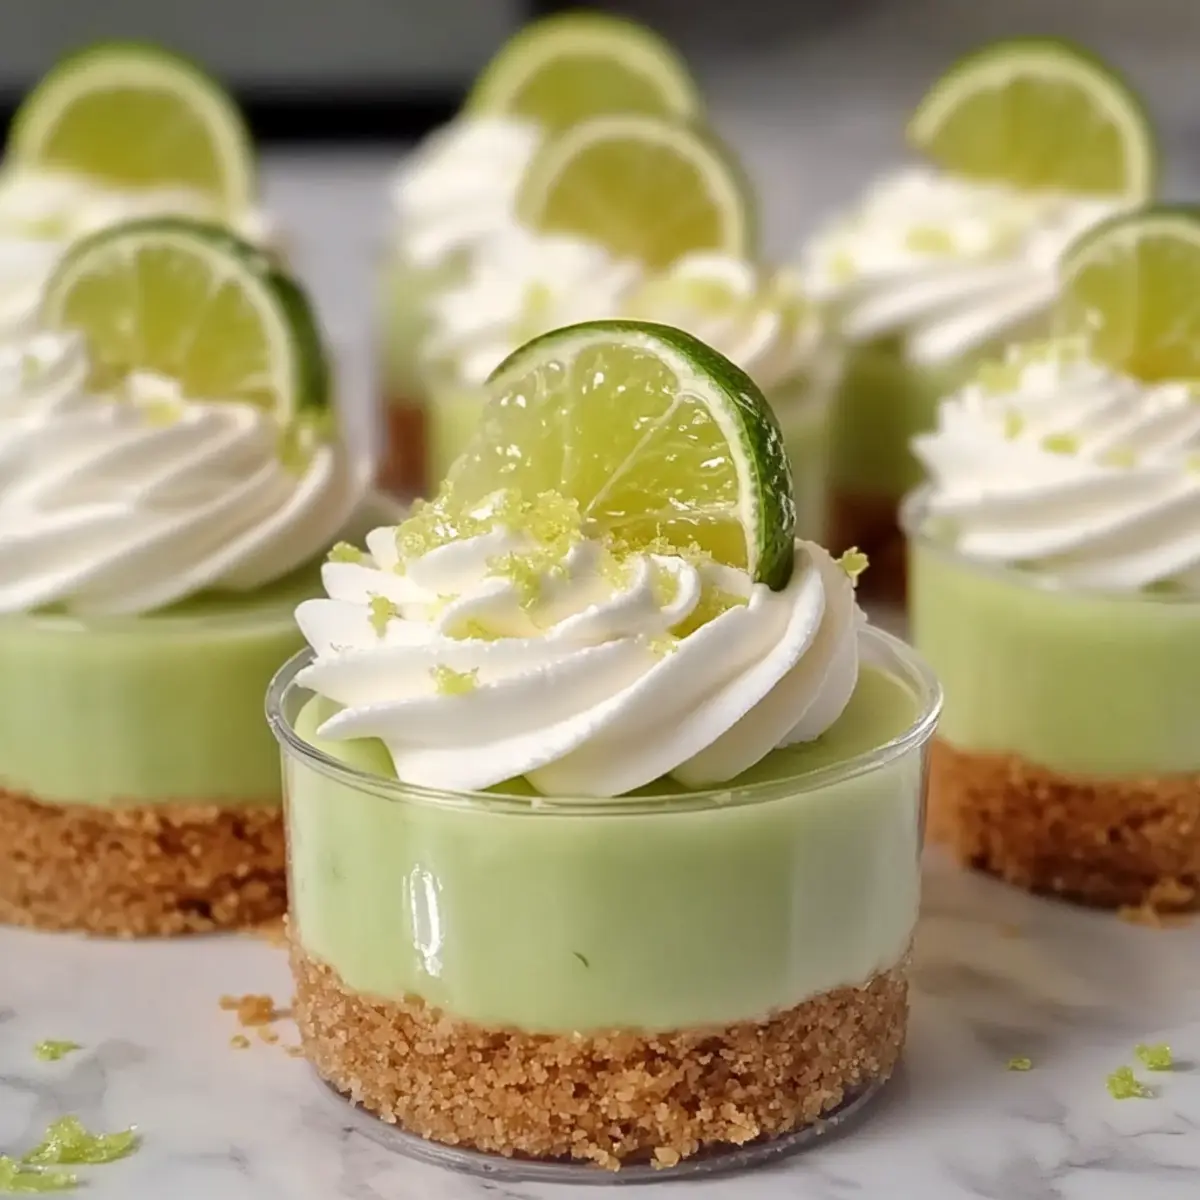
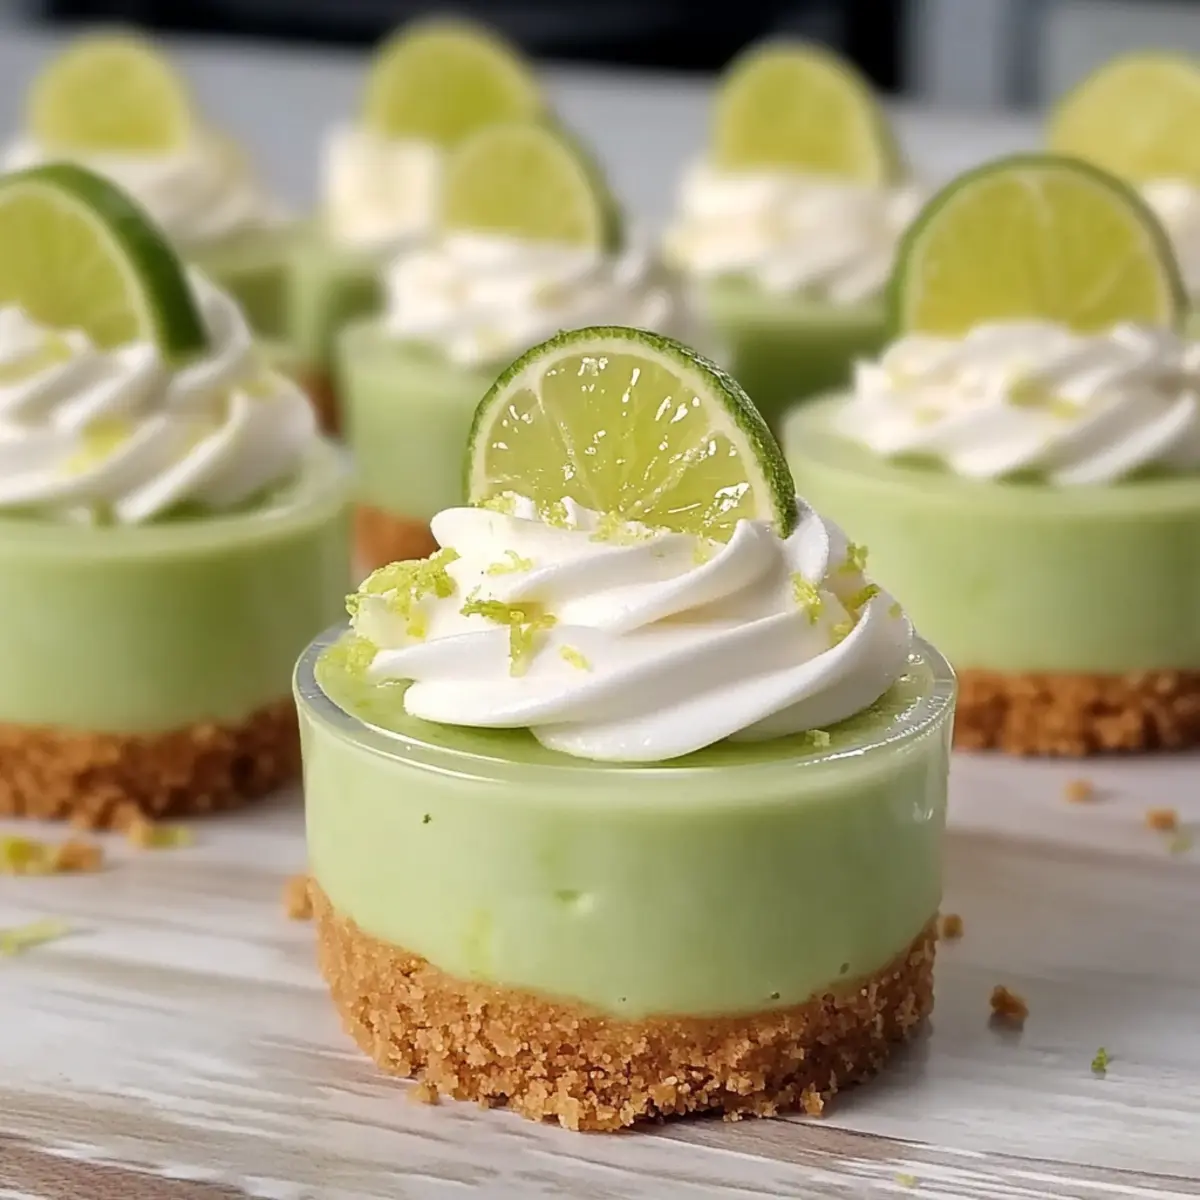
Once set, remove the cups from the refrigerator. For a beautiful presentation, garnish each No-Bake Key Lime Cheesecake Cup with a dollop of whipped topping and a sprinkle of lime zest. Enjoy this refreshing dessert as a perfect treat for any occasion!
No-Bake Key Lime Cheesecake Cups Variations
Feel free to make these No-Bake Key Lime Cheesecake Cups your own, and explore delightful twists that will dazzle your taste buds!
-
Dairy-Free: Swap cream cheese for a vegan cream cheese alternative and use coconut whipped cream for a luscious, dairy-free option.
-
Sugar-Free: Use a sugar substitute like stevia or monk fruit sweetener in the crust and filling for a low-calorie dessert that doesn’t skimp on taste.
-
Flavor Infusion: Try using lemon or orange juice instead of key lime. The bright flavors will deliver a refreshing twist that’s equally delicious and inviting.
-
Nutty Crunch: Add finely chopped nuts, such as almonds or pistachios, to the crust for an added layer of flavor and texture. This will bring a delightful crunch to each bite.
-
Berry Bliss: Top your cheesecake cups with fresh berries or a berry compote. This not only enhances the visual appeal but also adds a sweet and tangy contrast to the creamy filling.
-
Chocolate Lovers: Fold in melted chocolate or cocoa powder into the filling for a rich twist on the classic recipe. It’s a fantastic way to satisfy any chocolate cravings!
-
Spicy Citrus: Incorporate a pinch of cayenne pepper or chili powder into the filling for a subtle kick that perfectly complements the citrusy notes. It’s an adventurous twist that will surprise your guests.
-
Serving Style: Layer the crust and filling in jars or parfait glasses instead of cups for a beautiful presentation. The layers will create a stunning visual and make serving a breeze.
Each of these variations will help you make this recipe truly yours, and as always, feel free to check out more helpful ideas for customizing your favorite desserts!
Make Ahead Options
Preparing these No-Bake Key Lime Cheesecake Cups in advance is a fantastic way to save time, especially for busy weeknights or gatherings! You can make the crust and filling up to 24 hours ahead of time; simply store the crust in the cups separately from the filling in the refrigerator to prevent sogginess. When ready to serve, layer the filling over the chilled crust, smooth the tops, and chill for another 30 minutes if needed. This ensures the dessert is just as delicious while allowing flavors to meld beautifully. With these prep-ahead tips, you’ll have a delightful treat ready to impress at a moment’s notice!
Expert Tips for No-Bake Key Lime Cheesecake Cups
-
Room Temperature Cream Cheese: Ensure your cream cheese is softened to room temperature to avoid lumps, resulting in a smooth, creamy filling.
-
Proper Chilling: Chill the assembled cups for at least two hours to allow the filling to firm up and set properly, ensuring the perfect texture.
-
Gentle Folding: When adding the whipped topping, fold gently to maintain airiness—overmixing can lead to a dense filling.
-
Flavor Variations: Feel free to experiment with flavor by swapping key lime juice for lemon or orange juice, creating a delightful twist on the classic recipe.
-
Presentation Tips: Garnish with additional whipped topping and fresh lime zest for an eye-catching finish that will impress guests and elevate your dessert!
These tips will help you create the best No-Bake Key Lime Cheesecake Cups full of flavor and charm!
What to Serve with No-Bake Key Lime Cheesecake Cups
Brighten your meal with delightful pairings that complement these creamy dessert cups.
-
Fresh Berries: Juicy, seasonal berries add a burst of color and tartness, enhancing the creamy texture of the cheesecake.
-
Coconut Macaroons: The chewy sweetness of coconut macaroons provides a playful contrast to the tangy cheesecake, creating an irresistible duo.
-
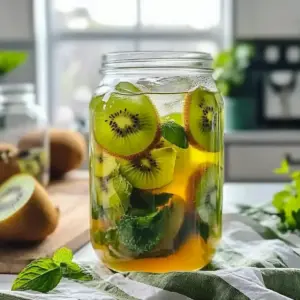
Iced Tea: A refreshing glass of iced tea, whether sweetened or herbal, offers a cooling beverage that balances the zesty flavors of the dessert.
-
Mint Sprigs: A sprig of fresh mint serves as an elegant garnish, introducing a crisp aroma that livens up each bite of cheesecake.
-
Chilled Wine: A light, citrusy white wine like Sauvignon Blanc pairs beautifully with the bright flavors of key lime, making it an inviting addition.
-
Chocolate Shavings: A sprinkle of dark chocolate shavings adds a touch of decadence, offering a delicious contrast to the tangy sweetness of the cheesecake.
These thoughtful pairings create a delightful experience around your No-Bake Key Lime Cheesecake Cups, making every gathering sweeter!
Storage Tips for No-Bake Key Lime Cheesecake Cups
-
Fridge: Store your No-Bake Key Lime Cheesecake Cups in the refrigerator for up to 3 days in an airtight container to maintain freshness and prevent flavors from mingling.
-
Freezer: For longer preservation, freeze the cheesecake cups for up to 2 months. Wrap each cup tightly in plastic wrap before placing them in a freezer-safe container.
-
Thawing: When you’re ready to enjoy, transfer the cups to the refrigerator to thaw overnight. This will ensure a creamy texture when served.
-
Reheating: These cheesecake cups are best served cold, so there’s no need to reheat; simply enjoy straight from the fridge!
No-Bake Key Lime Cheesecake Cups Recipe FAQs
Can I use any type of lime juice?
Absolutely! While key lime juice is the star ingredient, you can use regular lime juice as a substitute. Just keep in mind that the flavor will differ slightly, presenting a more familiar tartness rather than the subtle sweetness of key limes.
How should I store my No-Bake Key Lime Cheesecake Cups?
For best results, store your cheesecake cups in an airtight container in the refrigerator for up to 3 days. This keeps them fresh and prevents mingling of flavors. If you plan to enjoy them later, you can freeze them for up to 2 months. Just make sure they’re tightly wrapped in plastic wrap or placed in a freezer-safe container!
What’s the best way to freeze them?
To freeze your No-Bake Key Lime Cheesecake Cups, first, chill them in the fridge for the recommended time. Next, wrap each cup tightly in plastic wrap and place them in a freezer-safe container. This prevents freezer burn and helps maintain the lovely creamy texture. When you’re ready to eat, simply transfer them to the refrigerator to thaw overnight!
What if my filling is too runny?
No worries! If your filling seems too runny, it might be because the cream cheese wasn’t softened enough, or it was overmixed. To fix this, ensure your cream cheese is at room temperature before starting. If the mixture is too runny, try chilling it for a bit longer in the refrigerator, as this could help firm it up. If all else fails, a little extra powdered sugar can help thicken it up.
Are there any dietary considerations I should be aware of?
Definitely! If someone has a dairy allergy, you can substitute the cream cheese with a vegan cream cheese alternative and opt for a dairy-free whipped topping. For those watching their sugar intake, consider using a sugar substitute in the crust and filling. Always make sure to check all ingredients for allergens to keep everyone safe and happy!
No-Bake Key Lime Cheesecake Cups for Effortless Summer Joy
Ingredients
Equipment
Method
- In a medium bowl, combine graham cracker crumbs, granulated sugar, and melted butter. Mix until the crumbs resemble wet sand. Fill individual cups and chill.
- In a large mixing bowl, beat cream cheese until smooth. Gradually add powdered sugar, then stir in key lime juice and lime zest until silky.
- Gently fold in the whipped topping to achieve a light, fluffy consistency.
- Scoop the filling into the crusts, smooth the tops, cover with plastic wrap, and chill for at least 2 hours.
- Garnish with whipped topping and lime zest before serving. Enjoy!