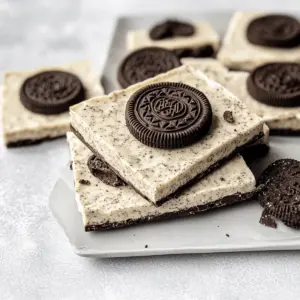
I once stumbled upon a little gem of a recipe that turned my dessert game upside down: White Chocolate Oreo Bark. With just a few simple ingredients and zero baking required, this sweet creation is the perfect antidote to any cookie craving. Imagine creamy white chocolate melding seamlessly with crunchy Oreo pieces, creating a treat that’s as delightful to eat as it is to share. Plus, it’s a breeze to whip up, making it a go-to for unexpected guests or a fun family project. This no-bake dessert not only satisfies your sweet tooth but also doubles as a thoughtful edible gift that friends and family will adore. Ready to dive into this delightful treat and discover the joy of making your own bark?
Why is White Chocolate Oreo Bark so Loved?
Simplicity and ease: This no-bake recipe requires minimal effort, making it perfect for busy days or last-minute gatherings. Decadent flavor: The creamy white chocolate combined with crunchy Oreos creates a delightful contrast that’s hard to resist. Versatile gift: Wrap it up beautifully, and it becomes a thoughtful gift for any occasion. Family-friendly: Involve the kids in making this bark for a fun kitchen activity that everyone will enjoy. Lastly, quick to set: With just 30 minutes in the fridge, you’ll be indulging in your sweet creation in no time! Why not pair it with your favorite drink for an extra special treat?
White Chocolate Oreo Bark Ingredients
The simplest and most delicious way to satisfy your sweet tooth!
For the Bark
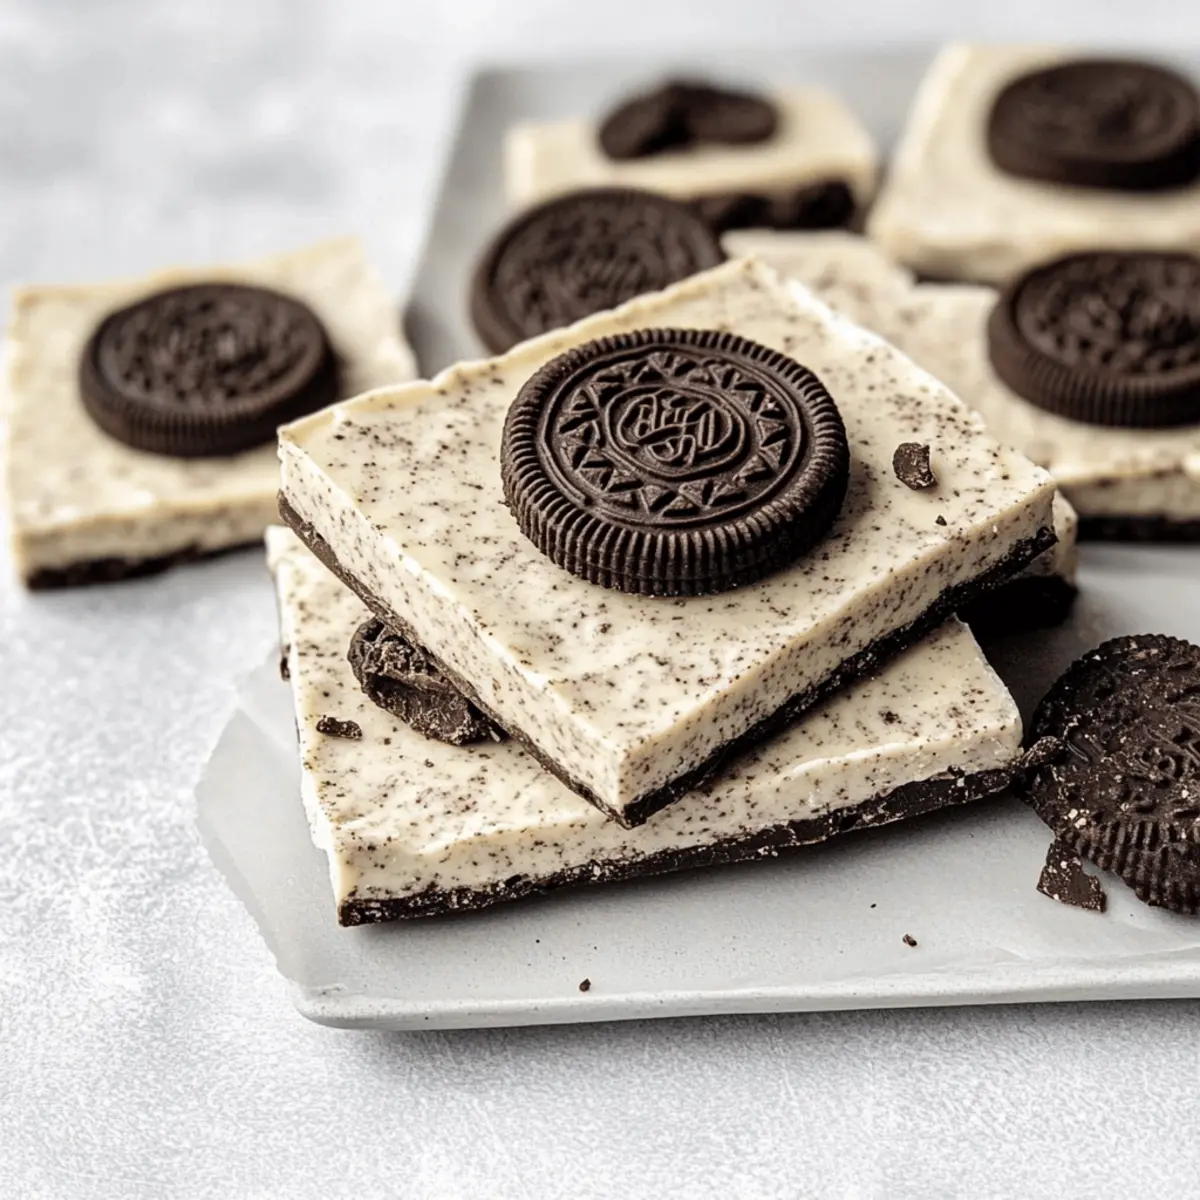
- 14 oz (410g) white chocolate – Be sure to use high-quality chocolate for a creamy texture that melts beautifully.
- 5 whole Oreos – Crush them finely to infuse their delightful flavor throughout the bark.
For Topping
- Additional Oreos – Use some whole, halved, and crushed for a decorative finish that enhances both texture and presentation.
This no-bake White Chocolate Oreo Bark is easy to make and sure to please all your friends and family!
Step‑by‑Step Instructions for White Chocolate Oreo Bark
Step 1: Prep the Pan
Start by lining a large baking tray with parchment paper, ensuring it covers the bottom and edges. This step is crucial for easy removal and clean-up later. Aim for a tray that measures about 9×13 inches for optimal thickness. Having the pan ready will streamline the process as you prepare your White Chocolate Oreo Bark.
Step 2: Melt the Chocolate
In a microwave-safe bowl, add the 14 oz of white chocolate. Heat the chocolate in 20-second intervals, stirring after each period, until it is completely melted and smooth. This should take about 1 to 2 minutes total. Be cautious not to overheat, and look for a glossy consistency that indicates it’s ready for mixing.
Step 3: Mix in Oreos
Once the white chocolate is melted, remove it from the microwave and immediately stir in the crushed Oreos. Mix well until the Oreo crumbs are evenly distributed throughout the chocolate, creating a wonderful blend of flavors. The mixture should be thick and creamy, reflecting the delightful essence of White Chocolate Oreo Bark.
Step 4: Spread Mixture
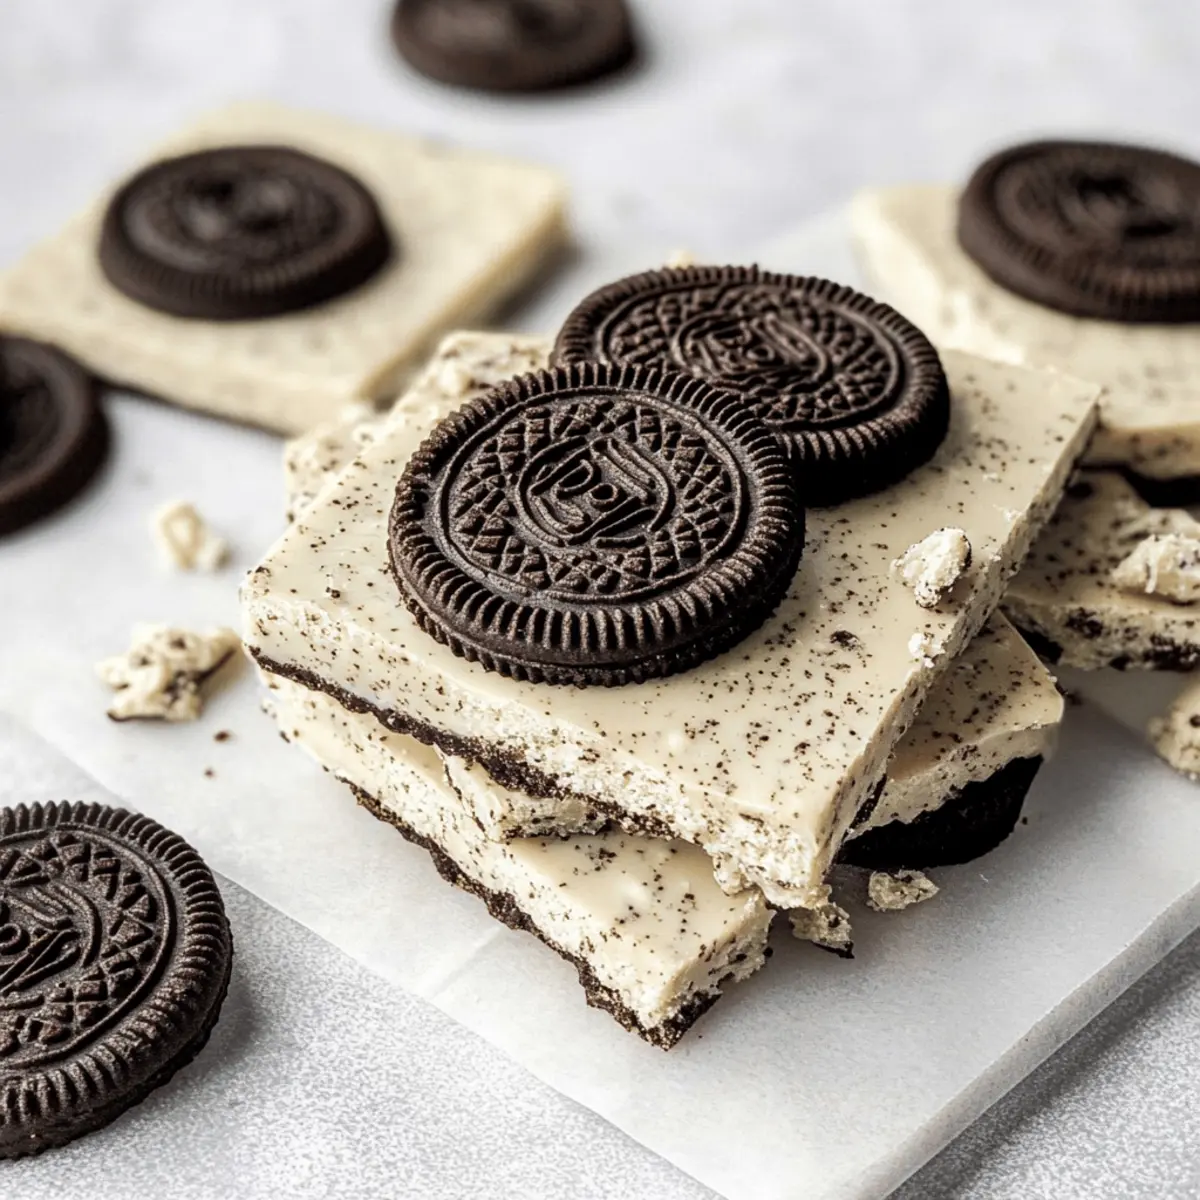
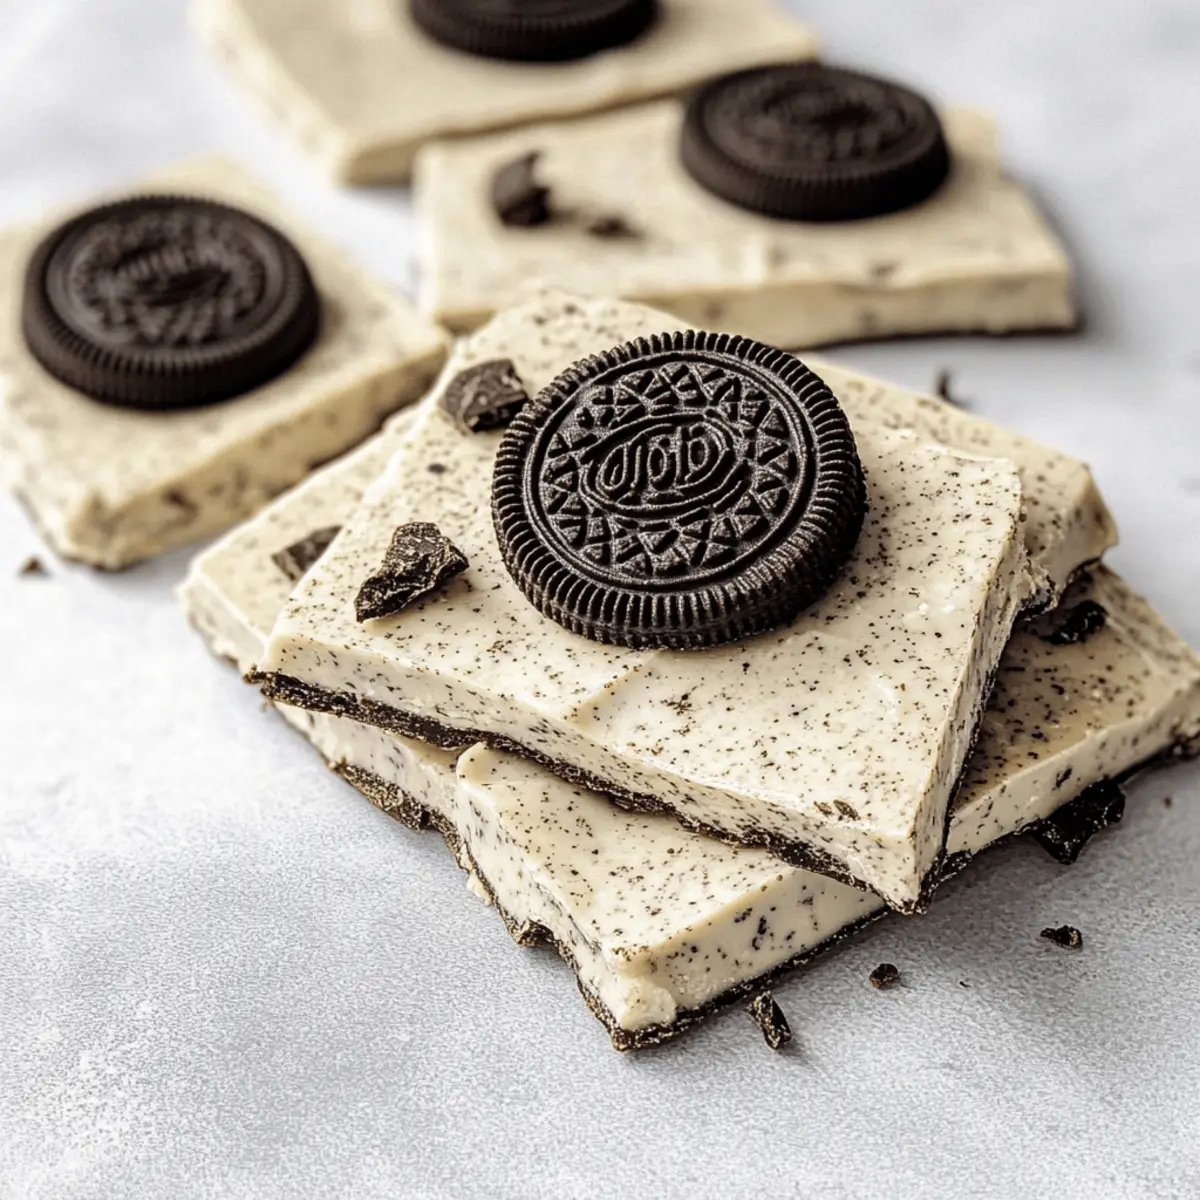
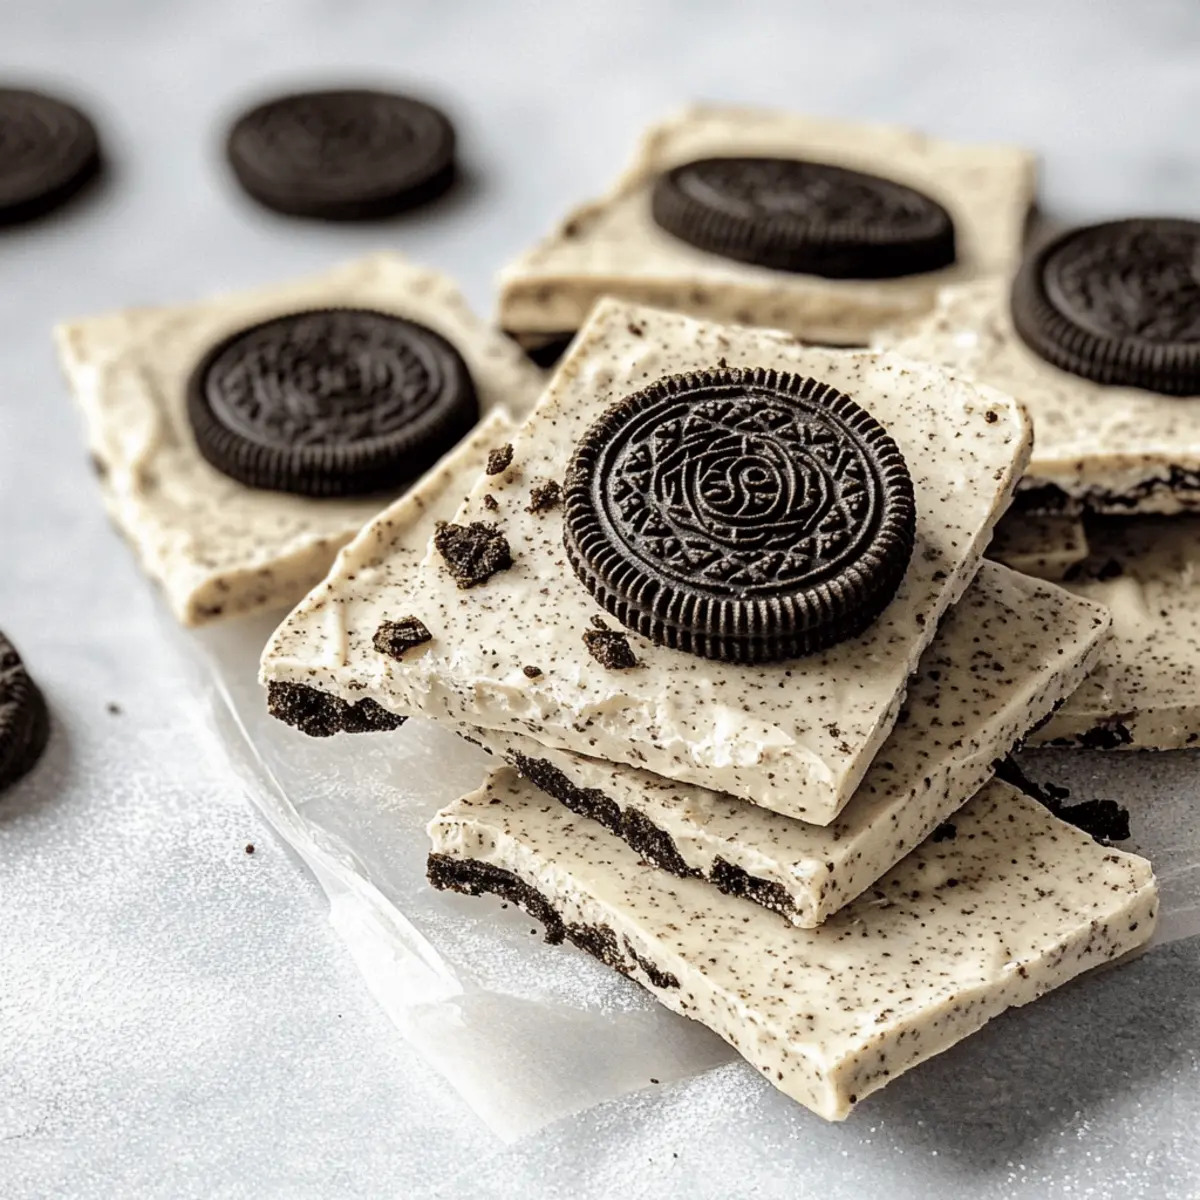
Carefully pour the Oreo-infused chocolate mixture onto the prepared baking tray. Use a spatula to spread it into an even layer, about ½ inch thick, making sure to reach the corners. This thick rectangle will form the base of your bark, and you want it to be uniform for even setting.
Step 5: Add Toppings
Before the chocolate sets, scatter additional Oreos on top—some whole, some halved, and others crushed for added texture. Press them gently into the melted chocolate to ensure they adhere well, enhancing both the visual appeal and flavor of your White Chocolate Oreo Bark.
Step 6: Set the Bark
Transfer the baking tray to the refrigerator and allow the bark to set completely, which typically takes about 30 minutes. Ensure that it feels firm to the touch before removing it. This chilling time is essential for achieving the perfect texture and makes breaking the bark into pieces easier later on.
Step 7: Break and Enjoy
Once the White Chocolate Oreo Bark has fully set, remove it from the refrigerator and lift it from the tray using the parchment paper. Break it into irregular pieces using your hands or a sharp knife for a rustic look. Enjoy your sweet treat or package it up as a delightful gift for friends and family!
Expert Tips for White Chocolate Oreo Bark
-
Quality Chocolate: Use high-quality white chocolate for the best results; it makes the bark smoother and creamier. Low-quality chocolate can lead to a grainy texture.
-
Even Distribution: When mixing in the crushed Oreos, ensure they are evenly distributed. This prevents clumping and guarantees that every bite of White Chocolate Oreo Bark has that delightful crunch.
-
Optimal Cooling: Allow the bark to set in the refrigerator for a full 30 minutes. Rushing this step can result in a sticky texture that’s hard to work with later.
-
Variety in Toppings: Get creative with your toppings! Adding a drizzle of dark chocolate or sprinkles not only adds flavor but also makes your bark visually stunning.
-
Storage Solutions: Store your finished bark in an airtight container to maintain its freshness. Proper storage prevents it from absorbing any odors or moisture.
Make Ahead Options
These White Chocolate Oreo Bark treats are perfect for busy home cooks who crave homemade desserts! You can easily melt the white chocolate and mix in the crushed Oreos up to 24 hours in advance, refrigerating the mixture for later use. Once prepped, simply store the mixture in an airtight container until you are ready to spread it in the baking tray and add your toppings. To maintain freshness, keep it chilled and ensure it’s sealed properly to prevent absorption of any unwanted flavors. When you’re ready to enjoy, just spread the mixture, add the extra Oreos, and let it set in the fridge for about 30 minutes for that delicious final touch!
How to Store and Freeze White Chocolate Oreo Bark
- Room Temperature: Keep the bark in an airtight container at room temperature for up to 3 weeks to maintain its texture and flavor.
- Fridge: For longer freshness, store the bark in the refrigerator, where it can last for up to 4 weeks. Make sure it’s well-wrapped to avoid moisture absorption.
- Freezer: White Chocolate Oreo Bark freezes beautifully for up to 2 months. Wrap pieces tightly in plastic wrap and place them in a freezer-safe container.
- Reheating: Thaw frozen bark overnight in the fridge before serving. Enjoy straight from the fridge for a refreshing treat or allow it to come to room temperature for a softer texture.
White Chocolate Oreo Bark Variations
Feel free to unleash your creativity and customize this delightful recipe to match your taste buds!
- Milk Chocolate: Swap white chocolate for milk chocolate for a richer, classic flavor that many adore.
- Dark Chocolate: For a bolder taste, use dark chocolate to enhance the sweetness of the Oreos and create a sophisticated dessert.
- Nutty Addition: Stir in chopped nuts like walnuts or almonds for an extra crunch and depth of flavor.
- Fruity Twist: Add dried fruit such as cranberries or raisins for a delightful contrast to the creamy chocolate.
- Minty Fresh: Incorporate mint extract into the melted chocolate for a refreshing twist; top with crushed peppermint for extra flair.
- Spicy Kick: Sprinkle a pinch of cayenne pepper or chili powder on top before it sets to create a unique spicy-sweet bark.
- Gluten-Free Option: To cater to gluten sensitivities, use gluten-free Oreos and ensure all other ingredients are also gluten-free.
- Flavored Extracts: Experiment with different extracts (like vanilla or orange) to take your bark to gourmet levels.
Enjoy this no-bake White Chocolate Oreo Bark with a twist, and don’t forget to pair it with your favorite beverage for an indulgent experience! It’s all about personalizing your sweet treat to make it even more special. For other delightful desserts, you might also like to explore these easy dessert recipes or try your hand at creative treats.
What to Serve with White Chocolate Oreo Bark?
Pair your delightful treat with a variety of accompaniments to elevate your dessert experience.
- Creamy Vanilla Ice Cream: A scoop of vanilla ice cream enhances the sweetness and adds a velvety texture to each bite of bark.
- Fruity Berry Compote: A drizzle of warm berry compote provides a tart contrast that balances the sweetness of the Oreo bark beautifully.
- Fresh Strawberries: Serve alongside plump, juicy strawberries for a refreshing crunch that complements the rich white chocolate.
- Nutty Trail Mix: A handful of nutty trail mix adds a delicious crunch and a contrasting earthy flavor, heightening the overall taste experience.
- Espresso or Coffee: Sip on a rich espresso or coffee for a sophisticated pairing; the bitterness cuts through the sweetness, creating a perfect balance.
- Chocolate-Covered Pretzels: These provide a delightful salty crunch, making them a fantastic contrast to the creamy sweetness of your White Chocolate Oreo Bark.
- Milkshake: Blend up a classic milkshake for an indulgent treat that complements the creamy texture of the bark and is sure to please everyone.
- Mint Chocolate Tea: A warm cup of mint chocolate tea lends a soothing finish; the mint flavor adds a refreshing note that rounds out your dessert moment.
- Peanut Butter Dip: Whip up a quick peanut butter dip for an irresistibly creamy pairing that adds an unexpected twist and boosts flavor depth.
White Chocolate Oreo Bark Recipe FAQs
How do I select the best white chocolate for my bark?
Absolutely! When selecting white chocolate, opt for high-quality brands that list cocoa butter as one of the first ingredients. This ensures a creamy and smooth texture. Avoid chocolate labeled as “white coating” or “white chips,” as they often contain more sugar and less cocoa butter, resulting in a grainy bark.
What’s the best way to store leftover White Chocolate Oreo Bark?
Very good question! Store your White Chocolate Oreo Bark in an airtight container at room temperature for up to 3 weeks. If you want it to last a little longer, refrigerate it where it can maintain its freshness for up to 4 weeks. Just make sure the container is sealed well to keep it from absorbing any odors!
Can I freeze White Chocolate Oreo Bark?
Absolutely! To freeze your White Chocolate Oreo Bark, first, wrap individual pieces tightly in plastic wrap. Then place them in a freezer-safe container or zip-top bag. This bark can be frozen for up to 2 months. When you’re ready to enjoy it, simply thaw it overnight in the refrigerator for the best texture.
What should I do if my chocolate seizes while melting?
No worries! If your white chocolate seizes, it can often be salvaged. First, remove it from heat. Then, add a small amount of vegetable oil or coconut oil—start with about 1 teaspoon. Stir it well until smooth. If it remains grainy, it may be beyond saving; always melt on low heat to prevent this issue next time.
Are there any dietary considerations for this recipe?
Great question! If you’re catering to dietary restrictions, consider using gluten-free Oreos for those with gluten intolerance. For dairy-free options, you can find dairy-free white chocolate alternatives. Always read ingredient labels to ensure they meet the needs of your guests, especially regarding allergies.
How can I make my White Chocolate Oreo Bark more visually appealing?
Wonderful idea! To add some pizzazz, consider drizzling dark chocolate on top or adding colorful sprinkles before the chocolate completely sets. You can even mix in different toppings like chopped nuts or dried fruits for added flavor and texture. Personal touches like these make your bark not just delicious, but stunning too!
Irresistible White Chocolate Oreo Bark Ready in Minutes
Ingredients
Equipment
Method
- Line a large baking tray with parchment paper, covering the bottom and edges.
- In a microwave-safe bowl, add the 14 oz of white chocolate. Heat in 20-second intervals, stirring after each, until melted and smooth.
- Stir in the crushed Oreos into the melted chocolate until evenly distributed.
- Pour the mixture onto the prepared baking tray and spread it into an even layer, about ½ inch thick.
- Before the chocolate sets, scatter additional Oreos on top and press gently to adhere.
- Transfer the tray to the refrigerator and allow the bark to set completely, about 30 minutes.
- Once set, remove from the refrigerator and break it into irregular pieces.