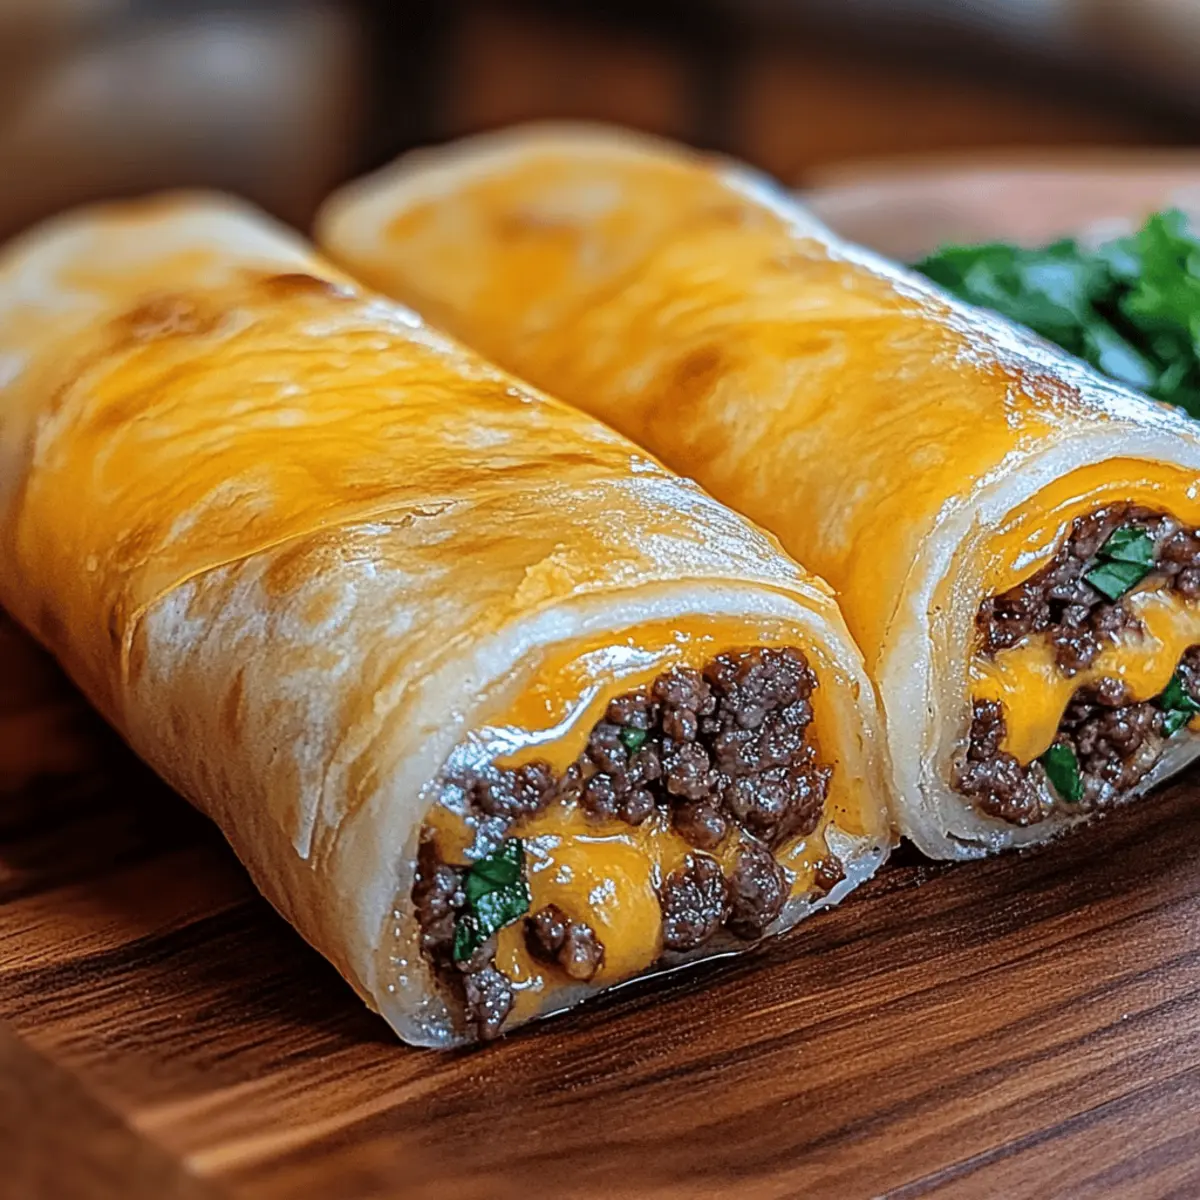
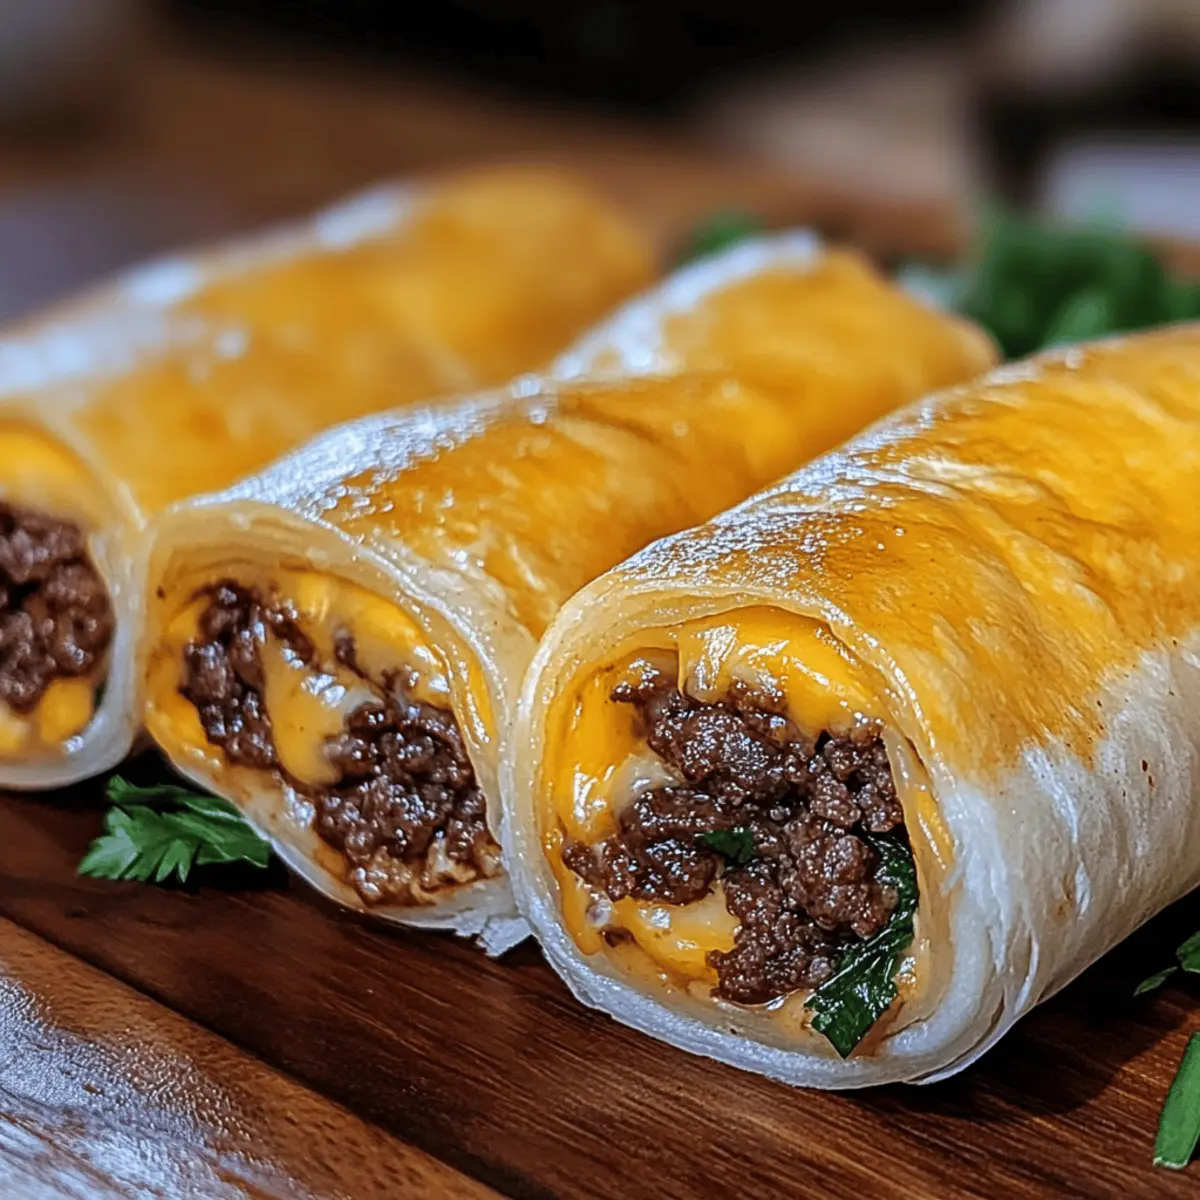
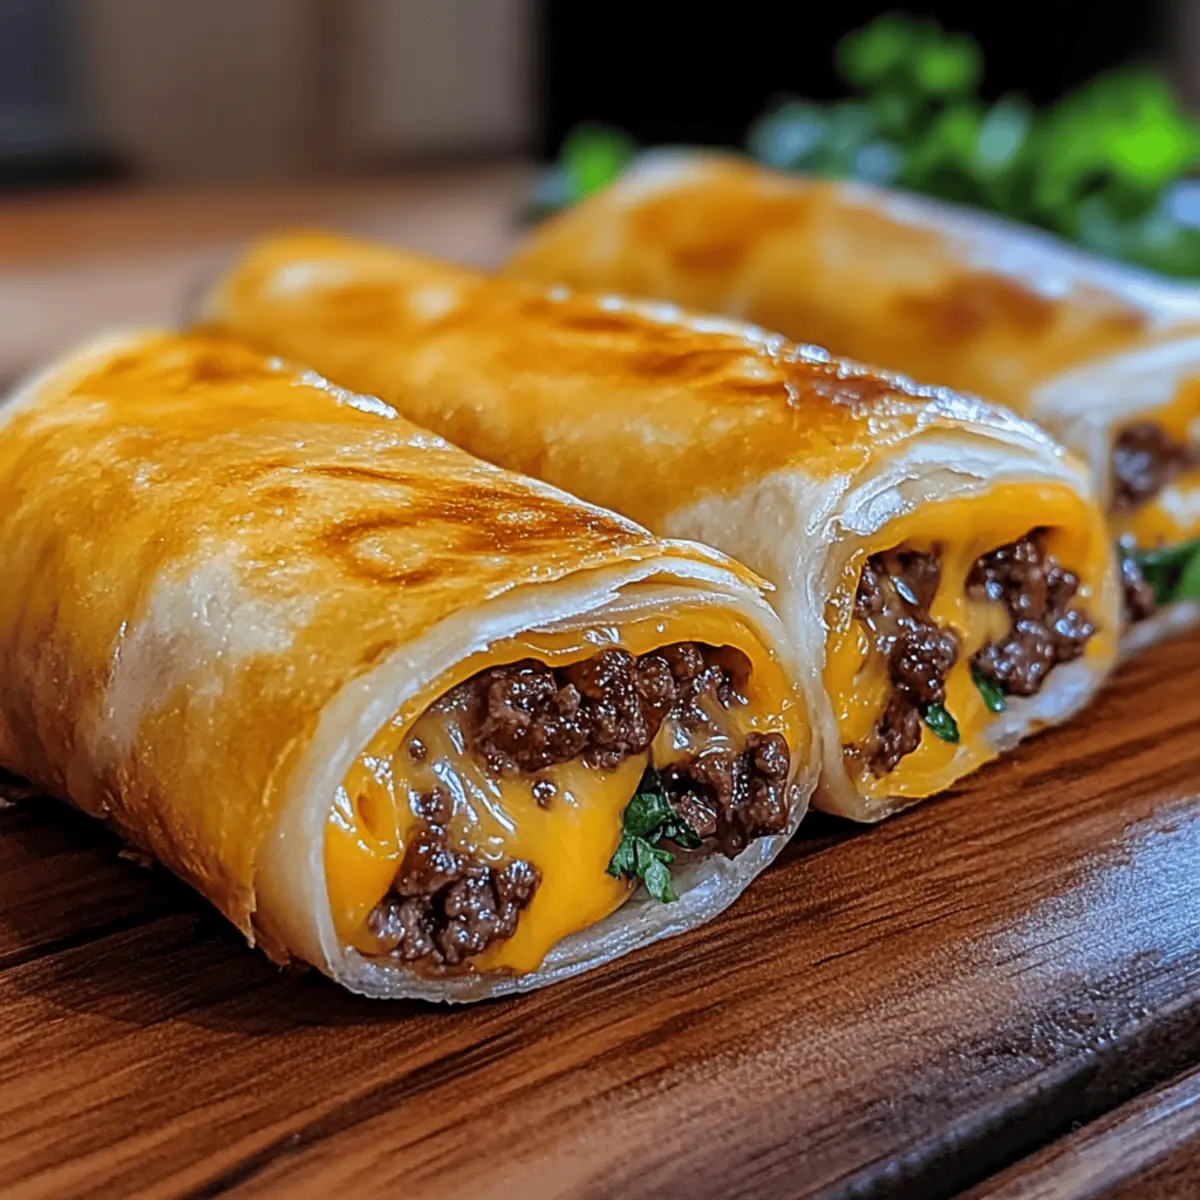
The aroma of sizzling garlic wafts through my kitchen, instantly transforming the ordinary into the extraordinary. That’s the magic of these Garlic Butter Beef Cheeseburger Rollups! They take the beloved flavors of a classic cheeseburger and present them in a fun, portable package perfect for any gathering or busy weeknight meal. What makes these rollups truly irresistible is their quick prep time, allowing you to whip up a satisfying comfort food that will have everyone asking for seconds. With a gooey, cheesy filling and a crispy exterior, these bites are a delightful departure from standard burgers, offering something uniquely delicious. Whether you’re looking to impress at your next party or simply escape the fast-food rut, these rollups are your perfect solution. Curious about how to elevate your dinner game? Let’s dive into this delicious adventure together!
Why are beef cheeseburger rollups a must-try?
Convenience: These rollups are incredibly easy to prepare, perfect for busy weeknights or snack cravings. You can have a satisfying meal ready in just 30 minutes!
Savory Goodness: The combination of tender ground beef, melted cheeses, and aromatic garlic butter creates an explosion of flavor that will keep everyone coming back for more.
Flexible Options: Feel free to customize with your favorite ingredients, from diced jalapeños for a kick to sautéed veggies for extra crunch.
Crowd-Pleaser: Serve them at parties as a fun appetizer, and watch your guests devour these delightful bites! For more easy crowd-pleasers, check out the Savory Ground Beef and Potato Skillet.
Comfort Food Redefined: These rollups take the beloved cheeseburger to new heights while being portable and mess-free, making them the ultimate comfort food!
1. Beef Cheeseburger Rollups Ingredients
• Note: Gather these essentials to create delicious Beef Cheeseburger Rollups!
For the Filling
- Ground Beef – The main protein source rich in flavor; choose ground chuck for optimum juiciness.
- Shredded Cheddar Cheese – Adds creamy, sharp flavor and contributes to the melty goodness.
- Shredded Mozzarella Cheese – Enhances cheesiness with its fantastic melting ability; feel free to swap with fontina for a twist.
- Worcestershire Sauce – Adds umami and depth to the beef mixture; soy sauce can be a suitable substitute.
- Onion Powder – Brings savory notes to the mix; use fresh onions for a different texture.
- Smoked Paprika – Adds a hint of smokiness; regular paprika can work if you’re in a pinch.
For the Wrap
- Flour Tortillas – These are the wraps for your rollups; opt for whole wheat or gluten-free for a healthier alternative.
- Butter – Provides richness for the garlic butter mixture; unsalted is best to control seasoning.
For the Garlic Butter
- Garlic – The star ingredient! Always use fresh minced garlic for the best flavor.
- Olive Oil – Perfect for sautéing the beef, offering a healthier fat option; can be substituted with canola oil.
Seasoning
- Salt & Black Pepper – Essential for seasoning; feel free to adjust according to taste.
- Garlic Powder – Enhances the garlic flavor; can be lessened if you’re using more fresh garlic.
Optional Garnish
- Sliced Pickles – Perfect for adding that crunch and tanginess to your rollups; any variety of dill pickle works wonders.
Gather these ingredients, and you’ll be on your way to creating mouthwatering Beef Cheeseburger Rollups that will impress family and friends alike!
Step‑by‑Step Instructions for Beef Cheeseburger Rollups
Step 1: Preheat the Oven
Begin by preheating your oven to 375°F (190°C). While the oven warms up, prepare a baking sheet by lining it with parchment paper or giving it a light coating of cooking spray to prevent sticking. This step ensures a perfectly baked exterior for your delicious Beef Cheeseburger Rollups.
Step 2: Cook the Ground Beef
In a large skillet, heat a drizzle of olive oil over medium-high heat. Once hot, add the ground beef and break it apart using a spatula. Cook for about 7-8 minutes, or until the meat is fully browned and no longer pink. Stir occasionally to ensure even cooking, and keep an eye out for any sizzling sounds that indicate it’s ready.
Step 3: Season the Beef
Once the beef reaches a rich brown color, stir in Worcestershire sauce, onion powder, garlic powder, smoked paprika, salt, and pepper. Mix thoroughly and let it cook for another minute, allowing the flavors to meld beautifully. Remove the skillet from the heat and let the mixture cool slightly while you prepare the garlic butter.
Step 4: Prepare the Garlic Butter
In a small bowl, combine melted butter and freshly minced garlic. Stir well to create a fragrant garlic butter mixture that will enhance the flavor of your Beef Cheeseburger Rollups. Set this aside, allowing the flavors to infuse while you assemble the rollups.
Step 5: Assemble the Rollups
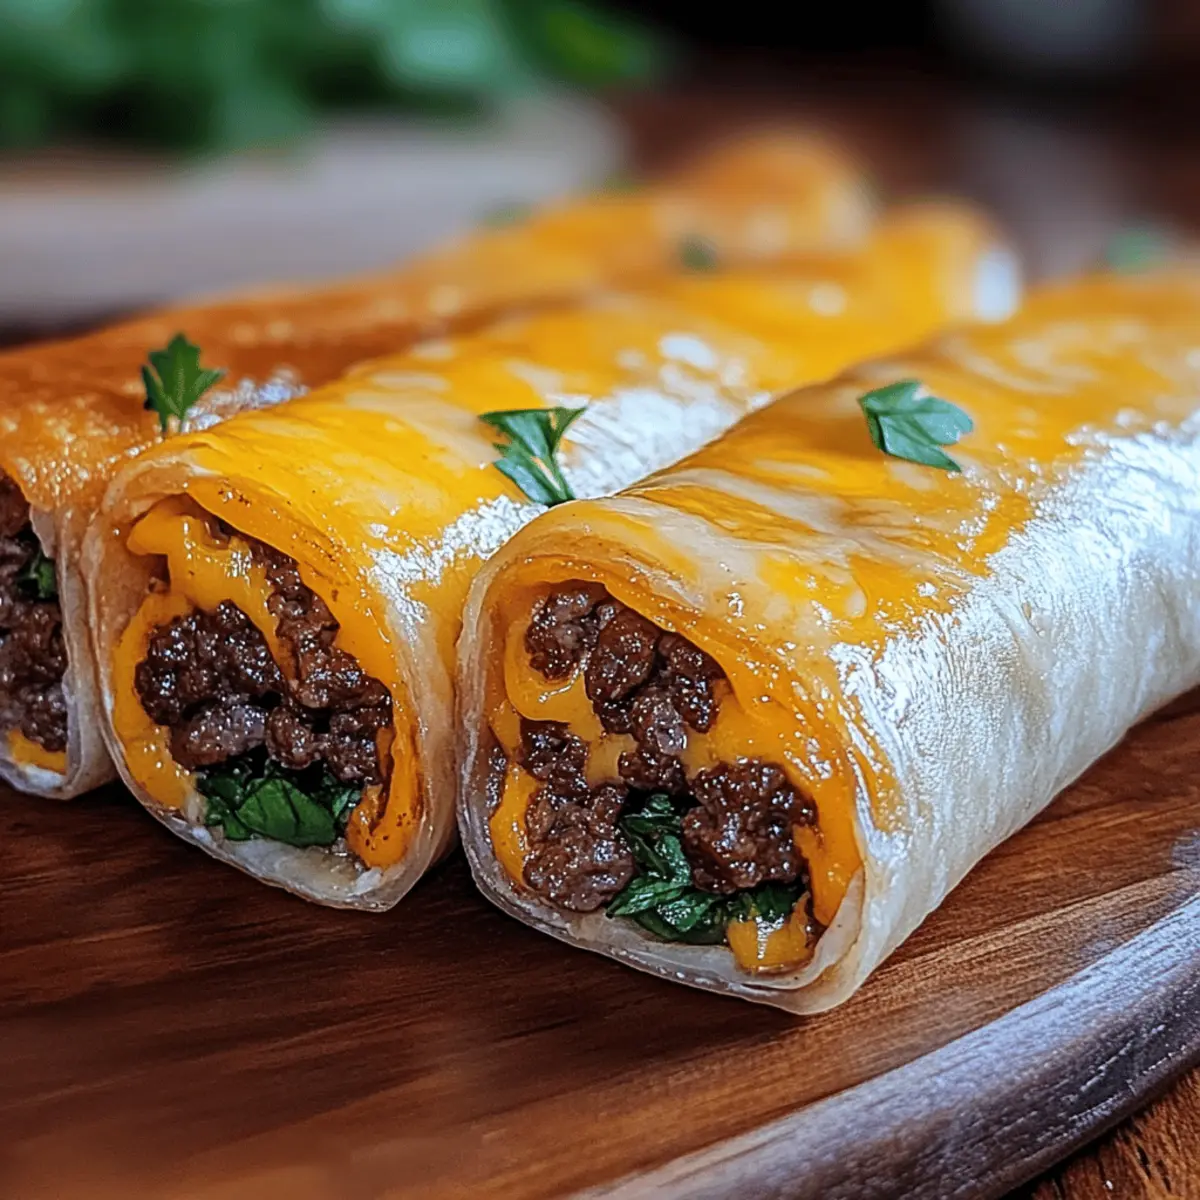
On a clean, flat surface, lay out your flour tortillas. Evenly distribute the cooled beef mixture across each tortilla, leaving a small border around the edges. Sprinkle shredded cheddar and mozzarella cheese over the beef. This cheesy layer is essential for that gooey goodness that makes these rollups irresistible.
Step 6: Roll the Tortillas
Carefully roll each tortilla tightly, ensuring the filling is sealed inside. Start at one edge and roll towards the opposite side, tucking in the filling as you go. Once rolled, place each Beef Cheeseburger Rollup seam-side down on the prepared baking sheet, which will help them stay intact during baking.
Step 7: Brush with Garlic Butter
Generously brush each rollup with the prepared garlic butter mixture. This step not only adds flavor but also helps create a lovely golden-brown exterior as they bake. Make sure to cover all sides for maximum deliciousness and beautiful presentation.
Step 8: Bake the Rollups
Place the baking sheet in the preheated oven and bake for 12-15 minutes, or until the rollups are golden brown and bubbly. Keep an eye on them during the last few minutes to prevent burning, and pull them out once they achieve that perfect crispy look. Allow to cool slightly before serving.
Tips for the Best Beef Cheeseburger Rollups
- Avoid Lean Cuts: Choose ground chuck (15-25% fat) for flavorful and juicy filling; leaner meats can result in dry rollups.
- Don’t Overstuff: While it’s tempting to fill them to the brim, overstuffing rollups can cause tearing or leakage during baking.
- Seal Properly: Ensure tortillas are tightly rolled to prevent opening while baking; this helps maintain their delicious filling.
- Brush Generously: Don’t skimp on the garlic butter—coating the rollups well promotes a crispy, golden crust that’s absolutely irresistible.
- Serve Fresh: Best enjoyed warm, these Beef Cheeseburger Rollups lose their gooey charm when cooled; serve immediately for maximum flavor!
Beef Cheeseburger Rollups Variations & Substitutions
Explore the delightful ways to customize your Beef Cheeseburger Rollups! Each suggestion is a fun opportunity to elevate your dish, inviting your taste buds to embark on a mini-adventure.
-
Spicy Kick: Add diced jalapeños to the beef mixture for an extra burst of flavor that packs some heat. The spiciness pairs beautifully with the creamy cheeses, bringing a whole new level of excitement.
-
Veggie Boost: Incorporate sautéed mushrooms or bell peppers for extra flavor and crunch. This not only enhances the taste but adds a pop of color to your rollups, making them even more appealing.
-
Turkey Twist: Swap the ground beef for ground turkey for a leaner option without sacrificing flavor. This variation keeps the comforting essence of the rollups while being a tad healthier.
-
Vegetarian Delight: Use a plant-based ground meat alternative instead of beef, creating a delicious vegetarian option that’s just as satisfying. Add some extra spices to enhance the flavor profile and make it unique.
-
Cheese Swaps: Experiment with Gruyère or Monterey Jack cheese instead of mozzarella or cheddar for a more gourmet touch. Different cheeses can transform the flavor and texture, giving you endless options to explore.
-
Herbed Garlic Butter: Elevate the flavor of your garlic butter by adding fresh herbs like parsley or thyme. This simple addition brings freshness to each bite, making your rollups feel even more special.
-
Sizzling Bacon: For a delightful twist, mix in some crispy bacon bits with the ground beef. Bacon’s smoky richness pairs beautifully with the classic cheeseburger flavors, creating an indulgent treat.
-
Crunchy Pickle Garnish: Don’t forget the garnish! Add sliced pickles within the rollup before baking for a delightful crunch and tanginess that balances the richness. Your guests will appreciate the added texture!
If you’re in the mood for exploring other delicious beef recipes, check out the delightful Savory Braised Beef or whip up an easy Slow Cooker Beef dish for more comforting options.
What to Serve with Garlic Butter Beef Cheeseburger Rollups?
The delightful aroma of these rollups fills the air with comfort and warmth, making any gathering feel special.
-
Crispy French Fries: Perfectly seasoned fries add that classic, indulgent crunch that pairs beautifully with the cheesy rollups.
-
Zesty Coleslaw: A fresh, tangy slaw offers a refreshing contrast, cutting through the richness of the rollups and balancing your plate.
-
Garlic Parmesan Breadsticks: Soft and savory, these breadsticks echo the garlic flavor in the rollups, making for a deliciously cohesive meal.
-
Creamy Mac and Cheese: This comfort food classic provides a creamy counterpart to the rollups, enveloping your taste buds in a warm embrace.
-
Spicy Nachos: Load them with jalapeños, cheese, and salsa for an exciting, crunchy counterpart to the cheesy goodness of the rollups.
-
Crunchy Vegetable Platter: Fresh veggies with a dip keep things light and refreshing while adding color and nutrition to your meal.
-
Sweet and Tangy Barbecue Sauce: Serve on the side for a delightful dip that enhances the flavors of your beef cheeseburger rollups.
-
Chilled Lemonade: A refreshing beverage option that pairs perfectly with the warmth of the rollups, elevating your meal experience.
Indulge in these pairing ideas to create a well-rounded and satisfying spread that everyone will love!
How to Store and Freeze Beef Cheeseburger Rollups
Fridge: Store leftover Beef Cheeseburger Rollups in an airtight container in the refrigerator for up to 3 days. This keeps them fresh and ready to reheat for a quick snack or meal.
Freezer: For long-term storage, freeze the cooked rollups in a single layer on a baking sheet until solid. Transfer them to a freezer-safe bag for up to 2 months.
Reheating: To reheat, bake frozen rollups straight from the freezer at 375°F (190°C) for about 15-20 minutes until they’re heated through and crisp.
Make-Ahead: You can prepare the rollups and store them uncooked in the fridge, covered with plastic wrap, for up to 1 day before baking. This makes dinner planning even easier!
Make Ahead Options
These Garlic Butter Beef Cheeseburger Rollups are perfect for meal prep, allowing you to save time on busy weeknights! You can prepare the rollups up to 24 hours in advance. Simply assemble the filled tortillas as instructed, then cover tightly with plastic wrap and refrigerate them until you’re ready to bake. To maintain their delicious quality, avoid brushing them with garlic butter until just before baking; this will keep the tortillas from becoming soggy. When it’s time to serve, preheat your oven, brush with garlic butter, and bake as directed. You’ll have restaurant-quality rollups ready with minimal effort and maximum flavor!
Beef Cheeseburger Rollups Recipe FAQs
How ripe should the ground beef be?
Absolutely! When it comes to selecting ground beef for your rollups, look for bright red color with marbling (fat) throughout—this indicates freshness and flavor. Choosing ground chuck with a fat content of 15-25% will yield the juiciest and most flavorful results.
What’s the best way to store leftover rollups?
Store your leftover Beef Cheeseburger Rollups in an airtight container in the refrigerator for up to 3 days. This keeps them fresh and ready for quick reheating. Be sure to let them cool completely before sealing to prevent moisture buildup.
Can I freeze the rollups?
Yes! For freezing, place the cooked Beef Cheeseburger Rollups in a single layer on a baking sheet until they are solid. Once frozen, transfer them to a freezer-safe bag or container for up to 2 months. When you’re ready to enjoy, bake them straight from the freezer at 375°F (190°C) for about 15-20 minutes until heated through and crisp.
What if my rollups leak while baking?
To prevent leaking, ensure that your tortillas are rolled tightly, and don’t overstuff them with the filling. Additionally, placing the rollups seam-side down on the baking sheet will help keep everything intact during baking. If you find them leaking, a little cheese oozing out can actually taste delightful!
Are these suitable for kids with allergies?
If you’re serving these rollups to kids or anyone with allergies, be cautious with ingredients. Opt for gluten-free tortillas if gluten is a concern, and double-check cheese and ingredient labels for potential allergens. You can easily substitute ground beef with turkey or plant-based proteins for dietary preferences.
Can I prepare the rollups in advance?
Certainly! You can assemble the Beef Cheeseburger Rollups a day ahead. Simply cover them tightly with plastic wrap and store them uncooked in the fridge. Bake them just before serving to enjoy that fresh-out-of-the-oven goodness!
Savory Beef Cheeseburger Rollups: The Perfect Comfort Snack
Ingredients
Equipment
Method
- Preheat the oven to 375°F (190°C) and prepare a baking sheet with parchment paper.
- Heat olive oil in a large skillet over medium-high heat. Add ground beef and cook until browned, about 7-8 minutes.
- Stir in Worcestershire sauce, onion powder, garlic powder, smoked paprika, salt, and pepper. Cook for another minute and then cool slightly.
- Combine melted butter and minced garlic in a bowl to create garlic butter.
- Lay out flour tortillas and distribute the cooled beef mixture, then top with shredded cheeses.
- Roll each tortilla tightly, seam-side down on the prepared baking sheet.
- Brush each rollup generously with garlic butter, covering all sides.
- Bake for 12-15 minutes until golden brown and bubbly. Let cool slightly before serving.