Introduction to Red, White, and Blue Marble Cake
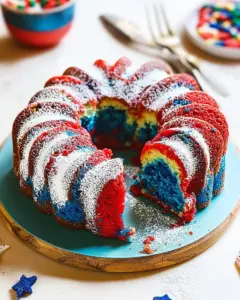
There’s something magical about a cake that captures the spirit of celebration. The Red, White, and Blue Marble Cake is not just a dessert; it’s a canvas of colors that brings joy to any gathering. I remember the first time I made this cake for a Fourth of July barbecue. The vibrant swirls of red and blue against the fluffy white batter had everyone reaching for seconds. It’s a quick solution for busy days, yet impressive enough to wow your friends and family. Let’s dive into this festive delight that’s sure to become a favorite!
Why You’ll Love This Red, White, and Blue Marble Cake
This Red, White, and Blue Marble Cake is a delightful blend of flavor and festivity. It’s incredibly easy to whip up, making it perfect for both novice and seasoned bakers. The vibrant colors not only make it visually stunning but also add a fun twist to traditional cake. Plus, it’s versatile enough for any occasion, from summer barbecues to birthday parties. You’ll love how quickly it disappears from the table!
Ingredients for Red, White, and Blue Marble Cake
Gathering the right ingredients is the first step to creating your masterpiece. Here’s what you’ll need for this Red, White, and Blue Marble Cake:
- All-purpose flour: The backbone of your cake, providing structure and texture.
- Granulated sugar: Sweetens the cake and helps create that lovely golden crust.
- Baking powder: This leavening agent gives your cake the lift it needs to rise beautifully.
- Salt: A pinch enhances the flavors, balancing the sweetness.
- Unsalted butter: Adds richness and moisture; make sure it’s softened for easy mixing.
- Eggs: They bind the ingredients together and contribute to the cake’s fluffiness.
- Vanilla extract: A splash of this classic flavor elevates the overall taste.
- Whole milk: Keeps the batter moist and helps achieve a tender crumb.
- Red food coloring: This is what gives your cake its festive hue; feel free to use gel or liquid.
- Blue food coloring: Adds the second vibrant color, making your cake a true showstopper.
- Additional milk: Use this if your batter needs a little thinning for easier pouring.
For those looking to lighten things up, consider substituting half of the butter with unsweetened applesauce. And if you want to add a creamy twist, a layer of cream cheese frosting between the cake layers is a delicious option. You can find the exact measurements for these ingredients at the bottom of the article, ready for printing!
How to Make Red, White, and Blue Marble Cake
Creating a Red, White, and Blue Marble Cake is a delightful journey that combines colors and flavors. Follow these simple steps, and you’ll have a stunning cake that’s perfect for any celebration.
Step 1: Preheat and Prepare
Start by preheating your oven to 350°F. This ensures your cake bakes evenly. While the oven warms up, grease and flour two 9-inch round cake pans. This step is crucial; it prevents your cake from sticking and makes for easy removal later.
Step 2: Mix the Batter
In a large mixing bowl, combine the all-purpose flour, granulated sugar, baking powder, and salt. Mix these dry ingredients well. Then, add the softened butter, eggs, vanilla extract, and whole milk. Beat everything together on medium speed for about 2 minutes. You want a smooth, creamy batter that’s ready to shine.
Step 3: Color the Batter
Now comes the fun part! Divide the batter evenly into three bowls. Leave one bowl plain for the white layer. In the second bowl, mix in the red food coloring until you achieve your desired shade. Do the same with the blue food coloring in the third bowl. If the batter feels too thick, add a splash of additional milk to thin it out.
Step 4: Assemble the Cake
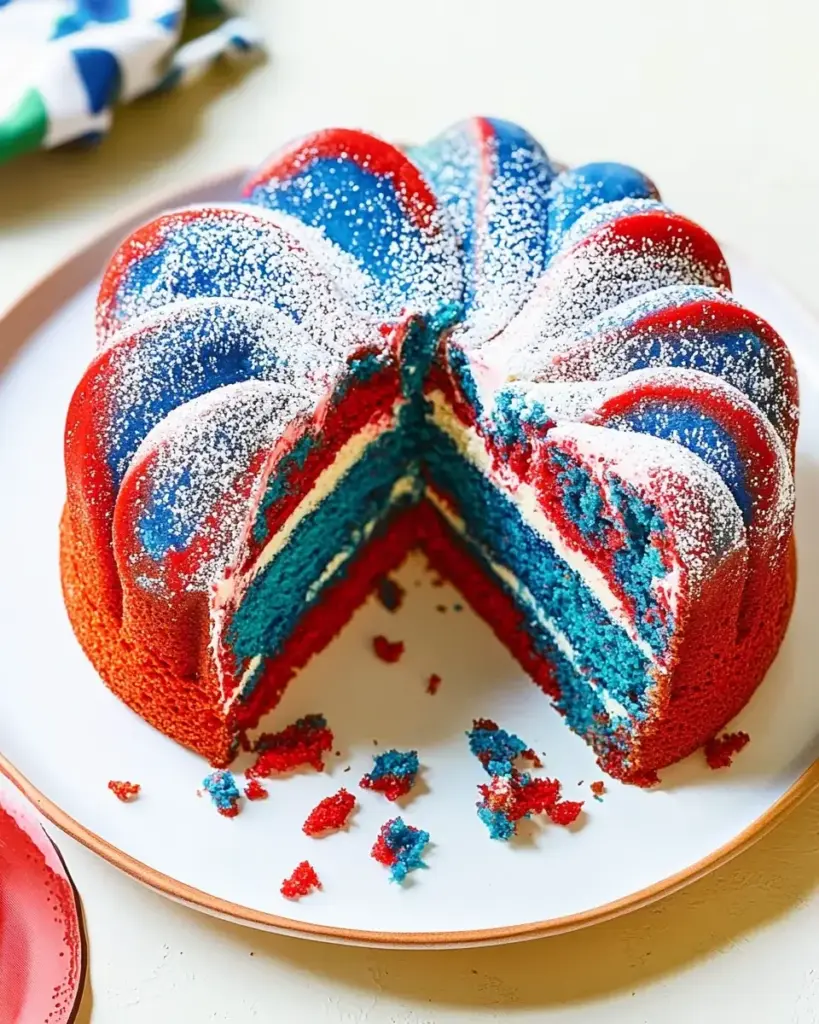
Grab your prepared cake pans and start spooning the batters in. Alternate between the red, white, and blue batters, creating a beautiful pattern. Once you’ve added all the batter, take a knife or skewer and gently swirl the colors together. This will create that stunning marbled effect that makes this cake so special.
Step 5: Bake the Cake
Place the cake pans in the preheated oven and bake for 25-30 minutes. Keep an eye on them! To check for doneness, insert a toothpick into the center of the cakes. If it comes out clean, they’re ready to come out. If not, give them a few more minutes.
Step 6: Cool and Frost
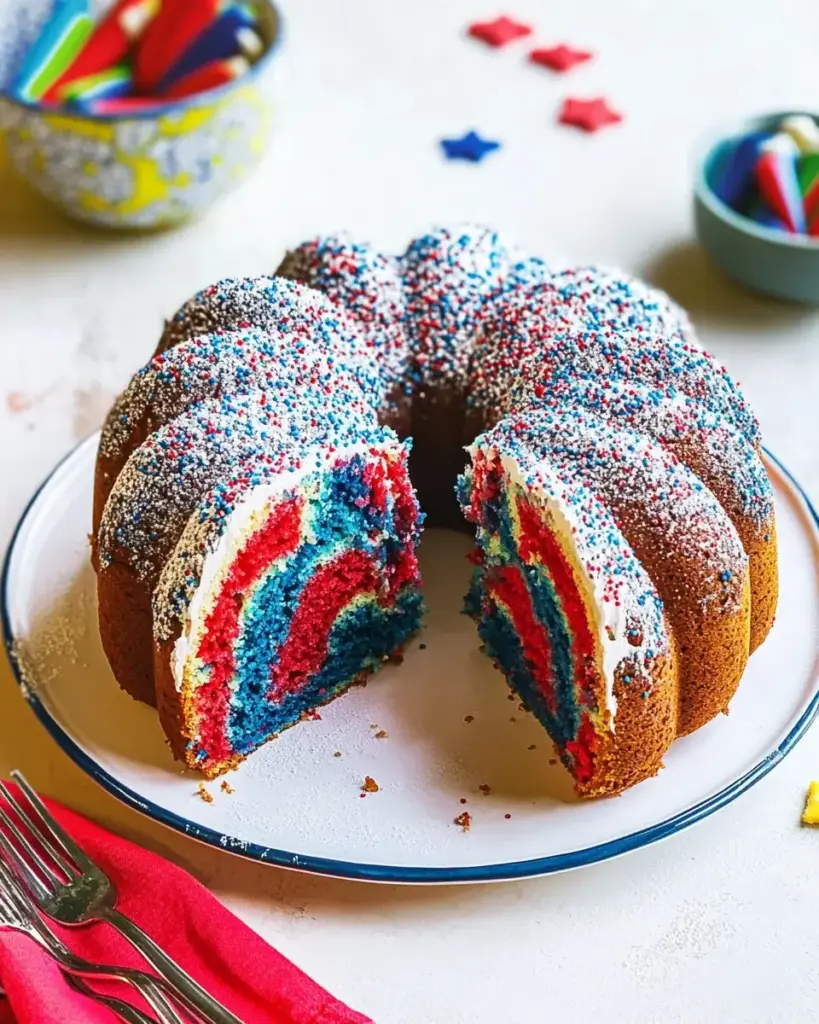
Once baked, let the cakes cool in the pans for about 10 minutes. Then, carefully transfer them to wire racks to cool completely. This step is essential; frosting a warm cake can lead to a melty mess! Once cooled, frost with your favorite white frosting and feel free to decorate with sprinkles or fresh berries for that extra festive touch.
Tips for Success
- Make sure your ingredients are at room temperature for better mixing.
- Don’t overmix the batter; stop once everything is just combined.
- Use gel food coloring for more vibrant colors without altering the batter’s consistency.
- Let the cakes cool completely before frosting to avoid melting.
- For a fun twist, add a layer of whipped cream between the cake layers.
Equipment Needed
- Mixing bowls: Use any size, but a large one is best for mixing the batter.
- Electric mixer: A hand mixer works well, but a stand mixer can save time.
- Measuring cups and spoons: Essential for accuracy in your ingredients.
- Spatula: Great for scraping down the sides of the bowl.
- 9-inch round cake pans: If you don’t have these, any similar-sized pans will do.
Variations
- Chocolate Marble Cake: Add cocoa powder to one of the colored batters for a delicious chocolate twist.
- Gluten-Free Option: Substitute all-purpose flour with a gluten-free blend to accommodate dietary needs.
- Fruit-Infused: Incorporate pureed strawberries or blueberries into the batter for a fruity flavor boost.
- Vegan Version: Replace eggs with flaxseed meal and use plant-based butter and milk for a vegan-friendly cake.
- Nutty Surprise: Fold in chopped nuts like walnuts or pecans for added texture and flavor.
Serving Suggestions
- Pair with a scoop of vanilla ice cream for a delightful contrast in temperature and texture.
- Serve alongside fresh fruit, like strawberries or blueberries, to enhance the festive theme.
- For drinks, consider lemonade or iced tea to keep things refreshing.
- Present the cake on a colorful platter, garnished with extra berries and sprinkles for a vibrant display.
FAQs about Red, White, and Blue Marble Cake
Can I make this cake ahead of time?
Absolutely! You can bake the Red, White, and Blue Marble Cake a day in advance. Just store it in an airtight container at room temperature. Frost it on the day you plan to serve for the best texture.
What can I use instead of food coloring?
If you prefer a natural approach, consider using beet juice for red and blueberry puree for blue. The colors may not be as vibrant, but they’ll still add a lovely hue to your cake.
How do I store leftovers?
Store any leftover cake in an airtight container in the fridge. It should stay fresh for about 3-4 days. Just remember to let it come to room temperature before serving for the best flavor.
Can I freeze this cake?
Yes! You can freeze the unfrosted cake layers. Wrap them tightly in plastic wrap and then in aluminum foil. They’ll keep well for up to three months. Just thaw in the fridge before frosting.
What frosting pairs best with this cake?
A classic buttercream frosting works wonderfully, but cream cheese frosting adds a delightful tang. You can also try whipped cream for a lighter option that complements the cake’s sweetness.
Final Thoughts
Creating a Red, White, and Blue Marble Cake is more than just baking; it’s about crafting memories. Each slice is a celebration of color and flavor, perfect for any gathering. I love how this cake brings people together, sparking joy and laughter around the table. Whether it’s a holiday barbecue or a simple family dinner, this cake is sure to impress. So, roll up your sleeves, gather your loved ones, and dive into this delightful baking adventure. Trust me, the smiles and compliments will be worth every swirl of color!
Red, White, and Blue Marble Cake: A Festive Delight!
Ingredients
Method
- Preheat the oven to 350°F. Grease and flour two 9-inch round cake pans.
- In a large mixing bowl, combine the flour, sugar, baking powder, and salt. Add the softened butter, eggs, vanilla extract, and milk. Beat on medium speed for about 2 minutes until well combined and smooth.
- Divide the batter evenly into three bowls. Leave the first bowl plain, mix red food coloring into the second bowl, and blue food coloring into the third bowl.
- If the batter is too thick, add a little of the additional milk to thin it out.
- Spoon the batters into the prepared cake pans, alternating between the red, white, and blue batters. Use a knife or skewer to swirl the colors together gently.
- Bake in the preheated oven for 25-30 minutes, or until a toothpick inserted into the center comes out clean.
- Allow the cakes to cool in the pans for 10 minutes before transferring them to wire racks to cool completely.
- Once cooled, frost with your favorite white frosting and decorate with sprinkles or fresh berries.
Nutrition
Notes
- For a lighter version, substitute half of the butter with unsweetened applesauce.
- Add a layer of cream cheese frosting between the cake layers for added flavor.