I could feel the warmth of the kitchen enveloping me as I whisked together the vibrant red batter, the rich cocoa filling the air with its chocolatey charm. There’s something absolutely magical about baking homemade Red Velvet Brownies, and I guarantee you’ll experience this enchantment with every fudgy, melt-in-your-mouth bite. These brownies are not just a treat; they are a quick triumph in the world of dessert—perfectly adept to impress at any gathering or to satisfy that sweet craving on a quiet evening. Topped with a luscious cream cheese frosting that adds a delightful tang, these brownies are rich, indulgent, and strikingly beautiful. Curious about how to whip up this delightful dessert that will have everyone asking for seconds? Let’s dive in!
Why Are These Red Velvet Brownies Special?
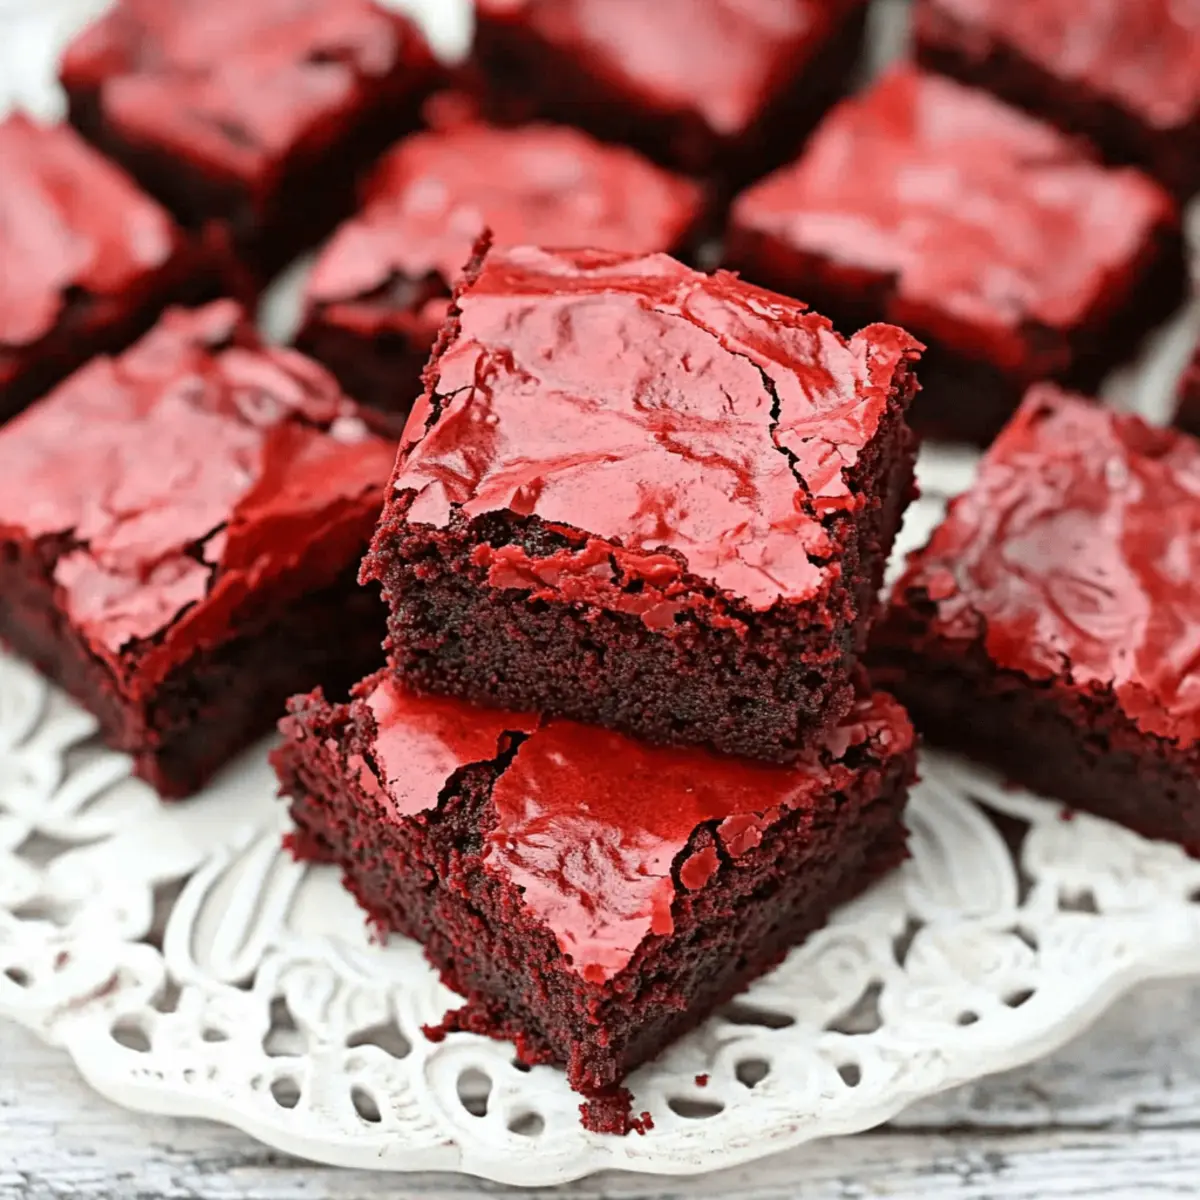
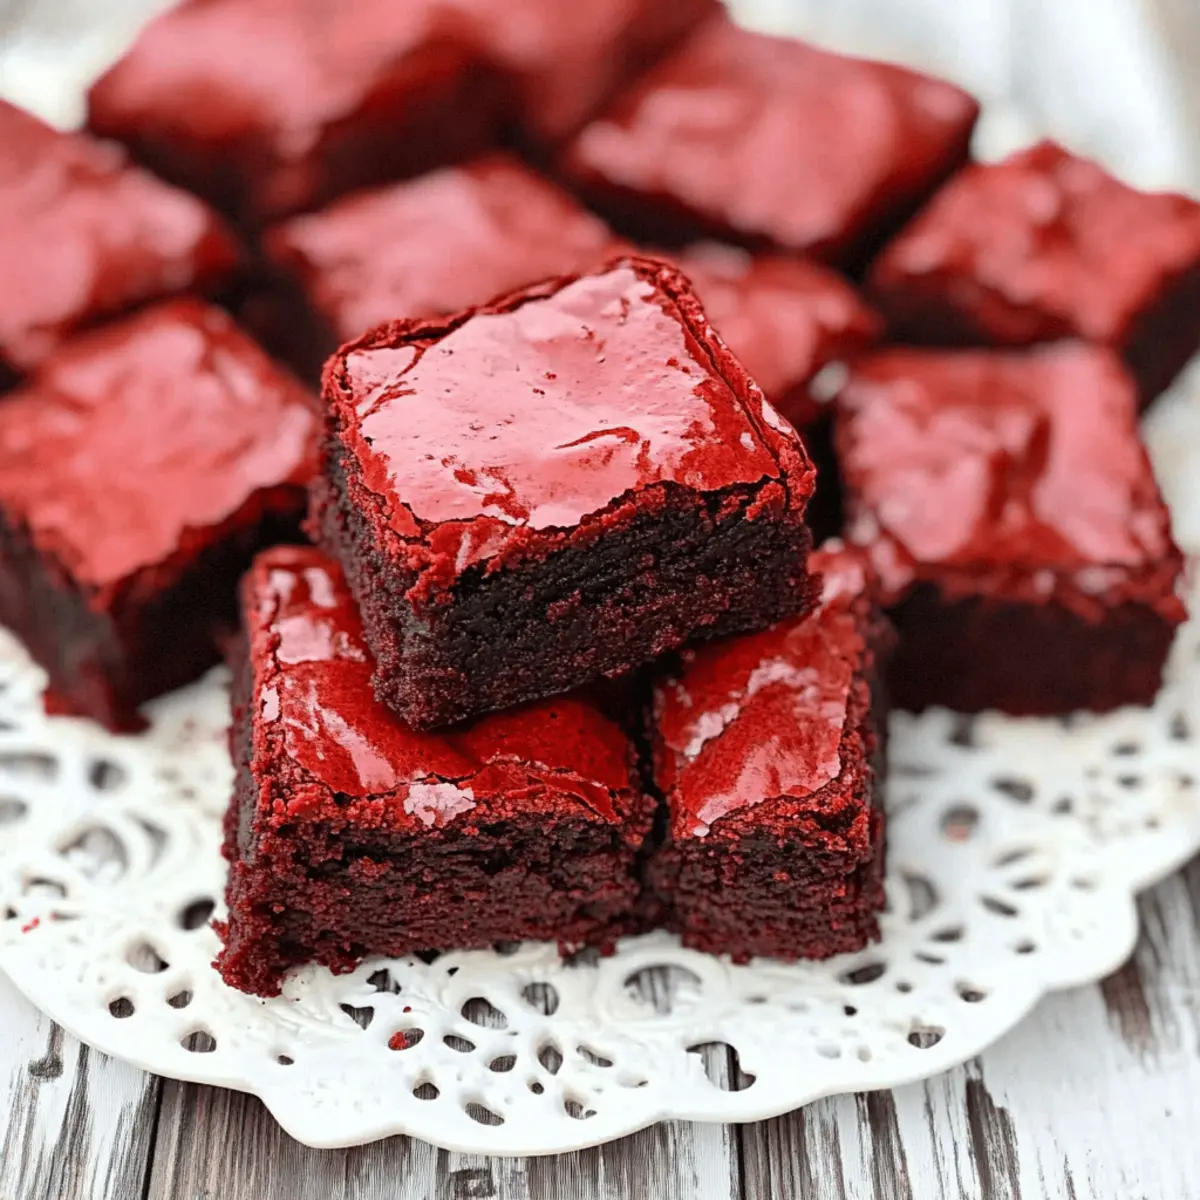
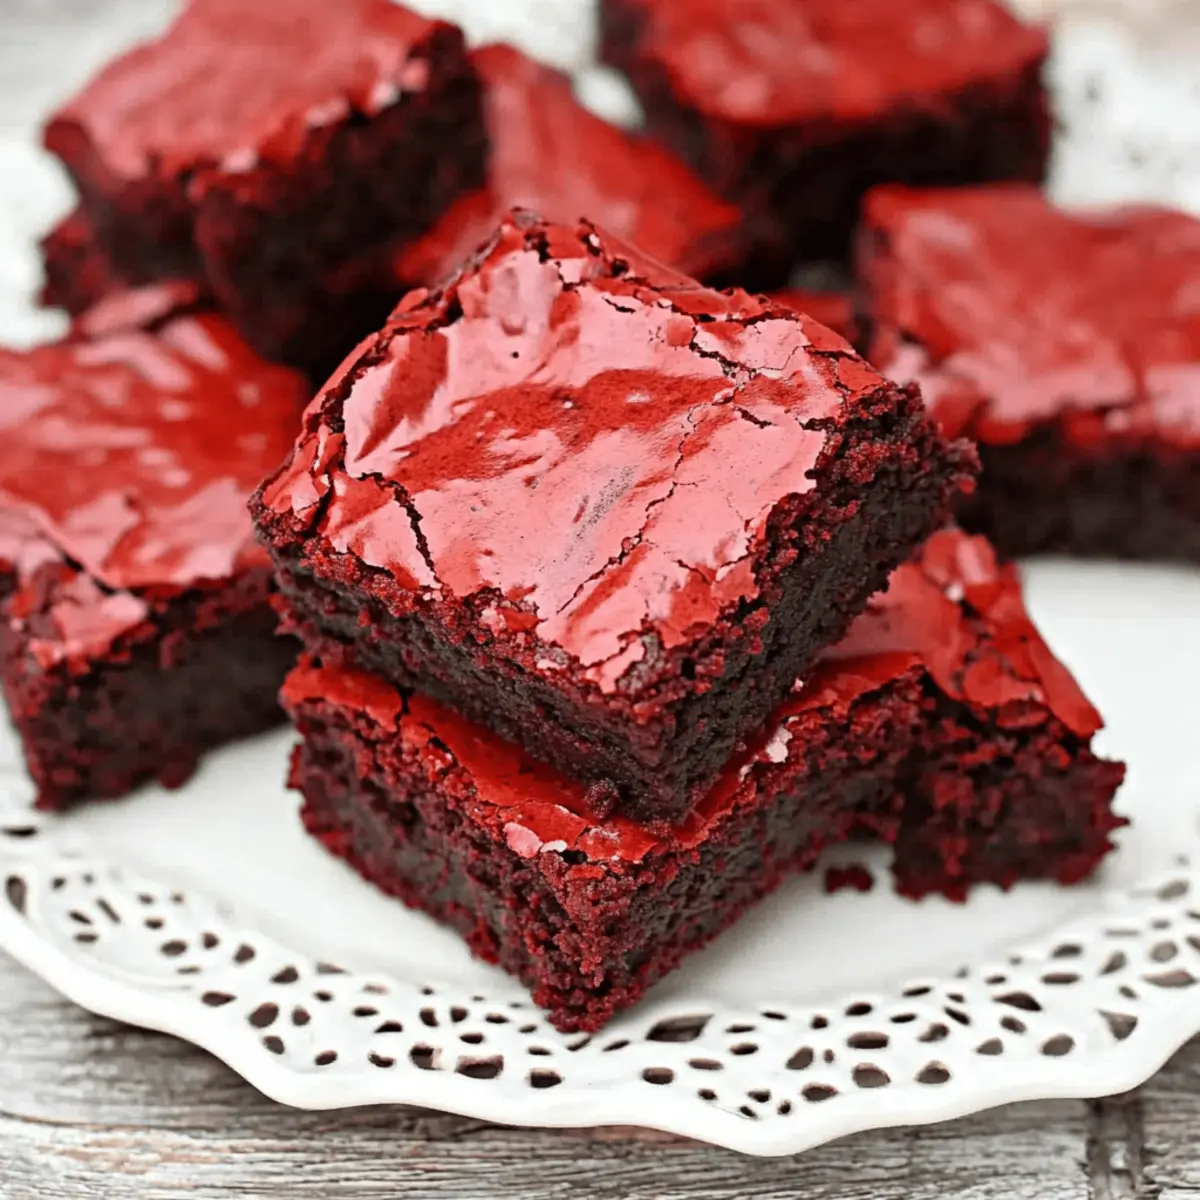
Indulgent, Fudgy Texture: Every bite of these brownies is an experience, characterized by an incredibly moist and rich texture that melts in your mouth.
Eye-Catching Appearance: The stunning red color makes them an absolute showstopper at any gathering, perfect for celebrations like Valentine’s Day or birthdays.
Easy to Make: With simple ingredients and straightforward steps, you’ll have these delectable treats ready in no time. If you love quick and rewarding recipes, check out my Mexican Shredded Chicken for another spectacular dish!
Creamy Frosting: The addition of cream cheese frosting brings a tangy richness that complements the sweet brownie base perfectly.
Versatile Variations: Feel free to adjust the toppings or mix-ins—chocolate chips or nuts can add an extra layer of delight.
Crowd-Pleasing Treat: Whether for a party or just a treat for yourself, these red velvet brownies are sure to impress and leave everyone asking for the recipe!
Red Velvet Brownie Ingredients
For the Brownies
- Unsalted Butter – Essential for moisture and richness; you can substitute it with salted butter if needed.
- Ghirardelli Milk Chocolate Chips – Provides a rich chocolate flavor; feel free to swap for dark chocolate chips for a bolder taste.
- Eggs – Binds everything together; remember to use room-temperature eggs for better mixing.
- Granulated Sugar – Adds sweetness without compromising texture; stick with granulated for the best results.
- Brown Sugar – Introduces moisture and a caramel undertone; either light or dark brown sugar can be used.
- Salt – Enhances the overall flavor; lessen the amount if you’re watching your sodium intake.
- Vanilla Extract – Brings depth to the flavor; you might substitute it with almond extract for a unique twist.
- Red Food Coloring – Essential for that iconic red hue; gel food coloring works best for vibrant color without altering moisture.
- All-Purpose Flour – Provides structure; for a gluten-free option, use a 1:1 gluten-free flour blend.
- Baking Powder – Aids in fluffiness; ensure it’s fresh for optimal results.
- Ghirardelli Unsweetened Cocoa Powder – Contributes rich chocolate flavor; any good quality cocoa powder can be used but might slightly change the taste.
For the Cream Cheese Frosting
- Cream Cheese – The base of the frosting; Neufchâtel is a lighter alternative if desired.
- Unsalted Butter – Adds creaminess; if using salted, reduce any additional salt in the frosting.
- Confectioners Sugar – Sweetens and thickens the frosting; adjust according to your taste preference.
- Heavy Cream or Milk – Adjusts the consistency; for vegan options, consider using non-dairy milk alternatives.
Step‑by‑Step Instructions for Irresistibly Fudgy Red Velvet Brownies
Step 1: Preheat and Prepare
Start by preheating your oven to 350°F (175°C). While that warms up, line a 9×13 inch baking pan with foil or parchment paper and lightly grease it with cooking spray or butter. This preparation ensures your Red Velvet Brownies come out easily once baked and helps achieve that perfect fudgy texture.
Step 2: Melt the Butter and Chocolate
In a microwave-safe bowl or a medium saucepan, combine the unsalted butter and Ghirardelli milk chocolate chips. Melt them together in the microwave in 20-second intervals, stirring in between, or over low heat on the stovetop until smooth. Allow this mixture to cool slightly for about 5-10 minutes so it doesn’t cook the eggs in the next step.
Step 3: Whisk Eggs and Sugars
In a large mixing bowl, whisk together the room temperature eggs, granulated sugar, brown sugar, and vanilla extract. Do this until the mixture becomes smooth and fluffy, which should take about 2-3 minutes. This aeration will contribute to the delightful texture of your fudgy Red Velvet Brownies.
Step 4: Incorporate the Red Food Coloring
Next, gently fold in the red food coloring into your egg and sugar mixture. Make sure to blend it until the red is evenly distributed, giving your batter that signature vibrant hue. The color should be bright and evenly mixed, ensuring a beautiful appearance once baked.
Step 5: Combine Chocolate and Wet Ingredients
Carefully fold the cooled chocolate mixture into the egg mixture until just combined. Be gentle to retain the air you whisked in earlier. This step is crucial in creating the rich flavor and fudgy consistency of your Red Velvet Brownies, ensuring everything is blended harmoniously.
Step 6: Sift and Fold in Dry Ingredients
Sift together the all-purpose flour, unsweetened cocoa powder, baking powder, and salt into a separate bowl. Gently add this dry mixture to the wet ingredients, folding carefully until just combined. Avoid overmixing, as this can lead to a more cake-like texture instead of the desired fudgy brownies.
Step 7: Bake the Brownies
Pour the brownie batter into the prepared pan, smoothing it out with a spatula for an even surface. Bake in the preheated oven for 35-40 minutes, or until a toothpick inserted in the center comes out with a few moist crumbs. The edges should appear set, while the center remains soft and fudgy.
Step 8: Cool the Brownies
Once baked, remove the pan from the oven and let the brownies cool in the pan for about 15 minutes. Then, carefully transfer them to a wire cooling rack to cool completely. Allowing them to cool fully ensures they set properly and are easier to frost later.
Step 9: Make the Cream Cheese Frosting
In a mixing bowl, beat together the cream cheese, unsalted butter, vanilla extract, salt, confectioners’ sugar, and heavy cream until the mixture is smooth and creamy. This should take about 3-4 minutes, resulting in a rich, tangy frosting that perfectly complements your Red Velvet Brownies.
Step 10: Frost and Serve
Once the brownies have completely cooled, spread the cream cheese frosting over the top using an offset spatula or transfer it to a piping bag for a decorative touch. After frosting, chill in the refrigerator for at least 30 minutes before serving to ensure neat slices and better flavor integration.
Storage Tips for Red Velvet Brownies
Room Temperature: Store brownies in an airtight container at room temperature for up to 3 days. This keeps them fresh while maintaining that delicious fudgy texture.
Fridge: If you’d like to enjoy your Red Velvet Brownies for a whole week, refrigerate them in a covered container. The cold enhances the flavor of the cream cheese frosting!
Freezer: For long-term storage, freeze individually wrapped brownies for up to 3 months. Thaw in the refrigerator before consuming for the best texture.
Reheating: To enjoy warm brownies, microwave a slice for about 10-15 seconds. This will revive the fudginess while keeping the frosting creamy.
Expert Tips for Red Velvet Brownies
-
Cool the Melted Mixture: Allow the melted butter and chocolate to cool before mixing in the eggs; this prevents curdling and keeps your brownie batter nice and smooth.
-
Mix Gently: Avoid overmixing the batter after adding the flour. This keeps the brownies delightfully fudgy—overmixing can create a cake-like texture instead.
-
Chill Before Cutting: Refrigerate the frosted brownies for at least 30 minutes before slicing for cleaner, more polished pieces that showcase the rich cream cheese frosting beautifully.
-
Use Quality Ingredients: Choose high-quality cocoa powder and chocolate chips for the richest flavor in your Red Velvet Brownies; it truly makes all the difference in taste!
-
Room Temperature Eggs: Always use room temperature eggs when making the batter. They emulsify better, resulting in a smoother batter and fluffier texture.
What to Serve with Best Homemade Red Velvet Brownies
Bring your dessert experience to the next level as you explore delightful pairings for these irresistible treats!
-
Vanilla Ice Cream: The creamy, cold texture of vanilla ice cream beautifully contrasts the fudgy warmth of your brownies, creating a sensational bite.
-
Fresh Berries: A medley of strawberries, raspberries, and blueberries adds a refreshing tartness that balances the richness of the brownies. Serve them alongside for a delightful pop of flavor.
-
Chocolate Ganache: Drizzling a velvety chocolate ganache over the top enhances the chocolatey goodness, elevating each decadent mouthful to new heights of indulgence.
-
Coffee or Espresso: The robust flavor of coffee or a shot of espresso complements the chocolate and adds depth to the dessert experience, turning every bite into a cozy moment.
-
Mint Mojito: The refreshing notes of a mint mojito create a wonderful contrast with the brownies. The cool, crisp flavors will make your taste buds dance in delight.
-
Caramel Sauce: A drizzle of warm caramel sauce adds a sweet, buttery richness that pairs perfectly with the brownies, bringing a new layer of flavor.
-
Chocolate Milkshake: For a true dessert lover’s treat, a thick chocolate milkshake serves as a delicious, creamy counterpart to the brownies that will ignite nostalgic childhood memories.
Red Velvet Brownies Variations & Substitutions
Feel free to personalize these delightful brownies and make them your own. The beauty of baking lies in your ability to customize flavors, textures, and dietary preferences to suit your taste!
- Gluten-Free: Use a 1:1 gluten-free flour blend instead of all-purpose flour for a gluten-free version that still delivers delicious results.
- Nutty Addition: Mix in chopped walnuts or pecans for a crunchy texture that complements the fudgy brownies beautifully.
- Dairy-Free: Swap the butter for coconut oil and use dairy-free chocolate chips to make these brownies suitable for a dairy-free diet.
- Lower Sugar: Substitute half of the granulated sugar with a natural sweetener like maple syrup for a slightly healthier option.
- Extra Chocolate: Fold in a handful of chocolate chips into the batter for an indulgent chocolate burst in every bite.
- Zesty Twist: Add a teaspoon of orange zest to the frosting to create a refreshing citrus flavor that pairs wonderfully with the cream cheese.
- Seasonal Swaps: Experiment with colored food dyes such as green or blue for unique themed brownies on occasions like St. Patrick’s Day or birthdays.
For more scrumptious dessert ideas, consider trying out my Chicken Buttered Noodles or also these crowd-pleasing Mexican Shredded Chicken options that your family will surely love!
Make Ahead Options
These irresistible Red Velvet Brownies are perfect for meal prep enthusiasts! You can prepare the brownie batter up to 24 hours in advance and store it in the refrigerator, which allows the flavors to meld beautifully. Simply mix the ingredients as directed but hold off on baking. When you’re ready to serve, pour the chilled batter into the prepared pan and bake as instructed. Additionally, the cream cheese frosting can be made up to 3 days ahead and stored in an airtight container in the fridge. Just give it a quick stir before frosting the brownies. This way, you’ll have delicious brownies with minimal effort on busy weeknights!
Red Velvet Brownies Recipe FAQs
What type of red food coloring should I use?
For the best results, I recommend using gel food coloring. It provides a vibrant red hue without altering the moisture content of your brownies, ensuring they remain fudgy and rich. Liquid food coloring can work in a pinch, but you might need to use more, which could affect the texture.
How should I store leftover Red Velvet Brownies?
Store leftover brownies in an airtight container at room temperature for up to 3 days. If you want them to last longer, place them in the refrigerator, where they will keep fresh for about a week. This method enhances the flavor of the cream cheese frosting, making the brownies even more delightful!
Can I freeze Red Velvet Brownies, and if so, how?
Absolutely! To freeze your brownies, first allow them to cool completely. Then, wrap each brownie individually in plastic wrap or aluminum foil and place them in a freezer-safe bag or container. They will keep well for up to 3 months. When you’re ready to enjoy them, thaw them in the refrigerator overnight, or let them sit at room temperature for a few hours.
What should I do if my brownies turn out too cakey?
If your brownies are too cakey, it’s often due to overmixing the batter once you’ve added the flour. To prevent this, mix just until combined for a fudgy texture. Also, ensure you haven’t added too much flour—measuring accurately is key! If you find that the batter was mixed well and it’s still too cakey, consider reducing the baking time by a few minutes the next time you make them.
Are these Red Velvet Brownies suitable for people with gluten allergies?
For those with gluten allergies, simply swap out the all-purpose flour for a 1:1 gluten-free flour blend. This substitution works seamlessly in this recipe and will allow everyone to enjoy these fudgy treats! Just be sure to check that all other ingredients, like baking powder and chocolate chips, are also gluten-free.
How can I make these brownies more indulgent?
To amp up the indulgence factor, you can add chocolate chips, nuts, or even a drizzle of caramel or chocolate on top of the cream cheese frosting. These additions will not only enhance the flavor but also add a delightful texture, making every bite even more satisfying!
Irresistibly Fudgy Red Velvet Brownies You Can’t Resist
Ingredients
Equipment
Method
- Preheat the oven to 350°F (175°C) and line a 9x13 inch baking pan with foil or parchment paper, greasing it lightly.
- Melt together unsalted butter and milk chocolate chips in a microwave-safe bowl or saucepan until smooth, then cool slightly.
- Whisk eggs, granulated sugar, brown sugar, and vanilla extract in a large bowl until smooth and fluffy for about 2-3 minutes.
- Fold in red food coloring until evenly distributed.
- Gently fold the cooled chocolate mixture into the egg mixture until combined.
- Sift together flour, cocoa powder, baking powder, and salt, then fold into the wet mixture until just combined.
- Pour batter into prepared pan and bake for 35-40 minutes or until a toothpick comes out with a few moist crumbs.
- Cool in the pan for 15 minutes, then transfer to a wire rack to cool completely.
- Beat cream cheese, unsalted butter, vanilla, salt, confectioners' sugar, and heavy cream until smooth to make frosting.
- Spread frosting over cooled brownies and chill in the refrigerator for at least 30 minutes before serving.