The aroma of freshly baked cookies always brings a sense of joy into my kitchen, but these Peanut Butter Spider Cookies take that happiness to a whole new level this Halloween. With their soft, chewy texture and the playful addition of melted chocolate and candy eyes, they’re the perfect festive treat to delight both kids and adults alike. What I love most about this recipe is how quick and easy it is—less time baking means more time enjoying the spook-tacular fun with my family! Plus, they’re easily adaptable to be gluten-free, ensuring everyone can join in on the Halloween treats. So, are you ready to whip up a batch of these creepy-crawly delights that will have your loved ones buzzing with excitement? Let’s dive into the recipe!
Why are these cookies a Halloween must?
Easy to Make: You’ll appreciate how quickly these Peanut Butter Spider Cookies come together! With just a handful of simple ingredients, you can have a batch ready in no time.
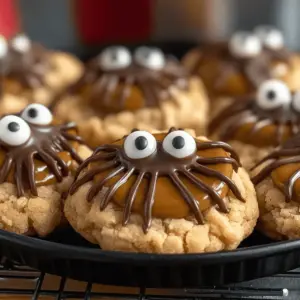
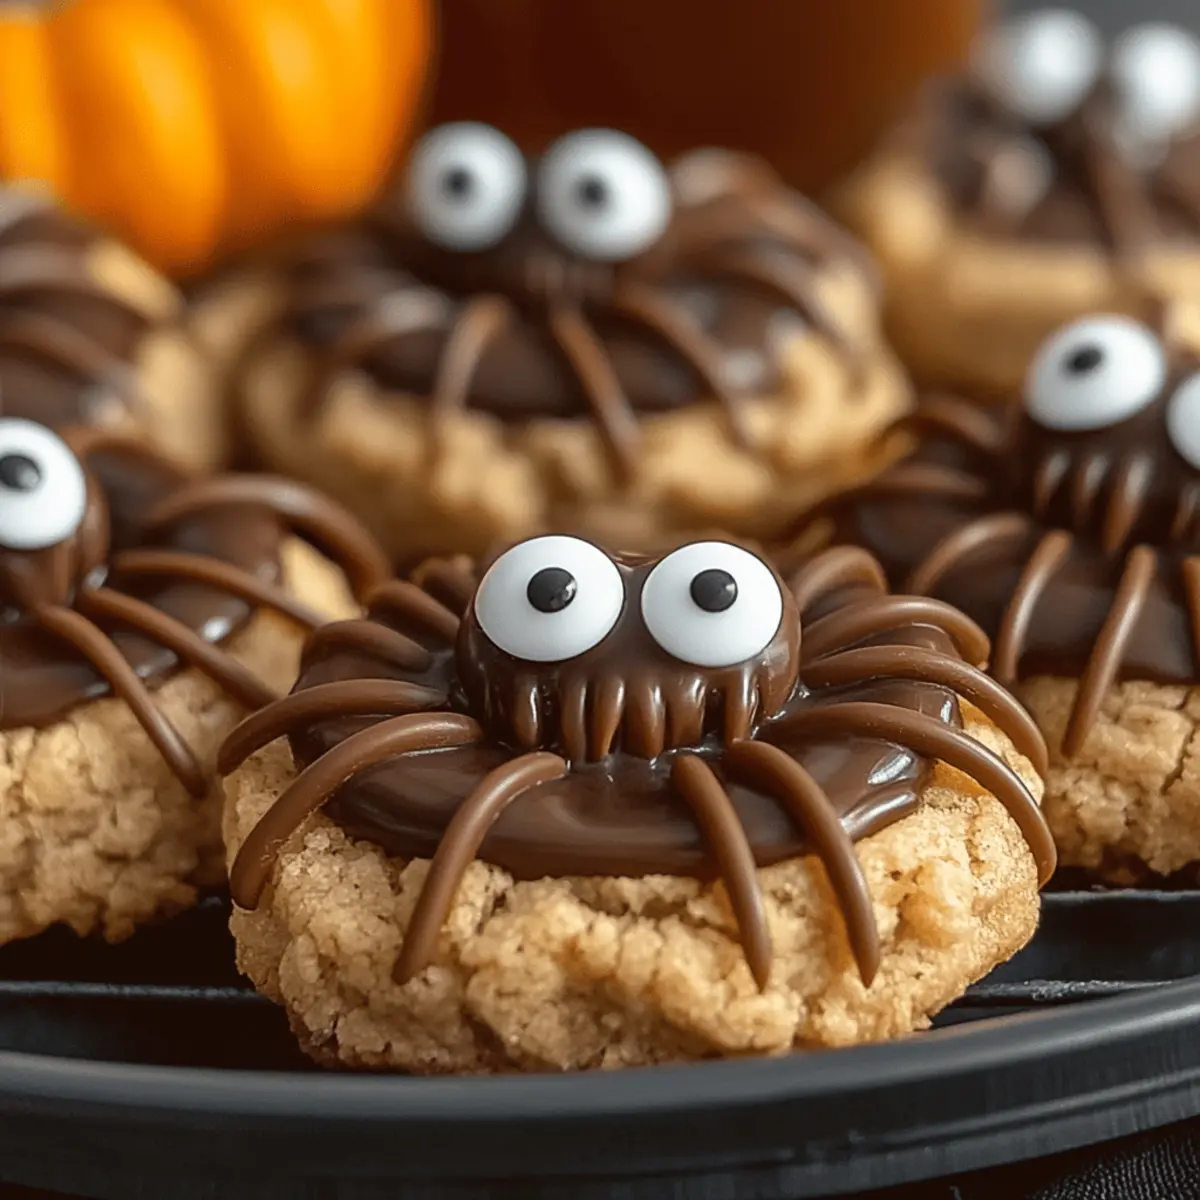
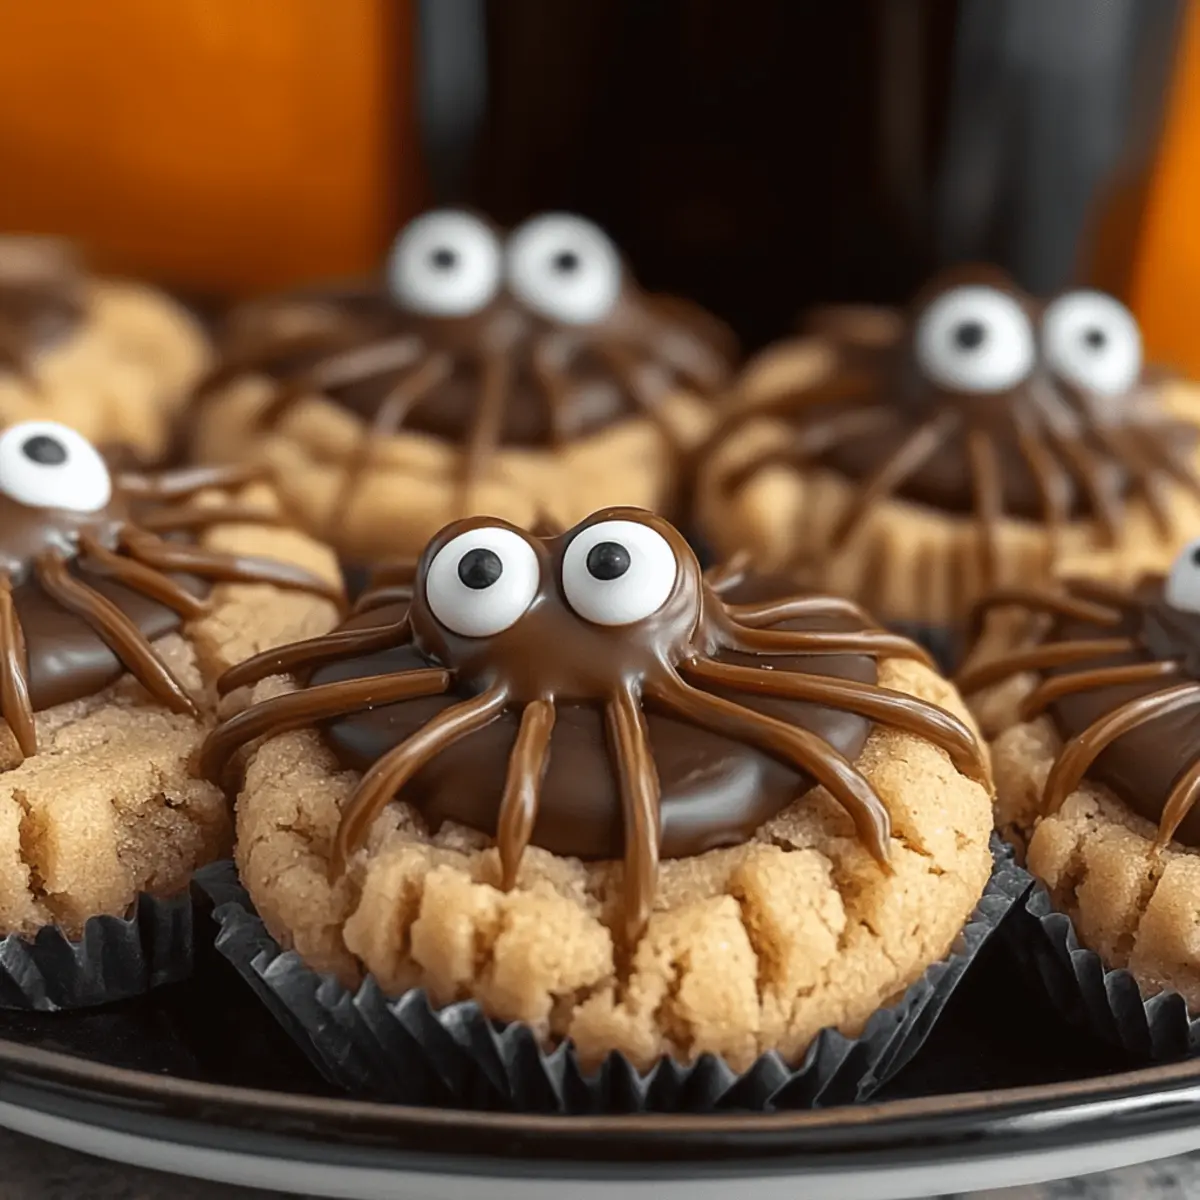
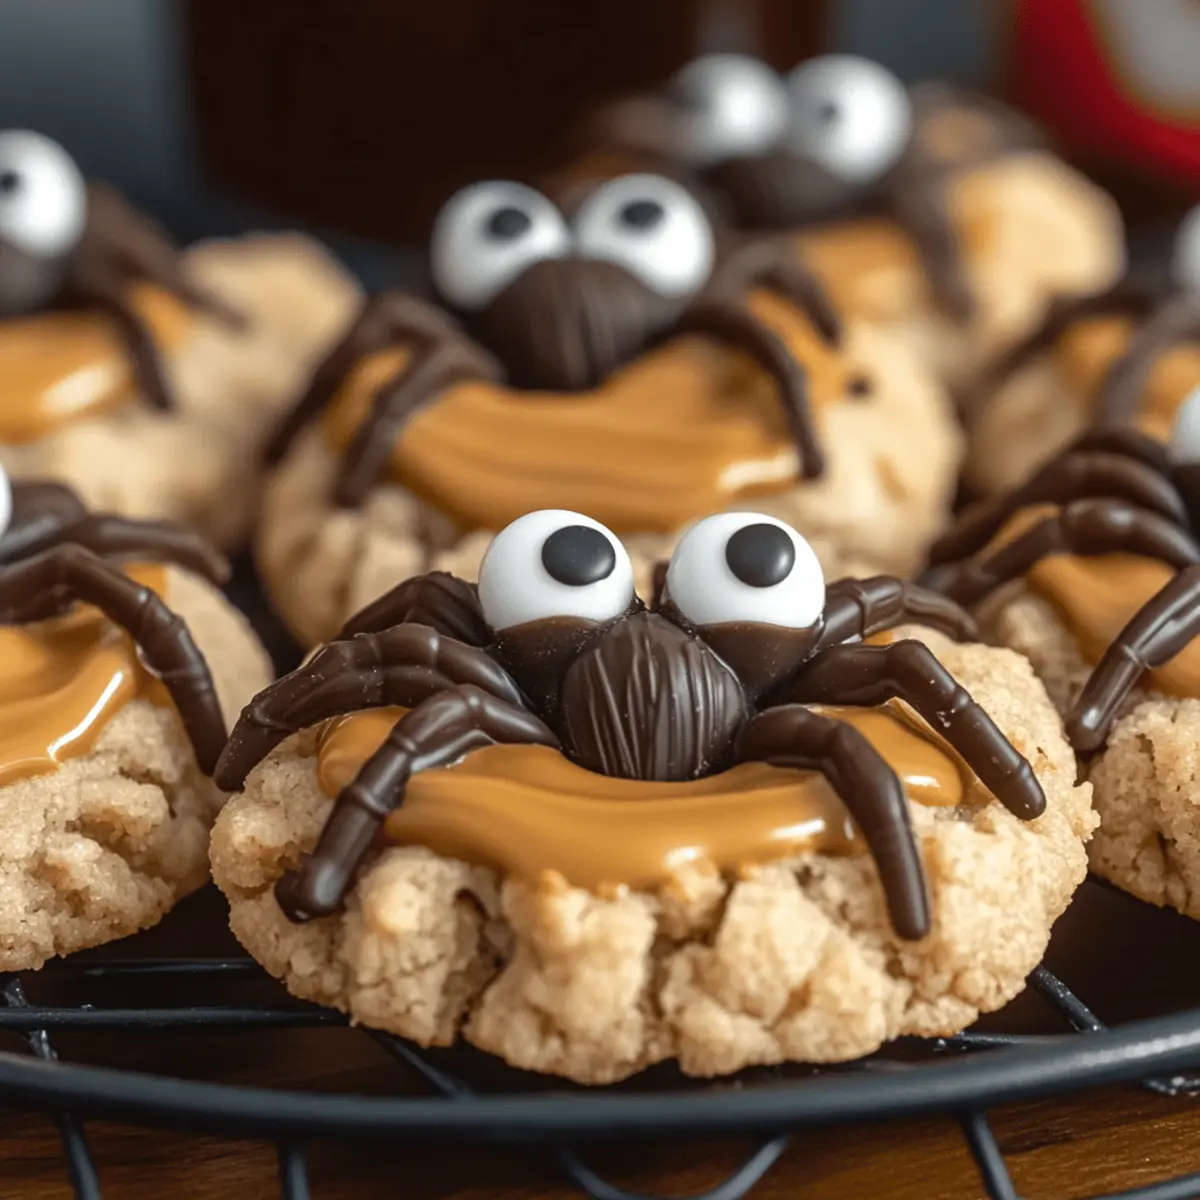
Festive and Fun: These cookies are a delightful visual treat, making them perfect for Halloween gatherings. The melted chocolate and candy eyes create an adorable spider design that’s sure to impress.
Crowd Pleaser: Both kids and adults will be reaching for these cookies! They are a hit at parties and make for excellent treats when entertaining guests.
Customizable: Want to switch things up? You can swap peanut butter for almond butter or use mint chocolate candies instead of Reese’s cups for a unique twist!
Gluten-Free Option: Not everyone can enjoy conventional treats, but this recipe can easily be made gluten-free, ensuring everyone can delight in these spooky sweets.
Whip up a batch of these delicious cookies and serve them alongside other favorites like Garlic Butter Meatballs or Garlic Butter Chicken Bites for a perfect Halloween spread!
Peanut Butter Spider Cookies Ingredients
• Get ready for spooky fun!
For the Cookie Dough
- Unsalted Butter – Adds richness and moisture; ensure it’s at room temperature for easier blending.
- Brown Sugar – Provides sweetness and depth of flavor; dark brown sugar enhances that delightful molasses taste.
- Granulated Sugar – Sweetens and helps form a crisp outer shell; you can substitute with coconut sugar for a unique flavor twist.
- Creamy Peanut Butter – Gives the primary flavor and chewy texture; avoid natural varieties as they can impact cookie consistency.
- Large Egg – Binds ingredients and adds moisture; for a vegan option, consider using a flax egg or chia egg.
- Vanilla Extract – Enhances the overall flavor; always use pure vanilla extract for the richest taste.
- All-Purpose Flour – Provides structure to the cookies; feel free to substitute with gluten-free all-purpose flour (1:1).
- Baking Soda – Acts as a leavening agent for lightness; be sure it’s fresh for the best rise.
- Baking Powder – Works alongside baking soda for added lift; consider using both for better texture.
- Salt – Balances the sweetness while enhancing flavor.
For Decorating
- Granulated Sugar (for rolling) – Adds a sugary crust; this step is essential for that delightful texture.
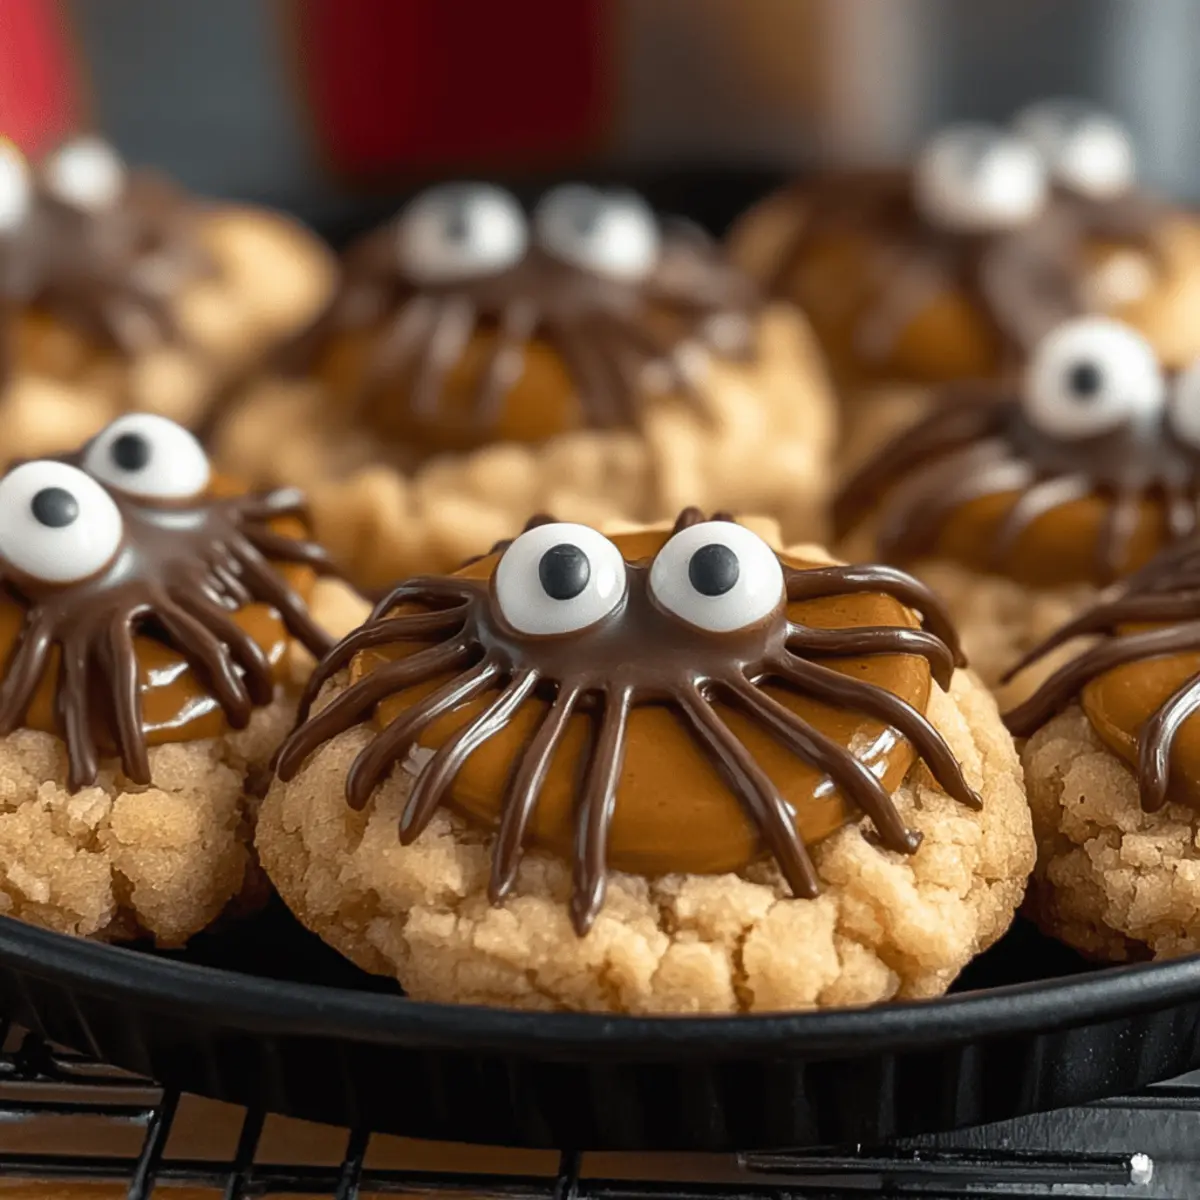
- Mini Reese’s Peanut Butter Cups – Serve as the cute ‘eyes’ on the cookies; you can opt for other chocolate candies, but Reese’s carry that classic flavor.
- Semi-Sweet Chocolate Chips – Melted to create spider legs and attach candy eyes; dark chocolate can be substituted for a richer experience.
- Candy Eyeballs – Decorative element to complete the spider look, ensuring each cookie is a visual delight.
Step‑by‑Step Instructions for Peanut Butter Spider Cookies
Step 1: Preparation
Begin by chilling 24 mini Reese’s cups in the freezer to keep them firm during baking. While they chill, preheat your oven to 350°F (175°C) and line a baking sheet with parchment paper. This step ensures your Peanut Butter Spider Cookies will bake evenly and stick less to the surface.
Step 2: Cream Butter & Sugars
In a large mixing bowl, use a hand mixer or stand mixer to beat ½ cup of softened unsalted butter, ½ cup of brown sugar, and ¼ cup of granulated sugar together until the mixture is light and fluffy, about 2 to 3 minutes. This fluffy base creates the perfect texture for your cookies, giving them that delightful chewy bite.
Step 3: Combine Wet Ingredients
Add in ¾ cup of creamy peanut butter, 1 large egg, and 1 teaspoon of vanilla extract to the butter and sugar mixture. Mix until fully combined, scraping down the sides of the bowl as needed. The creamy consistency will enrich your Peanut Butter Spider Cookies with essential flavor and moisture.
Step 4: Incorporate Dry Ingredients
Gradually mix in 1¼ cups of all-purpose flour, ½ teaspoon of baking soda, ¼ teaspoon of baking powder, and a pinch of salt until just combined. Avoid overmixing to keep your cookies tender and soft after baking. You should see a thick cookie dough forming, free from dry flour patches.
Step 5: Shape Cookies
Using a tablespoon, scoop out portions of dough and gently roll them into balls. Roll each ball in granulated sugar for an added sugary crust, then place them on the prepared baking sheet, spaced about 2 inches apart. This helps them have room to spread while baking, ensuring perfect forming for your festive treats.
Step 6: Bake
Slide the baking sheet into the preheated oven and bake the cookies for 8 to 11 minutes. Look for the edges to be set but the centers to remain soft and slightly underbaked; they’ll continue cooking once removed from the oven. This helps achieve that classic chewy texture found in Peanut Butter Spider Cookies.
Step 7: Cool & Decorate
Allow the cookies to cool on the baking sheet for 15-20 minutes. Once cooled, press a frozen mini Reese’s cup into the center of each cookie. Melt ½ cup of semi-sweet chocolate chips in a microwave or double boiler, then use a piping bag or a fork to draw spider legs on each cookie and attach candy eyeballs. Your Peanut Butter Spider Cookies are now ready to amaze!
How to Store and Freeze Peanut Butter Spider Cookies
Room Temperature: Store cookies in an airtight container at room temperature for up to 3 days; place parchment paper between layers to prevent sticking.
Fridge: If you prefer softer cookies, you can refrigerate them for up to a week, helping to prolong their freshness.
Freezer (Dough): Shape the cookie dough and freeze it without rolling in sugar. It can last up to 3 months; just bake from frozen for a quick treat!
Freezer (Baked Cookies): Baked Peanut Butter Spider Cookies can be frozen for up to 3 months. Thaw in the fridge or at room temperature before enjoying.
Expert Tips for Peanut Butter Spider Cookies
-
Ingredient Temperature: Ensure your unsalted butter is at room temperature for easier blending, which helps create a smooth dough.
-
Avoid Overmixing: Once you add the dry ingredients, mix just until combined. This prevents tough cookies and maintains that delightful chewy texture.
-
Cookie Spacing: Leave enough space between the cookie dough balls on the baking sheet to allow for spreading; aim for about 2 inches apart.
-
Perfectly Soft Centers: Remove the cookies from the oven when the edges are set but the centers are still soft. They’ll firm up as they cool.
-
Frozen Reese’s Trick: Keep the mini Reese’s cups frozen until you’re ready to press them into the cookies to prevent excessive melting during baking.
-
Gluten-Free Option: If using gluten-free flour, ensure it contains xanthan gum to replicate the chewy texture of traditional cookies.
Peanut Butter Spider Cookies Variations
Feel free to let your creativity shine and customize these delightful cookies to match your taste and dietary preferences!
-
Almond Butter: Swap out the peanut butter for almond butter for a unique, nutty flavor twist. It’s an excellent alternative that still delivers a satisfying chewiness.
-
Minty Touch: Replace Reese’s cups with mint chocolate candies to give your cookies a refreshing minty kick. This variation creates a spooky yet delicious flavor profile that excites the taste buds!
-
Gluten-Free Option: Use gluten-free all-purpose flour instead of regular flour for a delightful treat everyone can enjoy. This way, you maintain the chewy texture while accommodating dietary needs.
-
Choco-Mallow: Stir in mini marshmallows into the dough for a smushy, gooey surprise with each bite. This added texture brings a whole new level of fun, making them even more irresistible!
-
Sprinkle Fest: Use colorful Halloween sprinkles on top before baking. These whimsical decorations enhance the festive appearance, making your cookie platter an eye-catching showstopper.
-
Spicy Halloween: Add a pinch of cayenne pepper or cinnamon to the dough for a subtle spiced warmth that balances well with peanut butter. These playful heat levels can make your cookies stand out.
-
Nut-Free Variation: For a nut-free option, substitute the peanut butter with sunbutter (sunflower seed butter). It’s an excellent alternative that brings its unique flavor while keeping the spirit of fun alive!
These variations are not only delicious but also add a personal touch to your Halloween baking. Whether you stick with the classic version or explore these fun options, your Peanut Butter Spider Cookies are sure to delight everyone! Serve them alongside festive favorites like Garlic Butter Steak for an unforgettable Halloween spread.
Make Ahead Options
These Peanut Butter Spider Cookies are perfect for meal prep, allowing busy cooks to enjoy festive treats without the last-minute rush! You can prepare the cookie dough up to 24 hours in advance—simply follow the instructions up to step 5, then wrap the dough tightly in plastic wrap and refrigerate. Additionally, you can freeze baked cookies for up to 3 months; ensure they cool completely before placing them in an airtight container, separating layers with parchment paper to prevent sticking. When ready to enjoy your Peanut Butter Spider Cookies, simply thaw them at room temperature, add the decorative chocolate and candy eyes, and voilà—deliciously spooky cookies with minimal effort!
What to Serve with Peanut Butter Spider Cookies
Elevate your Halloween gathering with these adorable treats while exploring delightful pairings that spark joy and flavor.
-
Milk or Dairy-Free Alternatives: A classic pairing, milk beautifully complements the rich peanut butter flavor, while dairy-free options like almond or oat milk cater to various dietary needs.
-
Halloween-Themed Fruit Platter: Fresh fruits like orange segments, apples, and blackberries create a spooky yet healthy side that balances the sweetness of the cookies. They add color and freshness to your dessert table.
-
Pumpkin Spice Latte: Warm and spiced, this seasonal favorite enhances the cozy atmosphere of fall gatherings, making it a perfect sip alongside your cookies.
-
Chocolate-Dipped Pretzels: The salty crunch of pretzels creates a delicious contrast to the soft, chewy texture of the cookies. They’re a fun, interactive indulgence at the party too!
-
Apple Cider Sangria: For a festive and refreshing drink, this spiced cider with slices of apples and cranberries adds a fruity note that pairs wonderfully with sweet treats.
-
Decorated Cupcakes: Colorful cupcakes can echo the Halloween theme, with fun icing and garnishes that lure kids and adults alike into a sugary dreamland.
These pairings bring harmony and fun to your Halloween celebrations, enhancing the delightful experience of enjoying Peanut Butter Spider Cookies!
Peanut Butter Spider Cookies Recipe FAQs
How do I know when my peanut butter is ripe for baking?
Absolutely! When choosing peanut butter for these cookies, opt for a creamy variety to ensure a smooth texture. Avoid natural peanut butter with oil separation, as it can lead to inconsistent cookie texture. Look for well-stirred creamy options that will blend effortlessly into your dough.
What’s the best way to store leftover cookies?
Very! Store your Peanut Butter Spider Cookies in an airtight container at room temperature for up to 3 days. To keep them fresh and prevent sticking, I recommend placing a sheet of parchment paper between layers. If you prefer softer cookies, feel free to refrigerate them, where they can last up to a week.
Can I freeze the cookie dough?
You absolutely can! To freeze the dough, shape the cookie balls and place them on a baking sheet without rolling in sugar. Freeze until firm, then transfer them to an airtight container or freezer bag. They can be stored like this for up to 3 months. When you’re ready to bake, just pop them in the oven directly from frozen, adding an extra minute or two to the baking time.
What if my cookies come out too hard or too soft?
No worries! If your Peanut Butter Spider Cookies turn out too hard, it could be due to overbaking. Aim for the edges to be set while the centers look soft; they will firm up as they cool. On the other hand, if they’re too soft, it might be that the dough didn’t have enough flour or the cookies were underbaked. Make sure you’re leveling off flour and doing a quick bake test on a smaller batch if unsure.
Are these cookies safe for pets or those with allergies?
Great question! These cookies contain common allergens like peanuts and gluten, so they should be kept away from pets and those with allergies. If you need a safe alternative for your furry friends, consider peanut butter made specifically for dogs, and be sure to check for any added sugar or xylitol, which is harmful to them.
Can I make these cookies gluten-free?
Absolutely! To adapt your Peanut Butter Spider Cookies for a gluten-free diet, simply swap out the all-purpose flour for a 1:1 gluten-free flour blend. It’s essential to check that the blend includes xanthan gum, as this will help replicate the chewy texture of traditional cookies. Enjoy worry-free baking!
Peanut Butter Spider Cookies: A Fun Halloween Delight
Ingredients
Equipment
Method
- Begin by chilling 24 mini Reese’s cups in the freezer. Preheat your oven to 350°F (175°C) and line a baking sheet with parchment paper.
- In a large mixing bowl, beat ½ cup of softened unsalted butter, ½ cup of brown sugar, and ¼ cup of granulated sugar until light and fluffy, about 2 to 3 minutes.
- Add in ¾ cup of creamy peanut butter, 1 large egg, and 1 teaspoon of vanilla extract to the mixture. Mix until fully combined.
- Gradually mix in 1¼ cups of all-purpose flour, ½ teaspoon of baking soda, ¼ teaspoon of baking powder, and a pinch of salt until just combined.
- Using a tablespoon, scoop out portions of dough and roll them into balls. Roll each ball in granulated sugar, then place them on the baking sheet, spaced about 2 inches apart.
- Bake the cookies for 8 to 11 minutes, looking for set edges and soft centers.
- Allow the cookies to cool on the baking sheet for 15-20 minutes. Press a frozen mini Reese’s cup into the center of each cookie. Melt ½ cup of chocolate chips and use to draw spider legs and attach candy eyeballs.