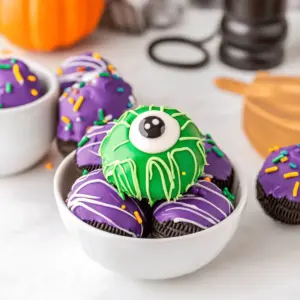
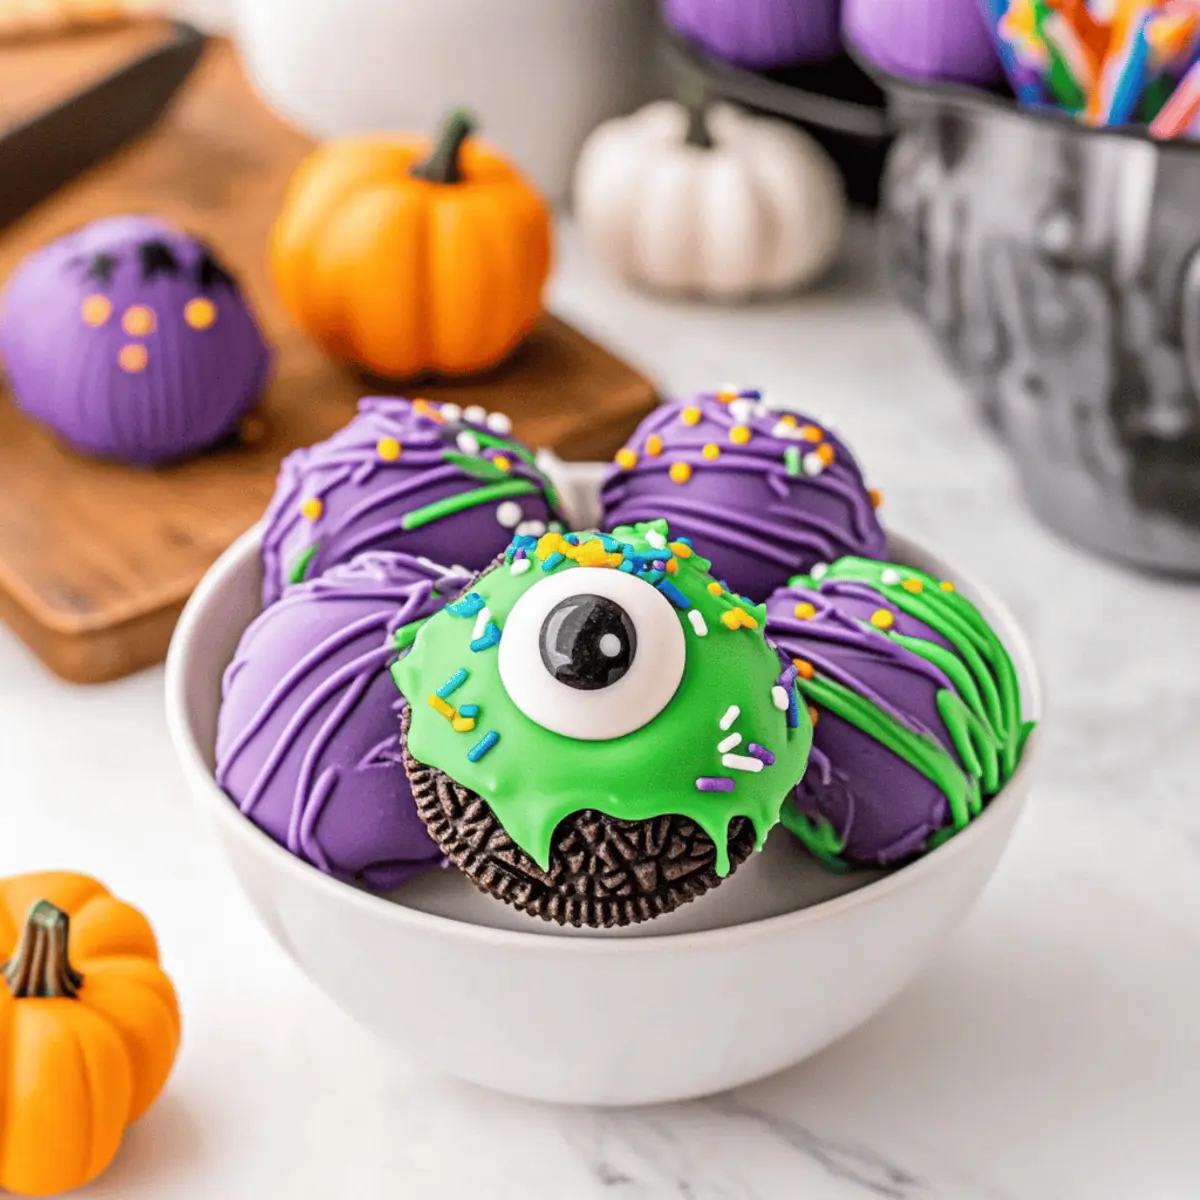
As the autumn leaves begin to fall and spooky decorations adorn every corner, there’s a thrill in indulging in playful treats that capture the spirit of Halloween. Enter the no-bake Monster Eyeballs, an adorable twist on traditional Oreo truffles that will enchant your family and friends alike. These delightful little monsters are not only a breeze to whip up, but they also make perfect festive gifts or centerpiece desserts for any Halloween bash. With their creamy interior wrapped in colorful candy melts and topped with whimsical eyes, they offer a delightful touch to your spooky celebrations. Are you ready to channel your inner monster and create these fun, easy-to-make treats? Let’s dive into the fun!
Why are Monster Eyeballs a must-try?
Delightfully fun: These no-bake treats bring a playful twist to your Halloween festivities, making them perfect for kids and adults alike.
Simplicity at its finest: With just a handful of ingredients, creating these adorable Monster Eyeballs is a breeze that even novice bakers can tackle.
Crowd-pleaser: When served at parties or classrooms, these spooky sweets are sure to steal the show and delight everyone’s taste buds!
Creative freedom: The decorations are entirely customizable! Mix and match colors of candy melts and sprinkles to reflect your unique style.
Make ahead: Prep them in advance with ease and store them in the fridge, making your Halloween preparations less stressful.
Dive deeper into the Halloween spirit with other festive recipes like spooky spider cupcakes or witches’ brew punch.
Monster Eyeballs Ingredients
Get ready to create the cutest and creepiest treats this Halloween with these delightful Monster Eyeballs!
For the Truffles
- Oreo Cookies – A delicious base for your Monster Eyeballs; feel free to try any flavor, but golden Oreos add a fun spin!
- Cream Cheese – Provides that rich, creamy texture; full-fat is recommended for the best flavor and consistency.
For the Coating
- Colored Candy Melts – These create the vibrant outer layer; experiment with mixing colors for unique shades, or stick with classic chocolate melts.
For the Decorations
- Color-Matching Sprinkles – Add a whimsical touch; get creative with different shapes and colors to match your Halloween vibe.
- Large Candy Eyes – Essential for that monster-like effect; don’t hesitate to use smaller eyes or even homemade options if you’re feeling adventurous!
Step‑by‑Step Instructions for Monster Eyeballs
Step 1: Crush Oreos
Begin by placing the Oreo cookies in a food processor. Blend them until they are finely crumbled, resembling sand. This should take about 30 seconds. If you don’t have a food processor, place them in a Ziploc bag and crush with a rolling pin. Make sure not to remove the filling, as it adds essential flavor.
Step 2: Combine Mixture
Transfer the crushed Oreos to a mixing bowl and add softened cream cheese. Use a spatula or your hands to mix until the mixture is well-combined and creamy, with no dry clumps remaining. This should take about 2-3 minutes. The consistency should be moist enough to hold together when formed, resulting in a rich filling for your Monster Eyeballs.
Step 3: Form Truffles
Using a cookie scoop or your hands, scoop out about 1.5 tablespoons of the Oreo mixture and roll it into a ball. Place each ball onto a parchment-lined baking sheet, ensuring they are spaced apart. Aim for about 12-15 balls. This step not only shapes your Monster Eyeballs but also prepares them for chilling, setting the foundation for these delightful treats.
Step 4: Chill
Once formed, refrigerate the truffles for 15-30 minutes until they are firm. This crucial chilling time helps the truffles hold their shape when coated later. Keep an eye on them; they should feel solid to the touch before proceeding to the next step.
Step 5: Melt Candy
While your truffles chill, prepare the coating by melting the colored candy melts. Place them in a microwave-safe bowl and heat in 30-second intervals, stirring between each, until fully smooth and melted, which should take about 1-2 minutes. The candy should be warm and easily coat your Monster Eyeballs.
Step 6: Coat Truffles
Remove the chilled truffles from the fridge and dip each one into the melted candy. Use a fork to ensure the truffle is completely coated, then gently tap it to remove excess candy. Place each candy-coated truffle back onto the parchment-lined baking sheet. Make sure each one has an even, glossy finish for that eye-catching Monster Eyeball appearance.
Step 7: Decorate
Before the candy coating hardens, press a large candy eye onto the center of each truffle. Then, sprinkle with color-matching sprinkles for an extra festive touch. This immediate decoration step is key, so work quickly! The sprinkles add the final whimsical touch, transforming simple truffles into fun Monster Eyeballs.
Step 8: Set
Finally, return your decorated Monster Eyeballs to the refrigerator for at least 30 minutes, allowing the candy coating to fully set. They should feel firm to the touch and have a solid appearance. Once set, these delicious no-bake treats are ready to impress at any Halloween gathering!
Storage Tips for Monster Eyeballs
- Fridge: Store your Monster Eyeballs in an airtight container in the refrigerator for up to 1 week, keeping them fresh and delicious for everyone to enjoy.
- Freezer: For longer storage, freeze the Monster Eyeballs in a freezer-safe container for 2-3 months. Thaw them in the fridge before serving for the best taste and texture.
- Wrapping: If stacking the truffles in a container, use parchment paper between layers to prevent sticking and maintain their delightful appearance.
- Reheating: There’s no need to reheat these no-bake treats; simply serve them chilled for the ultimate refreshing bite at your Halloween festivities!
Monster Eyeballs Variations & Substitutions
Feel free to mix things up with these delightful variations that can take your Monster Eyeballs to a whole new level of fun and flavor!
-
Flavored Cream Cheese: Try using flavored cream cheeses like chocolate or strawberry for a delicious twist.
-
Alternative Coatings: Instead of colored candy melts, use white chocolate or even dark chocolate for a richer flavor profile. This will give your Monster Eyeballs a splendid depth while keeping them festive.
-
Texture Boost: Add crushed nuts or crispy rice cereal to the mixture for an extra crunch. Mixing in a bit of texture makes each bite even more satisfying!
-
Spooky Colors: Customize the appearance by mixing candy melts to create unique shades or using seasonal colors like orange and purple—perfect for Halloween flair!
-
Mini Monster Eyes: Opt for smaller candy eyes or even make your own using piped melted chocolate. This gives a fun twist on the classic decoration and a chance to get creative.
-
Spice It Up: Add a pinch of cinnamon or nutmeg to the Oreo mixture for a warm, spiced flavor that evokes the coziness of fall.
-
Fruit Surprise: Incorporate finely chopped dried fruits like raisins or cranberries into the mixture for a chewy element that pairs wonderfully with the truffles.
-
Nut-Free Option: Switch the Oreo cookies for nut-free cookies if you’re accommodating allergies. Vanilla wafers or graham crackers can make delightful alternatives!
Dive deeper into creative baking with more festive goodies like spooky spider cupcakes or witches’ brew punch to complement your Halloween festivities!
Expert Tips for Monster Eyeballs
- Cream Cheese Temperature: Ensure that your cream cheese is at room temperature for easy mixing and maximum flavor in your Monster Eyeballs.
- Proper Crumbling: If you don’t have a food processor, use a Ziploc bag and a rolling pin to crush the Oreos. Keep the filling intact for added richness!
- Coating Technique: Use a fork to coat each truffle in melted candy, gently tapping to remove excess. This keeps the coating smooth and avoids clumping.
- Fun Variations: Experiment with different flavors of cream cheese or colored candy melts to give your Monster Eyeballs a unique twist that suits your taste.
- Storage Tips: Keep your Monster Eyeballs in an airtight container in the fridge for up to a week, or freeze them for 2-3 months for a spooky treat anytime.
Make Ahead Options
These Monster Eyeballs are perfect for busy home cooks looking to streamline their Halloween preparations! You can make the truffle mixture up to 24 hours in advance; simply prepare the crushed Oreos and cream cheese mixture, roll them into balls, and refrigerate them in an airtight container. For the best quality, ensure they are kept chilled to maintain their firmness. When you’re ready to serve, melt the candy melts and coat the truffles, adding the candy eyes and sprinkles just before enjoying. With this prep, your delicious, spooky treats will taste just as delightful and be ready to impress your guests without stress!
What to Serve with No-Bake Halloween Monster Eyeballs
Pair these charming treats with delightful accompaniments to create a spooky yet festive dessert table for your Halloween gathering.
-
Crispy Apple Slices:
Refreshing and crunching, these add a light contrast to the creamy Monster Eyeballs, enhancing the overall experience. -
Ghoulish Green Punch:
A fun, vibrant drink can elevate the festive mood—try lime sherbet, lemon-lime soda, and a splash of fruit juice for extra flavor. -
Chocolate-Dipped Pretzels:
Sweet and salty, these offer a delightful crunch that perfectly complements the softness of your truffles, providing an exciting texture contrast. -
Mini Pumpkin Cheesecakes:
Add a fall-inspired twist! These rich little desserts bring seasonal warmth while contrasting the playful decor of the Monster Eyeballs. -
Ghostly Meringue Cookies:
Light and airy, these whimsical treats can create a ghostly theme, delighting not just the eyes but the taste buds too. -
Spooky Trail Mix:
Create a mix of nuts, dried fruit, and chocolate-covered candies for a fun, crunchy side that’s easy to snack on between truffles. -
Candy Corn:
A Halloween classic! Its vibrant colors create a festive display and add a sweet crunch that engages every palate. -
Black Cat Cupcakes:
Bring the theme home with cupcakes topped with chocolate frosting and cat ears; the combination will keep guests coming back for more spooky fun!

Monster Eyeballs Recipe FAQs
What kind of Oreos should I use for Monster Eyeballs?
Absolutely! You can use any flavor of Oreo cookies, but I highly recommend using golden Oreos for a lighter appearance. The classic chocolate Oreos also work beautifully, giving a darker contrast against the colorful candy melts.
How should I store Monster Eyeballs once made?
Store your Monster Eyeballs in an airtight container in the refrigerator for up to 1 week. This keeps them fresh and delicious for everyone to enjoy. If you have more than you can consume in that time, don’t worry! These treats can be frozen for later enjoyment.
Can I freeze Monster Eyeballs?
Yes! To freeze your Monster Eyeballs, place them in a single layer on a baking sheet until firm, then transfer them to a freezer-safe container or a Ziploc bag, separating layers with parchment paper to prevent sticking. They can last up to 3 months in the freezer. When you’re ready to enjoy them, simply thaw them in the refrigerator for a few hours before serving!
What if my candy coating is too thick?
If you find that your melting candy is too thick for proper coating, try adding a teaspoon of vegetable oil to the melted candy. This will thin it out, making it easier to dip your truffles and create an even coating. Stir well until the oil is fully incorporated, and you should be ready to go!
Can pets have Monster Eyeballs?
Unfortunately, it’s best to keep these Monster Eyeballs away from pets. Ingredients like chocolate and cream cheese are not safe for dogs or cats. Always ensure that any treats you prepare are kept in pet-free zones during Halloween festivities.
Can I substitute the cream cheese?
Very! If you have dietary restrictions or prefer a different flavor, you can substitute cream cheese with flavored cream cheeses, such as chocolate or strawberry. Alternatively, for a vegan-friendly option, consider using a plant-based cream cheese to achieve a similar texture and taste!

Monster Eyeballs: Irresistible No-Bake Halloween Treats
Ingredients
Equipment
Method
- Crush Oreo cookies in a food processor until finely crumbled.
- Combine crushed Oreos with softened cream cheese in a mixing bowl and mix until smooth.
- Scoop about 1.5 tablespoons of the mixture and roll into balls, placing on a parchment-lined baking sheet.
- Chill truffles in the refrigerator for 15-30 minutes until firm.
- Melt colored candy melts in a microwave-safe bowl, stirring until smooth.
- Dip each chilled truffle into the melted candy, ensuring they are fully coated.
- Press a candy eye onto each truffle and sprinkle with matching sprinkles before the coating hardens.
- Return Monster Eyeballs to the fridge for at least 30 minutes to set.