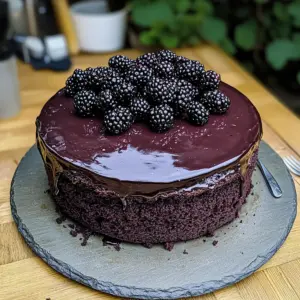
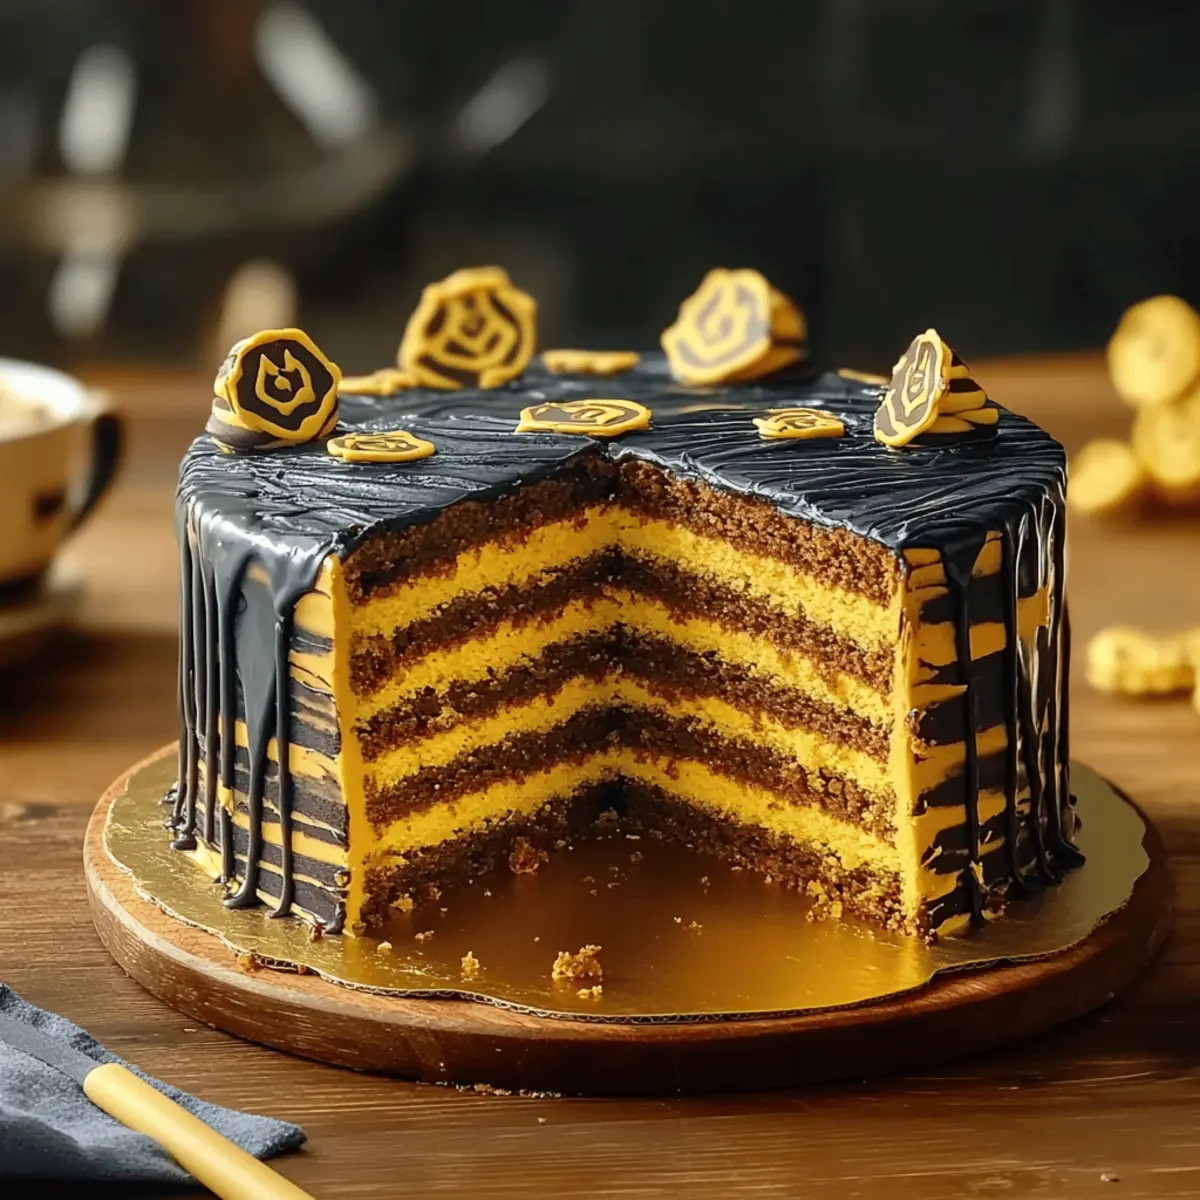
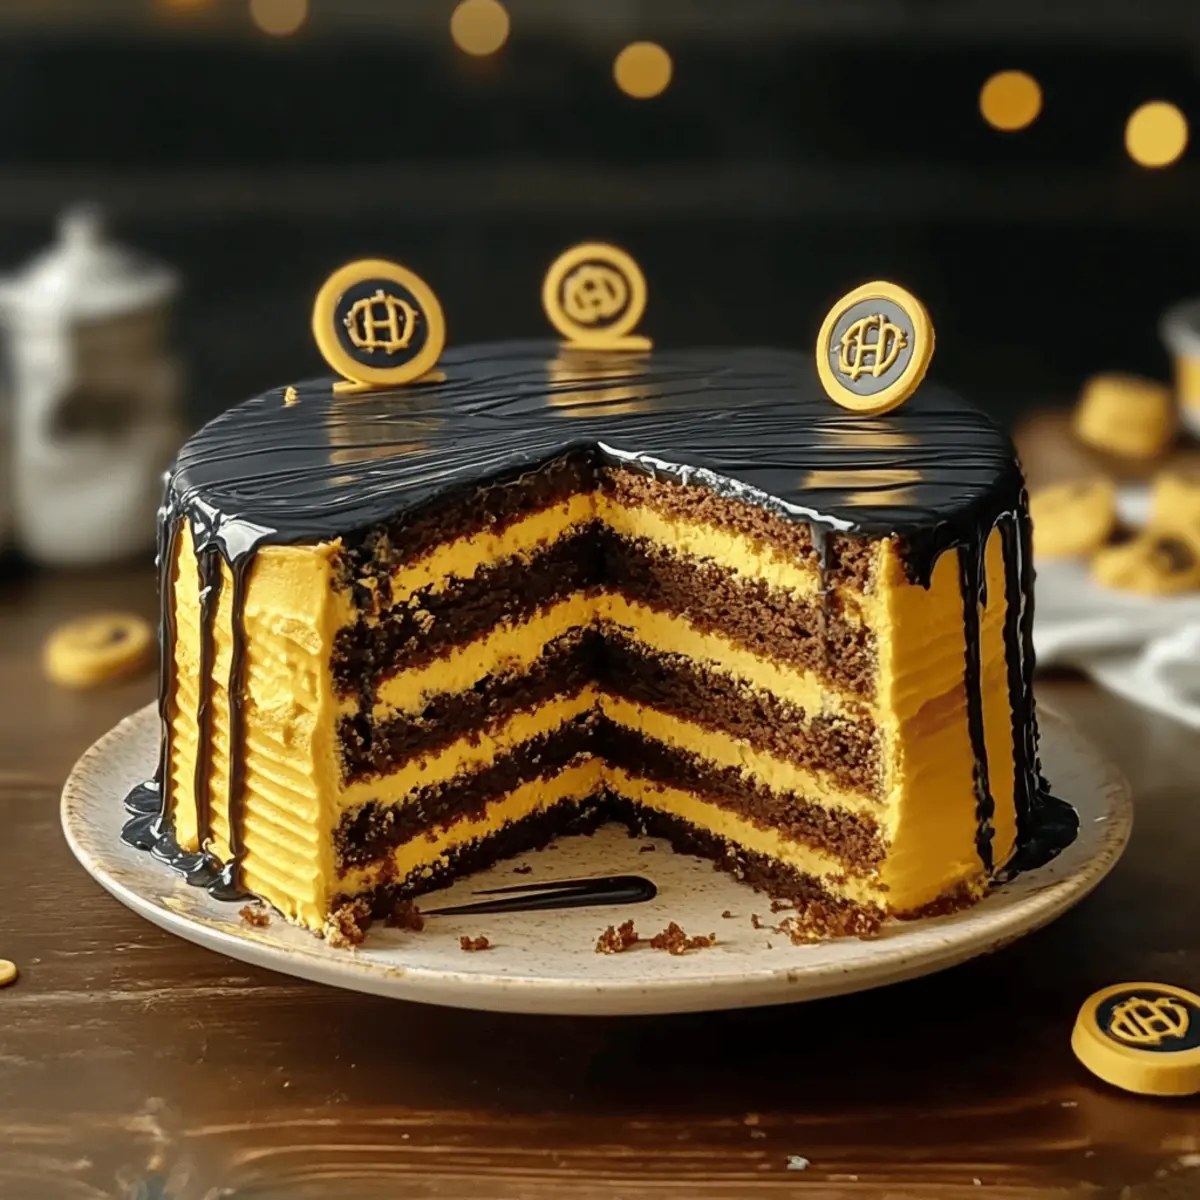
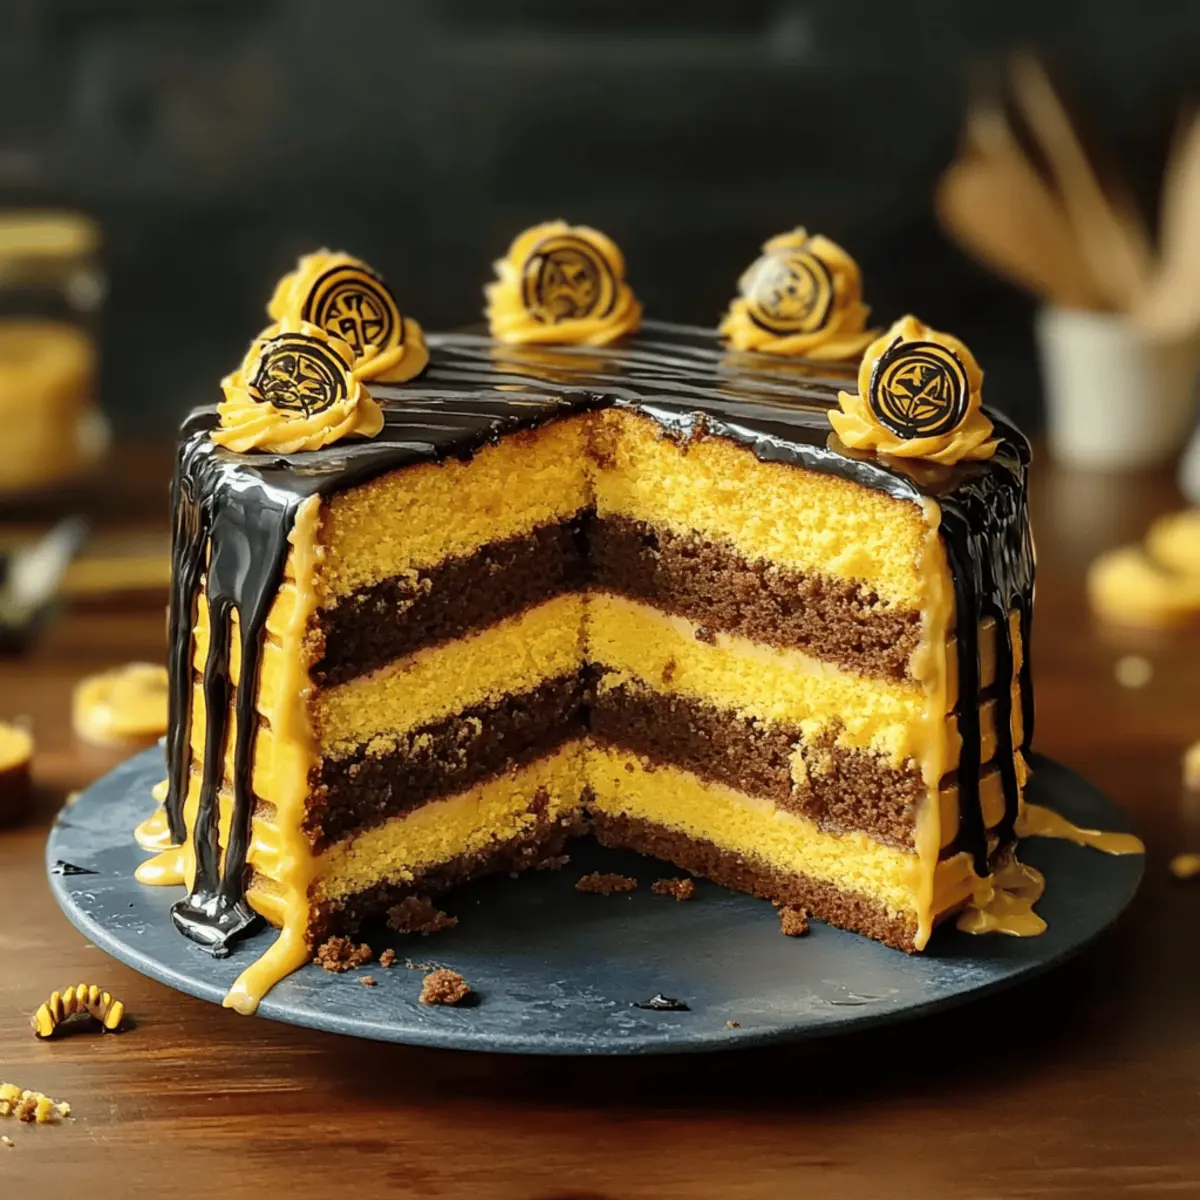
As I sifted through my cookbook collection, the vibrant colors of a layered cake caught my eye, instantly whisking me away to the whimsical world of Hufflepuff. This Homemade Hufflepuff’s Layer Cake is a delightful tribute to the spirit of kindness and community that embodies this beloved house. Perfect for themed parties or cozy family gatherings, this stunning dessert not only showcases beautiful layers of rich buttery cake but also offers a hint of chocolatey goodness with its luscious ganache. It’s a dish that’s as fun to make as it is to share, and it’s sure to leave your guests enchanted. Curious how to create this magical treat? Let’s dive into the baking adventure!
Why Is This Cake So Special?
Vibrant Colors: Each layer bursts with cheerful yellow, making your dessert visually captivating and perfect for gatherings.
Decadent Ganache: The rich, glossy ganache drizzled on top adds a touch of luxurious chocolate that delights the senses.
Easy to Prepare: With simple steps and readily available ingredients, this Homemade Hufflepuff’s Layer Cake is not just for experts; even novice bakers can create it effortlessly.
Themed Delight: Ideal for Harry Potter fans, this recipe brings a touch of magic to birthdays, parties, or simply an afternoon treat.
Crowd-Pleasing Flavor: The harmonious balance of buttery cake and chocolate ganache ensures every slice is a hit among guests, making this cake a sure standout at any event.
Don’t forget to check out my tips for perfect frosting techniques and explore variations that can personalize your baking experience!
Homemade Hufflepuff’s Layer Cake Ingredients
• Let’s gather everything you need to create this enchanting dessert!
For the Cake
- All-purpose flour – Provides structure; substitute with gluten-free flour mix if needed.
- Baking powder – Acts as a leavening agent; make sure it’s fresh for the best rise.
- Salt – Enhances flavor; keep it in for balance unless necessary to omit.
- Unsalted butter (softened) – Adds moisture and richness; vegan butter works for a dairy-free option.
- Granulated sugar – Brings sweetness; consider brown sugar for a deeper flavor.
- Eggs – Binds the cake together; flax eggs can substitute for a vegan alternative.
- Vanilla extract – Boosts flavor; opt for pure vanilla for the best quality.
- Whole milk – Contributes moisture; any plant-based milk can be used for a dairy-free version.
- Yellow gel food coloring – Provides visual appeal; skip it for a natural look or use turmeric as an alternative.
For the Ganache
- Heavy cream – Creates a luscious ganache; coconut cream works as a non-dairy substitute.
- Semi-sweet chocolate chips – Add flavor and richness; dark chocolate offers a deeper taste.
- Black gel food coloring – Enhances visual effect; can be omitted for a natural appearance.
For the Frosting
- Powdered sugar – Delivers sweetness and texture; adding cornstarch can enhance stability in homemade versions.
Optional Decorations
- Additional decorations – Enhance your cake’s presentation with edible gold dust or themed cake toppers.
With these ingredients, you’re ready to embark on your magical baking adventure creating the Homemade Hufflepuff’s Layer Cake!
Step‑by‑Step Instructions for Homemade Hufflepuff’s Layer Cake
Step 1: Prep Cake Pans
Preheat your oven to 350°F (175°C). While it’s heating, grease and flour three 8-inch round cake pans to prevent sticking. Make sure to tap out any excess flour, creating a nice non-stick base for your Homemade Hufflepuff’s Layer Cake.
Step 2: Mix Dry Ingredients
In a mixing bowl, whisk together 2 cups of all-purpose flour, 1 tablespoon of baking powder, and 1/2 teaspoon of salt until well combined. This step is essential for ensuring even distribution of the leavening agent and helps in creating the perfect fluffy texture. Set this mixture aside while you prepare the wet ingredients.
Step 3: Cream Butter and Sugar
Using a stand mixer or a large bowl and hand mixer, beat 1 cup of softened unsalted butter and 1 ¾ cups of granulated sugar together on medium speed until the mixture is light and fluffy, about 3-4 minutes. This creaming process is crucial for incorporating air, which gives your cake its delightful rise.
Step 4: Add Eggs and Vanilla
Add in 4 large eggs, one at a time, mixing well after each addition to ensure they are fully incorporated. Then, pour in 2 teaspoons of vanilla extract, mixing until rich and smooth. Your batter should appear creamy and deliciously fragrant by the end of this step, setting the stage for the vibrant layers of your cake.
Step 5: Combine Mixtures
Gradually add the dry ingredients to the wet mixture, alternating with 1 cup of whole milk. Start and end with the flour mixture, mixing just until combined. If using, add in several drops of yellow gel food coloring to get the bright, friendly hue of Hufflepuff. Be careful not to overmix to keep your cake tender!
Step 6: Bake
Divide the batter evenly among the prepared cake pans, smoothing it into an even layer. Bake in the preheated oven for 20-25 minutes or until a toothpick inserted into the center comes out clean. Your cakes should expand beautifully and be golden on top when they’re done. Once baked, allow them to cool in the pans for 10 minutes before transferring to wire racks.
Step 7: Make Ganache
While the cakes cool, prepare the ganache. In a small saucepan, heat 1 cup of heavy cream over medium heat until it just begins to simmer. Pour the hot cream over 2 cups of semi-sweet chocolate chips in a bowl. Allow the mixture to sit for about 5 minutes, then stir until smooth. For that magical touch, blend in a few drops of black gel food coloring, and let it cool slightly.
Step 8: Assemble Cake
Once the cakes are completely cooled, level them with a serrated knife for even stacking. Place the first cake layer on a serving plate and spread a generous layer of ganache on top. Repeat this process for the remaining layers, stacking them carefully. Coat the entire cake with a thin crumb coat of yellow buttercream and refrigerate for about 30 minutes to set.
Step 9: Frost and Decorate
After the crumb coat has set, remove the cake from the fridge and frost the entire surface with a thick layer of yellow buttercream. Drizzle the cooled ganache over the top, allowing it to cascade down the sides for a beautiful finish. If desired, add edible decorations for extra flair and celebration!
Step 10: Chill and Serve
Allow the assembled Homemade Hufflepuff’s Layer Cake to chill in the refrigerator for at least 30 minutes before serving. This resting period helps the ganache to set properly and makes cutting easier. Once ready, slice and serve to delighted guests, celebrating the whimsical charm of this magical dessert!
Homemade Hufflepuff’s Layer Cake Variations
Feel free to explore new avenues of flavor and texture as you customize your cake adventure! Here are some delightful ideas to elevate your creative baking experience.
-
Gluten-Free: Swap all-purpose flour for a gluten-free flour blend to make this cake perfect for those with dietary restrictions.
-
Dairy-Free: Replace unsalted butter and whole milk with vegan butter and any plant-based milk for a compassionate twist that doesn’t skimp on flavor.
-
Chocolate Lovers: Fold in cocoa powder with your flour mix to create a rich chocolate layer cake that adds a whole new dimension to the classic.
-
Fruit Infusion: Add fresh fruit purees (like raspberry or lemon) to the batter for a vibrant flavor burst; this works wonderfully with the buttery cake!
-
Nutty Crunch: Incorporate finely chopped nuts, such as walnuts or pecans, into the batter for added texture and a delicious nutty taste that contrasts beautifully with the soft cake.
-
Zesty Surprise: A teaspoon of lemon or orange zest in the batter brings a bright, fresh flavor to balance the richness of the ganache.
-
Layered Goodness: Create themed layers by adding flavored creams or fruit preserves between the cake layers for an added layer of surprise and delight.
For even more inspiration, consider exploring my hints on frosting techniques or discover how to personalize your cake with unique offerings that fit your style!
What to Serve with Homemade Hufflepuff’s Layer Cake?
Pairing this enchanting treat with the right accompaniments can elevate your dessert experience to a whole new level.
-
Butterbeer Float: The creamy vanilla and butterscotch flavors in this drink perfectly complement the cake’s buttery richness, boosting the magical theme.
-
Chocolate Frogs: A whimsical touch that echoes the cake’s chocolate ganache, offering a fun, nostalgic element for Harry Potter fans of all ages.
-
Coconut Macaroons: Their chewy texture and sweetness contrast beautifully with the moist, buttery layers of the cake, creating a delightful diversity of textures.
-
Fresh Berries: Juicy raspberries or sliced strawberries add a refreshing tartness, balancing the sweetness of the cake and enhancing the overall flavor combination.
-
Chilled Milk: A glass of cold milk serves as a classic accompaniment, its creaminess complementing the layers while making each bite even more satisfying.
-
Vanilla Ice Cream: A scoop of smooth vanilla ice cream adds a delightful creaminess that beautifully mingles with the cake’s rich ganache.
-
Mint Tea: The light, herbal notes of mint tea provide a refreshing contrast to the sweetness of the cake, making for a pleasant palate cleanser.
Elevate your celebration with these delightful pairings, ensuring that every bite of your Homemade Hufflepuff’s Layer Cake is a magical experience!
Make Ahead Options
These Homemade Hufflepuff’s Layer Cake components are perfect for meal prep, saving you valuable time on busy days! You can prepare the cake layers up to 24 hours in advance by baking them, letting them cool completely, and then wrapping each layer in plastic wrap to keep them fresh. The ganache can also be made ahead and stored in an airtight container in the fridge for up to 3 days; just reheat it slightly in the microwave before using. When you’re ready to assemble, simply stack the layers with ganache, frost with buttercream, and chill briefly before serving. Your cake will taste just as delicious while giving you the gift of time!
How to Store and Freeze Homemade Hufflepuff’s Layer Cake
Fridge: Store leftovers wrapped in plastic wrap or placed in an airtight container for up to 3 days. This will help maintain the cake’s freshness and flavor.
Freezer: For longer storage, freeze slices of the Homemade Hufflepuff’s Layer Cake without decorations for up to one month. Wrap each slice tightly in plastic wrap and then aluminum foil to prevent freezer burn.
Thawing: When ready to enjoy, thaw the cake in the fridge for several hours or overnight. This gradual thawing helps preserve the cake’s texture and taste.
Reheating: If desired, gently warm individual slices in the microwave for about 10-15 seconds for a cozy, freshly-baked taste.
Expert Tips for Homemade Hufflepuff’s Layer Cake
-
Measure Carefully: Always use a kitchen scale or measuring cups for precise quantities; incorrect measurements can lead to undesired textures.
-
Room Temperature Ingredients: Bringing butter, eggs, and milk to room temperature ensures better mixing and a smoother batter for your Homemade Hufflepuff’s Layer Cake.
-
Avoid Overbaking: To keep your cake moist, check for doneness a few minutes early; a toothpick should come out clean but not dry.
-
Cool Completely: Make sure your cake layers are completely cool before frosting to prevent melting your buttercream or ganache.
-
Use Quality Chocolate: For the ganache, choose high-quality semi-sweet chocolate; it significantly enhances the richness and flavor of your cake.
-
Chill Between Layers: Allow the cake to chill after applying the crumb coat; this helps in achieving a clean finish when layering and frosting.

Homemade Hufflepuff’s Layer Cake Recipe FAQs
How do I select the best ingredients for my cake?
Absolutely! When selecting produce, look for eggs that are fresh (check the date on the carton) and butter that has a creamy, pale yellow color. For the flour, make sure it’s finely milled and free from lumps. If using any food coloring, opt for gel-based varieties as they provide vibrant colors without altering the cake’s consistency.
How should I store my leftover Homemade Hufflepuff’s Layer Cake?
Very! To keep your cake fresh, wrap it in plastic wrap or store it in an airtight container in the fridge for up to 3 days. If you want to save it for longer, you can freeze it. Just make sure to wrap any leftover slices tightly in foil or plastic wrap to prevent freezer burn.
Can I freeze the Homemade Hufflepuff’s Layer Cake?
Absolutely! For freezing, I recommend wrapping individual slices—without any decorations—in plastic wrap followed by aluminum foil. This way, it will stay tasty for up to 1 month. When you’re ready to indulge again, simply thaw the slices in the refrigerator overnight for the best texture.
What if my cake layers collapse or are too dense?
Very common! If your layers collapse, it might be due to overmixing the batter or not enough leavening agent. To fix density issues, ensure your baking powder is fresh and don’t overmix after adding flour. Aim for a tender, light batter—stop mixing as soon as it’s just combined!
Are there any allergy considerations for this recipe?
Of course! This Homemade Hufflepuff’s Layer Cake contains eggs and dairy, so for those with allergies, consider using flax eggs for a vegan option and a dairy-free butter substitute. Make sure to check labels when using alternative ingredients to avoid cross-contamination.
Can I use different colors or decorations on my cake?
Absolutely! Feel free to swap out the yellow gel coloring for natural alternatives like turmeric if you prefer a more organic approach. You might also enjoy adding your favorite edible decorations or themed toppers to bring out your own creativity!
Homemade Hufflepuff’s Layer Cake: A Magical Baking Adventure
Ingredients
Equipment
Method
- Preheat your oven to 350°F (175°C). Grease and flour three 8-inch round cake pans.
- In a mixing bowl, whisk together 2 cups of all-purpose flour, 1 tablespoon of baking powder, and 1/2 teaspoon of salt.
- Beat 1 cup of softened unsalted butter and 1 ¾ cups of granulated sugar together on medium speed until light and fluffy.
- Add in 4 large eggs one at a time, then mix in 2 teaspoons of vanilla extract.
- Gradually add the dry ingredients to the wet mixture, alternating with 1 cup of whole milk, mixing just until combined.
- Divide the batter evenly among the prepared cake pans and bake for 20-25 minutes.
- In a small saucepan, heat 1 cup of heavy cream until it begins to simmer, then pour over 2 cups of semi-sweet chocolate chips.
- Once the cakes are completely cooled, level them with a serrated knife and stack with ganache in between.
- Frost the cake with a crumb coat of yellow buttercream and refrigerate for 30 minutes.
- Frost the entire surface with yellow buttercream and drizzle with cooled ganache.
- Chill for at least 30 minutes before serving.