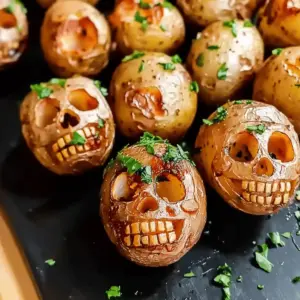
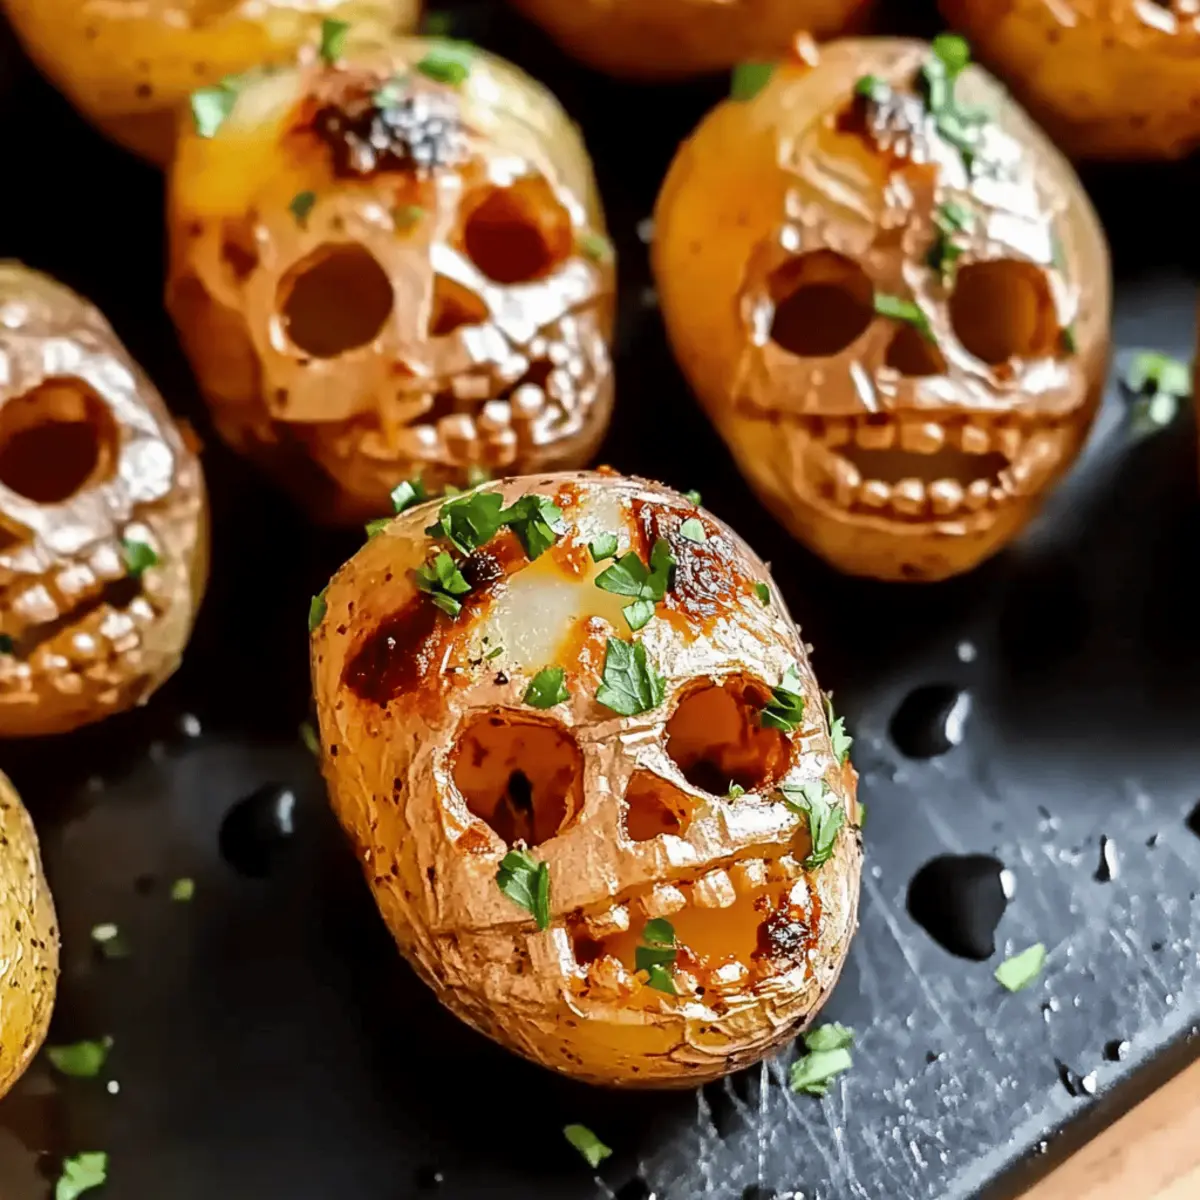
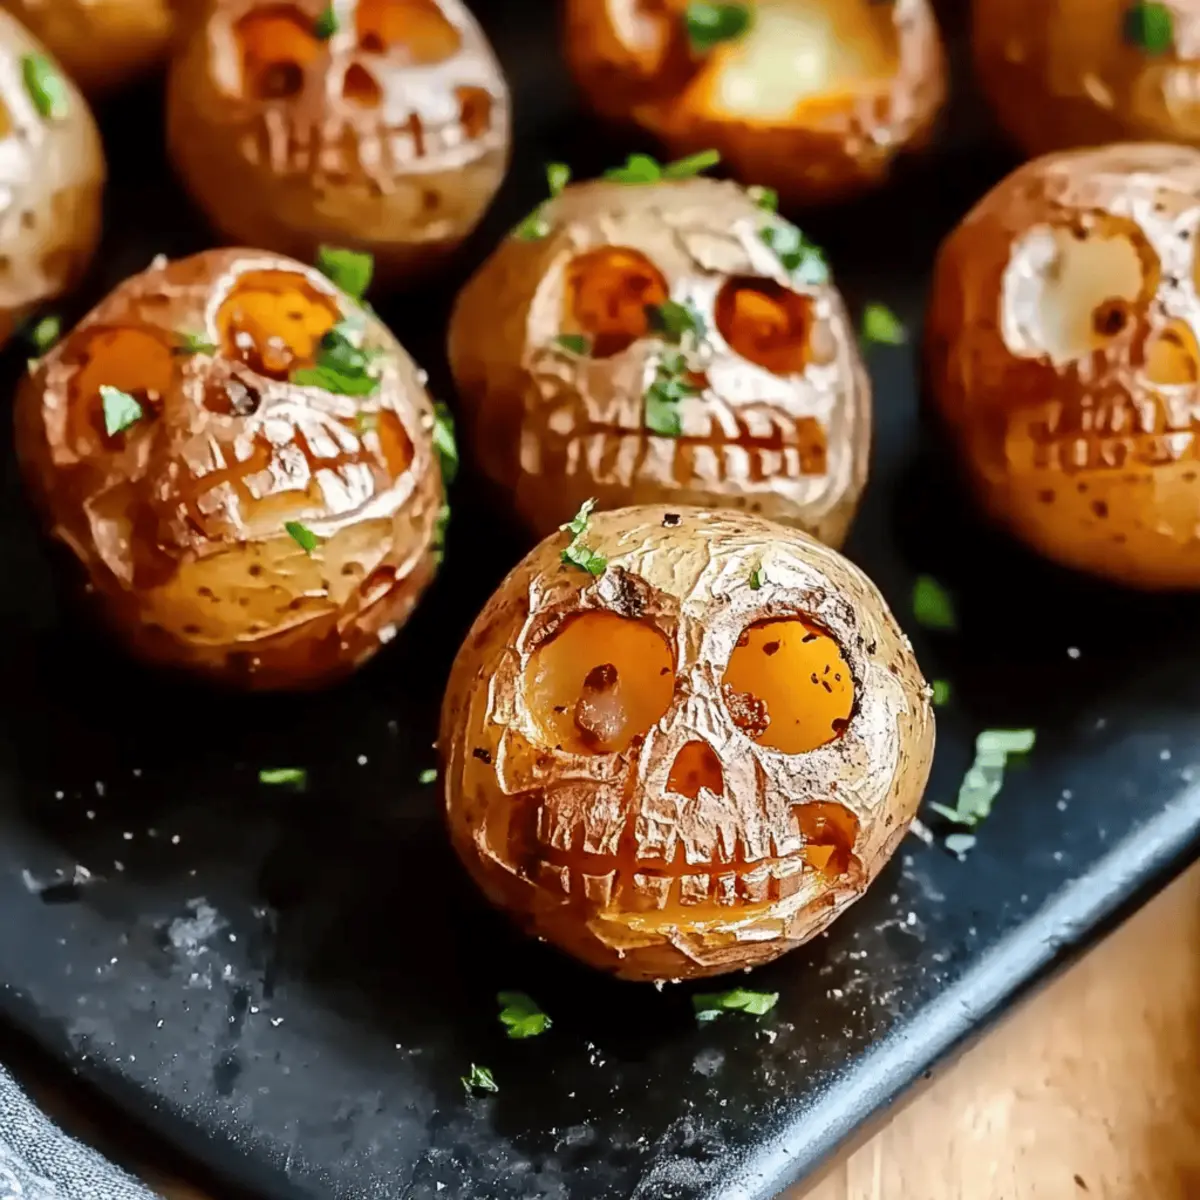
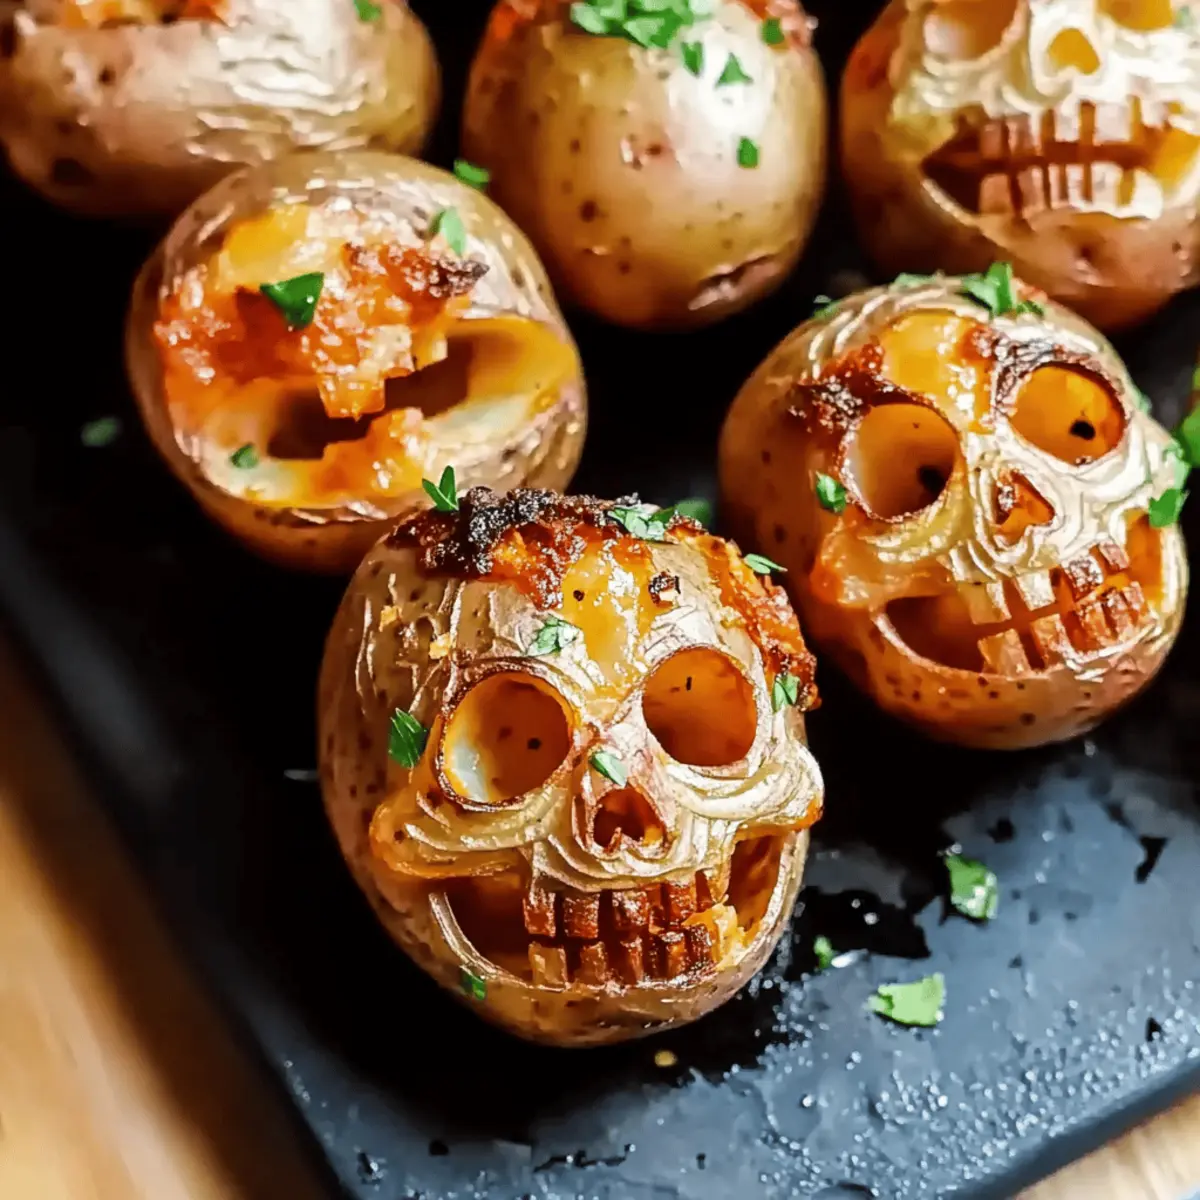
As the autumn leaves crisp underfoot, my kitchen transforms into a hub of Halloween excitement filled with creative culinary projects. One of my absolute favorites? Halloween Skull Potatoes! These fun, spooky snacks not only boast a crispy exterior that beckons to be bitten, but also a fluffy interior that makes every mouthful a delight. Perfect as a side dish, they’ll elevate your Halloween gathering with their whimsical skull designs, ensuring everyone leaves with a smile (and a full belly!). What’s even better is that they are both easy to prepare and a guaranteed crowd-pleaser. Ready to embrace the season with these eerie yet delicious spuds? Let’s dive into the recipe and add a dash of Halloween fun to your table!
Why Are Halloween Skull Potatoes So Fun?
Festive Appeal: These skull-shaped potatoes are the perfect way to bring Halloween spirit to your table, making them a hit with both kids and adults alike.
Easy to Make: You’ll be pleasantly surprised at how simple the preparation is, allowing you to focus on enjoying the festivities rather than spending hours in the kitchen.
Crispy Goodness: Achieve that coveted crispy exterior with a fluffy inside, creating a delightful contrast that will have everyone reaching for more.
Versatile Flavor: Experiment with different seasonings or toppings—try adding cheese for an extra indulgent treat or mix in herbs for a fresh twist.
Perfect Pairing: These spooky snacks can be served alongside other Halloween favorites, like Mummy Meatballs or your favorite spooky dips, for a truly festive feast.
Get ready to make these eye-catching Skull Potatoes the star of your Halloween celebrations!
Halloween Skull Potatoes Ingredients
For the Potatoes
• Mini Creamer Potatoes – These are the stars of our spooky dish; Yukon Gold work beautifully for even roasting.
• Olive Oil – This helps achieve that crispy texture; feel free to substitute with vegetable oil if needed.
• Salt – Enhances the flavor; consider garlic salt or seasoned salt for a twist.
• Pepper – Adds a little kick; cayenne pepper can elevate the heat if you’re feeling adventurous.
For the Seasoning
• Herbs/Seasoning – Post-baking, sprinkle on fresh herbs like rosemary or thyme for added flavor variations that take these Halloween Skull Potatoes to the next level!
Step‑by‑Step Instructions for Halloween Skull Potatoes
Step 1: Preheat the Oven
Begin by preheating your oven to 425°F (220°C). This high temperature is essential for achieving that golden, crispy exterior on your Halloween Skull Potatoes. As the oven heats up, gather your ingredients and tools, including a baking sheet lined with parchment paper for easy cleanup.
Step 2: Prepare the Potatoes
Next, clean the mini creamer potatoes thoroughly under running water, scrubbing away any dirt. Once cleaned, use a sharp paring knife to carefully carve spooky skull faces into each potato. Outline the features first for precision, then cut deeper to reveal your eerie designs. Ensure you cut away from your hands for safety.
Step 3: Season the Potatoes
In a large mixing bowl, toss your carved Halloween Skull Potatoes with a generous drizzle of olive oil, alongside a sprinkle of salt and pepper. Mix well to ensure each potato is evenly coated, enhancing the flavor while helping to achieve that required crispiness during baking.
Step 4: Arrange on Baking Sheet
Spread the seasoned potatoes across the lined baking sheet, taking care not to overcrowd them. This spacing is crucial for allowing hot air to circulate around each potato, promoting an even, crispy finish. Make sure they are facing up so the spooky faces are displayed prominently.
Step 5: Bake for Crispiness
Place the baking sheet in the preheated oven and bake the Halloween Skull Potatoes for 20 to 25 minutes. Halfway through the baking time, flip the potatoes to ensure they cook evenly and attain that delightful golden brown color. Keep an eye on them as they should be crisp and tender when done.
Step 6: Let Rest and Serve
Once baked, remove the potatoes from the oven and allow them to rest for a few minutes on the baking sheet. This resting period enhances their crispiness and flavor. Afterward, serve your festive Halloween Skull Potatoes warm, either plain or garnished with fresh herbs for an added flavor boost.
What to Serve with Halloween Skull Potatoes
As you prepare to set the scene for a spooktacular gathering, consider these delicious pairings that will complement your festive potatoes perfectly.
-
Mummy Meatballs: These adorable meatballs wrapped in crescent dough bring a playful twist to your Halloween spread, adding a savory note that balances the crispy potatoes.
-
Spooky Spinach Dip: Creamy and luscious, this dip served in a carved pumpkin enhances your snack table’s look, inviting guests to dig deeper and discover more flavors.
-
Creepy Veggie Platter: A colorful assortment of fresh veggies, arranged to resemble a ghost, adds a crisp and refreshing touch, offering a lighter option next to your hearty spuds.
Dive into deliciousness with a glass of cider to capture the essence of autumn while delighting in playful treats.
-
Caramel Apple Slices: These sweet bites drizzled in caramel provide a perfect contrast to the savory potatoes while keeping the fall theme alive at your gathering. The combination of crunchy and gooey is sure to please everyone.
-
Witch’s Brew Punch: A spooky-themed drink with floating gummy worms or eyeballs will keep the spirit of Halloween alive, adding an element of surprise that enhances the overall feast.
-
Chocolate Graveyard Pudding Cups: End your meal on a sweet note with these delightful dessert cups that visually echo the festive theme while satisfying sweet cravings with layers of creamy goodness.
How to Store and Freeze Halloween Skull Potatoes
Airtight Container: Store leftover Halloween Skull Potatoes in an airtight container in the fridge for up to 2 days to maintain their crispy texture and flavor.
Reheating: For best results, reheat in the oven at 350°F (175°C) for about 10-15 minutes until warmed through and crispy, rather than using a microwave.
Freezing: If you want to freeze Halloween Skull Potatoes, place them on a baking sheet to freeze individually before transferring to a freezer-safe bag—ideal for up to 3 months.
Thawing: When ready to enjoy, thaw in the fridge overnight before reheating, ensuring you bring back that delightful crispiness!
Halloween Skull Potatoes Variations
Feel free to unleash your creativity and customize these spooky treats to fit your taste and festive spirit!
-
Cheesy Delight: Add shredded cheese on top before baking for a gooey, melty finish that pairs perfectly with the crispy potatoes. Imagine the rich flavor of melted cheese mingling with the savory potato.
-
Garlic Lovers: Incorporate minced garlic into the olive oil mixture to elevate the flavor profile. Garlic and potatoes? It’s a classic match made in culinary heaven!
-
Herb Infusion: Toss in fresh chopped herbs like rosemary or thyme into your oil for an aromatic twist. The fragrant notes will beautifully complement the potatoes’ natural flavor.
-
Spicy Kick: Sprinkle cayenne pepper or your favorite hot seasoning into the oil for an added level of heat. Enjoy the contrast of spicy potatoes against their fluffy interior—it’s a delightful surprise!
-
Sweet and Savory: Glaze the potatoes with a honey or maple syrup drizzle before baking for a sweet twist that caramelizes beautifully, providing an unexpectedly delicious contrast to the savory elements.
-
Ghostly Faces: Get creative with your carving! Instead of skulls, try spooky ghost faces for a fun twist that delights kids and adults alike. Each potato will bring a new cheerful character to your Halloween spread.
-
Vegan Version: Substitute with vegan butter for a plant-based alternative that maintains that crispy charm. Enjoy plant-based goodness without sacrificing deliciousness!
-
Loaded Toppings: Serve the Skull Potatoes with sour cream or guacamole on the side to create a festive, filling experience. The rich, creamy dips will enhance every crunchy bite!
Complement your Halloween celebration with these delightful variations, and don’t forget to pair them with other festive dishes like Mummy Meatballs for a truly memorable feast!
Make Ahead Options
These Halloween Skull Potatoes are perfect for meal prep, allowing you to focus more on the festivities! You can carve the spooky faces and season the mini creamers up to 24 hours in advance, storing them in a sealed container in the refrigerator to maintain their freshness. To keep your potatoes from browning, place a damp paper towel over them before sealing. When you’re ready to serve, simply toss the prepped potatoes in olive oil, salt, and pepper, spread them on a baking sheet, and bake in a preheated oven for 20 to 25 minutes. This way, you’ll enjoy crispy, delicious Halloween Skull Potatoes with minimal effort, leaving you more time to enjoy the celebration!
Expert Tips for Halloween Skull Potatoes
-
Carving Technique: Use a sharp paring knife and outline the skull features first. This ensures precision and reduces the risk of accidents, keeping Halloween fun and safe.
-
Avoid Overcrowding: Spacing the potatoes on the baking sheet prevents steaming and promotes crispiness. Remember, the key to perfect Halloween Skull Potatoes is a crunchy exterior!
-
Resting Period: Let the baked potatoes cool for a few minutes before serving. This enhances their texture and flavor, ensuring every bite is as delicious as possible.
-
Experiment with Flavors: Don’t hesitate to try different seasoning blends! A unique mix can transform these spooky snacks into a flavor-packed delight that surprises your guests.
-
Serve Warm: For the best experience, serve Halloween Skull Potatoes warm right out of the oven, allowing everyone to enjoy that irresistible crunch and fluffy inside.
Halloween Skull Potatoes Recipe FAQs
How do I choose the best potatoes for Halloween Skull Potatoes?
Absolutely! Mini creamer potatoes are an excellent choice for this recipe. I recommend Yukon Gold varieties for their even roasting and creamy texture. Look for firm potatoes without any dark spots or blemishes, as these can indicate spoilage.
How should I store leftover Halloween Skull Potatoes?
To enjoy your Halloween Skull Potatoes fresh, store leftovers in an airtight container in the refrigerator for up to 1-2 days. This helps retain their crispy texture! When ready to eat, reheat them in the oven at 350°F (175°C) for about 10-15 minutes until crispy again.
Can I freeze Halloween Skull Potatoes?
Very! To freeze Halloween Skull Potatoes, first, let them cool completely. Then, place them in a single layer on a baking sheet to freeze for about 1-2 hours. Once frozen, transfer them to a freezer-safe bag or container. They can be stored for up to 3 months. For best results, thaw them overnight in the refrigerator before reheating in the oven.
What if my Halloween Skull Potatoes aren’t crispy enough?
No worries! If your potatoes are soggy, they may have been overcrowded on the baking sheet, which prevents proper air circulation. In the future, make sure to space them out. Additionally, remember to let them rest briefly after baking—they become even crispier as they cool slightly. If they’re already baked, you can pop them back in the oven for a few minutes to achieve that desired crispiness.
Are Halloween Skull Potatoes suitable for pets or children with allergies?
Definitely! This recipe features simple ingredients: potatoes, olive oil, salt, and pepper, which are safe for most. However, it’s always wise to check for any specific allergies in your household. For pets, while potatoes can be safe in moderation, avoid seasoning them. Keep them plain if you plan to share a little with your furry friends!
Can I use different seasonings or toppings for Halloween Skull Potatoes?
The more the merrier! Feel free to get creative with your flavor combinations. Try using garlic salt for an extra kick or add a sprinkle of cheese right before they finish baking for a delightful cheesy twist! Fresh herbs like rosemary or thyme can also elevate the taste. Enjoy experimenting!

Crispy Halloween Skull Potatoes for Spooky Celebrations
Ingredients
Equipment
Method
- Preheat your oven to 425°F (220°C). Gather your ingredients and tools, including a baking sheet lined with parchment paper.
- Clean the mini creamer potatoes under running water. Carefully carve spooky skull faces into each potato using a sharp paring knife.
- In a large mixing bowl, toss the carved potatoes with olive oil, salt, and pepper until evenly coated.
- Spread the seasoned potatoes across the lined baking sheet, making sure not to overcrowd them to allow even cooking.
- Bake the potatoes in the preheated oven for 20 to 25 minutes, flipping halfway through for even browning.
- Remove from oven and let the potatoes rest for a few minutes before serving, either plain or with fresh herbs.