As October whispers in, the chill in the air makes me crave cozy kitchen adventures. This month, I’m excited to introduce you to my Cheesy Halloween Pizza Skulls—a playful twist on your traditional pizza that’s as fun to make as it is to eat! With gooey mozzarella and endless topping possibilities, these bite-sized delights are perfect for parties or family gatherings. What I love most about this recipe is how quickly it comes together; you can whip up a batch in just 30 minutes! Plus, they’re customizable to fit any dietary preference, ensuring everyone at your table can enjoy this savory treat. Are you ready to make Halloween a little spookier and a lot tastier? Let’s dive in!
Why Are Halloween Pizza Skulls So Irresistible?
Fun and Festive: These Cheesy Halloween Pizza Skulls bring a playful twist to mealtime. Perfect for adding a spooky flair to your Halloween celebrations!
Quick Prep Time: With only 30 minutes from start to finish, they’re an ideal solution for busy families or last-minute snack lovers.
Customizable Creativity: Get creative! You can mix and match toppings to suit any taste or dietary preference, ensuring that everyone gets their perfect bite.
Crowd-Pleasing Appeal: Whether it’s a Halloween party or a cozy family dinner, these cheesy delights are sure to impress both kids and adults alike.
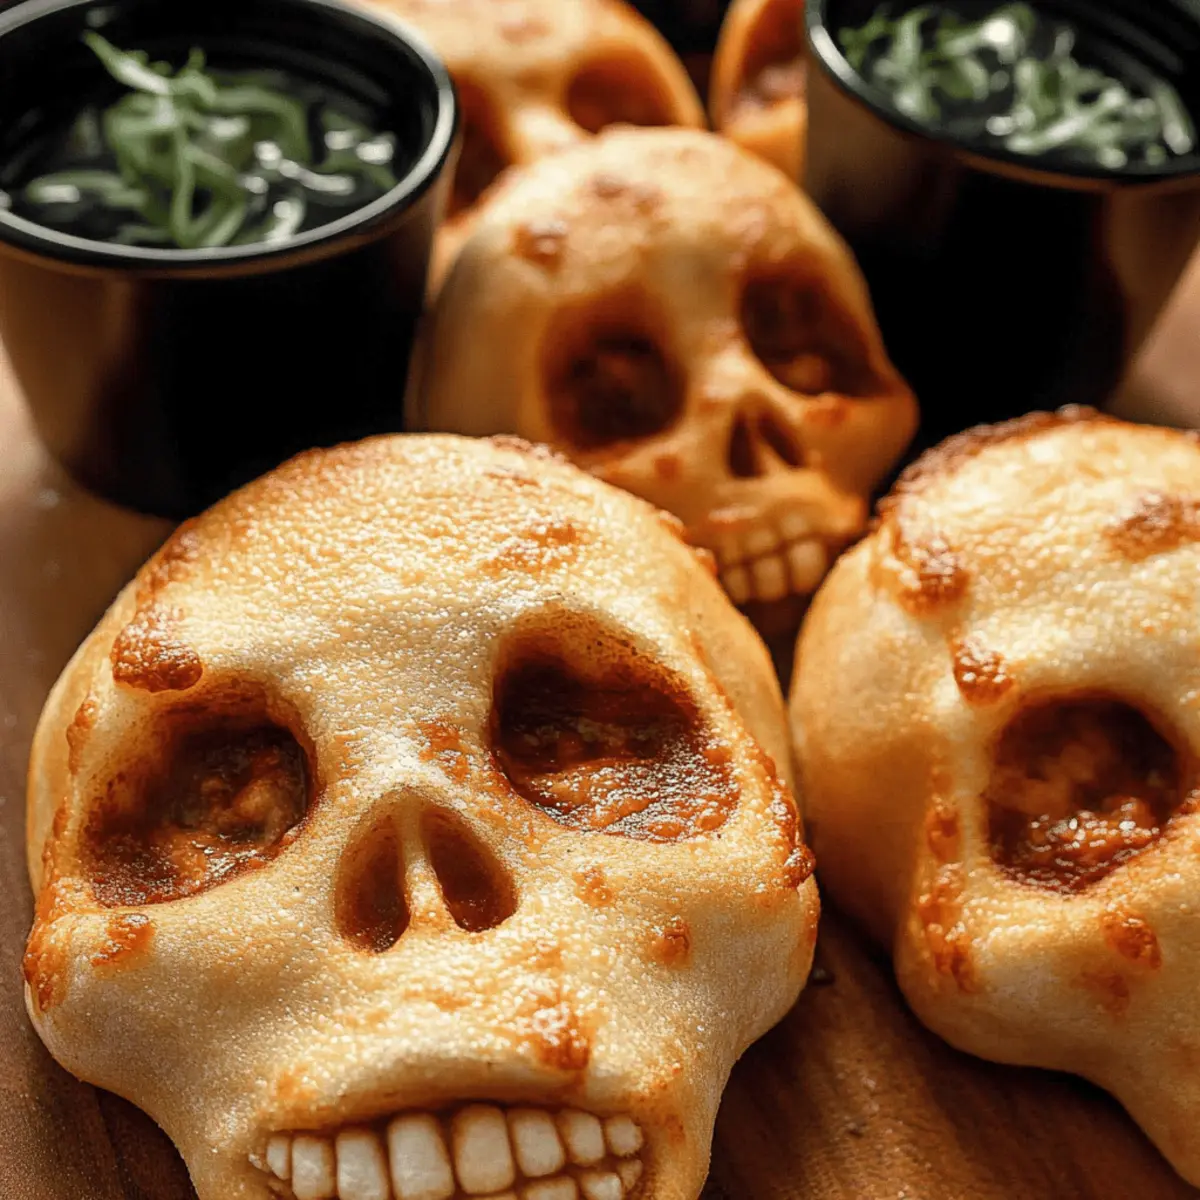
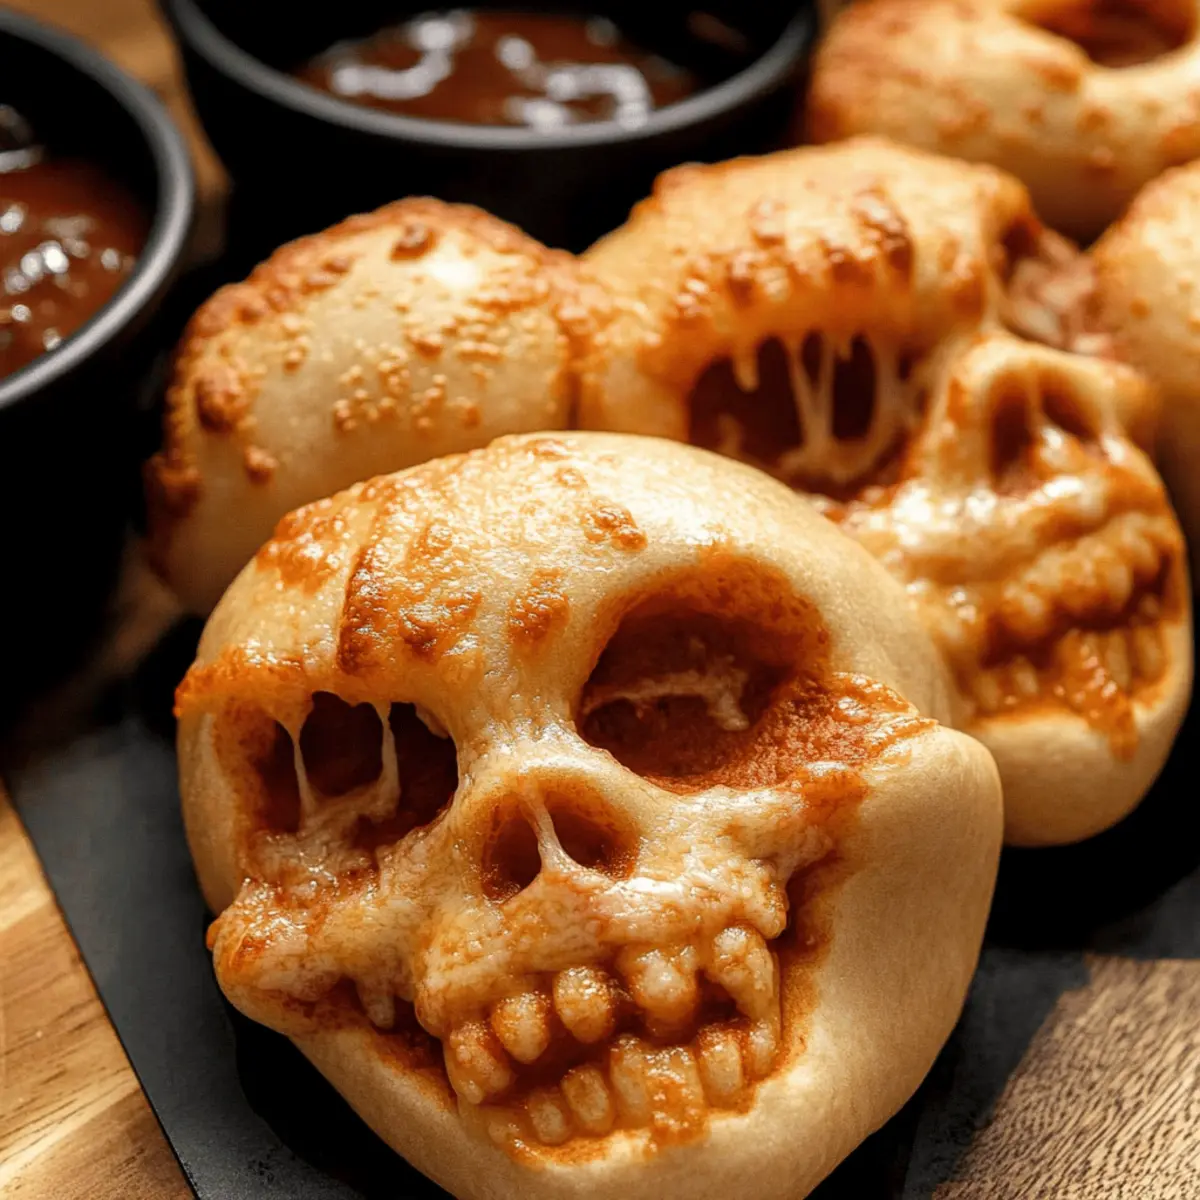
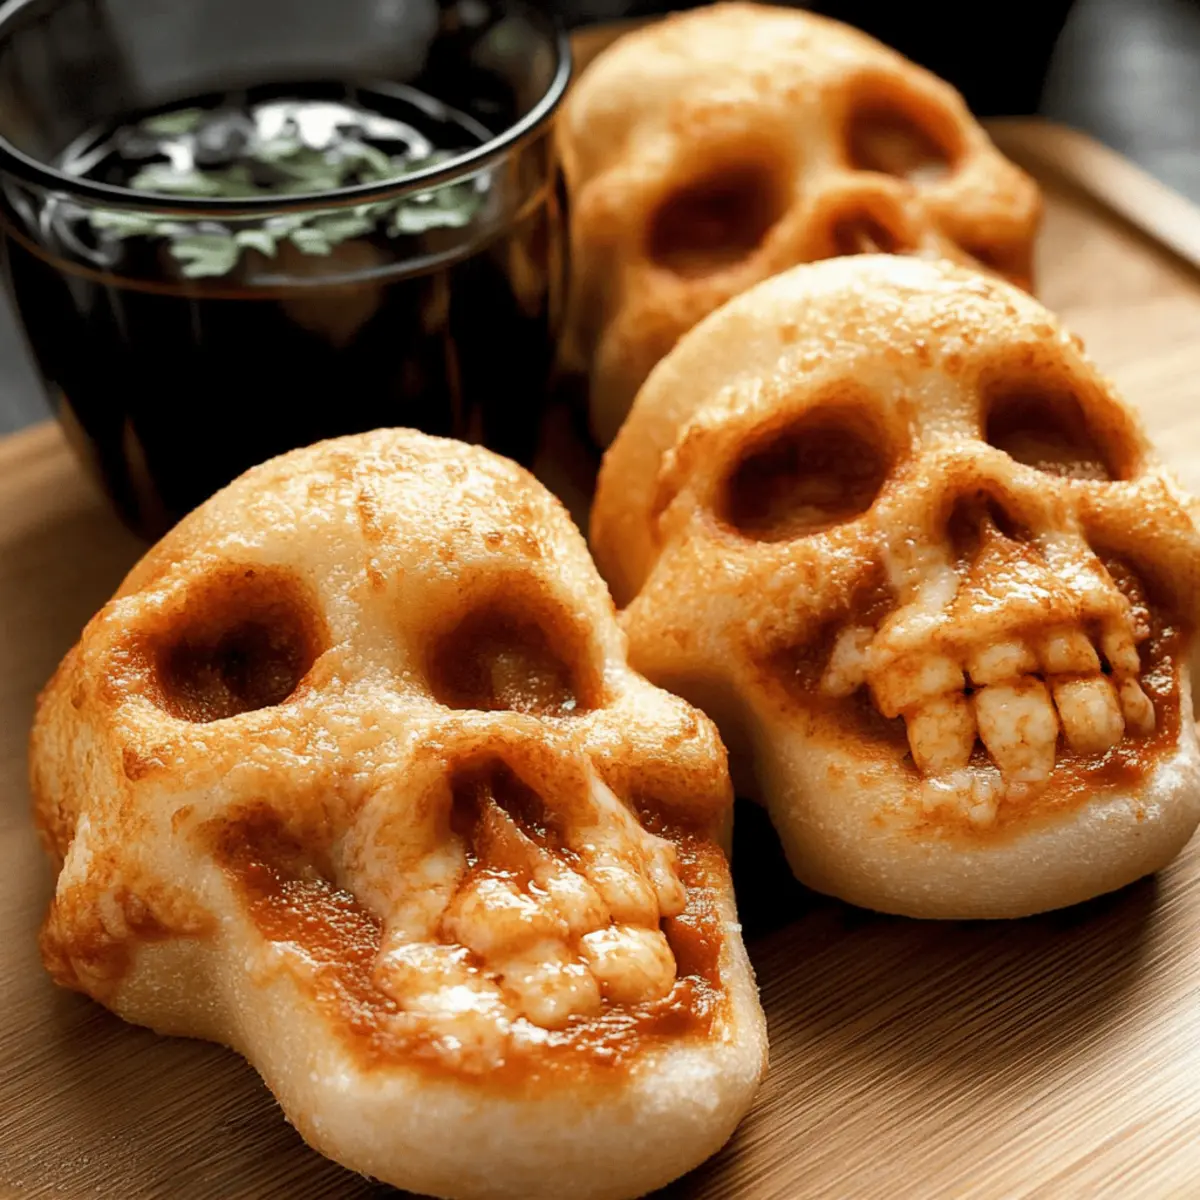
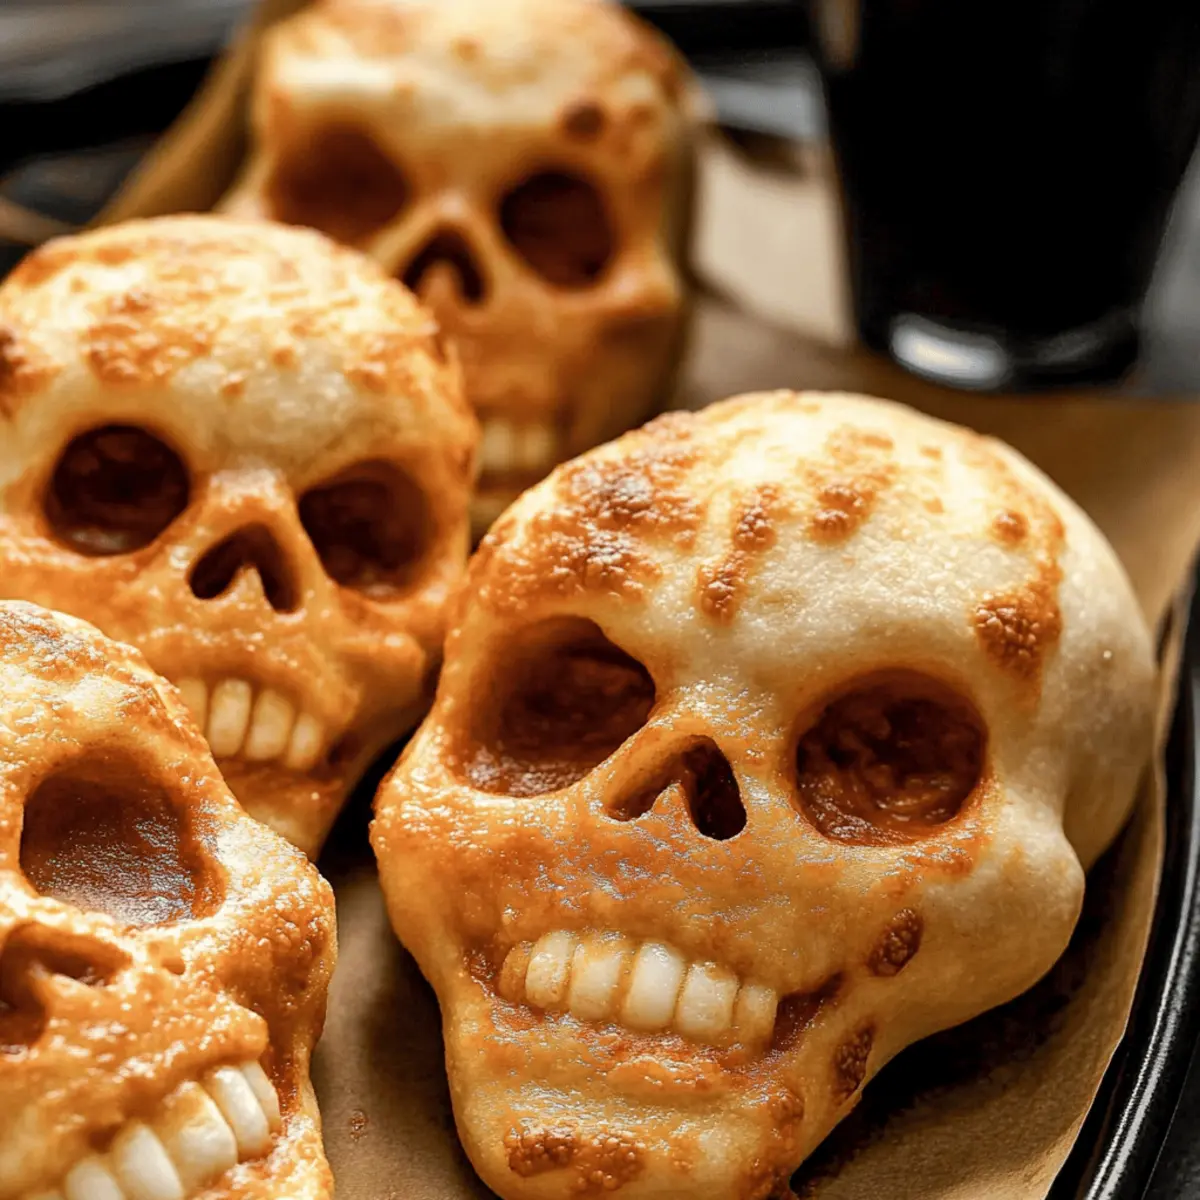
Satisfying Texture: Each skull is golden brown and crispy outside, bursting with gooey cheese and savory fillings on the inside—every bite is a delight!
No-Fuss Cooking: Using pre-made pizza dough saves time while still allowing you to showcase your culinary skills. Check out more quick snacks in our 20-Minute Appetizers!
Halloween Pizza Skulls Ingredients
Get ready to create these spooky delights!
For the Dough
• Pre-made Pizza Dough – The base of the skulls; can substitute with homemade dough or crescent roll dough, though results may vary.
For the Filling
• Pizza Sauce – Provides moisture and flavor; substitute with marinara or Alfredo for a different taste.
• Shredded Mozzarella – The main cheese for a gooey texture; substitute with cheddar or provolone if desired.
• Parmesan Cheese – Adds a salty flavor; Pecorino Romano can work as a great alternative.
• Cooked Sausage – An optional protein for meat lovers; swap with cooked chicken or omit for vegetarian versions.
• Mini Pepperoni – A kid-favorite topping; alternatives include turkey pepperoni or peppered salami.
• Black Olives – For a salty bite; feel free to omit if you prefer no olives.
• Sliced Ham – Another protein option; can substitute with turkey or a vegetarian alternative.
• Mini Italian Meatballs – Great for added protein; consider veggie meatballs for a plant-based option.
• Cooked Corn Kernels – Adds sweetness and crunch; can replace with bell pepper or sweet red onion.
• Baby Spinach – A pop of color and nutrients; substitute with other greens like kale or arugula.
• Fresh Basil – Perfect for freshness; dried basil can be used in a pinch.
For Serving
• Marinara Sauce – Ideal for dipping, not mandatory but highly recommended.
• Chopped Parsley or Basil – For garnish and added freshness, making your Halloween Pizza Skulls even more inviting!
Now you’re all set to make these Halloween Pizza Skulls! Enjoy the delicious creativity they bring to your spooky gatherings!
Step‑by‑Step Instructions for Halloween Pizza Skulls
Step 1: Preheat the Oven
Begin by preheating your oven to 400°F (200°C). This ensures that your Cheesy Halloween Pizza Skulls will bake evenly and develop that delightful golden-brown crust. While the oven heats, gather your ingredients and baking equipment to streamline your cooking process.
Step 2: Prepare the Baking Tin
Spray your skull-shaped baking tin generously with cooking spray to prevent sticking. This important step allows for easy removal of your spooky creations after baking. Set the tin aside while you get the dough ready.
Step 3: Roll Out the Dough
Lightly flour your work surface to avoid sticking, then roll or stretch out the pre-made pizza dough to about ¼ inch thickness. Use a sharp knife or pizza cutter to cut the dough into six rectangles, perfectly sized for the skull cavities.
Step 4: Assemble the Skulls
Carefully place each rectangle of dough into a cavity of the greased skull tin. Layer the base with a spoonful of pizza sauce followed by a generous amount of shredded mozzarella cheese. Sprinkle Parmesan and your chosen toppings inside, ensuring not to overfill for a neat bake.
Step 5: Seal the Dough
Fold the edges of the dough over the filling, creating a pocket and pinching the seams thoroughly to seal them. This will keep the cheesy goodness inside while baking, so take your time to ensure a good seal on your Halloween Pizza Skulls.
Step 6: Chill Before Baking
Transfer the assembled pizza skulls to the refrigerator while the oven continues to preheat. This chilling step helps the dough maintain its shape and makes it easier to bake to perfection as you wait for the temperature to rise.
Step 7: Bake the Skulls
Once your oven is preheated, carefully remove the skull tin from the fridge and place it in the oven. Bake for 16-20 minutes or until the tops are beautifully golden brown and the dough is fully cooked. Keep an eye on them to achieve that perfect, crispy exterior.
Step 8: Cool and Serve
After baking, let the Halloween Pizza Skulls cool in the tin for about 5 minutes. This allows the cheesy filling to set slightly for easier removal. Carefully unmold them and serve warm with marinara sauce for dipping and a sprinkle of chopped parsley or fresh basil for a festive touch.
What to Serve with Cheesy Halloween Pizza Skulls
There’s nothing quite like a delightful spread to elevate your Halloween gathering, and these tasty bites are perfect for pairing!
-
Spooky Salad: A colorful mix of greens with Halloween-themed toppings adds a fresh crunch to each bite. Consider adding jack-o’-lantern peppers for fun!
-
Pumpkin Soup: The creamy warmth of pumpkin soup provides a comforting contrast to the cheesy, savory skulls. A sip will have your taste buds dancing with joy.
-
Garlic Bread Sticks: Soft and buttery garlic bread sticks bring a familiar flavor that complements the cheesy goodness of the pizza skulls while satisfying those carb cravings!
-
Vegetable Platter: A vibrant assortment of fresh veggies and a creamy ranch dip keeps things light and refreshing, balancing out the richness of the skulls.
-
Cider Spritzers: A bubbly apple cider spritzer provides a festive, crisp counterpoint to the savory snacks, enhancing the fall vibes.
-
Chocolate-Covered Pretzels: For a sweet finish, chocolate-covered pretzels offer a playful twist on regular dessert. Their crunch and sweetness pair beautifully with these spooky treats.
-
Mini Corn Dogs: These bite-sized goodies add a touch of nostalgia while their savory, meaty flavor pairs perfectly with the gooey pizza skulls for a fun feast.
How to Store and Freeze Halloween Pizza Skulls
Room Temperature: These delightful Halloween Pizza Skulls are best enjoyed fresh, but can be left at room temperature for up to 2 hours before they need refrigeration.
Fridge: Store any leftover pizza skulls in an airtight container in the fridge for up to 3 days. Reheat in the oven or microwave for a quick snack!
Freezer: For longer storage, freeze assembled but unbaked Halloween Pizza Skulls. Wrap them tightly in plastic wrap and foil, and they’ll stay fresh for up to 3 months. Bake from frozen for 25-30 minutes!
Reheating: To regain their crispy texture, reheat the fridge leftovers in the oven at 350°F (175°C) for about 10 minutes. Enjoy the cheesy goodness again!
Make Ahead Options
These Cheesy Halloween Pizza Skulls are perfect for meal prep enthusiasts, saving time on busy weeknights! You can assemble the pizza skulls and refrigerate them for up to 24 hours before baking. Just layer the dough with pizza sauce, mozzarella, and your favorite toppings, then seal and place them in the fridge until ready to cook. To maintain quality, ensure they’re well-sealed to prevent drying out. When you’re ready to serve, preheat your oven and bake straight from the refrigerator for 16-20 minutes until golden brown. This way, you’ll have a festive treat with minimal last-minute effort, delighting your family and guests!
Halloween Pizza Skulls Variations & Substitutions
Feel free to mix and match ingredients to create your perfect Halloween pizza treat!
- Dairy-Free: Use a vegan cheese substitute and a dairy-free pizza dough to cater to lactose-intolerant guests.
- Gluten-Free: Swap regular pizza dough for gluten-free dough or use corn tortillas for a fun twist.
- Spicy Kick: Add sliced jalapeños or crushed red pepper to infuse some heat into your cheesy filling.
- Veggie Delight: Load them up with your favorite vegetables like mushrooms, bell peppers, and spinach for a healthier option.
- Herbaceous Flavor: Mix in fresh herbs such as oregano or thyme with the cheese for a fragrant boost—perfect for herb lovers!
- Sweet Twist: Use barbecue sauce instead of pizza sauce and fill with pulled pork for a sweet and savory combination.
- Savory & Smoky: Incorporate smoked sausage or bacon pieces for an irresistible smoky flavor that pairs well with cheesy goodness.
- Sweet Potato: Replace some cheese with mashed sweet potatoes for a nutritious, creamy alternative that adds a hint of sweetness.
Remember, creating savory delights at home turns ordinary gatherings into extraordinary celebrations! If you’re curious about other quick snack ideas to try, check out our 20-Minute Appetizers for inspiration. Enjoy the process and the tasty results of these Halloween Pizza Skulls!
Helpful Tricks for Halloween Pizza Skulls
- Grease Well: Ensure you spray the baking tin thoroughly with cooking spray to prevent sticking; this is crucial for easy removal of your Halloween Pizza Skulls.
- Don’t Overfill: Avoid overflowing the dough pockets; overfilling can cause spills during baking, leading to a messy outcome.
- Check Doneness Early: Ovens vary, so keep an eye on your pizza skulls and check for doneness around the 16-minute mark for the best results.
- Chill for Better Shape: Refrigerating the assembled skulls while the oven preheats helps maintain their shape, promoting a nice, crispy outside.
- Experiment Wisely: Feel free to be creative with fillings, but maintain balance—heavy, wet ingredients can lead to soggy skulls.
Cheesy Halloween Pizza Skulls Recipe FAQs
How do I choose the best pre-made pizza dough?
Absolutely! When selecting pre-made pizza dough, look for options that are fresh and have a good texture—soft but not sticky. A well-sealed package and a visible expiration date are musts. If you can, go for refrigerated dough rather than frozen, as it tends to roll out more easily.
What’s the best way to store leftover Halloween Pizza Skulls?
Leftover Halloween Pizza Skulls should be stored in an airtight container in the fridge and consumed within 3 days for the best texture and flavor. If you want to enjoy them later, consider freezing unbaked skulls instead, which can last up to 3 months.
Can I freeze assembled but unbaked Pizza Skulls?
Yes! To freeze your assembled but unbaked Pizza Skulls, wrap them tightly in plastic wrap and then in foil to prevent freezer burn. When you’re ready to bake, just preheat your oven and place them directly from the freezer into the oven, adjusting the baking time to 25-30 minutes.
What if my pizza skulls stick to the baking tin?
Oh no! If your pizza skulls stick, it’s likely a sign that the baking tin wasn’t greased adequately. In future attempts, be generous with your cooking spray. Additionally, allow them to cool in the tin for at least 5 minutes before trying to unmold—they might need a gentle nudge with a spatula around the edges.
Are there any allergy considerations I should be aware of?
Very good question! Be sure to ask your guests about dietary restrictions. You can easily make these Halloween Pizza Skulls vegetarian by omitting all meats or using plant-based alternatives, and ensure to check the labels on pre-made ingredients for allergens such as dairy or gluten. It’s all about keeping everyone happy at the table!
Cheesy Halloween Pizza Skulls: Creative & Customizable Fun
Ingredients
Equipment
Method
- Preheat your oven to 400°F (200°C).
- Spray your skull-shaped baking tin generously with cooking spray.
- Lightly flour your work surface and roll out the pre-made pizza dough to about ¼ inch thickness. Cut into six rectangles.
- Place each rectangle of dough into a cavity of the greased skull tin. Layer with pizza sauce, mozzarella, Parmesan, and your toppings.
- Fold the edges of the dough over the filling, pinching the seams to seal.
- Transfer the assembled pizza skulls to the refrigerator while the oven preheats.
- Once preheated, bake for 16-20 minutes or until golden brown.
- Let the Halloween Pizza Skulls cool for about 5 minutes before serving with marinara sauce.