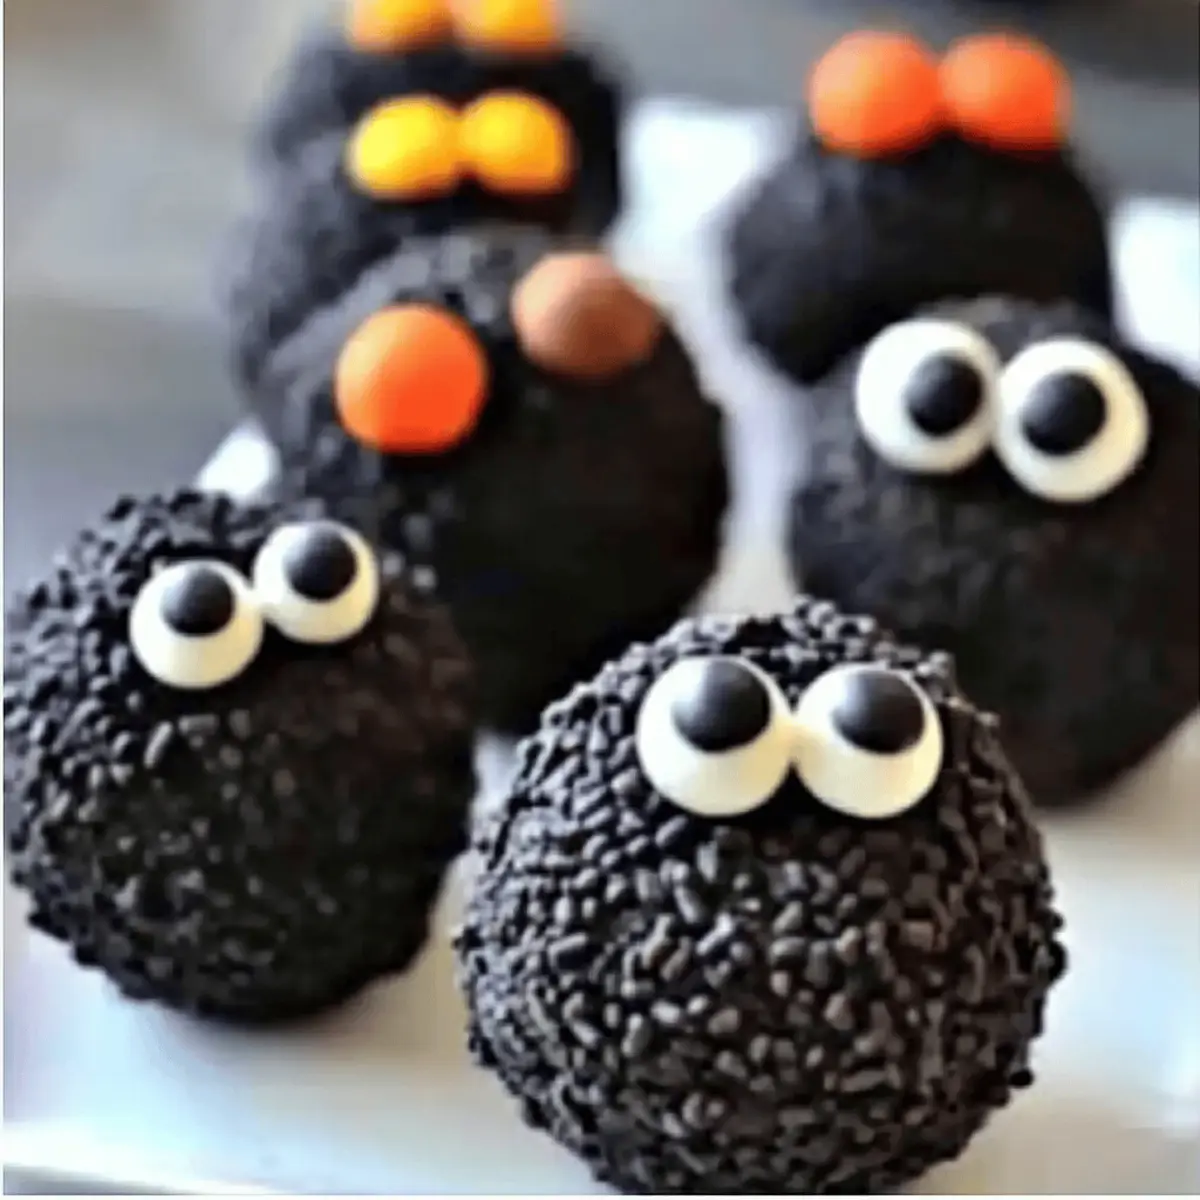
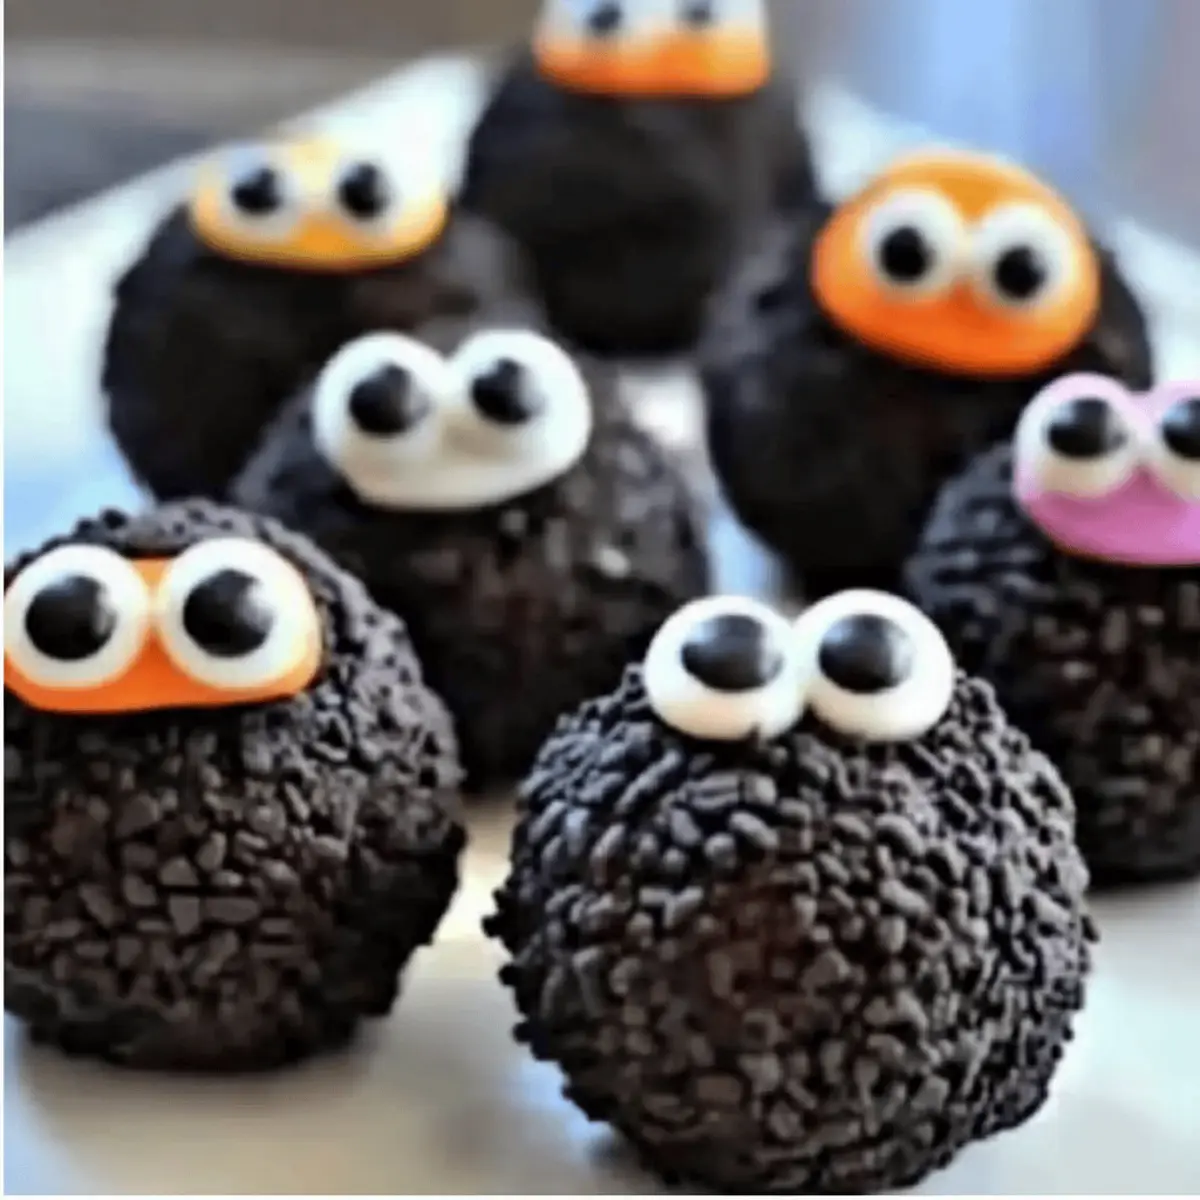
As I unwrapped the last of the Halloween decorations, a gleam caught my eye—a batch of vibrant Halloween Oreo Balls waiting to be brought to life! These delightful no-bake treats are the perfect combination of crushed Oreos and creamy cheese, all draped in a colorful chocolate coating. Not only are they a breeze to whip up, making them ideal for busy schedules, but their festive design brings a spark of joy to any Halloween gathering. From spooky ghosts to cheerful pumpkins, these treats allow your creativity to run wild and kids’ excitement to soar. Ready to roll up your sleeves and create these adorable Halloween Oreo Balls? Let’s dive in and make some magic together!
Why Are These Treats So Irresistible?
Simplicity: The no-bake preparation makes these Halloween Oreo Balls incredibly easy, perfect for bakers of all skill levels.
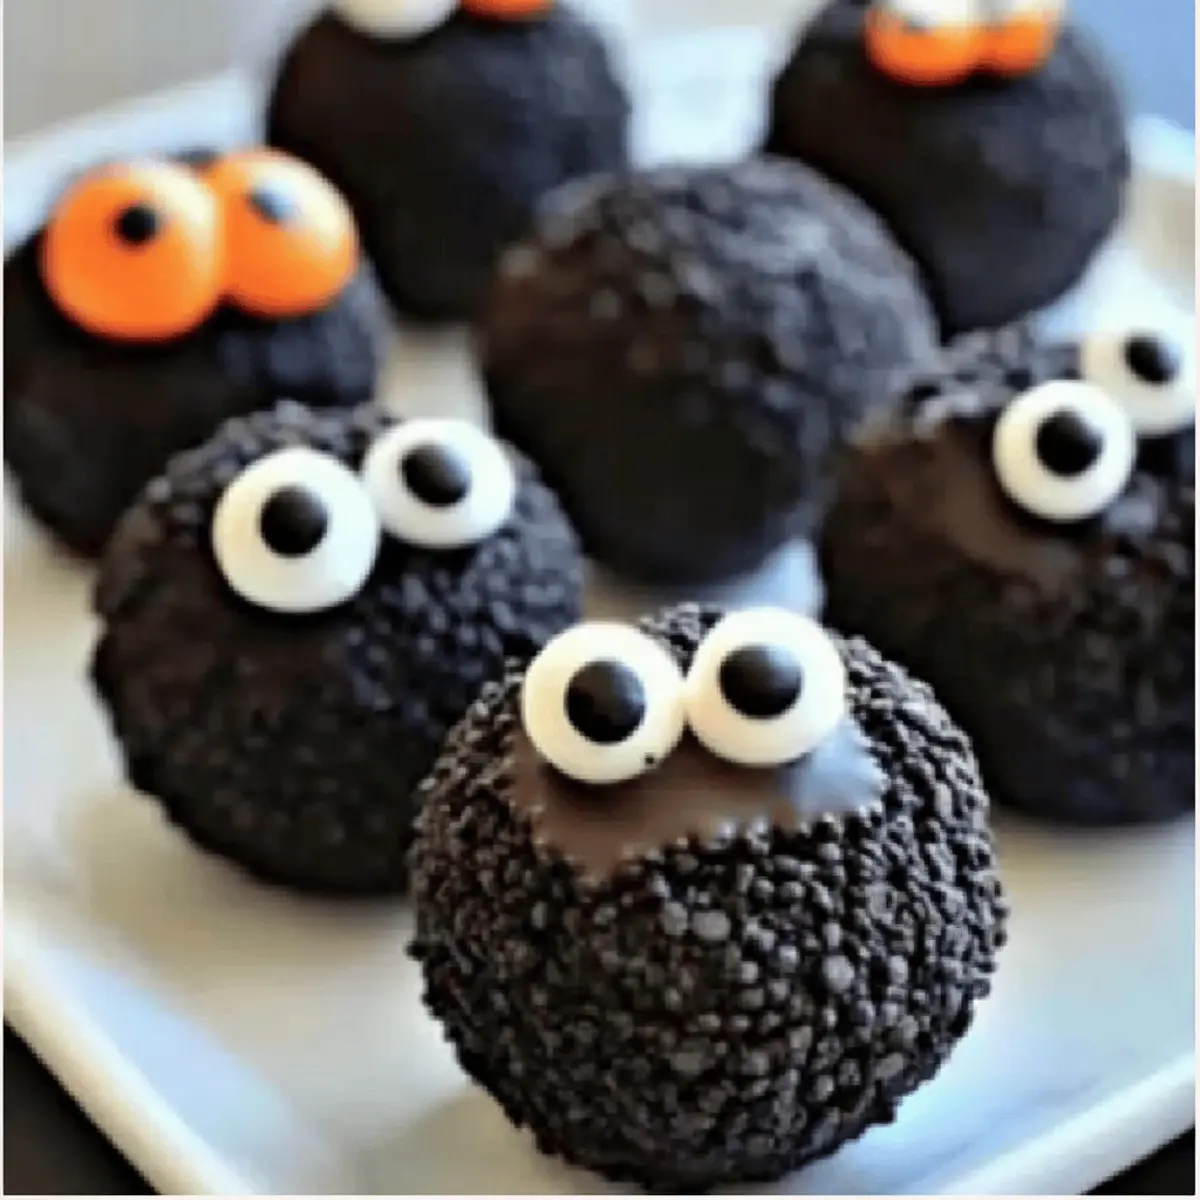
Endless Creativity: Decorate with candy eyes and sprinkles to match your favorite spooky themes—ghosts, mummies, or pumpkins!
Family Fun: Involve the kids for a delightful family activity; rolling the balls is a hit with little hands.
Crowd-Pleaser: Their rich, creamy flavor guarantees they’ll be the star of any Halloween party, delighting both kids and adults alike.
Make-Ahead Magic: Perfect for busy schedules, these treats can be made in advance and stored, ensuring you’re always ready for a celebration.
Try pairing these with other easy recipes like Garlic Butter Meatballs or Mushroom Chicken Meatballs for a festive spread!
Halloween Oreo Balls Ingredients
-
For the Oreo Base
• Oreo cookies – These provide sweetness and structure; you can use classic or Halloween-themed Oreos for fun!
• Cream cheese – Adds creaminess and binds the ingredients together; opt for full-fat for the best flavor. -
For the Coating
• Candy melts or white chocolate chips – Perfect for coating your balls, offering a colorful and shiny finish; choose orange, black, or green for a festive Halloween vibe.
• Gel food coloring (optional) – Customize the colors of your coating to match different seasonal themes for a personal touch! -
For Decoration
• Candy eyes, sprinkles, or mini chocolate chips – Enhance the visual appeal and create playful themes with these fun toppings! -
For Prep
• Parchment paper – This is essential to prevent sticking during preparation, making clean-up a breeze.
With these ingredients in hand, you’re all set to create the enchanting Halloween Oreo Balls that will surely delight everyone at your gathering!
Step‑by‑Step Instructions for Halloween Oreo Balls
Step 1: Crush the Oreos
Begin by placing your Oreo cookies in a food processor and pulse them until they become a fine crumb-like consistency—this should take about 30 seconds. If you don’t have a processor, you can place them in a resealable bag and crush them with a rolling pin until no chunks remain. This texture forms the base for your delightful Halloween Oreo Balls.
Step 2: Combine with Cream Cheese
In a large mixing bowl, combine the crushed Oreo cookies with softened cream cheese. Use a spatula or your hands to mix the ingredients together until a smooth, dough-like consistency forms—about 2 to 3 minutes of mixing should do the trick. This creamy blend is the heart of your Halloween Oreo Balls and will create that rich, delightful flavor.
Step 3: Shape the Mixture
Take small portions of the Oreo mixture and roll them into 1-inch balls using your palms. Place each ball onto a parchment-lined baking sheet, ensuring they are evenly spaced to prevent sticking. This shaping process should result in about 20 to 25 balls, ready to chill. Each round ball will be the perfect canvas for your Halloween decorations!
Step 4: Chill the Balls
Once shaped, refrigerate the baking sheet with the Oreo balls for about 20 to 60 minutes. This step firms them up, making it easier to dip into chocolate later. You’ll know they’re ready when they are firm to the touch but still soft enough to maintain their shape, ensuring the best texture for your Halloween Oreo Balls.
Step 5: Melt the Chocolate
While the Oreo balls are chilling, melt your candy melts or white chocolate chips. Place them in a microwave-safe bowl and heat in 30-second intervals, stirring in between, until completely smooth and melted—this should take about 1 to 2 minutes in total. Be careful not to overheat; your melted chocolate should have a glossy, fluid consistency.
Step 6: Coat the Oreo Balls
Using a fork or toothpick, dip each chilled Oreo ball into the melted chocolate, ensuring they are fully coated. Allow excess chocolate to drip off before placing them back on the parchment paper. Continue this process until all your Halloween Oreo Balls are coated, creating a delicious chocolate sheen that helps to seal the cookies inside.
Step 7: Decorate Your Treats
While the chocolate coating is still wet, get creative and decorate your Halloween Oreo Balls! Add candy eyes, sprinkles, or mini chocolate chips to resemble spooky ghosts or bright pumpkins. Working quickly is key, as the chocolate will set soon. This step is where your fun and creativity come to life!
Step 8: Let Set and Store
Allow the coated Halloween Oreo Balls to sit at room temperature for about 30 minutes or until the chocolate has completely set. Once firm, transfer them to an airtight container and store them in the refrigerator. They can be kept for up to a week, making these festive treats ready for your next gathering!
Make Ahead Options
Halloween Oreo Balls are a tremendous time-saver for busy individuals! You can prepare the Oreo balls up to 24 hours in advance by rolling them into balls and refrigerating them. Simply keep them in an airtight container to maintain their freshness. If you’re looking to prep even further, you can freeze the undipped balls for up to 2 months; just thaw before dipping! When it’s time to serve, melt your chocolate coating and dip each ball, decorating them right afterward for added flair. This advance preparation ensures you can whip out these festive treats effortlessly, making them just as delicious as when made fresh!
Expert Tips for Halloween Oreo Balls
-
Chill Well: Make sure to chill the balls sufficiently before coating. Chilling helps maintain their shape during the dipping process, preventing them from becoming misshapen.
-
Use Quality Cream Cheese: Opt for full-fat cream cheese for the best flavor and texture. Low-fat alternatives may lead to a less creamy filling.
-
Dipping Tool: Use a fork or toothpick for dipping to achieve a smooth finish. This technique helps avoid chocolate clumps and allows for easy retrieval from the coating.
-
Work Quickly: Decorate immediately after dipping while the chocolate is still wet. This ensures sprinkles or candy toppings adhere properly without falling off.
-
Consider Allergies: If serving at school events, double-check the toppings for allergy-friendly options. Candy eyes and sprinkles are often favorites but may contain allergens.
-
Experiment with Flavors: Don’t hesitate to try different flavored Oreos or colored candy melts to add variety and spice with these Halloween Oreo Balls!
How to Store and Freeze Halloween Oreo Balls
Fridge: Store your Halloween Oreo Balls in an airtight container in the refrigerator for up to 1 week. This keeps them fresh and delicious for any spooky gatherings.
Freezer: For longer storage, freeze undipped Oreo balls for up to 2 months. When you’re ready to enjoy them, thaw in the fridge before dipping in chocolate for perfect texture.
Reheating: There’s no need to reheat these treats—just serve them chilled for the best experience. Enjoy the rich, creamy flavor of the Halloween Oreo Balls!
Decorating: For best results, decorate your Halloween Oreo Balls immediately after coating while the chocolate is still wet. This ensures the toppings stick beautifully for a fun presentation.
Halloween Oreo Balls Variations & Substitutions
Feel free to personalize your Halloween Oreo Balls with these exciting twists, making them your own festive delight!
-
Flavor Swaps: Experiment with different Oreo flavors, such as mint or peanut butter, for a unique taste experience. The adaptable base opens up endless possibilities for flavor exploration.
-
Dairy-Free Option: Use vegan cream cheese and dairy-free chocolate to create a deliciously inclusive treat perfect for your vegan friends and family. Enjoy the same rich flavor while accommodating different dietary needs!
-
Colorful Coatings: Aside from traditional colors, try vibrant pastels or even metallics using specialty candy melts for an unexpected twist. Your treats will dazzle in any seasonal gathering.
-
Crunchy Texture: Incorporate crushed nuts or pretzels into the Oreo mixture for a delightful crunch. This adds a fun contrast to the creamy filling, enhancing both flavor and texture for a delightful surprise.
-
Spicy Kick: For those who love a bit of heat, add a pinch of cayenne pepper to the mixture for a surprising twist. It’s an adventurous way to make your Halloween treats stand out at the party!
-
Mini Versions: Roll smaller ½-inch balls for bite-sized treats that are perfect for party platters. They become instant crowd-pleasers, allowing guests to sample the deliciousness without overindulging.
-
Decorate Differently: Instead of candy eyes or sprinkles, consider using edible glitter or chocolate drizzle to give a glamorous finish. You can create a spooky but elegant look that’s bound to impress!
-
Theme Variations: Tailor your decorations to other holidays or events! Use pastel colors and floral decorations for spring gatherings, turning your Oreo Balls into seasonal delights for year-round enjoyment.
Feel free to adapt and explore! And for a delightful dinner, don’t forget to check out my Garlic Butter Meatballs or try these tasty Mushroom Chicken Meatballs to round out your festive occasions!
What to Serve with Halloween Oreo Balls?
Imagine a spooktacular celebration, where bite-sized treats bring joy and fun to your Halloween festivities.
-
Crispy Rice Treats: These sweet and chewy snacks add a delightful texture contrast, perfect for balancing the creamy bites.
-
Pumpkin Spice Hot Chocolate: A warm, spiced drink that envelops your senses, making every moment cozy and festive.
-
Spooky Fruit Skewers: Fresh fruit shapes, like ghostly bananas and pumpkin oranges, offer a bright, refreshing complement that contrasts sweet treats.
-
Mini Pumpkin Pies: These classic fall desserts echo the season and delight with a flaky crust and warm spices, enhancing the festive theme.
-
Ghostly Marshmallow Pops: Simple to make, these pops offer playful decorations and a satisfying chewy texture to pair with your Oreo Balls.
-
Witch’s Brew Punch: This fun, fizzy drink infuses your gathering with excitement—add colorful gummy worms for a whimsical touch!
-
Creamy Vanilla Cupcakes: Light and fluffy, cupcakes topped with candy corn sprinkles offer an extra touch of sweetness that echoes your decadent treats.
-
Monster Trail Mix: A mix of nuts, dried fruit, and candy pieces adds a crunchy texture that kids love, making it a perfect snack beside your Halloween Oreo Balls.

Halloween Oreo Balls Recipe FAQs
What type of Oreo cookies should I use for Halloween Oreo Balls?
You can use classic Oreo cookies for a traditional flavor, or go for Halloween-themed Oreos that have fun designs and flavors that fit the season. Both options work beautifully, providing delicious sweetness and a fun touch to your treats.
How should I store Halloween Oreo Balls, and how long do they last?
Store your Halloween Oreo Balls in an airtight container in the refrigerator for up to 1 week. This keeps them fresh and ready to delight your guests at any gathering. If you want to make them ahead of time, feel free to freeze undipped balls for up to 2 months! Just thaw them in the fridge, dip in chocolate, and enjoy!
Can I freeze Halloween Oreo Balls, and if so, how?
Absolutely! To freeze your Halloween Oreo Balls, first prepare the undipped balls and place them on a baking sheet lined with parchment paper. Freeze them overnight, then transfer to a freezer-safe bag or container. They’ll keep well for up to 2 months. When you’re ready to enjoy them, simply thaw in the fridge for a few hours before dipping in chocolate.
What should I do if my chocolate coating isn’t smooth?
If you find your chocolate coating isn’t smooth, it may be too thick. Try adding a small amount of vegetable oil or shortening to the melted chocolate and stir well—it’ll thin out the coating, making it easier to dip your Halloween Oreo Balls. Also, remember to melt the chocolate in short intervals and stir between each one to avoid overheating.
Are there any allergy considerations I should be aware of when making Halloween Oreo Balls?
Yes, be mindful of any allergies when selecting your toppings. Candy eyes, sprinkles, and other decorations often contain allergens like nuts or gluten. Always check the packaging for allergen information, especially if you’re making these treats for a school event or a gathering with friends and family who have dietary restrictions. I recommend making a few allergy-friendly versions just in case!
Can I make Halloween Oreo Balls vegetarian-friendly?
Absolutely! The base of Halloween Oreo Balls is already vegetarian since it mostly consists of Oreos and cream cheese. Just ensure you choose candies and decorations that are also vegetarian-friendly. Many candy melts and sprinkles are suitable, so just double-check the labels to make sure they’re animal product-free!
Halloween Oreo Balls: No-Bake Treats for Spooky Fun
Ingredients
Equipment
Method
- Crush the Oreos in a food processor or by hand in a resealable bag until fine crumbs form.
- Combine crushed Oreos with softened cream cheese in a large mixing bowl until a smooth dough-like consistency forms.
- Roll the mixture into 1-inch balls and place on a parchment-lined baking sheet.
- Chill the baking sheet with the Oreo balls in the refrigerator for 20 to 60 minutes.
- Melt candy melts or white chocolate chips in a microwave-safe bowl in 30-second intervals until smooth.
- Dip each chilled Oreo ball into the melted chocolate, allowing excess to drip off before placing back on parchment.
- Decorate with candy eyes, sprinkles, or mini chocolate chips while the chocolate is still wet.
- Let the coated Oreo balls sit at room temperature for 30 minutes or until chocolate has set, then store in an airtight container in the refrigerator.