Introduction to Garlic Cheese Breadsticks
Garlic cheese breadsticks are a delightful treat that can elevate any meal. They are perfect for family dinners, movie nights, or even as a snack. The combination of warm, cheesy goodness and the aromatic flavor of garlic makes these breadsticks irresistible. Plus, they are easy to make, which is a bonus for busy cooks!
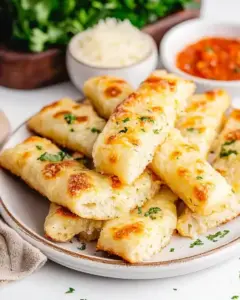
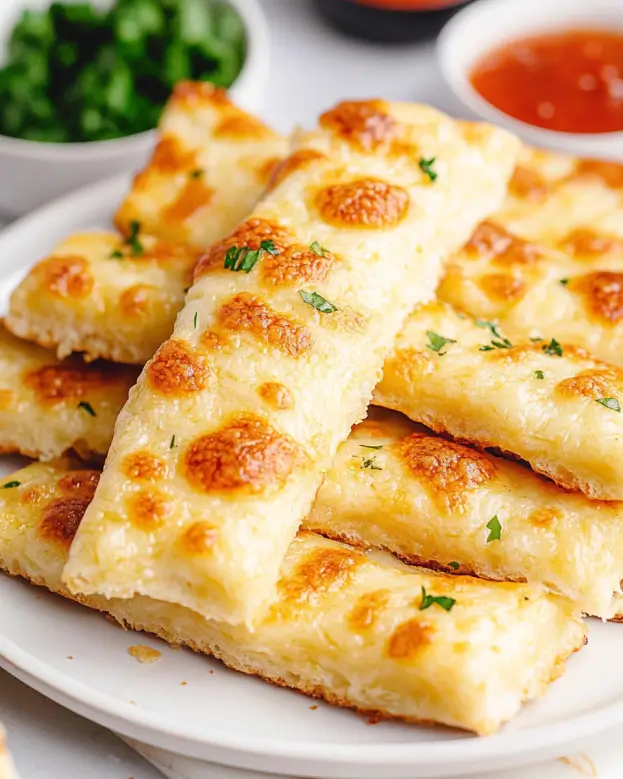
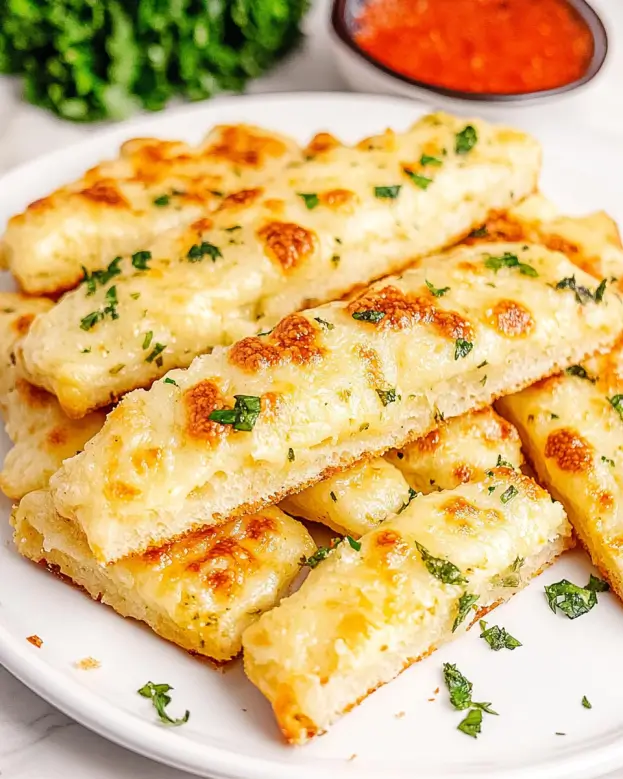
Imagine pulling a tray of golden-brown breadsticks from the oven, the aroma wafting through your kitchen. Each twist is soft, cheesy, and bursting with flavor. Whether you enjoy them on their own or paired with a marinara sauce, garlic cheese breadsticks are sure to please everyone at the table.
In this article, we will guide you through the simple steps to create your own garlic cheese breadsticks. We’ll cover everything from the ingredients you need to tips for perfecting your recipe. So, roll up your sleeves and get ready to impress your family and friends with this delicious treat!
Ingredients for Garlic Cheese Breadsticks
To create the perfect garlic cheese breadsticks, you’ll need a few simple ingredients. Each one plays a vital role in achieving that delightful flavor and texture. Here’s what you’ll need:
- 2 cups all-purpose flour: This is the base of your breadsticks, providing structure and chewiness.
- 1 tablespoon baking powder: This helps the breadsticks rise, making them light and fluffy.
- 1 teaspoon garlic powder: This adds that essential garlic flavor that makes these breadsticks so tasty.
- 1 teaspoon salt: Salt enhances the overall flavor of the breadsticks.
- 1 cup shredded mozzarella cheese: Mozzarella gives the breadsticks their cheesy goodness and stretchy texture.
- 1 cup buttermilk: Buttermilk adds moisture and a slight tang, making the breadsticks tender.
- 1/4 cup unsalted butter, melted: Butter adds richness and flavor, making the breadsticks even more delicious.
- 1 teaspoon dried parsley (optional): This adds a pop of color and a hint of herbal flavor.
- 1/2 teaspoon crushed red pepper flakes (optional): For those who enjoy a little heat, these flakes add a spicy kick.
Gathering these ingredients is the first step toward making your garlic cheese breadsticks. Each component contributes to the overall taste and texture, ensuring that every bite is a delight. Now that you have everything ready, let’s move on to the preparation!
Preparation of Garlic Cheese Breadsticks
Now that you have all your ingredients ready, it’s time to dive into the preparation of your garlic cheese breadsticks. This process is simple and fun, making it a great activity for the whole family. Let’s break it down into easy steps!
Step 1: Preparing the Dough for Garlic Cheese Breadsticks
Start by preheating your oven to 400°F (200°C). This ensures that your breadsticks will bake evenly. Next, grab a large mixing bowl and whisk together the all-purpose flour, baking powder, garlic powder, and salt. Mixing these dry ingredients well is crucial for a consistent flavor throughout your breadsticks.
Once combined, gently fold in the shredded mozzarella cheese. This step is important because it helps distribute the cheese evenly in the dough. After that, gradually pour in the buttermilk and melted butter. Stir the mixture gently until everything is just combined. Remember, overworking the dough can lead to tough breadsticks, so be careful!
Step 2: Shaping the Garlic Cheese Breadsticks
After preparing the dough, transfer it to a lightly floured surface. Pat the dough into a rectangle that is about 1/2 inch thick. This thickness is perfect for achieving that soft and chewy texture. Using a sharp knife or a pizza cutter, slice the dough into strips that are approximately 1 inch wide.
Now comes the fun part! Take each strip and twist it a few times. This not only adds a beautiful shape but also helps the breadsticks cook evenly. Arrange the twisted strips on your prepared baking sheet, making sure to leave some space between each piece. This allows them to expand while baking.
Step 3: Adding the Garlic and Cheese Topping
For an extra burst of flavor, you can sprinkle the tops of your twisted breadsticks with dried parsley and crushed red pepper flakes. These toppings are optional but can elevate the taste and presentation of your garlic cheese breadsticks. The parsley adds a lovely color, while the red pepper flakes give a hint of spice.
Step 4: Baking the Garlic Cheese Breadsticks
Now it’s time to bake! Place the baking sheet in your preheated oven and let the breadsticks bake for about 15-20 minutes. Keep an eye on them as they bake. You want them to be puffed up and golden brown. Once they reach that perfect color, take them out and let them cool for a few minutes before serving.
And there you have it! Your delicious garlic cheese breadsticks are ready to be enjoyed. They are perfect for dipping in marinara sauce or simply savoring on their own. Let’s move on to some variations you can try to make these breadsticks even more exciting!
Variation of Garlic Cheese Breadsticks
While the classic garlic cheese breadsticks are already a hit, there are many ways to switch things up! By experimenting with different cheeses and adding various herbs and spices, you can create unique flavors that will delight your taste buds. Let’s explore some fun variations!
Different Cheese Options for Garlic Cheese Breadsticks
Cheese is the star of garlic cheese breadsticks, so why not try different types? Here are some tasty options:
- Cheddar Cheese: For a sharper flavor, use shredded cheddar cheese. It melts beautifully and adds a rich taste.
- Parmesan Cheese: Mixing in grated Parmesan can give your breadsticks a nutty flavor. Sprinkle some on top for a crispy finish!
- Monterey Jack Cheese: This cheese is creamy and mild, making it a great choice for those who prefer a softer taste.
- Gouda Cheese: If you want a smoky flavor, try using Gouda. It adds a unique twist to your breadsticks.
Feel free to mix and match these cheeses! Combining mozzarella with cheddar or Parmesan can create a delightful blend of flavors. The possibilities are endless!
Adding Herbs and Spices to Garlic Cheese Breadsticks
Herbs and spices can elevate your garlic cheese breadsticks to a whole new level. Here are some ideas to consider:
- Oregano: This herb adds a Mediterranean flair. Sprinkle some dried oregano into the dough for a fragrant touch.
- Basil: Fresh or dried basil can bring a sweet and aromatic flavor. It pairs wonderfully with cheese!
- Italian Seasoning: A blend of herbs like thyme, rosemary, and marjoram can add depth to your breadsticks.
- Garlic Salt: For an extra garlic kick, replace regular salt with garlic salt. It enhances the garlic flavor even more!
By adding these herbs and spices, you can customize your garlic cheese breadsticks to suit your taste. Whether you prefer a classic flavor or something more adventurous, these variations will surely impress your family and friends!
Cooking Note for Garlic Cheese Breadsticks
When it comes to making garlic cheese breadsticks, a few cooking notes can help ensure your breadsticks turn out perfectly every time. These tips will guide you through the process and help you avoid common pitfalls. Let’s dive into some essential cooking notes!
First, always preheat your oven. This step is crucial for achieving that golden-brown crust. If your oven isn’t hot enough, the breadsticks may not rise properly, resulting in a dense texture. So, set your oven to 400°F (200°C) and let it heat up while you prepare the dough.
Next, be mindful of your dough consistency. The dough should be soft and slightly sticky but not overly wet. If it feels too sticky, you can sprinkle a little more flour while kneading. However, avoid adding too much flour, as this can make your breadsticks tough.
When shaping your breadsticks, try to keep the strips uniform in size. This ensures even baking. If some strips are thicker than others, they may not cook at the same rate, leading to uneven results. Aim for about 1 inch wide for each strip.
Another important note is to watch the baking time closely. Ovens can vary, so start checking your breadsticks around the 15-minute mark. You want them to be puffed and golden brown. If they start to brown too quickly, you can cover them loosely with aluminum foil to prevent burning.
Lastly, let your garlic cheese breadsticks cool for a few minutes after baking. This allows the cheese to set slightly, making them easier to handle. Enjoy them warm for the best flavor and texture!
By keeping these cooking notes in mind, you’ll be well on your way to creating delicious garlic cheese breadsticks that everyone will love. Now, let’s explore some serving suggestions to make your meal even more delightful!
Serving Suggestions for Garlic Cheese Breadsticks
Garlic cheese breadsticks are not just a treat on their own; they can also be paired with various dishes to create a delightful meal. Here are some serving suggestions that will enhance your dining experience and make your garlic cheese breadsticks even more enjoyable!
One of the most popular ways to serve garlic cheese breadsticks is with marinara sauce. The rich, tangy flavor of the sauce complements the cheesy goodness perfectly. Simply warm up some marinara sauce in a small bowl and use it for dipping. Your guests will love this classic combination!
If you’re looking for a heartier meal, consider serving your garlic cheese breadsticks alongside a fresh salad. A crisp Caesar salad or a garden salad with a light vinaigrette can balance the richness of the breadsticks. The freshness of the vegetables will provide a nice contrast to the warm, cheesy bread.
Another great option is to pair your breadsticks with a bowl of soup. Tomato soup, in particular, is a fantastic match. The creamy texture of the soup and the cheesy breadsticks create a comforting and satisfying meal. You can also try them with a hearty minestrone or a spicy chili for a cozy dinner.
For a fun twist, serve garlic cheese breadsticks as part of a charcuterie board. Include a variety of cheeses, cured meats, olives, and nuts. This makes for a great appetizer or snack for gatherings. The breadsticks will add a delicious cheesy element to the board, making it even more appealing.
Lastly, don’t forget about breakfast! Garlic cheese breadsticks can be enjoyed in the morning too. Serve them with scrambled eggs or an omelet for a cheesy breakfast treat. You can even slice them and use them as a base for breakfast sandwiches, adding eggs, cheese, and your favorite toppings.
With these serving suggestions, your garlic cheese breadsticks will shine in any meal. Whether you choose to dip them, pair them with salads, or enjoy them with soup, they are sure to be a hit. Now that you have some ideas on how to serve them, let’s move on to tips for perfecting your garlic cheese breadsticks!
Tips for Perfect Garlic Cheese Breadsticks
Creating the perfect garlic cheese breadsticks is all about attention to detail. With a few simple tips, you can elevate your breadsticks from good to great! Here are some helpful hints to ensure your garlic cheese breadsticks turn out perfectly every time.
First, always measure your ingredients accurately. Using the right amounts of flour, baking powder, and cheese is crucial for achieving the desired texture. Too much flour can make the breadsticks dense, while too little can lead to a flat result. Use measuring cups and spoons for precision.
Next, consider the temperature of your ingredients. For the best results, use room temperature buttermilk and melted butter. This helps the dough come together smoothly and ensures even mixing. Cold ingredients can lead to a lumpy dough, which may affect the final product.
When mixing the dough, remember to mix gently. Overmixing can develop gluten, making the breadsticks tough. Stir just until the ingredients are combined. A few lumps are okay; they will bake out during cooking.
Another tip is to let the dough rest for a few minutes after mixing. This allows the flour to hydrate fully, resulting in a softer texture. Cover the dough with a clean kitchen towel while it rests to keep it from drying out.
For an extra cheesy flavor, don’t hesitate to add more cheese! Sprinkling additional cheese on top before baking can create a delicious, gooey layer. Just be mindful not to overload it, as too much cheese can make the breadsticks greasy.
Lastly, experiment with different dipping sauces. While marinara is a classic choice, you can also try garlic butter, ranch dressing, or even a spicy aioli. These sauces can add a new dimension to your garlic cheese breadsticks, making them even more enjoyable.
By following these tips, you’ll be well on your way to making perfect garlic cheese breadsticks that everyone will love. Now that you have the tools for success, let’s break down the time needed to prepare and cook these delicious treats!
Breakdown of Time for Garlic Cheese Breadsticks
Prep Time for Garlic Cheese Breadsticks
Preparing garlic cheese breadsticks is a quick and enjoyable process. The prep time typically takes about 15-20 minutes. This includes gathering your ingredients, mixing the dough, and shaping the breadsticks. If you have everything ready, you can whip up the dough in no time!
To make the most of your prep time, consider measuring out your ingredients beforehand. This way, you can focus on mixing and shaping without interruptions. It’s a great way to keep the process smooth and efficient!
Cooking Time for Garlic Cheese Breadsticks
Once your breadsticks are shaped and ready, it’s time to bake! The cooking time for garlic cheese breadsticks is around 15-20 minutes. You’ll want to keep an eye on them as they bake. Look for that perfect golden-brown color and puffed-up appearance.
Every oven is a bit different, so it’s wise to check them a few minutes before the timer goes off. If they start to brown too quickly, you can cover them with aluminum foil to prevent burning. This way, you’ll ensure they come out just right!
Total Time for Garlic Cheese Breadsticks
In total, you can expect to spend about 30-40 minutes from start to finish when making garlic cheese breadsticks. This includes both prep and cooking time. It’s a quick and rewarding recipe that’s perfect for busy weeknights or last-minute gatherings.
With such a short time commitment, you can enjoy warm, cheesy breadsticks without spending hours in the kitchen. So, gather your ingredients and get ready to impress your family and friends with these delicious treats!
Nutritional Information for Garlic Cheese Breadsticks
Understanding the nutritional content of your garlic cheese breadsticks can help you enjoy them as part of a balanced diet. Here’s a breakdown of the key nutritional components per serving, so you can indulge with confidence!
Calories in Garlic Cheese Breadsticks
Each serving of garlic cheese breadsticks contains approximately 210 calories. This makes them a satisfying snack or side dish without being overly heavy. If you’re watching your calorie intake, you can enjoy these breadsticks in moderation, knowing they provide a tasty treat without too many calories.
Protein Content in Garlic Cheese Breadsticks
Garlic cheese breadsticks offer about 8 grams of protein per serving. The protein primarily comes from the mozzarella cheese and buttermilk used in the recipe. This protein content can help keep you feeling full and satisfied, making these breadsticks a great addition to your meal.
Sodium Levels in Garlic Cheese Breadsticks
Each serving of garlic cheese breadsticks contains around 400 milligrams of sodium. While this is a reasonable amount for a flavorful snack, it’s essential to be mindful of your overall sodium intake throughout the day. If you’re watching your sodium levels, consider adjusting the amount of salt in the recipe or pairing the breadsticks with low-sodium dipping sauces.
By keeping these nutritional facts in mind, you can enjoy your garlic cheese breadsticks while maintaining a balanced diet. They are a delicious option that can fit into various meal plans, whether you’re enjoying them as a snack or as part of a larger meal. Now that you know the nutritional information, let’s move on to some frequently asked questions about garlic cheese breadsticks!
FAQs about Garlic Cheese Breadsticks
Can I make Garlic Cheese Breadsticks ahead of time?
Yes, you can prepare garlic cheese breadsticks ahead of time! To do this, follow the recipe up to the point of shaping the dough. After twisting the strips, place them on a baking sheet lined with parchment paper. Cover the baking sheet with plastic wrap and refrigerate for up to 24 hours. When you’re ready to bake, simply remove them from the fridge and let them sit at room temperature for about 15 minutes before baking. This way, you can enjoy fresh, warm breadsticks without the hassle of preparing them from scratch on the day of your gathering!
What can I serve with Garlic Cheese Breadsticks?
Garlic cheese breadsticks are versatile and can be served with a variety of dishes. They pair wonderfully with marinara sauce for dipping, adding a classic Italian touch. You can also serve them alongside a fresh salad, like Caesar or garden salad, to balance the richness. For a heartier meal, consider pairing them with soups such as tomato or minestrone. Additionally, they make a great addition to a charcuterie board, complementing cheeses, meats, and olives. The options are endless, so feel free to get creative!
How do I store leftover Garlic Cheese Breadsticks?
Storing leftover garlic cheese breadsticks is easy! Allow them to cool completely, then place them in an airtight container. You can keep them at room temperature for up to two days. If you want to store them for a longer period, consider refrigerating them. They can last in the fridge for about a week. To reheat, simply pop them in the oven at 350°F (175°C) for about 5-10 minutes until warmed through. This will help restore their delicious texture and flavor!
Can I freeze Garlic Cheese Breadsticks?
Absolutely! Freezing garlic cheese breadsticks is a great way to enjoy them later. To freeze, first, let the baked breadsticks cool completely. Then, place them in a single layer on a baking sheet and freeze until solid. Once frozen, transfer them to a freezer-safe bag or container. They can be stored in the freezer for up to three months. When you’re ready to enjoy them, simply reheat from frozen in the oven at 350°F (175°C) for about 10-15 minutes. This way, you can have warm, cheesy breadsticks anytime you crave them!
Conclusion on Garlic Cheese Breadsticks
In conclusion, garlic cheese breadsticks are a delightful addition to any meal or gathering. Their warm, cheesy goodness combined with the aromatic flavor of garlic makes them a favorite for many. Whether you enjoy them as a snack, a side dish, or part of a larger meal, these breadsticks are sure to impress.
With simple ingredients and easy preparation steps, you can whip up a batch in no time. Plus, the variations and tips provided allow you to customize your breadsticks to suit your taste. From experimenting with different cheeses to adding herbs and spices, the possibilities are endless!
Remember, the joy of cooking comes not just from the final product but also from the process itself. So, gather your loved ones, roll up your sleeves, and enjoy making these delicious garlic cheese breadsticks together. They are perfect for sharing and will surely bring smiles to everyone at the table.
So, the next time you’re looking for a tasty treat, consider making garlic cheese breadsticks. They are easy, fun, and oh-so-delicious! Enjoy every cheesy bite, and don’t forget to dip them in your favorite sauce for an extra burst of flavor. Happy baking!