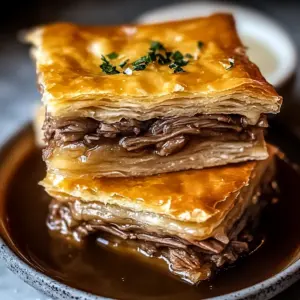
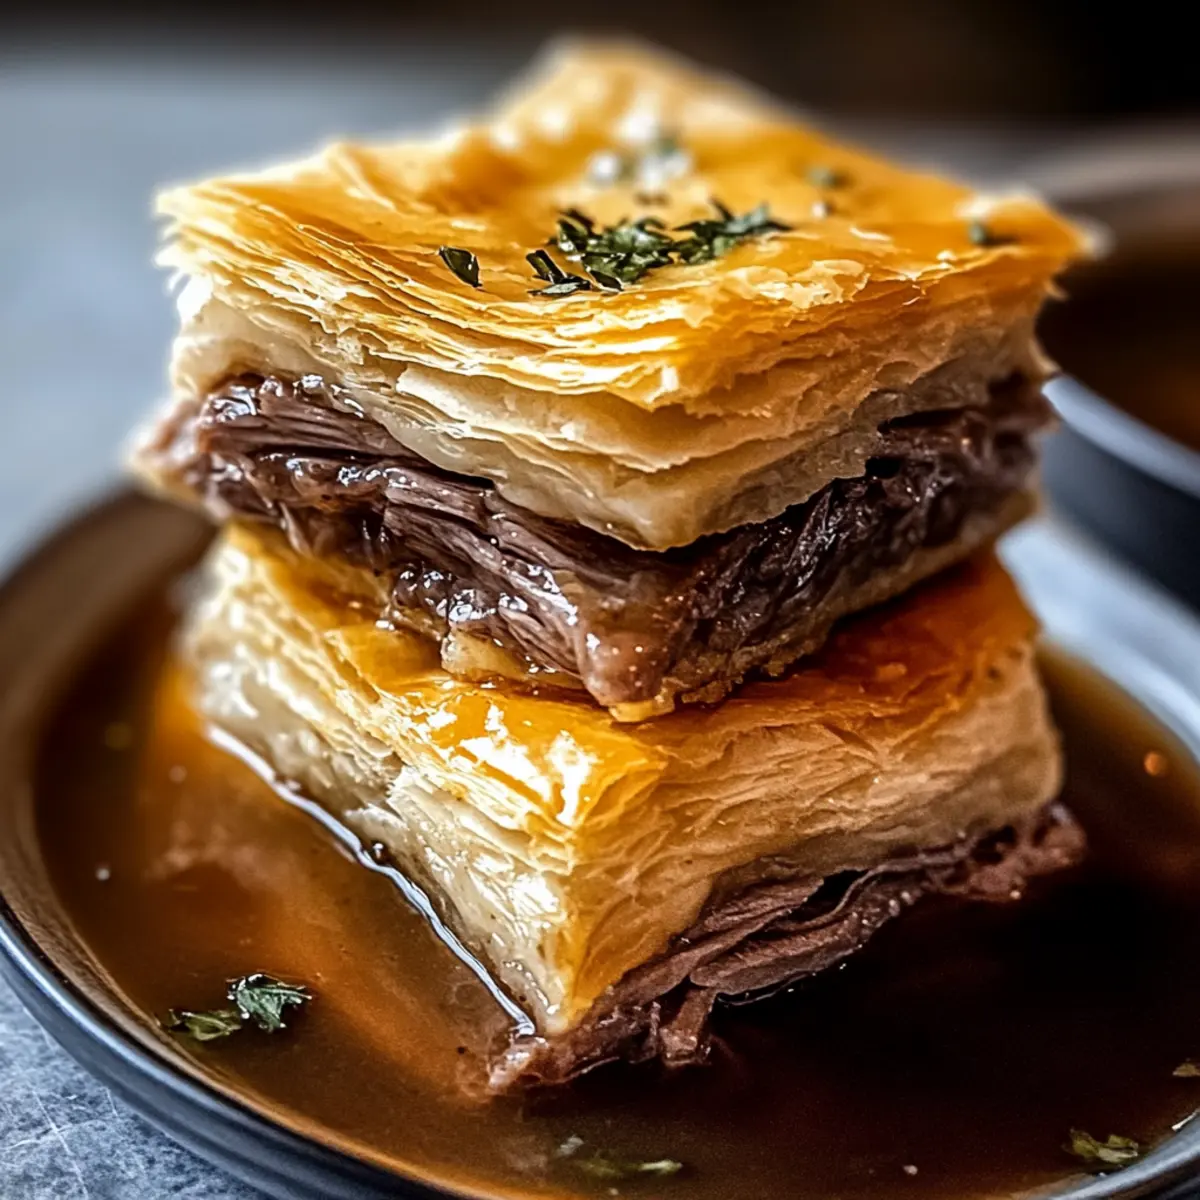
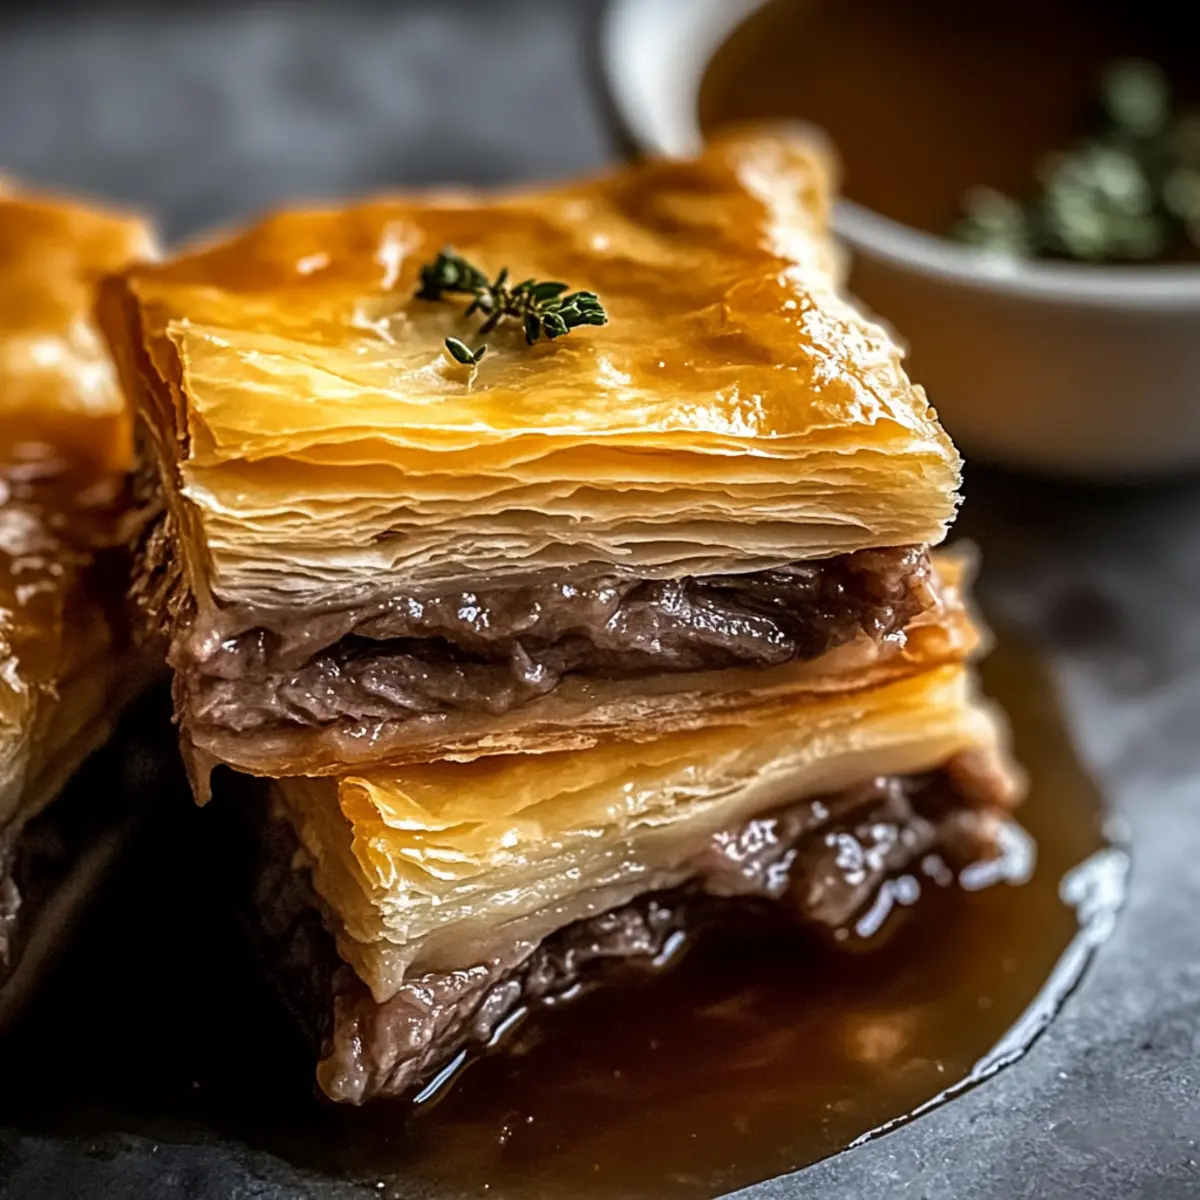
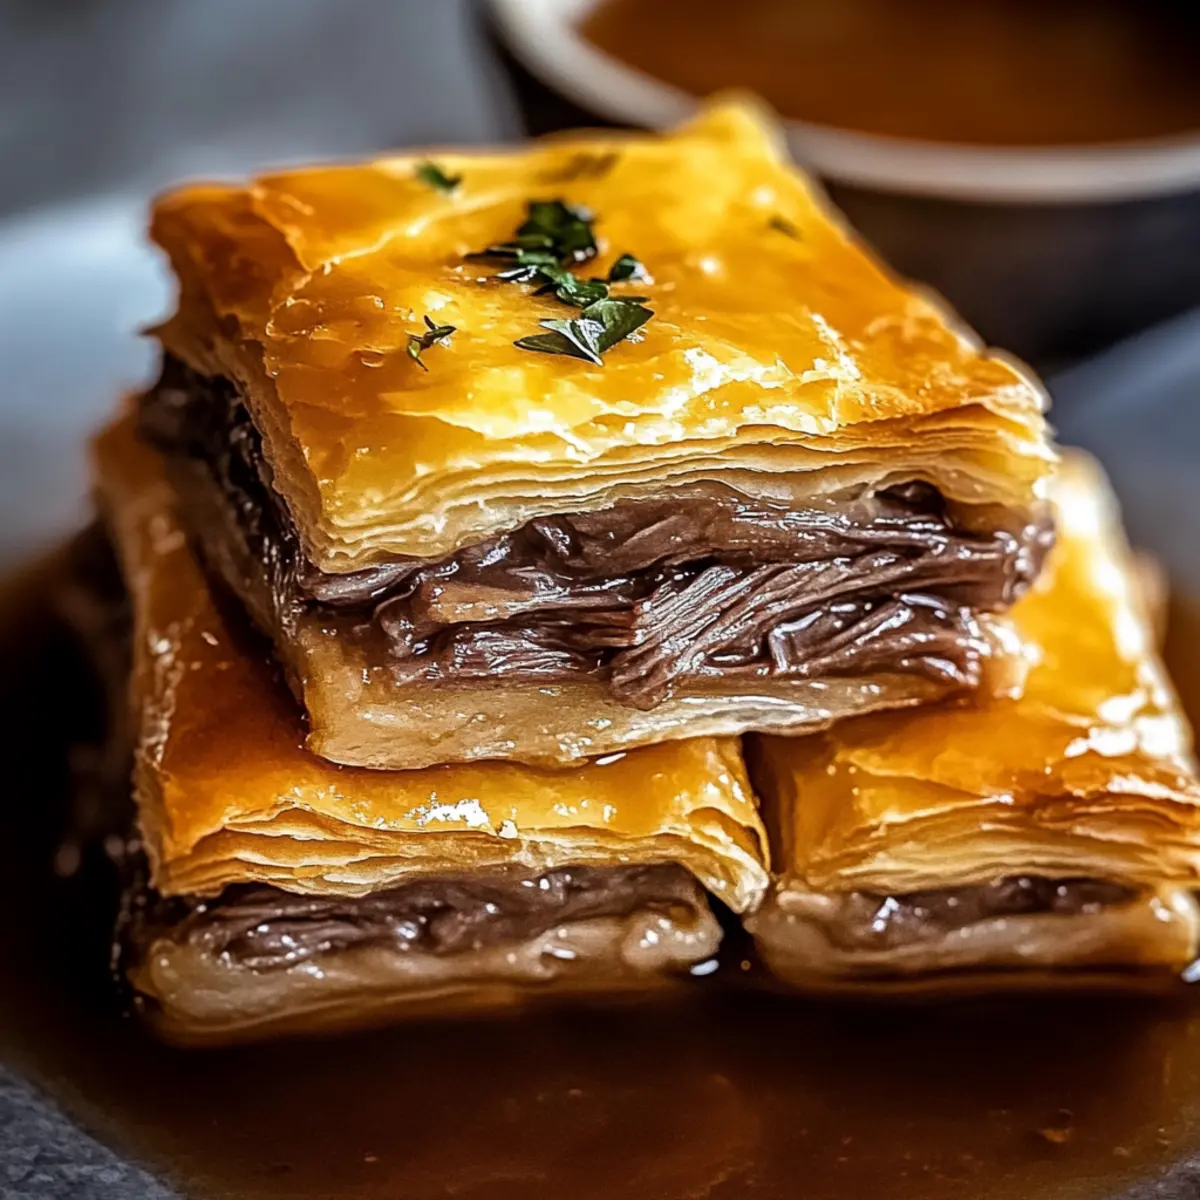
As I scoured my kitchen for a dish that balances comfort and flavor, I stumbled upon the idea of turning a classic French Dip sandwich into a shareable crowd-pleaser: French Dip Squares. Imagine buttery crescent rolls wrapping around tender roast beef and melted Swiss cheese—it’s like a warm hug from your oven. This easy recipe is not only perfect for gatherings and casual dinners, but it also simplifies the sandwich experience, making it a breeze to serve. Plus, the savory dipping broth adds that nostalgic touch everyone loves. Are you ready to make a dish that’s destined to become a new favorite? Let’s dive in!
Why are French Dip Squares a must-try?
Simplicity at its finest: With just a few ingredients and minimal steps, you can whip up this crowd-pleasing comfort food in no time.
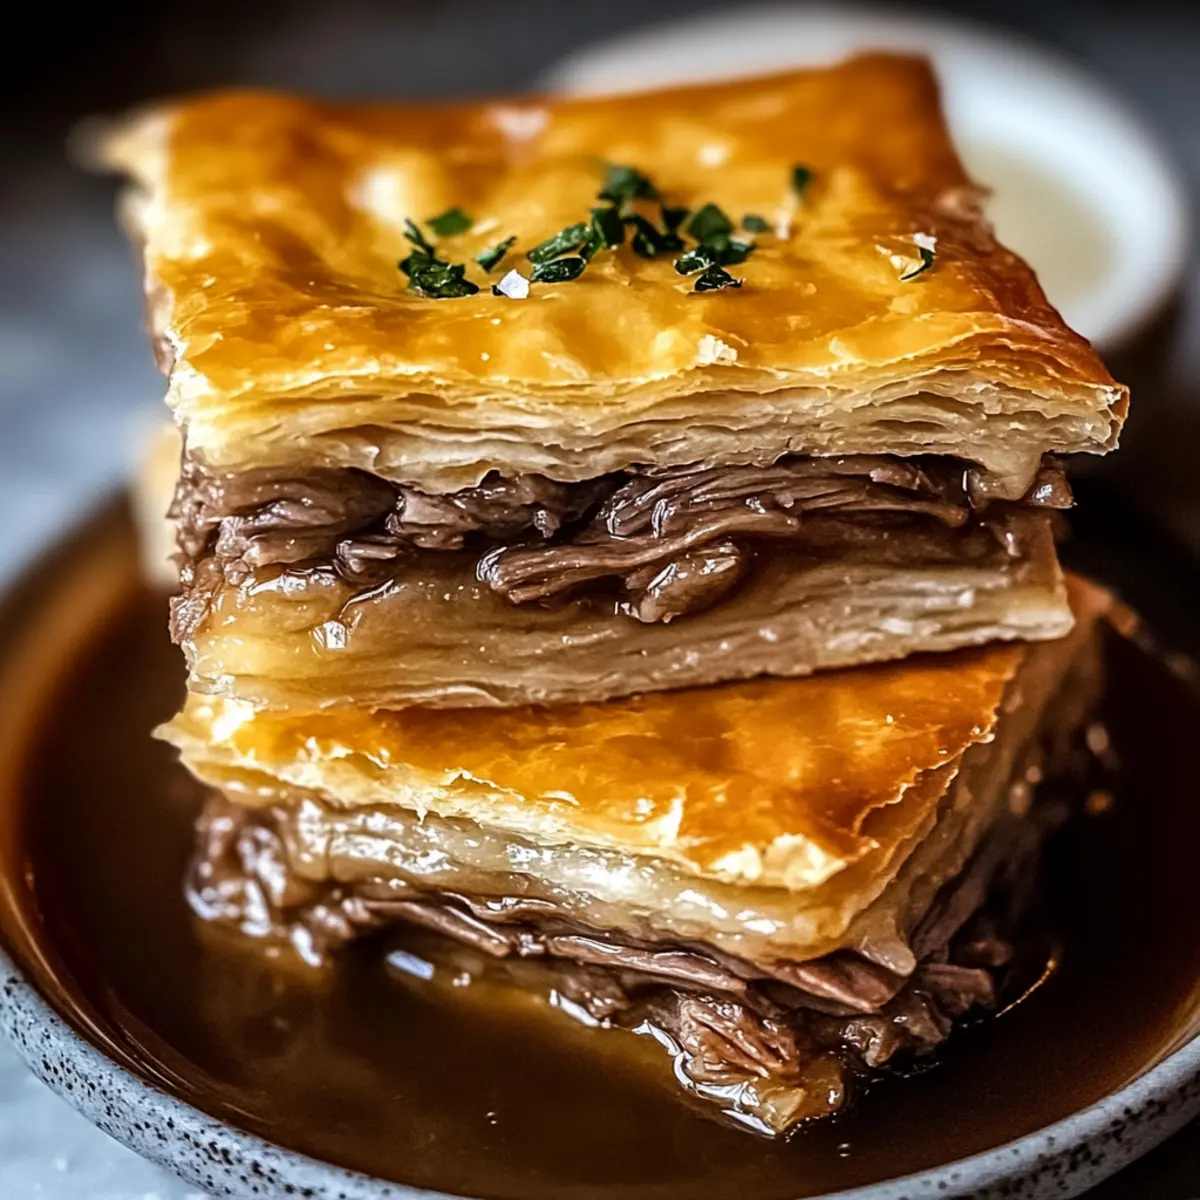
Flaky, Buttery Layers: The crescent rolls create a delightful crust, enveloping the rich filling of roast beef and Swiss cheese.
Savory Dipping Broth: This essential addition replicates the classic French Dip experience, enhancing each bite.
Versatile Twist: Easily customize this recipe with different cheeses or meats, making every batch unique.
Perfect for Gatherings: French Dip Squares are ideal for parties, ensuring you serve a dish that everyone will rave about. Whether you’re gathering friends for a casual dinner or just looking to elevate a weeknight meal, this recipe is the perfect fit.
French Dip Squares Ingredients
For the Dough
• Refrigerated Crescent Rolls – Provides a buttery, flaky crust, perfect for a satisfying base.
For the Filling
• Deli Roast Beef – Tender and savory, this is the star ingredient that brings the essence of classic French Dip squares to life.
• Swiss Cheese – Melts beautifully to impart a mild, nutty flavor that perfectly complements the beef.
For the Sauce
• Dry Onion Soup Mix – Enhances the flavor profile with aromatic, onion-forward notes, elevating the overall taste.
• Melted Butter – Adds rich flavor and creates a golden crust on top of the dish.
• Worcestershire Sauce – Infuses depth and umami, rounding out the savory experience.
• Garlic Powder – Provides an aromatic touch that enhances the savory filling.
For Serving
• Beef Broth – Served warm for dipping, it replicates the traditional French Dip experience, making each bite delightful.
Step‑by‑Step Instructions for French Dip Squares
Step 1: Preheat the Oven
Start by preheating your oven to 375°F (190°C). While that’s heating up, grab a 9×13 inch baking dish and give it a light spray with non-stick cooking spray to ensure easy removal of your French Dip Squares once they’re baked.
Step 2: Prepare the Crescent Roll Base
Unroll one can of refrigerated crescent rolls and carefully lay the dough into the prepared baking dish. Use your fingers to press the dough into the bottom, making sure to seal any seams or gaps. This will form a sturdy base to hold all the delicious layers of your French Dip Squares.
Step 3: Layer the Filling
Evenly distribute the deli roast beef across the crescent roll base, ensuring each bite will be packed with juicy flavor. Next, layer the Swiss cheese slices over the beef, allowing them to melt beautifully as the dish bakes, creating that delightful gooey texture everyone loves.
Step 4: Mix the Savory Sauce
In a mixing bowl, combine the dry onion soup mix, melted butter, Worcestershire sauce, and garlic powder. Stir thoroughly until well blended, and then drizzle this savory mixture over the Swiss cheese layer. This sauce will infuse your French Dip Squares with incredible flavor as they bake.
Step 5: Top with Crescent Roll Layer
Unroll the second can of crescent rolls over the top of the assembled layers. Gently pinch the seams together to prevent any fillings from leaking out during baking. This top layer will create a deliciously flaky crust that holds everything together.
Step 6: Bake until Golden Brown
Pop the baking dish into the preheated oven and bake for 15-20 minutes. Keep an eye on the squares as they cook; you’ll know they’re done when the top is golden brown and the dough is fully cooked through, giving a warm, inviting appearance.
Step 7: Heat the Beef Broth
While your French Dip Squares are baking, pour beef broth into a saucepan and warm it over medium heat. This will serve as your delightful dipping sauce, adding an authentic touch reminiscent of the classic French Dip experience with every bite.
Step 8: Cut and Serve
Once the baking time is completed, remove the dish from the oven and allow the squares to cool for a few minutes. Carefully cut them into squares, and serve them warm with the heated beef broth on the side for dipping. Enjoy the rich flavors and comforting textures of your freshly made French Dip Squares!
Make Ahead Options
These French Dip Squares are a fantastic choice for meal prep enthusiasts looking to save time on busy weeknights! You can assemble the entire casserole up to 24 hours in advance by preparing the layers and covering the dish tightly with plastic wrap before refrigerating. To maintain their flaky texture, be sure to keep the crescent roll seams well sealed. When you’re ready to serve, simply bake the dish directly from the fridge (adding a few extra minutes to the baking time if needed) and heat the beef broth on the stovetop for dipping. Enjoy the ease of having a comforting meal ready to go whenever you are!
French Dip Squares Variations and Substitutions
Feel free to explore these delightful twists on French Dip Squares to make them your own!
- Cheese Swap: Replace Swiss cheese with provolone or cheddar for a bolder flavor. It’s a quick way to shake things up!
- Protein Option: Use turkey or ham in place of roast beef for a lighter, yet equally delicious choice. This can cater to different preferences at your gathering.
- Veggie Boost: Add caramelized onions or sautéed mushrooms for a rich, earthy flavor. These ingredients can bring new dimensions to your classic dish.
- Spice It Up: For a spicier kick, mix in horseradish or Dijon mustard into the beef layer. These ingredients elevate the flavor profile dramatically.
- Herby Touch: Toss in some fresh herbs, like thyme or rosemary, to enhance the aroma and add freshness to your dish. A little greenery goes a long way!
- Gluten-Free Option: Substitute crescent rolls with gluten-free dough to accommodate dietary needs without sacrificing taste. The flavor remains intact, making it a great alternative.
- Creamy Addition: Incorporate a layer of cream cheese with herbs to bring creaminess and zest. This extra layer could become the star of the show!
- Garnish Idea: Top the squares with fresh chives or parsley just before serving. This adds a pop of color and a burst of freshness that completes the dish beautifully.
Whether you’re looking to mix up the flavors or accommodate dietary preferences, these variations ensure that your French Dip Squares will always be a crowd-pleaser. Happy cooking!
Expert Tips for French Dip Squares
- Seam Sealing: Pinch the seams of the crescent rolls together well to prevent leaks during baking. This ensures every bite remains filled with deliciousness.
- Stay Golden: Keep an eye on your French Dip Squares while they bake; check for that perfect golden brown crust to know they’re ready.
- Use a Timer: Set a timer for baking to avoid overcooking; it’s easy to lose track of time, and nobody enjoys a dry dish.
- Experiment with Cheeses: Feel free to swap Swiss cheese for provolone or cheddar to find the flavor combination that your family loves the most.
- Serve Warm Broth: Make sure to always serve the beef broth warm for dipping, as this elevates the whole dining experience significantly.
How to Store and Freeze French Dip Squares
Fridge: Store leftover French Dip Squares in an airtight container for up to 3 days. To maintain freshness, cover them tightly with plastic wrap or aluminum foil.
Freezer: For longer storage, freeze French Dip Squares before baking. Wrap tightly in plastic wrap, then in foil, ensuring they last up to 2 months.
Reheating: When ready to enjoy, thaw overnight in the fridge, then bake in a preheated oven at 350°F (175°C) for 15-20 minutes, or until warmed through.
Assembled Dish: If you prefer, prepare the entire dish ahead of time, refrigerating it for up to 24 hours before baking. This still makes for an easy and tasty meal!
What to Serve with French Dip Squares?
Imagine a vibrant spread accompanying those golden, gooey squares—let’s make your meal complete!
-
Crispy French Fries: Perfectly crispy fries offer a satisfying crunch that contrasts the tender squares, making each bite delightful.
-
Light Green Salad: A refreshing side with crisp greens and a zesty vinaigrette balances the rich flavors, adding a burst of freshness.
-
Roasted Vegetables: Seasoned roasted veggies provide a hearty, nutritious component that complements the savory filling in a delicious way.
-
Garlic Toast: Crunchy, buttery garlic toast is a fabulous way to enjoy every last drop of that warm dipping broth.
-
Coleslaw: The creamy, tangy bite of coleslaw adds a refreshing contrast to the comforting richness of French Dip Squares.
-
Creamy Potato Salad: This classic picnic side dish offers a rich creaminess that harmonizes beautifully with the savory beef and cheese.
-
Craft Beer: A light lager or amber ale pairs wonderfully, enhancing the comforting experience with a refreshing effervescence.
-
Chocolate Chip Cookies: For dessert, classic cookies provide a sweet finish to the meal, leaving everyone with a smile and satisfied taste buds.
French Dip Squares Recipe FAQs
What is the best way to select the right ingredients for French Dip Squares?
Absolutely! When choosing the deli roast beef, look for slices that are tender and have a rich color. A good Swiss cheese should have a slightly nutty aroma, and for the crescent rolls, ensure the packaging is intact and that they haven’t expired. Fresh ingredients will make your dish more flavorful and enjoyable!
How should I store leftover French Dip Squares?
Very easy! Place your leftover French Dip Squares in an airtight container and keep them in the fridge for up to 3 days. For a bit of added freshness, you can cover the squares tightly with plastic wrap or aluminum foil to prevent them from drying out.
Can I freeze French Dip Squares?
You bet! To freeze them, I recommend preparing the dish completely but without baking. Wrap the unbaked squares tightly in plastic wrap, then in foil to reduce freezer burn. They can stay good for up to 2 months. When you’re ready to bake, just thaw them in the fridge overnight and bake as directed!
What if my crescents don’t seal properly?
Don’t worry! If your crescent roll seams don’t seal well, slice the squares carefully before baking. This way, any filling that might ooze out will still be delicious. Make sure to pinch the seams tightly next time; they should be easy to seal with a little practice!
Are there any dietary considerations for French Dip Squares?
Absolutely! If you’re cooking for someone with allergies, check that the crescent rolls are free from allergens like nuts or gluten where necessary. For a lighter option, you could use turkey instead of roast beef, and swapping the Swiss cheese for a dairy-free alternative is a great way to accommodate those with lactose intolerance.
How long do baked French Dip Squares last in the fridge?
Baked French Dip Squares should be consumed within 3 days for the best flavor and texture. Remember to store them in an airtight container to help them stay fresh as long as possible! If you have any leftovers, they make a quick and delightful meal for the next couple of days.
Savory French Dip Squares: Your New Go-To Comfort Food
Ingredients
Equipment
Method
- Preheat your oven to 375°F (190°C). Spray a 9x13 inch baking dish with non-stick cooking spray.
- Unroll one can of refrigerated crescent rolls and lay the dough into the baking dish, pressing it into the bottom.
- Distribute deli roast beef across the crescent roll base and layer Swiss cheese slices over the beef.
- Mix the dry onion soup mix, melted butter, Worcestershire sauce, and garlic powder in a bowl. Drizzle over the Swiss cheese layer.
- Unroll the second can of crescent rolls over the top, pinching seams together to prevent filling leaks.
- Bake for 15-20 minutes until golden brown and fully cooked.
- While baking, heat beef broth in a saucepan over medium heat for dipping.
- After baking, let cool for a few minutes, cut into squares, and serve warm with beef broth.