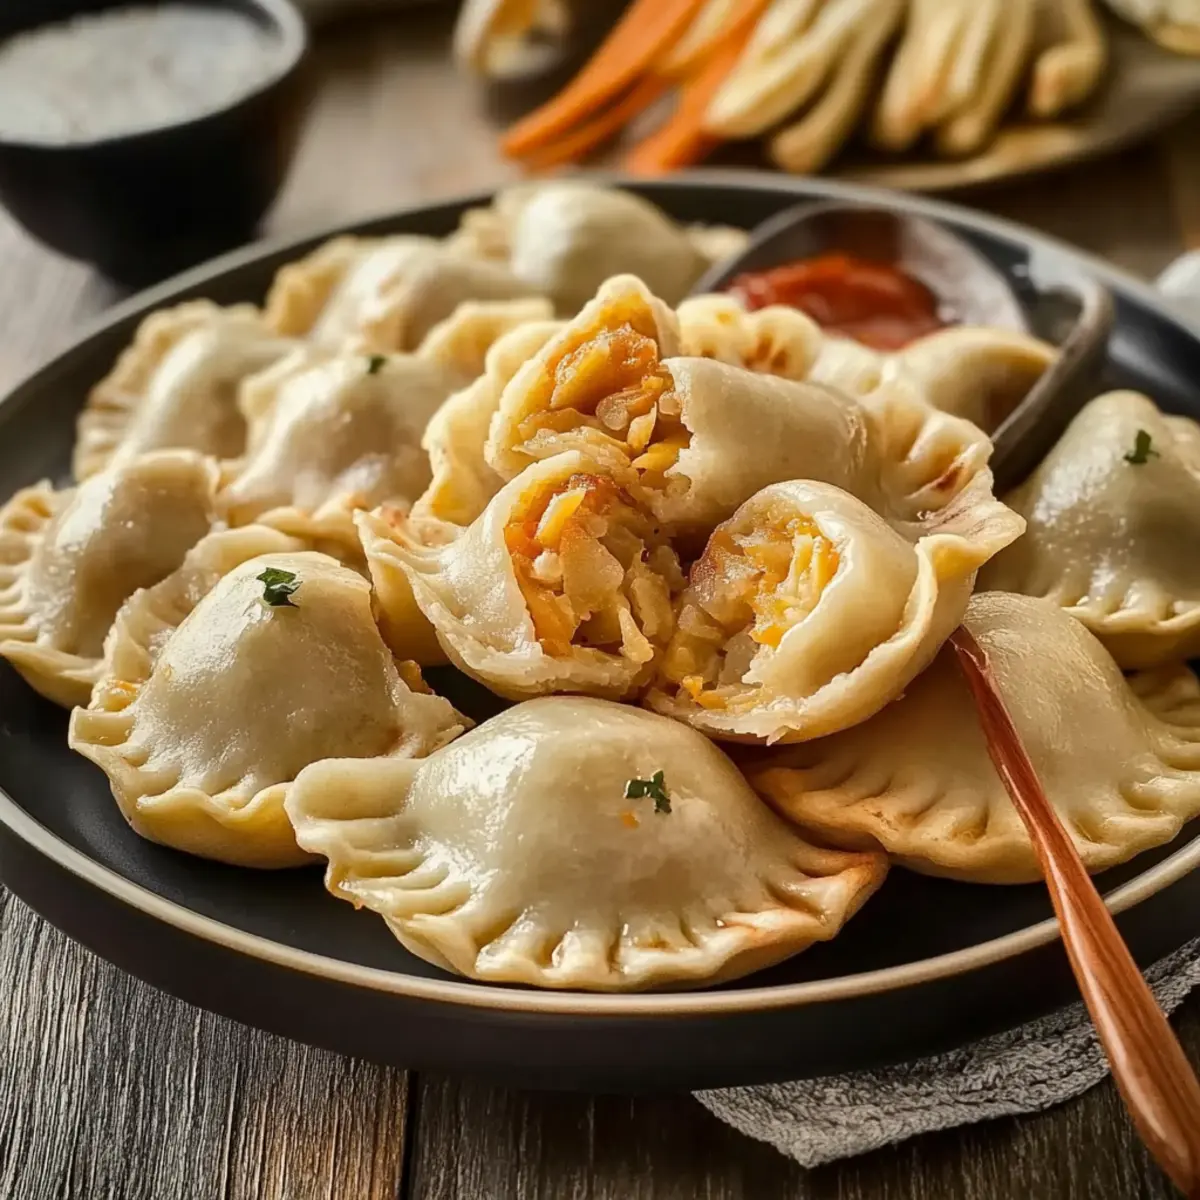
As the aroma of golden-brown dumplings fills the kitchen, it’s impossible not to feel nostalgic for more comforting times. Today, I’m excited to share my Easy Homemade Perogies Recipe, a true gem of Eastern European cuisine that brings warmth and joy to any dining table. These soft dumplings are crispy on the outside and filled with creamy potato and sharp cheddar cheese, making them the ultimate comfort food. Plus, they’re freezer-friendly, allowing you to whip up a batch ahead of time and enjoy a delightful homemade meal any day of the week. With endless filling options—from savory sautéed mushrooms to sweet berry surprises—this recipe is perfect for everyone, whether you’re catering to dietary preferences or simply feeling adventurous in the kitchen. Ready to dive into a world of flavors and creativity? Let’s get started!
Why Make Homemade Perogies?
Comforting, Familiar Flavors: Experience the heartwarming essence of Eastern European cuisine right in your home.
Endless Customizations: Choose from savory or sweet fillings, making this recipe adaptable for every palate.
Freezer-Friendly: Prepare a big batch ahead of time, ready to enjoy delicious homemade meals on busy days.
Simple Preparation: With just a few ingredients, even novice cooks will find success in their kitchen. Take a look at my Creamy Sausage Rigatoni for more easy comfort food ideas!
Family Fun: Gather your loved ones for a fun and engaging cooking experience as you shape these tasty dumplings together.
Dive into this wholesome dish that’ll impress both family and friends!
Easy Homemade Perogies Ingredients
For the Dough
- All-Purpose Flour – Provides structure and texture for the perfect dumpling; whole wheat or gluten-free blends work too!
- Salt – Enhances flavor throughout the dough and filling; don’t skip this essential ingredient.
- Egg – Acts as a natural binder; for an egg-free option, substitute with aquafaba for a similar consistency.
- Sour Cream – Adds moisture and richness, keeping the dough tender; plain yogurt can give a nice tang instead.
- Unsalted Butter – Contributes to a deliciously tender dough; opt for plant-based butter if you need a dairy-free alternative.
For the Filling
- Warm Mashed Potatoes – The star of your filling, offering creaminess and flavor; you can replace with sweet potatoes for a fun twist.
- Sharp Cheddar Cheese – Adds a delightful creaminess and depth of flavor; feel free to use mozzarella or dairy-free cheese if desired.
- Shallots/Onion – Provides aromatic depth when sautéed; green onions or leeks can be great substitutes for a fresh taste.
Get creative with your Easy Homemade Perogies, and delight in the endless possibilities that await you in the kitchen!
Step‑by‑Step Instructions for Easy Homemade Perogies Recipe
Step 1: Prepare the Dough
Begin by whisking together 2 cups of all-purpose flour and 1 teaspoon of salt in a large mixing bowl. Make a well in the center and crack in 1 egg. Gradually mix in ½ cup of sour cream and 2 tablespoons of softened unsalted butter until the dough begins to form. Knead it on a floured surface for about 5-7 minutes until smooth, then cover and let it rest for 30-60 minutes.
Step 2: Assemble the Filling
While the dough rests, prepare the filling for your Easy Homemade Perogies. In a mixing bowl, combine 2 cups of warm mashed potatoes with 1 cup of sharp cheddar cheese, seasoning with salt and pepper to taste. Mix well until the cheese is melted and evenly incorporated into the potatoes. This hearty filling will create the perfect center for your dumplings.
Step 3: Shape the Perogies
After resting, roll out the dough on a floured surface to a thickness of about 1/8 inch. Use a round cutter or glass to cut out circles, approximately 3 inches in diameter. Place a tablespoon of the potato-cheese filling in the center of each circle. Gently fold the dough over, pinching the edges firmly to seal the perogies and prevent any filling from leaking out during cooking.
Step 4: Cook the Perogies
To cook your perogies, bring a large pot of salted water to a rolling boil. Carefully add the perogies to the boiling water in batches to avoid overcrowding. Once they float to the surface (about 2-3 minutes), let them simmer for an additional 2-3 minutes. Use a slotted spoon to remove them from the pot, ensuring they drain well before moving on to the next step.
Step 5: Pan-Fry for Extra Crispness (Optional)
For added flavor and texture, heat 2 tablespoons of unsalted butter in a large skillet over medium heat. Once melted, add the boiled perogies to the skillet and sauté until they are golden brown and crispy on both sides, about 3-4 minutes per side. This step enhances the delightful crunch and adds depth to your Easy Homemade Perogies.
What to Serve with Homemade Perogies?
There’s nothing quite like enjoying these delightful dumplings surrounded by hearty sides and comforting flavors.
-
Grilled Kielbasa: A sizzling sausage adds a smoky flavor that perfectly complements the richness of perogies. The combination creates a well-rounded plate that’s sure to satisfy your cravings.
-
Sautéed Cabbage: This tender, lightly caramelized side balances the richness of the perogies with a touch of tanginess. Simply sauté with onion and a dash of vinegar for added zest.
-
Fresh Garden Salad: Crisp greens, mixed herbs, and a light vinaigrette brighten up your meal and offer a refreshing contrast to the warm, soft dumplings.
-
Creamy Garlic Sauce: A drizzle of garlic-infused sour cream elevates the perogies to new heights, enhancing their flavor with a rich, savory touch.
-
Applesauce: For the sweet tooth in the family, a side of warm applesauce adds a hint of sweetness that pairs beautifully with the savory filling of the perogies.
-
Beet Salad: Vibrant and earthy, a beet salad topped with feta cheese brings a pop of color and a delightful flavor, rounding out your homemade meal perfectly.
-
Cold Beer or Sparkling Water: A chilled beverage of your choice—whether a hearty lager or refreshing sparkling water—complements the richness of the perogies while keeping your meal light and enjoyable.
Make Ahead Options
These Easy Homemade Perogies are a dream for busy home cooks looking to save time without sacrificing flavor! You can prepare the dough and filling up to 24 hours in advance. Simply make the dough and filling as per the recipe, then wrap them tightly in plastic wrap and refrigerate. For even longer storage, shape the perogies and freeze them on a baking sheet before transferring to a freezer-safe bag, where they can last for up to 3 months. When ready to enjoy, boil the frozen perogies straight from the freezer (no need to thaw!) until they float, then proceed with the optional pan-frying to achieve that crispy exterior. Trust me, they’ll be just as delicious!
How to Store and Freeze Easy Homemade Perogies
Fridge: Store cooked perogies in an airtight container for up to 4 days. Reheat them by sautéing in a skillet with a little oil or butter for a crispy finish.
Freezer: Uncooked perogies can be frozen in a single layer on a baking sheet for up to 3 months. Once frozen, transfer them to a freezer bag.
Reheating: For frozen perogies, drop them directly into boiling water from the freezer and cook until they float, then simmer for an additional 2-3 minutes before enjoying.
Dough Storage: If you have leftover dough, wrap it tightly in plastic wrap and store it in the fridge for up to 2 days. Roll out and use as needed for your easy homemade perogies!
Helpful Tricks for Easy Homemade Perogies
- Knead Just Right: Over-kneading leads to tough dough. Aim for a smooth texture without excessive elasticity for the best homemade perogies.
- Seal Them Well: Make sure the edges are tightly sealed. A good pinch prevents the filling from leaking during cooking, ensuring a perfect bite.
- Boiling Magic: Allow perogies to float before simmering. This indicates they’re cooked through; simmering ensures the filling is warm and flavors meld beautifully.
- Cooling Time: After boiling, let perogies sit for a few minutes before pan-frying. This step helps achieve that coveted crispy exterior as moisture evaporates.
- Filling Variations: Don’t shy away from experimenting! Try different fillings like sautéed mushrooms or sweet berries to discover your new favorite with this easy homemade perogies recipe.
Easy Homemade Perogies Variations
Feel free to let your creativity shine by customizing these delightful perogies to match your taste and dietary needs!
- Vegan: Substitute the egg with aquafaba and use plant-based butter and cheese for a completely dairy-free delight.
- Gluten-Free: Use a gluten-free flour blend to create a dough that’s still deliciously tender, ensuring everyone can enjoy them.
- Sweet Fillings: Replace the potato filling with a sweet mixture of berries and ricotta for a unique dessert twist; serve with a dusting of powdered sugar.
- Herbed Mashed Potatoes: Mix chopped fresh herbs such as parsley or dill into the mashed potatoes for an aromatic upgrade that elevates your filling.
- Spicy Kick: Add diced jalapeños or crushed red pepper flakes into the potato filling for a bold, spicy surprise in each bite.
- Savory Cheese Boost: Try replacing sharp cheddar with blue cheese or feta for a punch of flavor that complements savory fillings beautifully.
- Mushroom Medley: Sauté a mixture of mushrooms with garlic and herbs for a hearty alternative filling that provides earthy, umami flavors.
- Fresh Veggies: Incorporate finely chopped sautéed spinach or zucchini into the potato filling; these add freshness and a lovely, vibrant color.
With these variations, you can shape your perogies to suit any occasion, much like the comforting meals found in my Alice Springs Chicken recipe. Happy cooking!

Easy Homemade Perogies Recipe FAQs
What kind of potatoes should I use for the filling?
For the perfect filling, I recommend using starchy potatoes like Russets or Yukon Golds. They get creamy when mashed, providing a silky texture that complements the cheese. You can also experiment with sweet potatoes for a delightful twist on traditional flavors!
How long do cooked perogies last in the fridge?
Cooked perogies can be stored in an airtight container in the refrigerator for up to 4 days. Just reheat them in a skillet to regain that lovely crispiness, bringing back the joy of homemade comfort food.
Can I freeze uncooked perogies?
Absolutely! You can freeze uncooked perogies for up to 3 months. Just arrange them in a single layer on a baking sheet to freeze first, then transfer them to a freezer bag. This way, you can have homemade comfort food ready whenever you desire!
What’s the best way to reheat frozen perogies?
To reheat frozen perogies, drop them directly into boiling water without thawing. Cook until they float to the surface, which usually takes about 3-4 minutes. Then simmer for an additional 2-3 minutes. This method ensures they stay tender and delicious!
How can I tell if my dough is too wet or dry?
If your dough is too wet and sticky, gradually add small amounts of flour until it reaches a soft, smooth consistency. On the other hand, if it’s too dry and crumbly, add a teaspoon of water or extra sour cream to bring it all together. Aim for a dough that’s easy to handle but not overly sticky!
Are there any allergies I should consider when making perogies?
Yes! If you have gluten sensitivities, use a gluten-free flour blend to make your dough. Additionally, for dairy allergies, substitute the sour cream and butter with suitable plant-based alternatives. Always read ingredient labels to ensure everyone at the table can enjoy these delightful dumplings!

Easy Homemade Perogies Recipe: Comfort Food Your Way
Ingredients
Equipment
Method
- Prepare the Dough: Whisk together flour and salt in a large mixing bowl. Make a well, add egg, sour cream, and softened butter. Knead for 5-7 minutes until smooth. Let rest for 30-60 minutes.
- Assemble the Filling: In a mixing bowl, combine warm mashed potatoes with cheddar cheese and seasonings. Mix well until cheese is melted and evenly mixed.
- Shape the Perogies: Roll out the dough and cut out circles. Place filling in the center, fold over and pinch edges to seal.
- Cook the Perogies: Boil salted water, add perogies in batches. Let float and simmer for an additional 2-3 minutes before removing.
- Pan-Fry for Extra Crispness (Optional): Sauté boiled perogies in butter until golden brown and crispy on both sides.