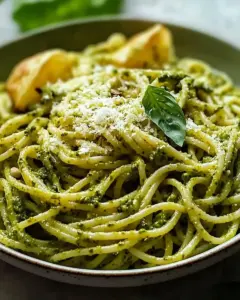
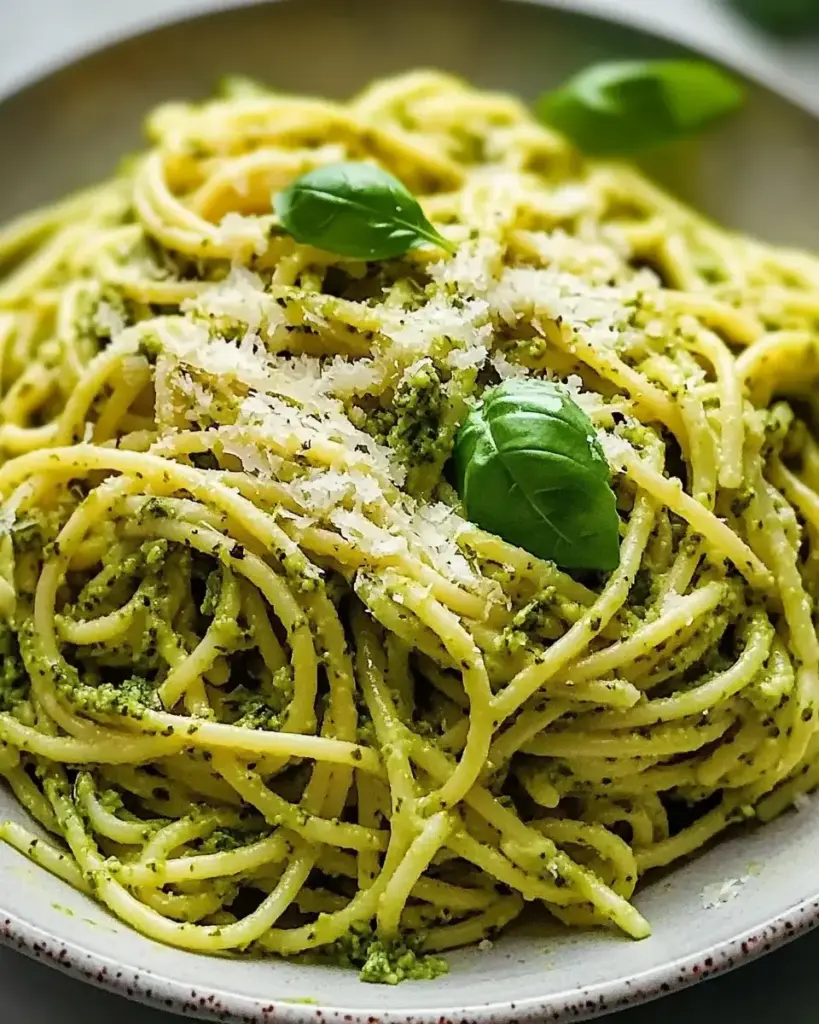
Introduction to Creamy Pesto Pasta
There’s something magical about a bowl of Creamy Pesto Pasta that instantly transports me back to my childhood kitchen. The aroma of fresh basil and garlic wafting through the air always felt like a warm hug. This dish is not just a meal; it’s a quick solution for those busy weeknights or a delightful way to impress your loved ones during a cozy dinner. With its rich flavors and creamy texture, it’s a crowd-pleaser that comes together in no time. Trust me, once you try this recipe, it will become a staple in your culinary repertoire.
Why You’ll Love This Creamy Pesto Pasta
This Creamy Pesto Pasta is a game-changer for anyone who craves deliciousness without the fuss. It’s incredibly easy to whip up, taking just 25 minutes from start to finish. The vibrant flavors of fresh basil and garlic dance on your palate, while the creamy texture wraps around each pasta piece like a warm embrace. Perfect for busy weeknights or impressing guests, this dish is sure to become a favorite in your home.
Ingredients for Creamy Pesto Pasta
Gathering the right ingredients is the first step to creating a delicious Creamy Pesto Pasta. Here’s what you’ll need:
- Pasta: Choose your favorite type, like penne or fusilli. They hold the sauce beautifully.
- Fresh Basil: The star of the show! Its aromatic leaves bring a burst of flavor.
- Parmesan Cheese: Grated for a nutty, salty kick that enhances the pesto.
- Pine Nuts: These add a delightful crunch. If you’re nut-free, sunflower seeds work well too.
- Garlic: Minced for that essential zing. It’s a must for any good pesto.
- Olive Oil: A smooth, rich base that brings everything together. Use high-quality for the best flavor.
- Salt and Pepper: Essential for seasoning. Adjust to your taste.
- Heavy Cream: Optional, but it adds a luxurious creaminess to the dish.
- Cherry Tomatoes: Halved for garnish, they add a pop of color and freshness.
For exact measurements, check the bottom of the article where you can find everything listed for easy printing. Happy cooking!
How to Make Creamy Pesto Pasta
Creating a bowl of Creamy Pesto Pasta is a straightforward process that anyone can master. Follow these simple steps, and you’ll have a delicious meal ready in no time. Let’s dive in!
Step 1: Cook the Pasta
Start by boiling a large pot of salted water. Once it’s bubbling, add your pasta. I love using penne or fusilli because they catch the sauce perfectly. Cook according to the package instructions until it’s al dente. This usually takes about 8 to 10 minutes. Remember to reserve half a cup of that pasta water before draining. It’s liquid gold for adjusting your sauce later!
Step 2: Prepare the Pesto
While the pasta cooks, it’s time to whip up the pesto. Grab your food processor and toss in the fresh basil leaves, grated Parmesan cheese, pine nuts, and minced garlic. Pulse until everything is finely chopped. Then, with the processor running, slowly drizzle in the olive oil. This will create a smooth, creamy mixture. Don’t forget to season with salt and pepper to taste. Taste as you go; it’s all about finding that perfect balance!
Step 3: Combine Pasta and Pesto
Once your pasta is cooked and drained, transfer it to a large mixing bowl. Pour in the freshly made pesto and give it a good toss. If you’re feeling indulgent, stir in the heavy cream for that extra creaminess. If the sauce seems too thick, add a splash of the reserved pasta water until you reach your desired consistency. It should be luscious and inviting!
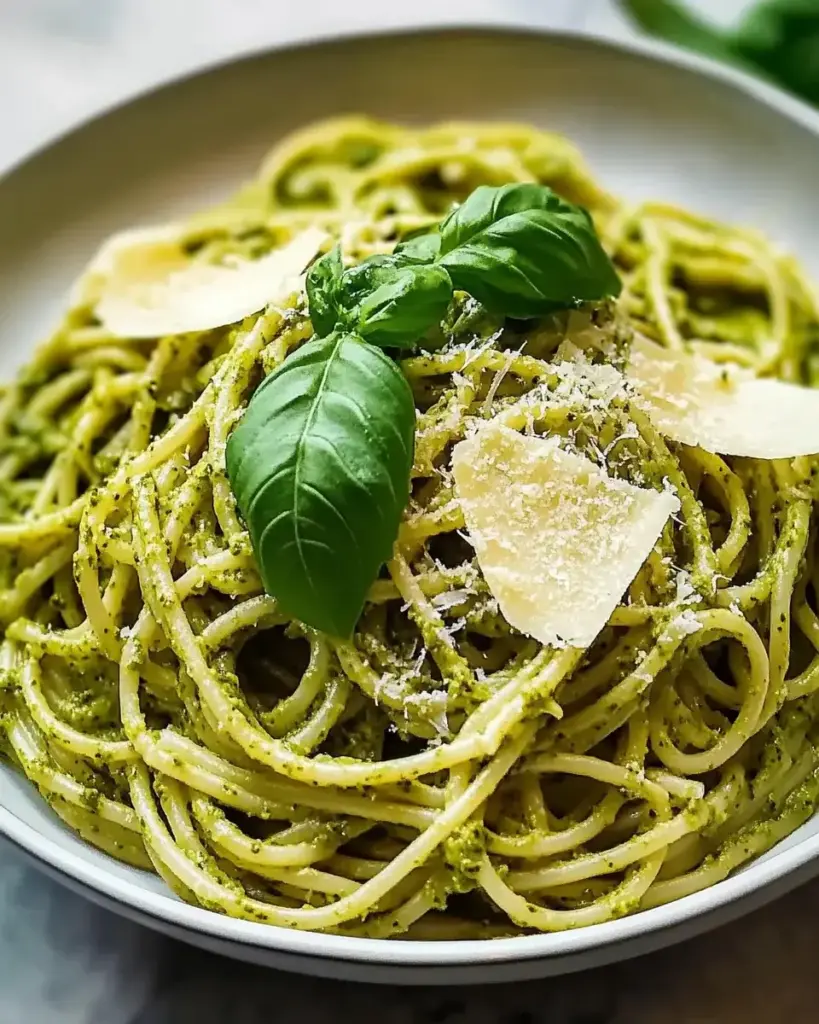
Step 4: Serve and Garnish
Now comes the fun part—serving! Dish out the creamy pasta into bowls and garnish with halved cherry tomatoes for a pop of color. A sprinkle of extra Parmesan on top never hurts either. Enjoy your Creamy Pesto Pasta while it’s warm, and watch as everyone digs in with delight!
Tips for Success
- Always salt your pasta water; it enhances the flavor of the pasta.
- Use fresh basil for the best flavor; dried basil won’t give you the same vibrant taste.
- Don’t over-process the pesto; a little texture adds character.
- Adjust the creaminess by adding more or less heavy cream based on your preference.
- Save leftover pesto in the fridge for up to a week or freeze it for later use.
Equipment Needed
- Large Pot: For boiling pasta. A deep skillet can work in a pinch.
- Colander: To drain the pasta. A slotted spoon can also do the job.
- Food Processor: Essential for making pesto. A blender can be a good alternative.
- Mixing Bowl: For combining pasta and pesto. Any large bowl will suffice.
Variations
- Protein Boost: Add grilled chicken, shrimp, or sautéed mushrooms for a hearty meal.
- Nut-Free Option: Substitute pine nuts with sunflower seeds or omit nuts entirely for a nut-free version.
- Vegan Twist: Use nutritional yeast instead of Parmesan and coconut cream for a dairy-free alternative.
- Spicy Kick: Toss in red pepper flakes or a dash of hot sauce for a spicy version.
- Veggie Delight: Mix in sautéed spinach, zucchini, or bell peppers for added nutrition and color.
Serving Suggestions
- Side Salad: Pair your Creamy Pesto Pasta with a light arugula or mixed greens salad for a refreshing contrast.
- Garlic Bread: Serve with warm, crusty garlic bread to soak up any leftover sauce.
- Wine Pairing: A crisp white wine, like Sauvignon Blanc, complements the dish beautifully.
- Presentation: Serve in shallow bowls, garnished with fresh basil leaves and a drizzle of olive oil for an elegant touch.
FAQs about Creamy Pesto Pasta
Can I make Creamy Pesto Pasta ahead of time?
Absolutely! You can prepare the pesto in advance and store it in the fridge for up to a week. Just cook the pasta fresh when you’re ready to serve. This way, you’ll have a quick meal ready to go!
What can I substitute for heavy cream?
If you’re looking for a lighter option, you can use half-and-half or even Greek yogurt for a creamy texture. Coconut cream is a great dairy-free alternative that adds a unique flavor.
How do I store leftovers?
Store any leftover Creamy Pesto Pasta in an airtight container in the fridge for up to three days. Reheat gently on the stove, adding a splash of water or broth to loosen the sauce.
Can I freeze Creamy Pesto Pasta?
While it’s best enjoyed fresh, you can freeze the pesto separately. Just remember that the pasta may become a bit mushy when thawed, so it’s better to freeze the pesto and cook fresh pasta later.
What other dishes can I use pesto in?
Pesto is incredibly versatile! Use it as a spread on sandwiches, a topping for grilled meats, or even a drizzle over roasted vegetables. The possibilities are endless!
Final Thoughts
Cooking Creamy Pesto Pasta is more than just preparing a meal; it’s about creating memories and sharing joy. The vibrant colors and rich flavors bring a sense of warmth to the table, making it perfect for family gatherings or a cozy night in. Each bite is a reminder of the simple pleasures in life, like laughter and good company. Whether you’re a seasoned chef or a kitchen novice, this dish invites you to explore your culinary creativity. So grab your ingredients, and let the magic of Creamy Pesto Pasta transform your dining experience into something truly special!
Creamy Pesto Pasta: A Rich Flavor Experience Awaits!
Ingredients
Method
- Cook the pasta according to package instructions in a large pot of salted boiling water until al dente. Drain and set aside, reserving 1/2 cup of the pasta water.
- In a food processor, combine the basil leaves, Parmesan cheese, pine nuts, and minced garlic. Pulse until finely chopped.
- With the food processor running, slowly drizzle in the olive oil until the mixture is smooth and creamy. Season with salt and pepper to taste.
- In a large mixing bowl, combine the cooked pasta and pesto. If you prefer a creamier sauce, stir in the heavy cream and mix well. If the sauce is too thick, add a bit of the reserved pasta water until the desired consistency is reached.
- Serve immediately, garnished with halved cherry tomatoes and additional Parmesan cheese if desired.
Nutrition
Notes
- For a protein boost, add grilled chicken or shrimp to the pasta before serving.
- Substitute the pine nuts with sunflower seeds or omit nuts entirely for a nut-free version.