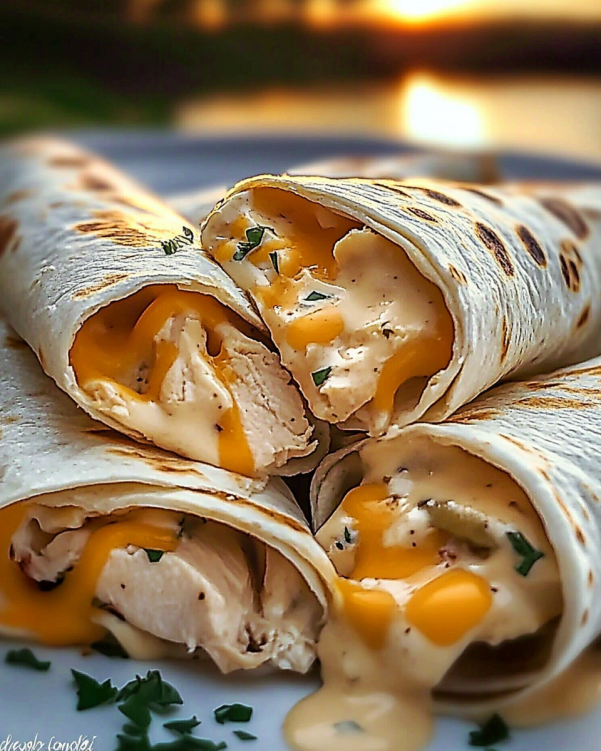
Introduction to Cheesy Garlic Chicken Wraps
When I think of comfort food, Cheesy Garlic Chicken Wraps always come to mind.
These wraps are not just a meal; they’re a warm hug on a plate.
Whether you’re racing against the clock after a long day or looking to impress friends at a casual gathering, this recipe is your go-to.
With tender chicken, creamy cheeses, and fresh veggies all wrapped up in a soft tortilla, it’s a delightful combination that satisfies every craving.
Plus, they’re easy to whip up, making them perfect for any occasion. Let’s dive into this delicious adventure together!
Why You’ll Love This Cheesy Garlic Chicken Wraps
These Cheesy Garlic Chicken Wraps are a game-changer for busy weeknights.
They come together in just 35 minutes, making dinner a breeze.
The combination of gooey cheese and savory chicken creates a flavor explosion that will have everyone asking for seconds.
Plus, they’re versatile! You can customize them with your favorite veggies or spices.
Trust me, once you try these wraps, they’ll become a staple in your kitchen!
Ingredients for Cheesy Garlic Chicken Wraps
Creating these Cheesy Garlic Chicken Wraps is a breeze, especially with the right ingredients.
Here’s what you’ll need to bring this delicious dish to life:
- Cooked chicken, shredded: The star of the show! Use rotisserie chicken for convenience or cook your own for a fresh taste.
- Shredded mozzarella cheese: This melty cheese adds creaminess and binds everything together beautifully.
- Cream cheese: Softened to perfection, it gives the filling a rich, velvety texture.
- Mayonnaise: A touch of mayo enhances the creaminess and adds a subtle tang.
- Garlic: Freshly minced garlic brings a punch of flavor that elevates the entire dish.
- Italian seasoning: A blend of herbs that adds depth and warmth to the filling.
- Salt and black pepper: Essential for seasoning, these staples enhance all the flavors.
- Flour tortillas: The perfect wrap for all your delicious fillings. Choose large ones for ample space.
- Fresh spinach leaves: Adds a pop of color and a nutritious crunch.
- Diced tomatoes: Fresh tomatoes provide juiciness and a burst of flavor.
- Grated Parmesan cheese: A sprinkle on top adds a delightful salty finish.
- Olive oil: Brushing the wraps with olive oil helps achieve that golden, crispy exterior.
Feel free to get creative!
For a spicy kick, toss in some diced jalapeños or red pepper flakes.
If you’re looking for alternatives, swap the chicken for shrimp or grilled veggies for a different flavor profile.
Exact measurements for these ingredients can be found at the bottom of the article, ready for printing!
How to Make Cheesy Garlic Chicken Wraps
Making Cheesy Garlic Chicken Wraps is a straightforward process that anyone can master.
With just a few simple steps, you’ll have a delicious meal ready to impress.
Let’s get started!
Step 1: Preheat the Oven
First things first, preheat your oven to 375°F (190°C).
This step is crucial for even cooking.
A hot oven ensures that your wraps bake perfectly, giving them that golden-brown finish we all crave.
Step 2: Prepare the Chicken Mixture
In a large bowl, combine the shredded chicken, mozzarella cheese, cream cheese, mayonnaise, minced garlic, Italian seasoning, salt, and black pepper.
Mix everything until it’s well combined.
You want a creamy, flavorful filling that’s packed with texture.
The combination of cheeses and chicken creates a mouthwatering base for your wraps.
Step 3: Assemble the Wraps
Now, lay out your flour tortillas on a clean surface.
Spread a generous layer of the chicken mixture evenly over each tortilla, leaving about an inch of space around the edges.
Next, add fresh spinach leaves and diced tomatoes on top of the chicken mixture.
Don’t skimp on the veggies; they add freshness and crunch!
Step 4: Roll the Tortillas
It’s time to roll!
Start from one end of the tortilla and tuck in the sides as you go.
This technique helps keep the filling secure.
Roll tightly but not too tight, or the filling might spill out during baking.
Step 5: Bake the Wraps
Place the wraps seam-side down on a baking sheet lined with parchment paper.
Brush the tops lightly with olive oil to help them crisp up in the oven.
Bake in the preheated oven for 15-20 minutes.
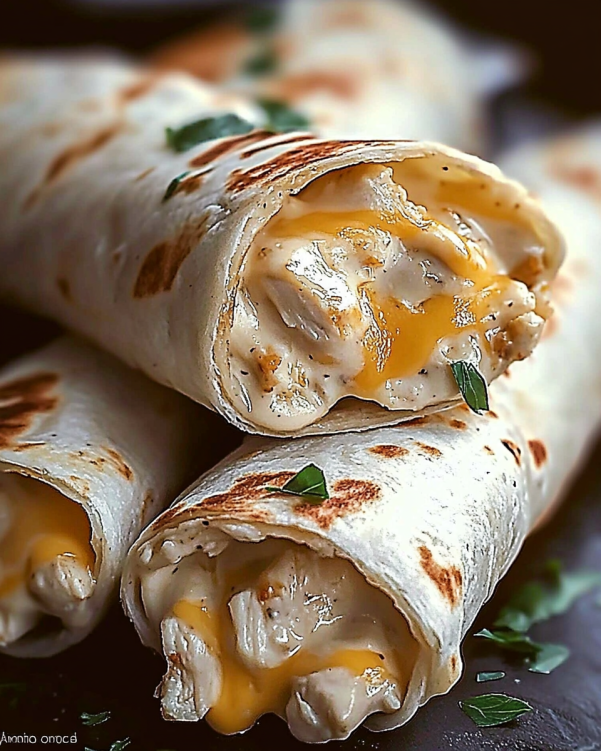
You’re looking for a golden brown color and melted cheese.
The aroma will be irresistible!
Step 6: Serve and Enjoy
Once baked, remove the wraps from the oven and let them cool for a few minutes.
This cooling time helps the cheese set a bit, making them easier to slice.
Cut them into halves or quarters for serving.
These wraps are best enjoyed warm, so gather your friends or family and dig in!
Tips for Success
- Use rotisserie chicken for a quick and easy option.
- Don’t overfill the tortillas to prevent spillage while rolling.
- Experiment with different cheeses for unique flavors.
- Let the wraps cool slightly before slicing for cleaner cuts.
- Brush the wraps with garlic-infused olive oil for extra flavor.
Equipment Needed
- Baking sheet: A standard sheet works, but a stoneware pan can enhance browning.
- Parchment paper: Use it for easy cleanup; aluminum foil is a good alternative.
- Mixing bowl: Any large bowl will do; a stand mixer can save time.
- Spatula: A rubber spatula is perfect for mixing and spreading.
- Knife: A sharp knife is essential for slicing the wraps after baking.
Variations
- Spicy Kick: Add diced jalapeños or a sprinkle of red pepper flakes to the chicken mixture for a fiery twist.
- Vegetarian Option: Substitute the chicken with grilled vegetables like zucchini, bell peppers, and mushrooms for a hearty meatless wrap.
- Cheese Lovers: Mix in different cheeses such as cheddar or pepper jack for a unique flavor profile.
- Herb Infusion: Incorporate fresh herbs like basil or cilantro into the filling for an aromatic touch.
- Low-Carb Version: Use lettuce leaves instead of tortillas for a lighter, gluten-free alternative.
Serving Suggestions
- Side Salad: Pair your wraps with a fresh garden salad for a light and crunchy contrast.
- Dipping Sauce: Serve with ranch or a zesty garlic aioli for an extra flavor boost.
- Drink Pairing: Enjoy with a cold beer or a refreshing iced tea to complement the meal.
- Presentation: Arrange wraps on a platter and garnish with fresh herbs for a pop of color.
FAQs about Cheesy Garlic Chicken Wraps
Can I make Cheesy Garlic Chicken Wraps ahead of time?
Absolutely! You can prepare the filling and assemble the wraps a few hours in advance. Just cover them tightly and refrigerate until you’re ready to bake. This makes for a quick dinner solution on busy nights!
What can I substitute for chicken in this recipe?
If you’re looking for alternatives, cooked shrimp or grilled vegetables work wonderfully. You can even use canned tuna for a different twist. The key is to keep the flavors balanced with the creamy cheeses.
How do I store leftovers?
Store any leftover Cheesy Garlic Chicken Wraps in an airtight container in the fridge for up to three days. Reheat them in the oven for a few minutes to restore that crispy texture.
Can I freeze these wraps?
Yes, you can freeze the assembled but unbaked wraps. Just wrap them tightly in plastic wrap and then foil. When you’re ready to enjoy, bake them straight from the freezer, adding a few extra minutes to the cooking time.
What sides pair well with Cheesy Garlic Chicken Wraps?
These wraps are delicious on their own, but they pair nicely with a fresh side salad, some crispy potato wedges, or even a bowl of soup for a comforting meal.
Final Thoughts
Cooking is more than just a task; it’s a way to connect with those we love.
These Cheesy Garlic Chicken Wraps embody that spirit perfectly.
With each bite, you’ll experience the warmth of melted cheese and the satisfaction of a well-rounded meal.
They’re not just easy to make; they’re a canvas for creativity and flavor.
Whether you’re sharing them with family or enjoying a quiet night in, these wraps bring joy to the table.
So roll up your sleeves, gather your ingredients, and let the deliciousness unfold.
You won’t regret it!
Cheesy Garlic Chicken Wraps: Tasty Recipe You’ll Love!
Ingredients
Method
- Preheat your oven to 375°F (190°C).
- In a large bowl, combine the shredded chicken, mozzarella cheese, cream cheese, mayonnaise, minced garlic, Italian seasoning, salt, and black pepper. Mix until well combined.
- Lay out the flour tortillas on a clean surface. Spread a layer of the chicken mixture evenly over each tortilla, leaving about an inch of space around the edges.
- Top the chicken mixture with fresh spinach leaves and diced tomatoes. Sprinkle grated Parmesan cheese on top.
- Roll each tortilla tightly, starting from one end and tucking in the sides as you go. Place the wraps seam-side down on a baking sheet lined with parchment paper.
- Brush the tops of the wraps lightly with olive oil to help them crisp up in the oven.
- Bake in the preheated oven for 15-20 minutes, or until the wraps are golden brown and the cheese is melted.
- Remove from the oven and let cool for a few minutes before slicing into halves or quarters. Serve warm.
Nutrition
Notes
- For a spicier kick, add diced jalapeños or a sprinkle of red pepper flakes to the chicken mixture.
- Substitute the chicken with cooked shrimp or grilled vegetables for a different flavor profile.