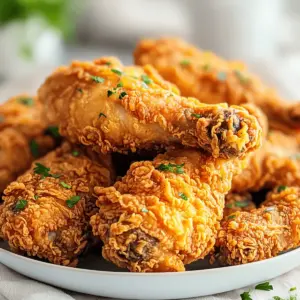
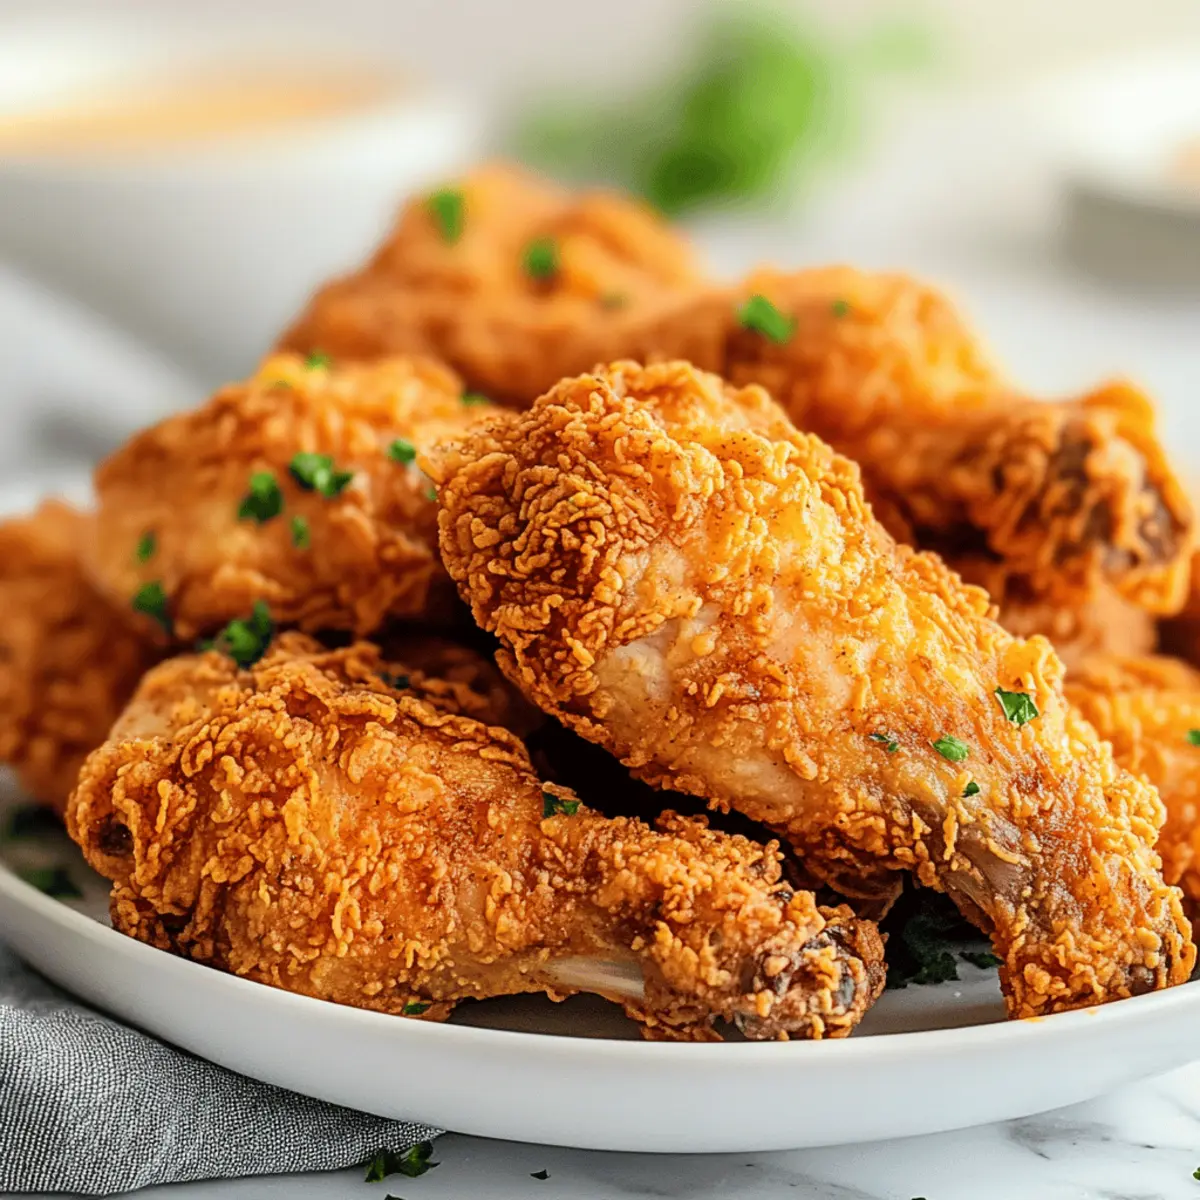
As the sizzling sound of chicken hits hot oil resonates in the kitchen, I can’t help but smile, knowing that perfectly crispy buttermilk fried chicken is just moments away. This beloved comfort food is not only easy to make but also incredibly satisfying, enveloped in a golden crust that hints at the juicy tenderness hidden inside. The secret? A tangy buttermilk marinade that infuses flavor and ensures every bite is as juicy as it is crispy. Whether you’re hosting a cozy gathering or treating yourself to a solo feast, this recipe promises to be a crowd-pleaser. Who’s ready to discover how to take homemade chicken to a delicious new level? Let’s dive into the magic of buttermilk fried chicken!
Why is Buttermilk Fried Chicken So Special?
Irresistible Crunch: Enjoy the perfect crispy coating that contrasts beautifully with juicy, tender meat for a delightful bite.
Flavor-Packed Marinade: The tangy buttermilk not only tenderizes but also amplifies the savory spices, ensuring bold flavor in every mouthful.
Crowd-Pleasing Comfort: This dish is a favorite at gatherings, making it the ultimate comfort food that everyone will love—just like my Lazy Chicken Parmesan.
Versatile Enjoyment: Substitute different cuts of chicken or add unique spices to create your own signature twist!
Quick and Easy: The step-by-step process of marinating and frying makes it accessible, allowing both novice cooks and seasoned chefs to shine in the kitchen.
Buttermilk Fried Chicken Ingredients
For the Chicken
• Bone-in, skin-on chicken – Preferring thighs and legs ensures a rich flavor and keeps the meat moisture-packed.
• Buttermilk – This tenderizes the chicken while adding a delicious tang; feel free to use yogurt or a milk-vinegar mix as a substitute.
For the Coating
• All-purpose flour – Essential for creating that signature crispy coating; substitute with gluten-free flour if needed.
• Garlic powder – Provides depth of flavor; fresh garlic is a tasty alternative.
• Paprika – Adds mild heat and vibrant color; consider using smoked paprika for a flavor boost.
• Onion powder – Elevates overall seasoning; onion salt can be used instead.
• Salt – Crucial for bringing out flavors; adjust according to dietary needs.
• Dried thyme & oregano – Infuse herbal notes into the mix; fresh herbs are a delightful option if available.
• Cayenne pepper – Offers a subtle kick; omit or reduce if you’re after a milder profile.
• Baking powder – Key to achieving a light and crispy texture, essential for optimal frying.
For Frying
• Vegetable oil – Perfect for frying; you can swap it with peanut oil for a different taste.
This delicious combination means that your buttermilk fried chicken will not only be crispy but also incredibly juicy, making it the perfect comfort food!
Step‑by‑Step Instructions for Perfectly Crispy Buttermilk Fried Chicken
Step 1: Marinade the Chicken
In a large mixing bowl, season your bone-in, skin-on chicken pieces generously with salt, pepper, garlic powder, and paprika. Pour in enough buttermilk to fully submerge the chicken, ensuring every bite will be juicy and flavorful. Cover the bowl and refrigerate for at least 1 hour, ideally overnight, allowing the buttermilk to tenderize the meat and infuse it with tangy goodness.
Step 2: Prepare Coating
While the chicken marinates, prepare the crispy coating by whisking together all-purpose flour, baking powder, garlic powder, paprika, thyme, oregano, cayenne, and a pinch of salt in a shallow dish. This mixture will create that irresistible crunchy crust. Make sure it’s well combined to ensure every piece of chicken is generously coated later on, promising the ultimate in flavor and texture.
Step 3: Heat Oil
In a deep fryer or a large heavy-bottomed pot, pour in enough vegetable oil to cover the chicken pieces halfway. Heat the oil to 340°F (medium-high heat) using a candy thermometer for accuracy. This is the perfect temperature for frying perfectly crispy buttermilk fried chicken without burning it. Watch for shimmering oil to indicate that it’s ready for frying, creating a welcoming atmosphere in your kitchen.
Step 4: Dredge Chicken
Once the chicken is done marinating, take each piece out and let the excess buttermilk drip off. Dredge the chicken in the prepared flour mixture, making sure it’s thoroughly coated for that delightful crunch. Gently shake off any excess flour before frying. This step is crucial for achieving that signature crispy coating that makes buttermilk fried chicken a comfort food favorite.
Step 5: Fry Chicken
Carefully place the coated chicken pieces into the hot oil, being cautious not to overcrowd the pot, which can reduce the oil temperature. Fry in batches for about 15 minutes, turning occasionally until the chicken is golden brown and reaches an internal temperature of 170°F. The sizzling sounds and delicious aromas wafting from the pot signify that your buttermilk fried chicken is nearly ready to be enjoyed.
Step 6: Drain
Once fried, use a slotted spoon to transfer the chicken to a wire rack set over a baking sheet. This allows excess oil to drain off and maintains its crispy texture. Let the chicken rest for a few minutes before serving. This crucial step not only ensures it stays crunchy but also gives you the perfect window to admire your perfectly crispy buttermilk fried chicken before diving in!
What to Serve with Perfectly Crispy Buttermilk Fried Chicken
The ease and satisfaction of serving perfectly crispy buttermilk fried chicken makes it an ideal centerpiece for a delightful meal.
-
Creamy Coleslaw: This crunchy, tangy side dish balances the richness of the chicken with cool, refreshing flavors, making every bite a delight.
-
Fluffy Cornbread: Soft and slightly sweet, cornbread complements the savory notes of fried chicken, offering a comforting, homestyle touch.
-
Collard Greens: A traditional Southern side, these greens bring a savory earthiness to the meal, perfectly contrasting the crispy chicken.
-
Garlic Mashed Potatoes: Creamy and buttery, these mashed potatoes add a comforting texture and flavor that harmonizes beautifully with the juicy chicken.
-
Pickles: Adding a tart crunch, pickles cut through the rich flavors of fried chicken, offering a delightful zing that makes each bite exciting.
-
Biscuits with Gravy: Flaky biscuits smothered in savory sausage gravy are a soul-soothing addition that enhances the comfort of this Southern feast.
-
Lemonade or Sweet Tea: A refreshing glass of lemonade or classic sweet tea ties the meal together, providing a sweet contrast to the savory chicken.
-
Chocolate Chip Cookies: End your meal on a sweet note with warm chocolate chip cookies, a nostalgic treat that pairs perfectly with the comfort of fried chicken.
Make Ahead Options
These Crispy Buttermilk Fried Chicken pieces are perfect for meal prep, allowing you to enjoy delightful homemade comfort food without the last-minute rush. You can marinate the chicken in buttermilk and spices up to 24 hours in advance, ensuring maximum flavor penetration. Additionally, you can prepare the coating and store it in an airtight container for up to 3 days in the fridge. When you’re ready to fry, simply dredge the marinated chicken in the prepared flour mixture and fry as directed. To maintain that signature crispiness, make sure the oil is at the right temperature before frying, and drain on a wire rack instead of paper towels. This way, you’ll experience restaurant-quality results with minimal effort on busy weeknights!
How to Store and Freeze Buttermilk Fried Chicken
Fridge: Store cooked buttermilk fried chicken in an airtight container for up to 3 days. This helps keep it juicy while preventing it from drying out.
Freezer: For longer storage, place individual pieces in a freezer-safe bag or container, separating layers with parchment paper. It can last for up to 3 months.
Reheating: To enjoy leftovers, reheat in the oven at 350°F for about 20 minutes, or until heated through, to maintain that satisfying crunch.
Avoid Moisture: Never store fried chicken in plastic wrap; it traps moisture and can lead to sogginess. Always use breathable containers to keep that crispy texture intact.
Buttermilk Fried Chicken Variations
Feel free to play with this classic recipe and find the perfect twist that excites your taste buds!
- Gluten-Free: Use a gluten-free flour mix in place of all-purpose flour for a crispy coating everyone can enjoy.
- Spicy Kick: Add a teaspoon of hot sauce to the buttermilk marinade for an extra layer of heat. It’s a delightful surprise that will elevate the flavor profile!
- Herb-Infused: Swap the dried herbs for fresh thyme and rosemary for a bright, garden-fresh flavor that pairs beautifully with the chicken.
- Crispy Skin Lovers: Before breading, pat the chicken dry and rub a little baking powder directly on the skin for an even crispier finish when frying.
- Honey Glaze: Drizzle a bit of honey on the chicken just after frying. The sweetness paired with the savory crunch creates a rich and mouthwatering contrast.
- Citrus Zest: Add lemon or orange zest to your flour mixture to introduce a subtle brightness that beautifully complements the chicken’s richness.
- Asian-Inspired: Replace the spices with a blend of ginger and five-spice powder, and dip in a sesame-ginger sauce for an exciting fusion flavor. You might also enjoy this with my delightful Garlic Butter Chicken!
- Baked Option: Instead of frying, coat the marinated chicken and bake it at 425°F for about 40 minutes for a healthier, yet still delicious, alternative.
These variations not only provide you with a chance to experiment but also encourage everyone to find their unique favorite!
Expert Tips for Buttermilk Fried Chicken
Preparation Matters: Ensure the chicken marinates for at least an hour, ideally overnight, to fully benefit from the buttermilk’s tenderizing magic.
Temperature Check: Use a candy thermometer to maintain the oil temperature at 340°F. This helps achieve a perfectly crispy buttermilk fried chicken without burning.
Avoid Overcrowding: Fry chicken in batches. Overcrowding the pot causes temperature drop, leading to soggy, unevenly cooked pieces.
Proper Coating: Ensure each chicken piece is thoroughly dredged in flour. This crucial step guarantees that signature crispy crunch in every bite.
Drain Right: Place fried chicken on a wire rack instead of paper towels to keep it crisp. Moisture from paper can make the coating soggy.
Reheating Tips: Save leftovers? Reheat in the oven at 350°F to maintain crispiness, ensuring a delightful experience even the next day.
Buttermilk Fried Chicken Recipe FAQs
What type of chicken should I use for buttermilk fried chicken?
I recommend using bone-in, skin-on chicken pieces, specifically thighs and legs, as they provide a rich flavor and stay moist during the frying process. You can also use chicken breasts or tenders if you prefer, but they may require shorter cooking times.
How long can I store buttermilk fried chicken in the fridge?
You can store cooked buttermilk fried chicken in an airtight container in the fridge for up to 3 days. To keep it juicy and prevent drying out, make sure to let it cool completely before sealing it in the container.
Can I freeze buttermilk fried chicken?
Absolutely! To freeze, place individual pieces of fried chicken in a freezer-safe bag or container, separating the layers with parchment paper to prevent sticking. It can last for up to 3 months.
How do I reheat leftover buttermilk fried chicken?
To enjoy your leftovers, reheat the chicken in a preheated oven at 350°F for about 20 minutes, or until heated through. This method helps retain that delicious crispy coating, ensuring every bite is just as satisfying as the day it was made.
What should I do if my fried chicken turns out soggy?
If your fried chicken has turned out soggy, it might be due to overcrowding the frying pan, which can lower the oil temperature. To troubleshoot, always fry in batches, ensuring the oil stays between 340°F to 350°F. For crispy results, drain the fried chicken on a wire rack instead of paper towels, as this allows air circulation and prevents moisture retention.
Is buttermilk fried chicken safe for my pets?
While it might be tempting to share, it’s best to keep buttermilk fried chicken away from pets. Ingredients like garlic powder and excessive spices can be harmful to dogs and cats. Always check for specific ingredient safety with your vet before sharing human food with your furry friends.
Crispy Buttermilk Fried Chicken for Irresistible Comfort
Ingredients
Equipment
Method
- In a large mixing bowl, season chicken with salt, pepper, garlic powder, and paprika. Pour buttermilk over chicken to fully submerge. Cover and refrigerate for at least 1 hour, ideally overnight.
- In a shallow dish, whisk together flour, baking powder, garlic powder, paprika, thyme, oregano, cayenne, and salt to prepare the coating.
- In a deep fryer or large pot, heat vegetable oil to 340°F using a candy thermometer.
- Remove chicken from buttermilk, dredge in flour mixture, shaking off excess flour.
- Carefully fry chicken pieces in batches for about 15 minutes until golden brown and internal temperature reaches 170°F.
- Transfer fried chicken to a wire rack set over a baking sheet to drain excess oil. Let rest for a few minutes before serving.