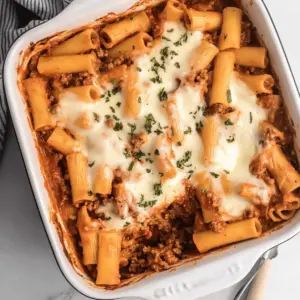
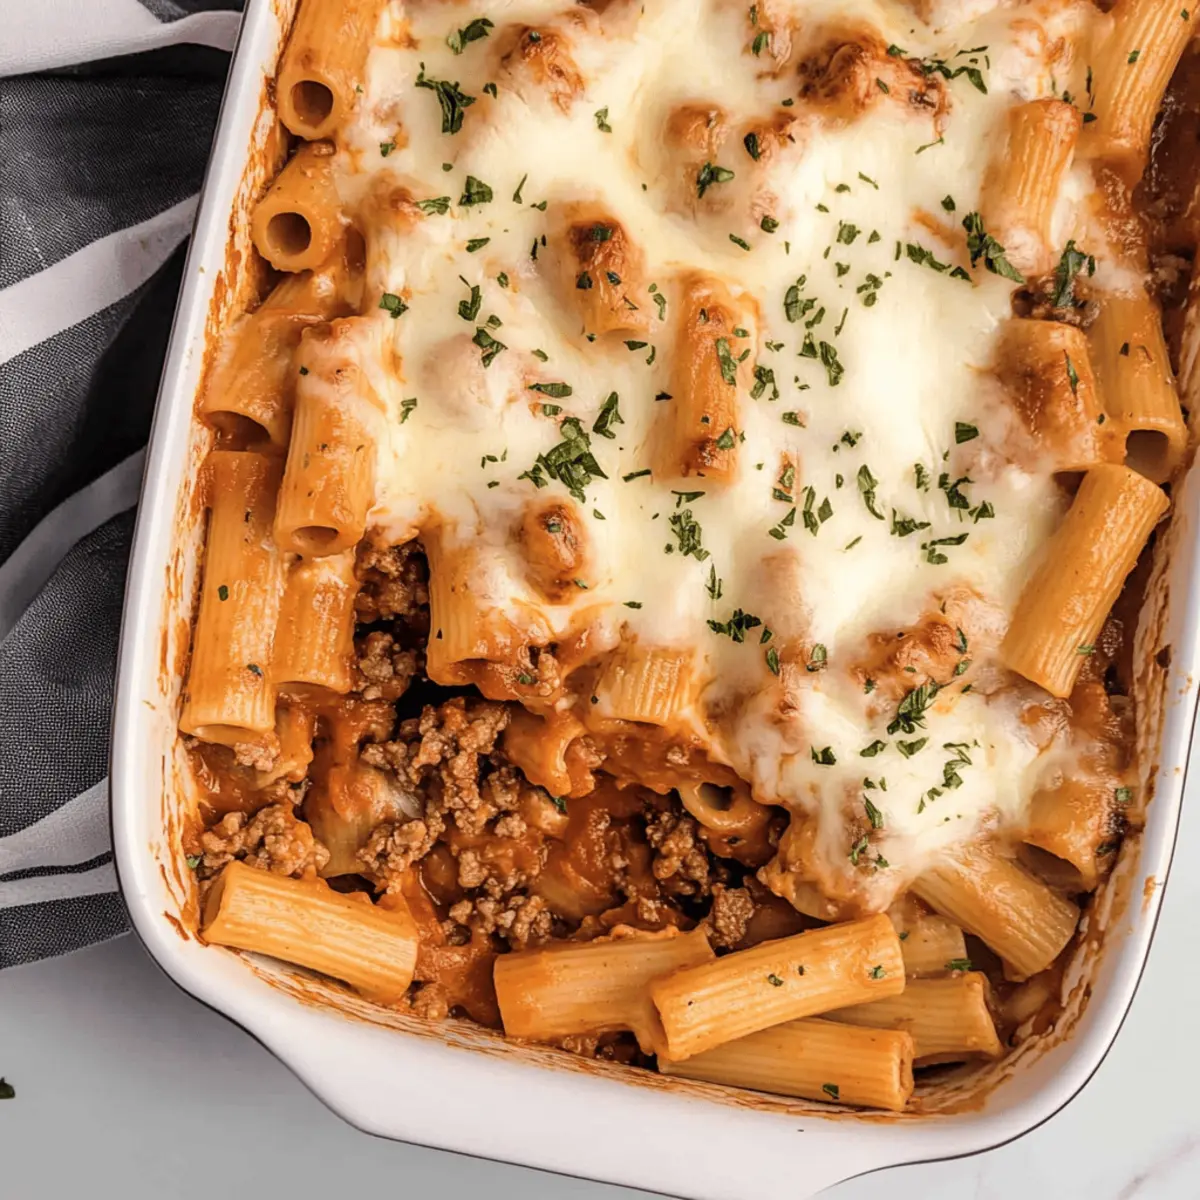
It’s a Friday evening, the sun is setting, and the delicious aroma of baked rigatoni is wafting through my kitchen, creating a warm, inviting atmosphere. This hearty dish is not just an Italian comfort food; it’s a true crowd-pleaser that brings family together for a satisfying meal that even the pickiest eaters will love. What I adore about this Easy Cheesy Baked Rigatoni is how effortless it is to whip up—perfect for those busy weeknights when time is tight, but the craving for home-cooked goodness is strong. Plus, with customizable ingredients, you can easily make it your own! How do you like to mix things up in your pasta dishes?
Why is Baked Rigatoni a Family Favorite?
Comforting, Hearty Delight: This baked rigatoni combines gooey cheese and savory meat sauce, making it a true comfort dish that warms the soul.
Customizable Ingredients: Whether you prefer ground beef, turkey, or even spicy sausage, this recipe invites you to play with flavors and ingredients to suit your family’s taste.
Quick to Prepare: With straightforward steps, you’ll have a delicious meal ready in no time—a winning option for busy weeknights!
Crowd-Pleaser: Guaranteed to impress the family, serving alongside a fresh green salad or crunchy garlic bread will elevate this dish to a full dining experience.
Perfect for Leftovers: Store the remaining portions for easy lunches or quick dinners later in the week. Baked rigatoni truly adapts to your lifestyle!
For even more hearty options, don’t miss my recipes for Oven Baked Chicken or Sausage Rigatoni Dish!
Baked Rigatoni Ingredients
• Dive into the heart of this Italian comfort food with these delightful ingredients!
For the Pasta
- Dried Rigatoni – This tube-shaped pasta is perfect for holding sauces and cheese; cook until just al dente.
For the Sauce
- Olive Oil – Adds richness and is essential for sautéing; can swap for vegetable oil if needed.
- Onion (1 large, diced) – Provides a flavorful base for the sauce; yellow or white onions work beautifully.
- Garlic (2 cloves, finely chopped) – Enhances flavor with aromatic notes; fresh garlic is highly recommended.
- Ground Beef (1 pound) – The hearty protein backbone of this dish; ground turkey or Italian sausage makes great substitutes.
- Marinara Sauce (40 ounces, approximately 5 cups) – Keeps the pasta moist and adds rich tomato flavor; choose store-bought or homemade.
For the Topping
- Mozzarella Cheese (2 cups, grated) – Adds gooey deliciousness on top; consider mixing in provolone or parmesan for extra flavor.
- Fresh Basil (¼ cup, roughly chopped) – For garnishing and a fresh flavor finish; fresh parsley is a lovely alternative.
Seasonings
- Salt and Pepper – Essential for enhancing all the flavors; adjust based on personal preference.
This Baked Rigatoni is a wonderful canvas for customization—feel free to explore different meats, vegetables, and cheeses to craft your ideal family dish!
Step‑by‑Step Instructions for Baked Rigatoni
Step 1: Preheat the Oven
Begin by preheating your oven to 350°F (177°C), allowing it to reach the perfect temperature for baking. This ensures your baked rigatoni will cook evenly and develop a deliciously golden top. While the oven heats, prepare the other ingredients so you can move seamlessly to the next steps.
Step 2: Cook the Rigatoni
In a large pot, bring salted water to a boil and cook the rigatoni according to package instructions until al dente, about 8-10 minutes. Once cooked, drain the pasta thoroughly and reserve it in the pot or a large bowl. This step ensures the pasta won’t become mushy when combined with the savory sauce later.
Step 3: Sauté the Aromatics
Heat a generous drizzle of olive oil in a large skillet over medium-high heat. Once the oil shimmers, add the diced onion and sauté for about 3-4 minutes until softened and translucent. Adding garlic next, sauté for another minute, letting its fragrant aroma fill your kitchen as it becomes golden and fragrant.
Step 4: Brown the Meat
Incorporate the ground beef into the skillet, breaking it apart with a wooden spoon. Cook for about 5-7 minutes, stirring occasionally, until the meat is browned and no longer pink. This step is crucial for developing a rich flavor in your baked rigatoni, so be sure to maintain an even cook throughout.
Step 5: Add the Sauce
Once the beef is browned, pour in the marinara sauce and stir well to combine everything. Allow the mixture to simmer on low heat for about 5 minutes, giving it a chance to meld together. Taste and adjust the seasoning with salt and pepper, making sure every bite will be bursting with flavor.
Step 6: Combine Pasta and Sauce
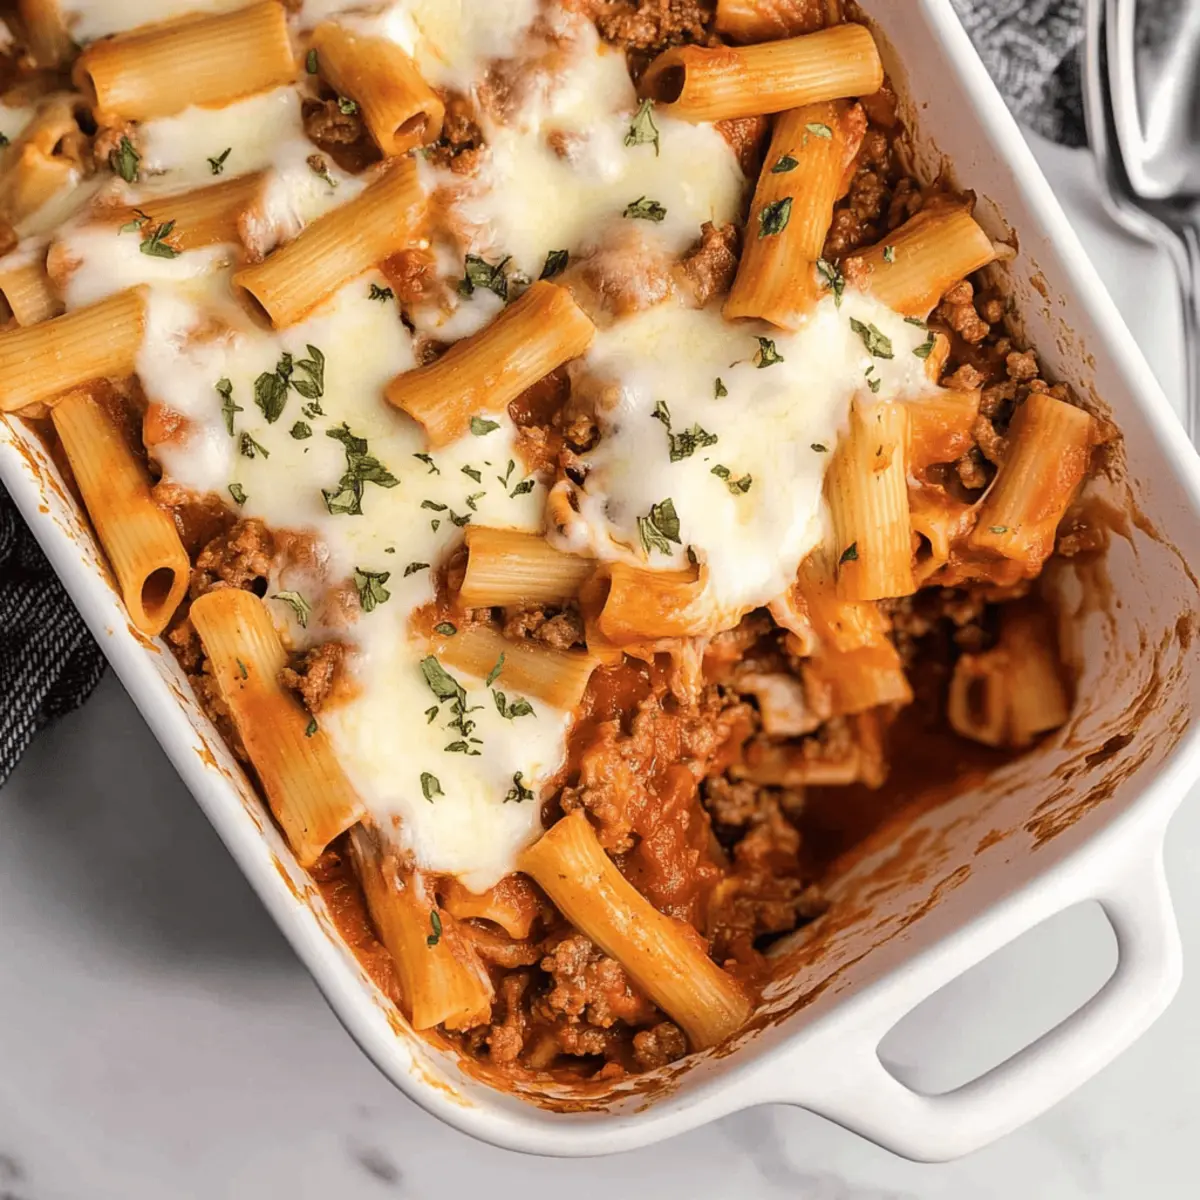
Add the drained rigatoni to the skillet, gently folding it into the meat sauce mixture. Ensure the pasta is well-coated with sauce, allowing it to absorb those wonderful flavors. This is where the heart of your baked rigatoni truly comes together into a delightful medley.
Step 7: Transfer to the Baking Dish
Carefully transfer the rigatoni mixture to a 13×9 inch baking dish, spreading it out evenly. This step makes room for the glorious cheese topping that will soon elevate your delicious baked rigatoni to the next level. Ensure all the pasta is nestled well in the sauce for a hearty bake.
Step 8: Bake Covered
Cover the baking dish loosely with aluminum foil and place it in the preheated oven. Bake for 20 minutes to allow the flavors to meld and the textures to soften beautifully. This initial baking covered helps retain moisture, setting you up for a perfect dish.
Step 9: Add Cheese and Bake Uncovered
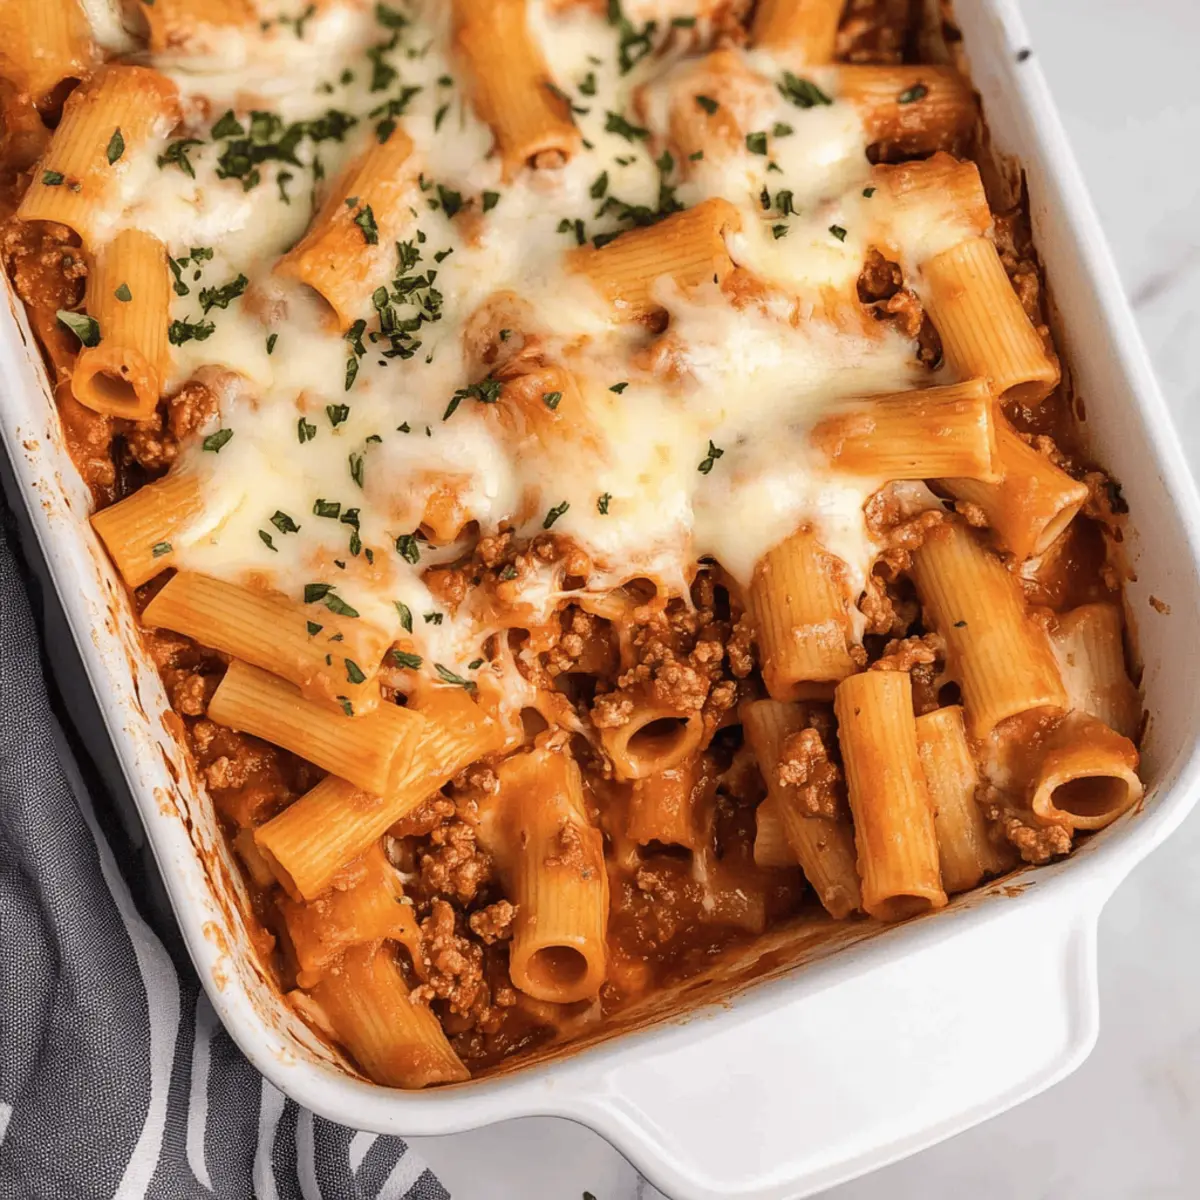
After 20 minutes, remove the foil and sprinkle the grated mozzarella cheese evenly over the top of the baked rigatoni. Return the dish to the oven, this time uncovered, and bake for an additional 10 minutes until the cheese is melted and golden brown. This last step creates that irresistible, bubbling layer of cheesy goodness.
Step 10: Serve and Enjoy
Once baked to perfection, take the rigatoni out of the oven and let it sit for a few minutes. This resting time helps the layers settle and makes serving easier. Garnish with freshly chopped basil before diving in with your loved ones, celebrating the warmth and comfort of this delightful baked rigatoni.
Make Ahead Options
Baked rigatoni is a fantastic dish for meal prep, saving you invaluable time on busy weeknights! You can cook the rigatoni, prepare the meat sauce, and mix everything together up to 24 hours in advance. Simply let the combined mixture cool before transferring it to a baking dish, then cover and refrigerate. This maintains its freshness and flavor until you’re ready to enjoy. When you’re set to serve, just pop it in a preheated oven at 350°F (177°C) and bake covered for 20 minutes. Finally, uncover, sprinkle the mozzarella cheese, and bake for an additional 10 minutes for a bubbly, cheesy delight that’s just as delicious as when made fresh!
Expert Tips for Baked Rigatoni
-
Avoid Overcooking: Watch the pasta closely while boiling; cooking it just to al dente ensures it won’t get mushy in the oven.
-
Seasoning Matters: Don’t skip the salt and pepper! Taste as you go when adding to your baked rigatoni to achieve the perfect flavor balance.
-
Layering Technique: When combining sauce and rigatoni, ensure all pasta is coated to flavor every bite.
-
Mix It Up: Incorporate different meats or veggies based on your family’s preferences. This makes your baked rigatoni all the more exciting!
-
Perfect Cheese Melt: Broil for a minute at the end for a truly golden cheese top—but keep a close eye to avoid burning!
Baked Rigatoni Variations & Substitutions
Feel free to customize your baked rigatoni with these fun and flavorful twists that will ignite your creativity in the kitchen!
-
Sausage Swap: Replace ground beef with Italian sausage for a spicy kick that elevates the dish’s flavor profile. The hints of fennel and herbs in the sausage create a delightful contrast with the creamy cheese.
-
Vegetable Boost: Stir in fresh spinach, mushrooms, or bell peppers into the sauce for extra nutrition and texture. These vegetables not only add vibrant color but also enhance the visual appeal of your dish.
-
Cheesy Blend: Use a combination of mozzarella and provolone cheese or mix in ricotta for a creamier texture. This variation will bring a new layer of richness, making each bite even more indulgent.
-
Zucchini Noodles: For a low-carb option, swap out the rigatoni with spiralized zucchini noodles. This twist lightens the meal while maintaining the delicious flavors of the sauce.
-
Herb Infusion: Add a sprinkle of Italian seasoning or fresh herbs like oregano and thyme to the sauce for a fragrant flavor upgrade. Fresh herbs can elevate the dish’s taste and create an inviting aroma while baking.
-
Spicy Version: Incorporate crushed red pepper flakes into the sauce to add some heat. Perfect for spice lovers, this little addition provides a surprising kick that contrasts beautifully with the creamy cheese.
-
Creamy Delight: Mix in a dollop of cream cheese or sour cream to the meat sauce for a richer texture and flavor. This twist creates a luxurious mouthfeel while enhancing the overall creaminess of the dish.
-
Pasta Shape Change: Feel free to use penne or fusilli instead of rigatoni for a different pasta experience. Though the shapes vary, each addition holds onto the sauce scrumptiously, promising delightful bites every time!
As you enjoy cooking this delicious baked rigatoni, don’t forget to check out my Baked Chicken Chimichangas for another amazing family-friendly dish!
How to Store and Freeze Baked Rigatoni
Fridge: Store leftover baked rigatoni in an airtight container for up to 2 days. This keeps your dish fresh and ready for a quick meal without losing flavor.
Freezer: For longer storage, freeze baked rigatoni in a freezer-safe container for up to 3 months. Be sure to wrap it tightly to prevent freezer burn.
Reheating: To reheat, thaw overnight in the fridge if frozen, then bake in a preheated oven at 350°F (177°C) for about 20-25 minutes until heated through. Enjoy that comforting goodness once again!
Serving Suggestions: Pair reheated baked rigatoni with a sprinkle of fresh basil or a drizzle of olive oil before serving for an extra touch of flavor.
What to Serve with Easy Cheesy Baked Rigatoni?
Elevate your hearty baked dish into a complete meal with these delightful pairings that offer a perfect symphony of flavors and textures.
-
Garlic Bread: A crunchy, buttery delight that provides a satisfying textured contrast and captures any leftover sauce beautifully.
-
Caesar Salad: Crisp romaine paired with creamy dressing adds a fresh, zesty kick, balancing the rich flavors of the rigatoni.
-
Roasted Vegetables: Seasonal roasted veggies bring earthy sweetness that complements the savory meat sauce and adds a colorful appeal to your plate.
-
Antipasto Platter: A mix of olives, cheeses, and cured meats offers a Mediterranean flair, perfect for sharing alongside your baked rigatoni.
-
Homemade Pesto: Drizzling vibrant basil pesto over each serving brightens the dish with a fresh, herbal note that dances with the melted cheese.
-
Chardonnay: A chilled glass of this white wine cuts through the richness of the cheese, enhancing your dining experience with its delicate flavors.
-
Chocolate Mousse: For a sweet finish, this luscious dessert provides a creamy contrast to the savory baked rigatoni, rounding out your meal with indulgence.
Baked Rigatoni Recipe FAQs
What kind of pasta should I use for baked rigatoni?
Absolutely! Dried rigatoni is perfect for this dish as its tubular shape holds the sauce and cheese wonderfully. If you can’t find rigatoni, feel free to substitute with other tube-shaped pastas like penne or ziti, which will also work beautifully in this baked dish.
How should I store leftovers of baked rigatoni?
Leftover baked rigatoni can be stored in an airtight container in the refrigerator for up to 2 days. Make sure to cool it to room temperature before sealing it up to retain its delicious flavors. When ready to enjoy, simply reheat and relish the creamy goodness!
Can I freeze baked rigatoni?
Definitely! For freezing, let the baked rigatoni cool completely, then transfer it to a freezer-safe container or wrap it tightly with plastic wrap and aluminum foil to prevent freezer burn. It can be frozen for up to 3 months. Just make sure to label it with the date so you can keep track!
What should I do if my baked rigatoni turns out dry?
Very! If your baked rigatoni seems dry, it could be due to undercooking the pasta or overbaking. To remedy this, next time, ensure the rigatoni is cooked until just al dente, and consider covering it with foil during the baking to lock in moisture. If you find yourself with dry leftovers, try adding a splash of marinara sauce or a drizzle of olive oil when reheating to restore some moisture!
Can I make baked rigatoni gluten-free?
Absolutely! You can easily make baked rigatoni gluten-free by using gluten-free pasta alternatives available on the market. Just make sure to adjust the cooking time according to the package instructions, as gluten-free pasta can have different requirements. Additionally, check your marinara sauce for any gluten-containing ingredients to ensure it fits your dietary needs.
Is there a way to make baked rigatoni healthier?
Yes, there are plenty of ways to enhance the nutritional value! You can substitute ground beef with lean ground turkey or chicken, or even veggie-based proteins for a lighter option. Adding chopped veggies like spinach, zucchini, or bell peppers to the sauce will also pack in more nutrients without compromising the flavor. Enjoy the process of turning this comfort dish into a healthful delight!

Delicious Baked Rigatoni That Will wow Your Family
Ingredients
Equipment
Method
- Preheat your oven to 350°F (177°C) to ensure even cooking.
- Cook the rigatoni in salted boiling water until al dente, about 8-10 minutes. Drain and reserve.
- Sauté diced onion in olive oil for 3-4 minutes until softened, then add garlic and sauté for another minute.
- Brown the ground beef in the skillet for 5-7 minutes; ensure it is cooked evenly.
- Pour in the marinara sauce and simmer for 5 minutes; adjust seasoning with salt and pepper.
- Fold the cooked rigatoni into the meat sauce mixture until well-coated.
- Transfer the rigatoni mixture to a 13x9 inch baking dish and spread evenly.
- Cover loosely with aluminum foil and bake for 20 minutes.
- Remove foil, sprinkle mozzarella cheese on top, and bake uncovered for an additional 10 minutes.
- Let the rigatoni rest for a few minutes before serving, garnished with fresh basil.