Introduction to REESE'S CUPCAKES
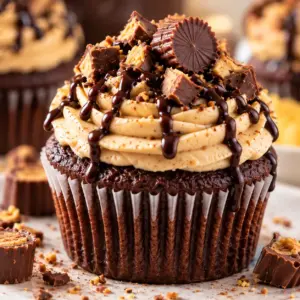
Reese's cupcakes bring together the familiar combination of chocolate and peanut butter in a simple batch of homemade cupcakes. A boxed chocolate cake mix keeps the cake portion practical, while a soft peanut butter filling and easy buttercream make each cupcake taste special without complicated techniques.
This recipe is included in the Sugar Free Easy Blueberry Delight collection, but these cupcakes are not sugar-free because the cake mix, powdered sugar, and peanut butter contain sugar. The finished cupcakes are best served as a dessert for birthdays, bake sales, family gatherings, or any time you want a dependable chocolate-peanut butter treat.
Why You'll Love This REESE'S CUPCAKES
- The cake starts with a boxed mix, so the batter comes together quickly and consistently.
- A spoonful of peanut butter filling gives each cupcake a soft center.
- The frosting uses pantry staples and can be spread or piped with basic equipment.
- Mini Reese's cups make an easy decoration without extra candy work.
- The cupcakes can be prepared ahead and stored safely for serving later.
Ingredients for REESE'S CUPCAKES
- 1 box chocolate cake mix
- 3/4 cup vegetable oil
- 1 cup water
- 3 large eggs
- 1 cup peanut butter
- 1/4 cups powdered sugar
- 1/2 cup butter
- 1 1/2 tsp vanilla extract
- 2 1/4 cups powdered sugar
- 3-5 tbsp milk
- Mini Reese's cups
Use regular creamy peanut butter rather than natural peanut butter if possible. Natural peanut butter can separate and make the filling oily or loose. If your peanut butter is very firm, let it sit at room temperature for 15 to 20 minutes before mixing it with the powdered sugar.
How to Make REESE'S CUPCAKES
Step 1: Prepare the Oven and Pan
Heat the oven to 350°F. Line a standard 12-cup muffin pan with paper cupcake liners. Set the pan on a level surface and make sure the oven has fully preheated before the batter goes in. The liners help the cupcakes release cleanly and make them easier to handle once filled and frosted.
Step 2: Mix the Chocolate Batter
In a large mixing bowl, combine the chocolate cake mix, vegetable oil, water, and large eggs. Beat with a hand mixer on low speed until the dry mix is moistened, then beat on medium speed for about 2 minutes, following the general mixing directions for the cake mix. Scrape the sides and bottom of the bowl so no dry pockets remain, but do not keep mixing after the batter is smooth.
Step 3: Fill and Bake the Cupcakes
Divide the batter evenly among the 12 liners, filling each about two-thirds full. Bake for 18 to 23 minutes, or until the tops spring back lightly when pressed and a toothpick inserted into the center comes out with only a few moist crumbs. If the toothpick touches the peanut butter filling later, it may not give a clear result, so check the cake near the center but away from the filling. Place the pan on a cooling rack for 5 minutes, then transfer the cupcakes directly to the rack to cool completely.
Step 4: Make the Peanut Butter Filling
While the cupcakes cool, stir together the peanut butter and 1/4 cups powdered sugar until evenly combined. The mixture should be thick enough to scoop and hold its shape. If it seems unusually soft, chill it for 10 to 15 minutes. Divide the mixture into 12 small portions and roll each portion into a ball. Keep the portions covered while you wait so they do not dry out.
Step 5: Make the Frosting
Beat the butter in a clean bowl until smooth and creamy. Add the 2 1/4 cups powdered sugar in two or three additions, mixing on low speed after each addition to prevent a cloud of sugar. Add the vanilla extract and 3 tablespoons of milk, then beat on medium speed for 2 to 3 minutes. Add more milk, 1 tablespoon at a time, until the frosting is smooth and spreadable. Use no more than 5 tablespoons of milk total. If the frosting becomes too soft, add a little more powdered sugar; if it is too stiff, add a small splash of milk.
Step 6: Fill, Frost, and Decorate
Once the cupcakes are completely cool, cut a small cone from the center of each cupcake using a paring knife or a cupcake corer. Place one peanut butter portion into each opening, trimming the cake cone if needed so it sits back over the filling. Spread or pipe frosting over the top of each cupcake, then finish with a Mini Reese's cup. Keep the cupcakes refrigerated if the room is warm, and do not leave them at room temperature for more than 2 hours, or 1 hour when the temperature is above 90°F.
Tips for Success
- Cool the cupcakes completely before filling and frosting. Warm cake can soften the filling and cause the frosting to slide.
- A cookie scoop helps divide the batter evenly, which encourages the cupcakes to finish baking at the same time.
- Do not pack the powdered sugar into the measuring cup. Spoon it into the cup and level it for a lighter, more consistent frosting.
- For neat frosting, chill the filled cupcakes for 10 minutes before piping. A short chill helps the tops stay firm while you decorate.
- Store finished cupcakes in a covered container in the refrigerator for up to 4 days. Let them sit at room temperature for about 20 minutes before serving so the frosting softens.
Equipment Needed
- 12-cup muffin pan
- Paper cupcake liners
- Large mixing bowl and hand mixer
Variations
- For a stronger peanut butter flavor, spread a thin layer of peanut butter frosting over the cupcakes before adding the candy garnish. Keep the amount modest so the cupcakes are not difficult to bite.
- For a simpler finish, skip the center filling and spread the frosting directly over the cooled cupcakes, then top each one with a Mini Reese's cup.
- For smaller portions, use a 24-cup mini muffin pan and reduce the baking time. Start checking the mini cupcakes after 10 minutes.
- For a bakery-style look, pipe the frosting with a large open-star tip, then place the candy slightly off center.
- For a party presentation, use different paper liner colors while keeping the same batter, filling, frosting, and topping.
Serving Suggestions
Serve the cupcakes at cool room temperature with coffee, milk, or a glass of cold water. For the cleanest presentation, add the Mini Reese's cups after the frosting has been piped and keep the cupcakes covered until serving. If you are transporting them, arrange them in a snug cupcake carrier so the toppings do not shift. Because the recipe contains eggs and dairy, refrigerate leftovers promptly in a covered container and use them within 4 days.
FAQs about REESE'S CUPCAKES
Can I make Reese's cupcakes ahead of time? Yes. Bake the cupcakes up to 1 day ahead and store them covered at room temperature if your kitchen is cool. You can also make the frosting and filling a day ahead and refrigerate them separately. Bring the frosting to room temperature and beat it briefly before using.
Why did my peanut butter filling become too soft? Different peanut butters contain different amounts of oil. Natural peanut butter and warm kitchen temperatures can make the filling loose. Chill the mixture for 10 to 15 minutes, then add a small amount of powdered sugar if it still does not hold its shape.
Can I use a different cake mix flavor? A devil's food or dark chocolate cake mix will work well in the same way. Follow the ingredient amounts and mixing directions given here, but check the package instructions if your particular mix calls for a different pan size or baking time.
How do I know when the cupcakes are fully baked? The tops should spring back lightly when pressed, and a toothpick inserted into the cake should come out with a few moist crumbs rather than wet batter. Start checking at 18 minutes because oven temperatures and cake mixes can vary.
How should I store these cupcakes? Place the decorated cupcakes in a covered container and refrigerate them for up to 4 days. Do not leave them out for more than 2 hours, or more than 1 hour when the room is above 90°F. Let chilled cupcakes stand at room temperature briefly before serving.
Final Thoughts
These Reese's cupcakes are a practical way to make a chocolate-peanut butter dessert with a boxed cake mix and a few simple finishing steps. The filling, frosting, and candy topping give each cupcake a clear layer of texture and flavor, while the recipe remains manageable for a home baker. Make them a day ahead when you need an easy dessert that is ready to serve.
Looking for more? This recipe is part of our roundup of 3 Sugar Free Easy Blueberry Delight Recipes for Easy Baking.
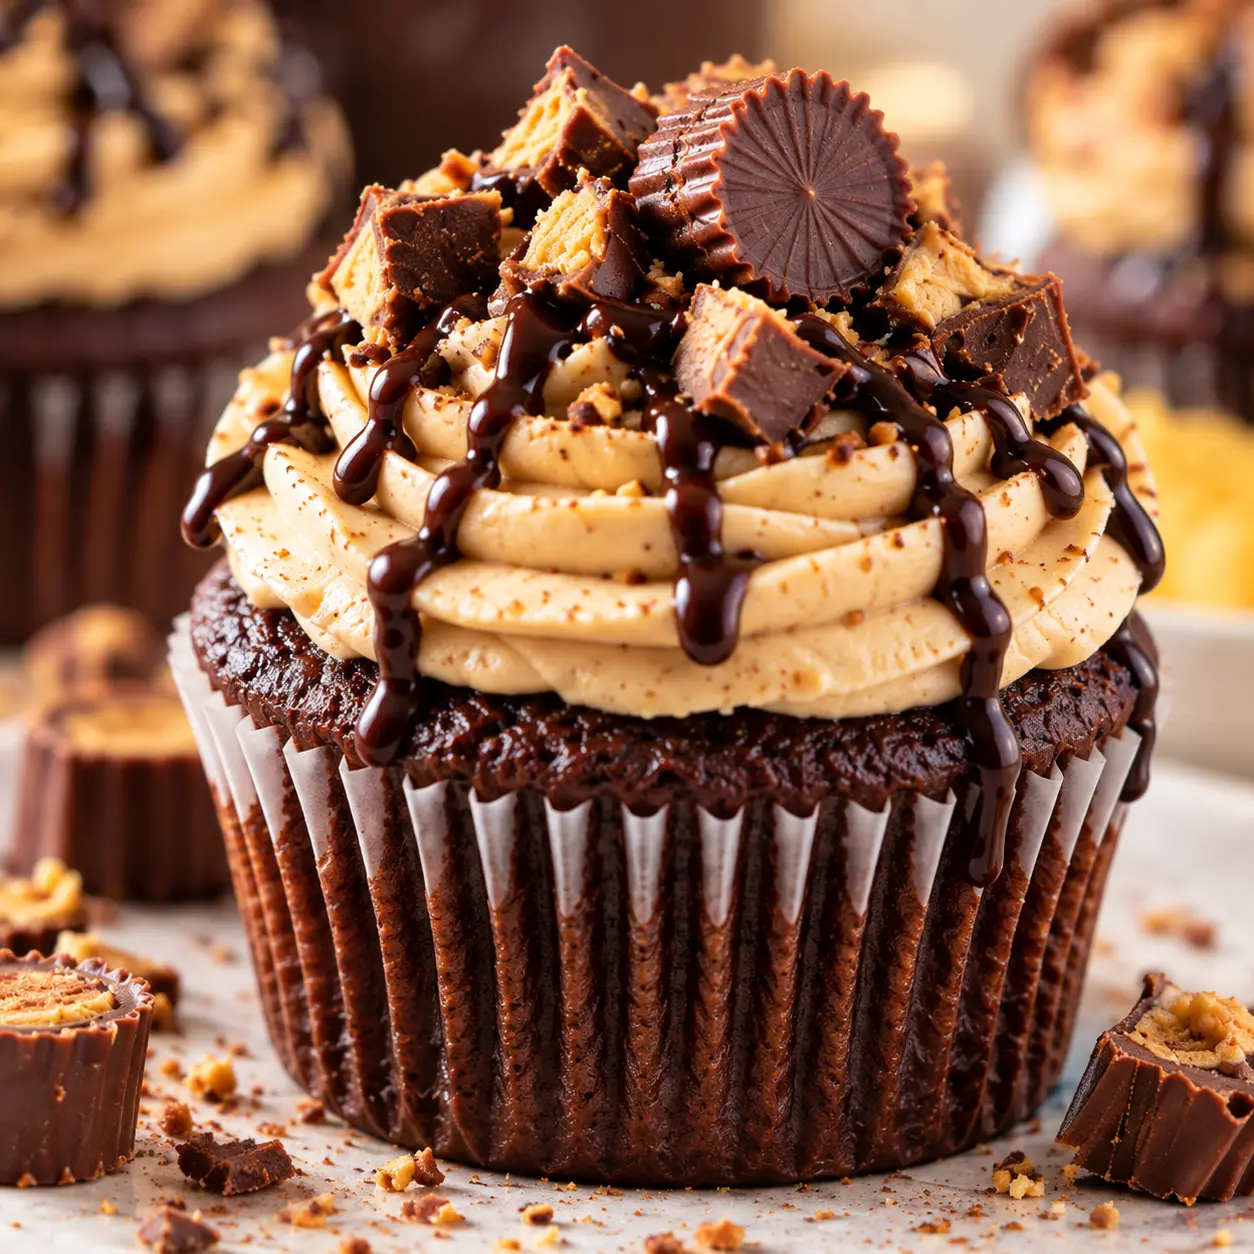
REESE’S CUPCAKES
Ingredients
Equipment
Method
- Heat the oven to 350°F and line a 12-cup muffin pan with paper liners.
- Mix the cake mix, oil, water, and eggs until smooth, then divide the batter among the liners.
- Bake for 18 to 23 minutes, cool in the pan for 5 minutes, and finish cooling on a rack.
- Mix the peanut butter with 1/4 cups powdered sugar, divide into 12 portions, and roll into balls.
- Beat the butter, 2 1/4 cups powdered sugar, vanilla, and milk into a smooth frosting.
- Cut a small center from each cooled cupcake, add the filling, replace the cake, frost, and top with a Mini Reese’s cup.
Nutrition
Notes
- Use creamy peanut butter for a firm, smooth filling.
- Cool the cupcakes fully before filling and frosting.
- Refrigerate leftovers in a covered container for up to 4 days.