Introduction to S’mores Bars
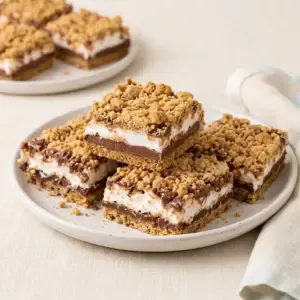
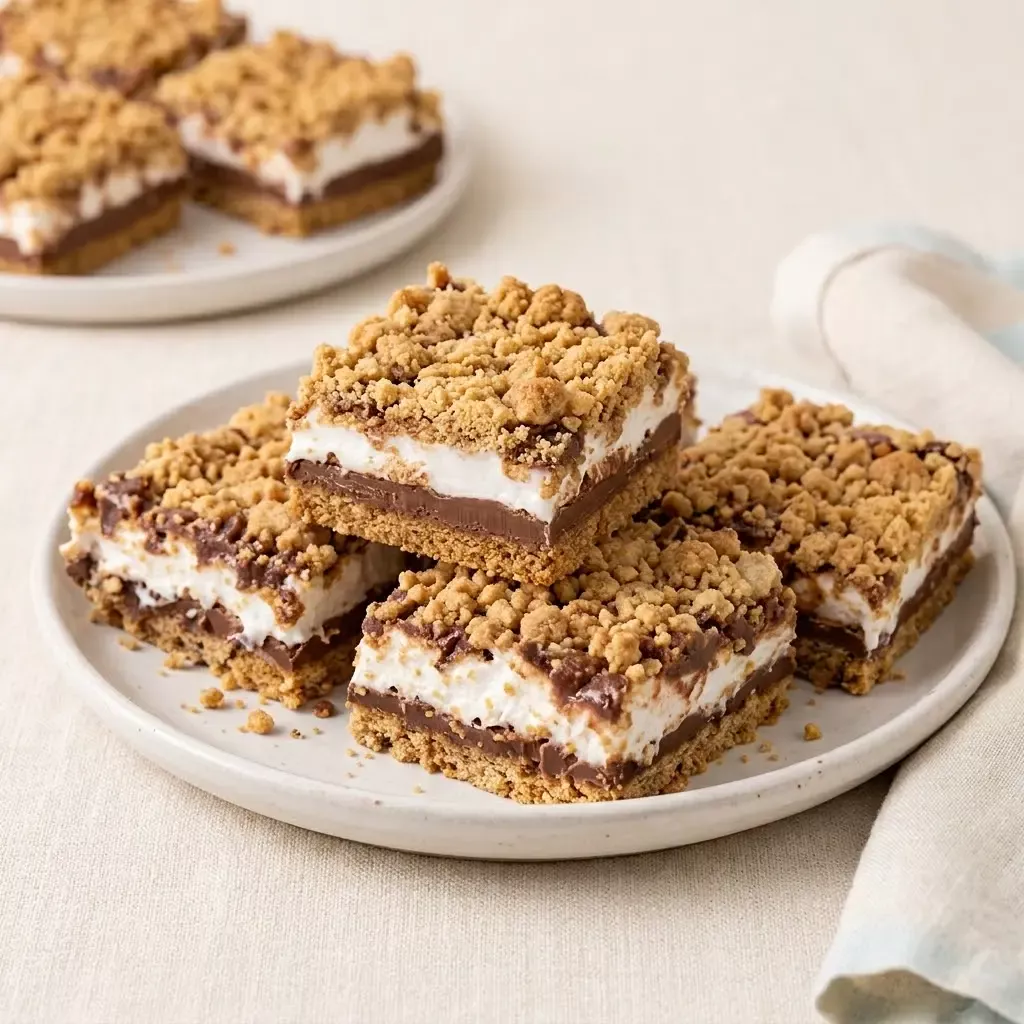
S’mores Bars bring the familiar campfire combination of graham crackers, chocolate, and marshmallow creme to the kitchen without a fire or oven. A buttery graham cracker base holds a soft layer of marshmallow creme and a smooth milk chocolate topping.
These bars are simple to assemble, but they do need time to chill so the layers can set cleanly. Make them in a square pan, slice them into generous pieces, and keep them refrigerated until you are ready to serve. They are part of the No-Bake Dessert Bars collection and are especially handy when you want a homemade dessert without heating the kitchen.
Why You'll Love This S’mores Bars
- The recipe uses only four ingredients and does not require an oven.
- The graham cracker base has enough buttery structure to hold the soft marshmallow layer.
- Milk chocolate gives the bars a familiar s’mores flavor that pairs well with the sweet creme.
- The bars can be prepared several hours before serving and kept chilled.
- Each piece has distinct layers, so the finished dessert looks special with very little decorating.
Ingredients for S’mores Bars
- Jet-Puffed Marshmallow Creme
- HERSHEY’S milk chocolate
- Honey Maid Graham Crackers
- butter
Use finely crushed Honey Maid Graham Crackers so the base packs together evenly. If you crush whole crackers in a food processor, measure the crumbs after crushing. Melt the butter separately and let it cool for a few minutes so it is warm rather than hot when mixed with the crumbs.
How to Make S’mores Bars
Step 1: Prepare the Pan
Line an 8-inch square baking pan with parchment paper, leaving some paper overhanging two sides to act as handles. Lightly grease the exposed sides of the pan if needed. The parchment will make it much easier to lift the chilled bars out for slicing.
Step 2: Make the Graham Cracker Base
Place the finely crushed Honey Maid Graham Crackers in a medium bowl and pour in the melted butter. Stir until all the crumbs are evenly moistened and the mixture resembles damp sand. Transfer it to the prepared pan and press it into a firm, level layer, paying special attention to the corners. Chill the base for 15 minutes.
Step 3: Add the Marshmallow Layer
Spoon the Jet-Puffed Marshmallow Creme over the chilled graham cracker base. Use a lightly greased offset spatula or the back of a spoon to spread it into an even layer. Work gently so the crumbs stay in place. If the creme sticks, lightly grease the utensil rather than adding water.
Step 4: Melt the Chocolate
Place the HERSHEY’S milk chocolate in a microwave-safe bowl. Microwave it at 50 percent power for 30 seconds, then stir well. Continue heating in 15-second intervals at 50 percent power, stirring after each interval, until the chocolate is almost fully melted. Stir until the remaining small pieces disappear from the residual heat. Do not let water or steam get into the bowl.
Step 5: Finish the Top Layer
Pour the melted HERSHEY’S milk chocolate over the marshmallow creme and spread it carefully into an even layer. The chocolate will begin to thicken as it cools, so work steadily but without pressing hard enough to disturb the creme. If a few swirls of marshmallow show through, the bars will still slice and serve well.
Step 6: Chill and Slice
Refrigerate the pan for at least 2 hours, or until the chocolate is firm and the layers feel set. Lift the bars out using the parchment handles and place them on a cutting board. For neater pieces, use a sharp knife warmed under hot water, then dried thoroughly, wiping the blade between cuts. Store the finished bars in a covered container in the refrigerator and serve chilled or let them stand at room temperature for about 10 minutes before serving.
Tips for Success
- Press the graham cracker mixture firmly into the pan, especially around the edges, to help prevent a crumbly base.
- If the marshmallow creme is difficult to spread, warm the filled bowl of creme very briefly in the microwave, just until it loosens slightly. Do not overheat it.
- Chop the HERSHEY’S milk chocolate into small pieces before melting so it heats more evenly.
- Keep every utensil and bowl completely dry when working with the chocolate. Even a small amount of water can make melted chocolate turn thick and grainy.
- For the cleanest slices, chill the bars fully and use a dry knife warmed between cuts. Let the bars soften only briefly before serving.
Equipment Needed
- 8-inch square baking pan
- Parchment paper
- Microwave-safe bowl
Variations
- For a stronger toasted flavor, lightly toast the graham cracker crumbs in a dry skillet over medium-low heat before mixing them with the butter. Cool the crumbs completely before making the base.
- Make thinner bars in a 9-inch square pan. The layers will be shallower, so begin checking the texture after 90 minutes of chilling.
- Add a small pinch of salt to the graham cracker crumbs if you are using unsalted butter and prefer a more balanced sweet-salty flavor.
- Create a marbled top by reserving a spoonful of the marshmallow creme and swirling it through the melted chocolate before chilling.
- For small party pieces, make the bars in the square pan and cut each of the 8 servings in half after chilling.
Serving Suggestions
Serve the bars cold for the firmest layers, or let them rest at room temperature for about 10 minutes for a softer marshmallow layer. A hot, dry knife gives the cleanest cuts. Because the topping and creme soften as they warm, return leftovers to the refrigerator within 2 hours, or within 1 hour if the room is above 90°F.
FAQs about S’mores Bars
Can I make S’mores Bars ahead of time? Yes. Prepare them up to 2 days ahead, cover the pan or place the cut bars in an airtight container, and refrigerate them until serving. Keep the parchment between layers if stacking the bars.
Why is my graham cracker base falling apart? The crumbs may not have been fine enough, or the mixture may not have been pressed firmly into the pan. Make sure the butter coats all the crumbs and compact the base evenly with the bottom of a measuring cup.
Can I use a different pan size? An 8-inch square pan gives eight thick bars. A 9-inch square pan makes thinner bars, while a 9-inch by 13-inch pan makes much thinner bars with the same ingredients. Avoid spreading the mixture too thin if you want distinct layers.
How long do S’mores Bars keep? They keep well in a covered container in the refrigerator for up to 4 days. The graham cracker base will gradually soften, but the bars will remain suitable for serving while refrigerated.
Can I freeze these bars? You can freeze them, although the marshmallow layer may become a little softer after thawing. Wrap the chilled bars tightly, freeze for up to 1 month, and thaw them in the refrigerator before slicing or serving.
Final Thoughts
S’mores Bars are a practical way to turn four familiar ingredients into a layered dessert with very little work. Give the base time to chill, melt the chocolate gently, and keep the finished bars refrigerated for easy slicing and serving.
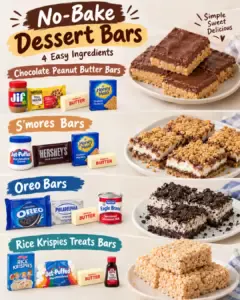
Looking for more? This recipe is part of our roundup of 4 No-Bake Dessert Bars For Easy Make-Ahead Sweet Treats.
S’mores Bars
Ingredients
Equipment
Method
- Press the buttered Honey Maid Graham Crackers into a parchment-lined 8-inch square pan and chill for 15 minutes.
- Spread the Jet-Puffed Marshmallow Creme over the chilled base.
- Melt the HERSHEY’S milk chocolate gently in the microwave, stirring between short intervals.
- Spread the melted chocolate over the marshmallow layer.
- Refrigerate for at least 2 hours, then lift out and slice into 8 bars.
Nutrition
Notes
- Keep the finished bars covered and refrigerated.
- Use a dry bowl and utensil when melting the chocolate.
- Warm and dry the knife between cuts for cleaner slices.