Introduction to Chocolate Peanut Butter Bars
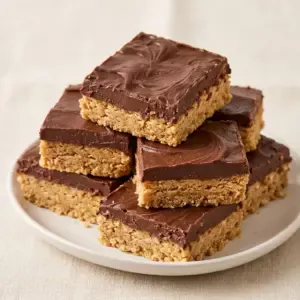
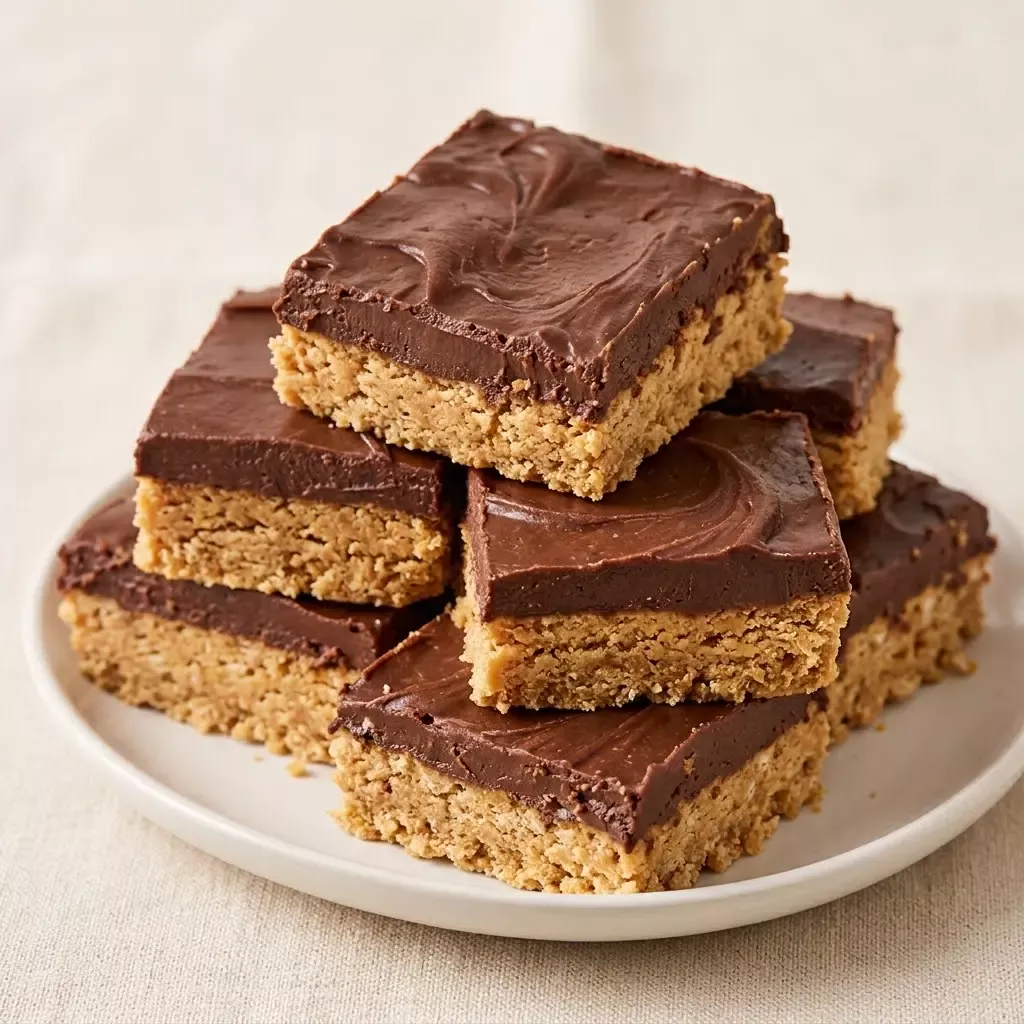
Chocolate peanut butter bars are an easy refrigerator dessert made with a buttery Honey Maid Graham Crackers base, creamy Jif peanut butter, and a smooth Nestlé Toll House semi-sweet morsels topping. They have the familiar combination of chocolate and peanut butter without requiring an oven.
The recipe comes together in about 20 minutes, then the refrigerator does the work. Press the crumb mixture firmly into the pan, chill it until set, and cut the bars cold for the cleanest edges. This recipe is part of the No-Bake Dessert Bars collection and makes eight generous servings.
Why You'll Love This Chocolate Peanut Butter Bars
- You need only four ingredients, and each one is easy to find at a regular grocery store.
- The graham cracker layer gives the soft peanut butter center a crisp, buttery base.
- The chocolate topping sets into a smooth layer that slices neatly after chilling.
- There is no oven to preheat, so these bars are useful when you want a simple make-ahead dessert.
- The bars can be prepared in advance and kept refrigerated until you are ready to serve them.
Ingredients for Chocolate Peanut Butter Bars
- Jif peanut butter
- Nestlé Toll House semi-sweet morsels
- butter
- Honey Maid Graham Crackers
Use creamy Jif peanut butter for the smoothest filling and measure it after stirring the jar well. Natural peanut butter can separate and may make the bars softer or more difficult to slice.
How to Make Chocolate Peanut Butter Bars
Step 1: Prepare the Pan
Line an 8-inch square baking pan with parchment paper, leaving a little paper over two opposite sides to use as handles. The parchment makes it easier to lift the chilled bars from the pan and helps protect the edges while you cut them.
Step 2: Crush the Graham Crackers
Place the Honey Maid Graham Crackers in a food processor and pulse until they become fine, even crumbs. If you do not have a food processor, put the crackers in a sealed bag and crush them with a rolling pin. Measure 1 1/4 cups of crumbs for the base and set aside any extra.
Step 3: Make the Base
Melt the butter in a small saucepan over low heat or in a microwave-safe bowl in short intervals. Stir the melted butter into the graham cracker crumbs until every crumb is moistened. Press the mixture firmly and evenly into the prepared pan, using the bottom of a measuring cup to compact it. Chill the base for 15 minutes while you make the peanut butter layer.
Step 4: Add the Peanut Butter Layer
Stir the Jif peanut butter until smooth, then spread it over the chilled graham cracker base. Work slowly from the center toward the edges so the crumb layer stays in place. Smooth the top with a small offset spatula or the back of a spoon.
Step 5: Melt the Chocolate
Place the Nestlé Toll House semi-sweet morsels in a clean microwave-safe bowl. Microwave at 50 percent power for 30 seconds, stir, and continue in 15-second intervals until the morsels are nearly melted. Stir after each interval and stop heating when a few small pieces remain, because the residual heat will finish melting them. Do not add water, and keep all utensils dry.
Step 6: Finish, Chill, and Cut
Spread the melted chocolate over the peanut butter layer and smooth it to the edges. Refrigerate the pan for at least 2 hours, or until the top is firm and the center feels set. Lift the slab out using the parchment, place it on a cutting board, and cut it into eight bars with a sharp knife. For especially clean cuts, warm and wipe the knife between slices.
Tips for Success
- Press the graham cracker crumbs firmly into the pan, because a loose base can crumble when the bars are lifted.
- Let the melted butter cool for a few minutes before mixing it with the crumbs so the base does not become greasy.
- Melt the chocolate gently and stir often; overheating can make the morsels thick and difficult to spread.
- Chill the bars until fully firm before cutting, and return them to the refrigerator if they begin to soften.
- Store the finished bars in a covered container in the refrigerator and use clean utensils when serving.
Equipment Needed
- 8-inch square baking pan
- Parchment paper
- Food processor or rolling pin
Variations
- For thinner bars, press the mixture into a 9-inch square pan and begin checking the texture after 90 minutes of chilling.
- For a less sweet finish, use a slightly thinner chocolate layer by spreading it very evenly across the top.
- For a softer, more spoonable texture, let each bar stand at room temperature for 10 minutes before serving.
- For small party portions, cut the chilled slab into 16 squares instead of eight bars.
- For a two-tone appearance, drag the tip of a knife lightly through the chocolate before chilling to create simple swirls.
Serving Suggestions
Serve the bars cold or let them sit at room temperature for about 10 minutes before serving. They are rich, so eight bars make generous portions and 16 smaller squares work well for a dessert tray. Keep leftovers covered and refrigerated, and do not leave them at room temperature for more than 2 hours, or 1 hour if the room is above 90°F.
FAQs about Chocolate Peanut Butter Bars
Can I make these chocolate peanut butter bars ahead of time? Yes. You can make the bars up to 3 days ahead and keep them covered in the refrigerator. Cut them once fully chilled, then return them to the container until serving.
Why is my graham cracker base falling apart? The crumbs may not have been fine enough, or the mixture may not have been pressed firmly into the pan. Make sure the crumbs are evenly moistened with butter and compact the base with the flat bottom of a measuring cup.
Can I use crunchy Jif peanut butter? Yes. Crunchy Jif peanut butter will work, but the middle layer will have peanut pieces and will not spread quite as smoothly as a creamy version.
How should I melt the Nestlé Toll House semi-sweet morsels? Use a completely dry microwave-safe bowl and heat the morsels at 50 percent power in short intervals, stirring often. Stop when only a few pieces remain and stir until smooth.
Can these bars be frozen? Yes. Wrap the chilled bars well and place them in an airtight freezer container for up to 1 month. Thaw them in the refrigerator before serving so the layers soften evenly.
Final Thoughts
These chocolate peanut butter bars keep the preparation simple while still giving you distinct layers and a satisfying contrast of textures. Once the pan is chilled, they are easy to portion, store, and serve whenever a make-ahead dessert is useful.
Looking for more? This recipe is part of our roundup of 4 No-Bake Dessert Bars For Easy Make-Ahead Sweet Treats.
Chocolate Peanut Butter Bars
Ingredients
Equipment
Method
- Line an 8-inch square pan with parchment paper and leave an overhang on two sides.
- Crush the Honey Maid Graham Crackers into fine crumbs, then mix them with melted butter and press the mixture firmly into the pan.
- Chill the graham cracker base for 15 minutes, then spread the Jif peanut butter evenly over it.
- Melt the Nestlé Toll House semi-sweet morsels gently in a dry microwave-safe bowl, stirring often.
- Spread the melted chocolate over the peanut butter layer and refrigerate for at least 2 hours.
- Lift out the chilled slab, cut it into eight bars, and keep the finished bars covered in the refrigerator.
Nutrition
Notes
- Use creamy peanut butter for the smoothest layer.
- Heat the chocolate at 50 percent power in short intervals to prevent scorching.
- Do not leave the finished bars at room temperature for more than 2 hours.