Introduction to No-Bake Pumpkin Pie
This No-Bake Pumpkin Pie is a simple way to make a creamy pumpkin dessert without turning on the oven. Cream cheese gives the filling a smooth, tangy base, while pumpkin puree and pumpkin pie spice bring the familiar flavor of the season.
The filling comes together in one bowl and sets inside a ready-made graham pie crust. Allow enough time for the pie to chill thoroughly before slicing, then serve it cold with a little extra whipped topping if you like. It is part of the Pumpkin 4 Ways collection, a group of practical pumpkin recipes with different textures and methods.
Why You'll Love This No-Bake Pumpkin Pie
- You can make this pie without heating the kitchen or preparing a pastry crust.
- The filling uses a short list of easy-to-find ingredients and takes about 20 minutes to mix.
- Cream cheese helps the pie hold a creamy, sliceable texture after chilling.
- The pumpkin flavor is gentle enough for a family dessert and easy to adjust with the included spice.
- You can prepare it several hours ahead, which makes it useful for a holiday meal or casual gathering.
Ingredients for No-Bake Pumpkin Pie
- 8 oz cream cheese
- 1 cup pumpkin puree
- 8 oz whipped topping
- 1 (3.4 oz) vanilla pudding mix
- 1 graham pie crust
- 1 tsp pumpkin pie spice
Use plain pumpkin puree, not pumpkin pie filling, because the pudding mix and pumpkin pie spice already provide the structure and seasoning. For the smoothest filling, let the cream cheese soften at room temperature for about 30 minutes before mixing. The ingredient list is 8 oz cream cheese, 1 cup pumpkin puree, 8 oz whipped topping, 1 (3.4 oz) vanilla pudding mix, 1 graham pie crust, and 1 tsp pumpkin pie spice.
How to Make No-Bake Pumpkin Pie
Step 1: Soften the Cream Cheese
Set the cream cheese on the counter for about 30 minutes, or until it is soft enough to press easily with a spoon. Keep the whipped topping refrigerated until you are ready to use it. A softened cream cheese block blends more evenly and helps prevent small lumps in the finished filling.
Step 2: Mix the Cream Cheese and Pumpkin
Place the softened cream cheese and pumpkin puree in a large mixing bowl. Beat them with an electric mixer on medium speed for 1 to 2 minutes, scraping the sides of the bowl once or twice, until the mixture looks smooth and evenly colored. If you do not have a mixer, stir firmly with a sturdy whisk or spatula.
Step 3: Add the Pudding Mix and Spice
Add the vanilla pudding mix and pumpkin pie spice to the bowl. Mix on low speed just until the dry ingredients are incorporated, then mix on medium speed for about 30 seconds. Do not prepare the pudding mix separately with milk; it is added dry so it can thicken the pumpkin filling.
Step 4: Fold in the Whipped Topping
Add the whipped topping in two or three additions. Fold gently with a rubber spatula after each addition, turning the mixture from the bottom of the bowl over the top. Stop as soon as no white streaks remain. Folding instead of beating keeps more of the topping's light texture in the filling.
Step 5: Fill the Crust
Spoon the filling into the graham pie crust and spread it into an even layer. Use the back of the spatula to smooth the top, or make soft swirls for a casual finish. Place the pie on a flat shelf in the refrigerator so the crust stays level while the filling sets.
Step 6: Chill and Serve
Cover the pie loosely with plastic wrap or the crust's lid and refrigerate it for at least 4 hours, or until the center is firm enough to slice. For the cleanest cuts, chill it overnight. Keep the finished pie refrigerated and return leftovers to the refrigerator within 2 hours of serving, or within 1 hour if the room is above 90°F.
Tips for Success
- Beat the softened cream cheese until smooth before adding the other ingredients so the filling does not have cream cheese pockets.
- Scrape the bowl during mixing because pudding mix can collect around the sides and bottom.
- Fold the whipped topping gently and stop once it is blended to keep the filling light.
- Chill the pie on a level refrigerator shelf, and avoid cutting it before the four-hour minimum.
- For neat slices, dip a sharp knife in hot water, wipe it dry, and cut the pie; repeat between slices.
Equipment Needed
- Large mixing bowl
- Electric mixer or sturdy whisk
- Rubber spatula
Variations
- Add a thin layer of whipped topping to the chilled pie just before serving for a softer, more finished look.
- Use a chocolate graham pie crust when you want a deeper cocoa contrast with the pumpkin filling.
- Stir a small amount of finely chopped toasted pecans into the filling for a little crunch, keeping in mind that the texture will be less smooth.
- Replace the plain graham crust with a ginger-flavored graham crust for a stronger spice note.
- Make mini pies by dividing the filling among individual prepared crumb crusts, then chill them for at least 3 hours before serving.
Serving Suggestions
Slice the pie cold and serve it on chilled dessert plates. A spoonful of whipped topping makes a simple finish, while a light dusting of pumpkin pie spice or a few graham crumbs adds color. Because the filling softens as it warms, take out only the portions you plan to serve and keep the rest refrigerated. The pie is best within 3 days, covered and stored at 40°F or below.
FAQs about No-Bake Pumpkin Pie
Can I use pumpkin pie filling instead of pumpkin puree? It is better to use plain pumpkin puree. Pumpkin pie filling already contains sweeteners and spices, which would change the balance of this recipe and may make the pie too sweet or strongly seasoned.
How long does no-bake pumpkin pie need to chill? Chill it for at least 4 hours so the pudding mix can thicken the filling and the slices can hold their shape. An overnight chill works well when you are preparing the pie ahead.
Can I freeze this no-bake pumpkin pie? Yes, you can freeze it covered for up to 1 month, although the whipped topping may change slightly in texture after thawing. Thaw it in the refrigerator until fully soft, and do not thaw it on the counter.
Why is my pie filling too soft? The pie may need more chilling time, especially if the cream cheese was warm or the whipped topping was allowed to sit out. Refrigerate it overnight before judging the texture. Also check that the pudding mix was added dry and that no extra liquid was included.
How should I store leftover pumpkin pie? Cover the pie and refrigerate it at 40°F or below. Do not leave it at room temperature for more than 2 hours, or more than 1 hour when the temperature is above 90°F.
Final Thoughts
No-Bake Pumpkin Pie keeps the process straightforward while still giving you a creamy, sliceable dessert with pumpkin flavor. Mix the filling carefully, give it the full chilling time, and you will have a make-ahead pie that fits easily into a busy meal plan.
Looking for more? This recipe is part of our roundup of Pumpkin 4 Ways for Easy Fall Baking, Snacking, and Sharing.
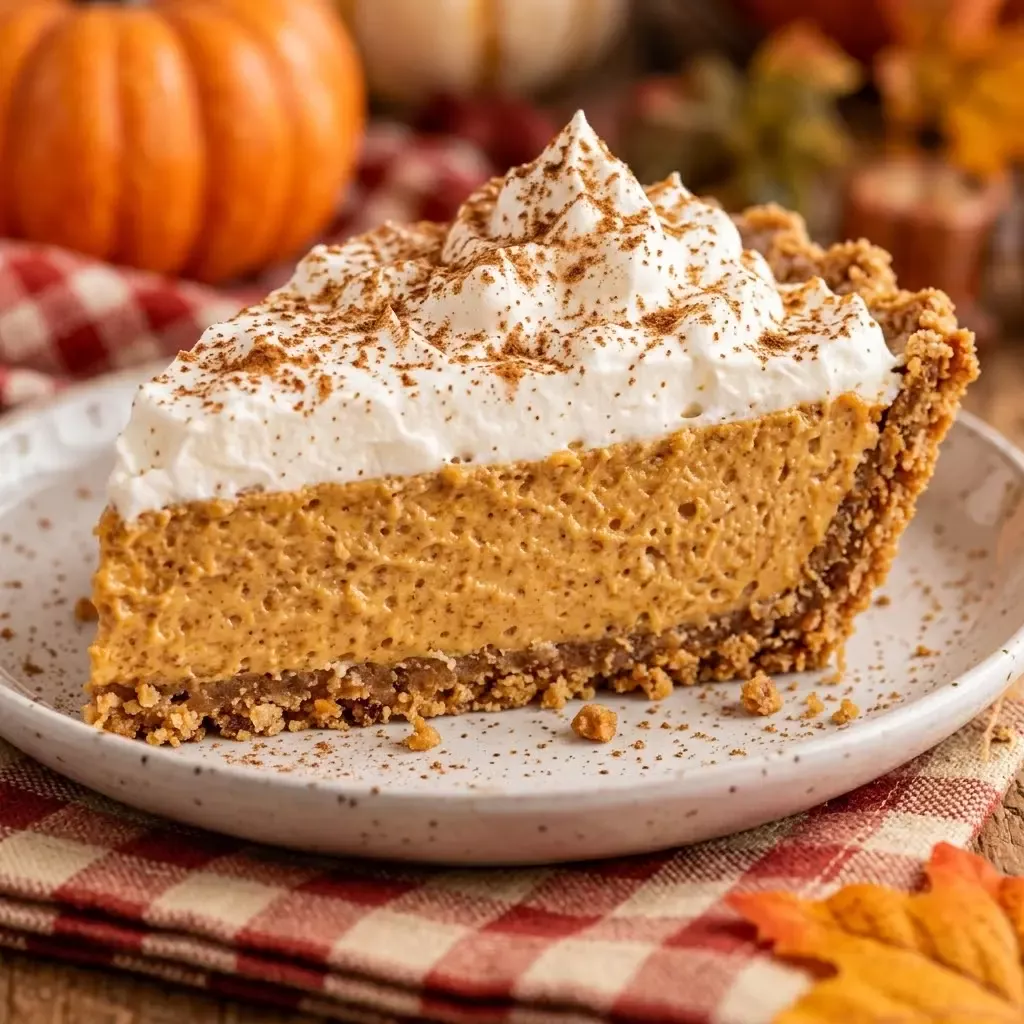
No-Bake Pumpkin Pie
Ingredients
Equipment
Method
- Beat softened cream cheese and pumpkin puree until smooth.
- Mix in the dry pudding mix and pumpkin pie spice.
- Fold in the whipped topping until no white streaks remain.
- Spread the filling into the graham pie crust.
- Cover and refrigerate for at least 4 hours before slicing.
Nutrition
Notes
- Use plain pumpkin puree rather than pumpkin pie filling.
- Keep the finished pie refrigerated at 40°F or below.
- For cleaner slices, chill the pie overnight and use a warm, dry knife.