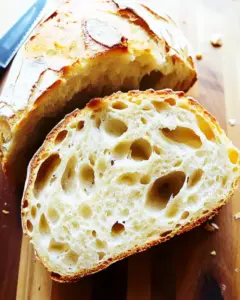
Introduction to No-Knead Artisan Bread Recipe
No-Knead Artisan Bread Recipe is perfect for you! This simple yet delicious recipe allows you to create a crusty, flavorful loaf without the need for extensive kneading. With just a few ingredients and some patience, you can enjoy the delightful aroma of freshly baked bread wafting through your home.
What Makes No-Knead Artisan Bread Unique?
No-knead bread is unique because it relies on a long fermentation process instead of traditional kneading. This method allows the dough to develop flavor and texture naturally. The combination of time and minimal handling creates a rustic loaf with a chewy crust and airy interior. The simplicity of this technique makes it accessible for bakers of all skill levels. Plus, you don’t need any special equipment—just a bowl, a spoon, and a Dutch oven!
Benefits of Making No-Knead Artisan Bread at Home
Making no-knead artisan bread at home comes with several benefits. First, it saves you time and effort. You can mix the ingredients, let the dough rise overnight, and bake it the next day with minimal fuss. Second, the flavor is unmatched. The long fermentation process enhances the taste, giving you a bread that rivals those from artisan bakeries. Lastly, baking at home allows you to control the ingredients, ensuring your bread is fresh and free from preservatives.
No-Knead Artisan Bread Recipe is a fantastic way to enjoy homemade bread without the hassle of kneading. With its unique flavor and easy preparation, it’s a must-try for anyone looking to elevate their baking game!
Ingredients for No-Knead Artisan Bread Recipe
No-Knead Artisan Bread Recipe, you’ll need just a handful of simple ingredients. Each one plays a crucial role in developing the bread’s flavor and texture. Here’s what you’ll need:
- 3 cups all-purpose flour: This is the base of your bread. All-purpose flour provides the right balance of protein and starch for a great rise.
- 1 ½ teaspoons sea salt: Salt enhances the flavor of the bread and helps control yeast activity, ensuring a perfect rise.
- ½ teaspoon active dry yeast: This is the leavening agent that helps the dough rise. It’s essential for creating that airy texture.
- 1 ½ cups lukewarm water: Water activates the yeast and hydrates the flour. The ideal temperature is around 110°F, which is warm but not hot.
These four ingredients are all you need to get started. The beauty of this recipe lies in its simplicity. You can also experiment with additional ingredients to customize your bread. For instance, adding herbs or cheese can elevate the flavor profile. But for the classic no-knead bread, stick to these essentials for the best results.
Now that you have your ingredients ready, you’re one step closer to baking a delicious loaf of no-knead artisan bread!
Step-by-Step Preparation of No-Knead Artisan Bread Recipe
No-Knead Artisan Bread Recipe. This process is simple and requires minimal effort, making it perfect for bakers of all levels. Let’s get started!
Step 1: Mixing the Dough
3 cups of all-purpose flour, 1 ½ teaspoons of sea salt, and ½ teaspoon of active dry yeast. Make sure these ingredients are well combined. Next, slowly pour in 1 ½ cups of lukewarm water. Use a wooden spoon or spatula to mix everything together. You want to create a sticky, shaggy dough. Don’t worry about making it perfect; the magic happens during the rise!
Step 2: First Rise
12 to 18 hours. During this time, the dough will become bubbly and roughly double in size. This long fermentation is what gives your bread its unique flavor and texture.
Step 3: Shaping the Dough
30 minutes.
Step 4: Second Rise
During this second rise, the dough will relax and puff up a bit more. This step is crucial for achieving that airy texture. While the dough rests, you can prepare your oven for baking. This will ensure that everything is ready when your dough is done resting.
Step 5: Preheating the Oven
450°F. Place a Dutch oven (with its lid) inside to heat for about 30 minutes. This step is important because the hot Dutch oven will create steam, which helps develop a crispy crust on your bread.
Step 6: Baking the Bread
30 minutes. After this time, remove the lid and continue baking for another 15 to 20 minutes. You want the crust to turn a beautiful golden brown and become crispy. Once baked, transfer the bread to a wire rack and allow it to cool for at least 30 minutes before slicing into it.
No-Knead Artisan Bread is ready to be enjoyed. The process may seem lengthy, but the hands-on time is minimal, making it a rewarding experience.
Variations of No-Knead Artisan Bread Recipe
No-Knead Artisan Bread Recipe, you might want to explore some exciting variations. These tweaks can enhance the flavor and make your bread even more delightful. Let’s dive into some creative ideas!
Adding Herbs and Spices
One of the easiest ways to elevate your no-knead bread is by adding herbs and spices. Consider mixing in dried herbs like rosemary, thyme, or oregano into the dough during the initial mixing stage. These herbs will infuse your bread with aromatic flavors. You can also experiment with spices like garlic powder or onion powder for an extra kick. Just a teaspoon or two can make a big difference!
Incorporating Cheese or Olives
If you love cheese, why not add some to your bread? Grated cheese, such as cheddar or parmesan, can be mixed into the dough for a rich, savory flavor. Alternatively, chopped olives can add a Mediterranean twist. Just be sure to adjust the salt in your recipe, as both cheese and olives can be salty. These additions will create a deliciously unique loaf that’s perfect for snacking or serving at gatherings.
Whole Wheat or Gluten-Free Options
For those looking for healthier options, you can easily adapt the recipe to use whole wheat flour. Simply replace half of the all-purpose flour with whole wheat flour. This will give your bread a nuttier flavor and added nutrients. If you need a gluten-free version, consider using a gluten-free all-purpose flour blend. Just make sure it contains xanthan gum, which helps mimic the texture of traditional bread. With these variations, everyone can enjoy a slice of your homemade bread!
No-Knead Artisan Bread Recipe to suit your taste preferences. So, feel free to get creative and make it your own!
Cooking Note for No-Knead Artisan Bread Recipe
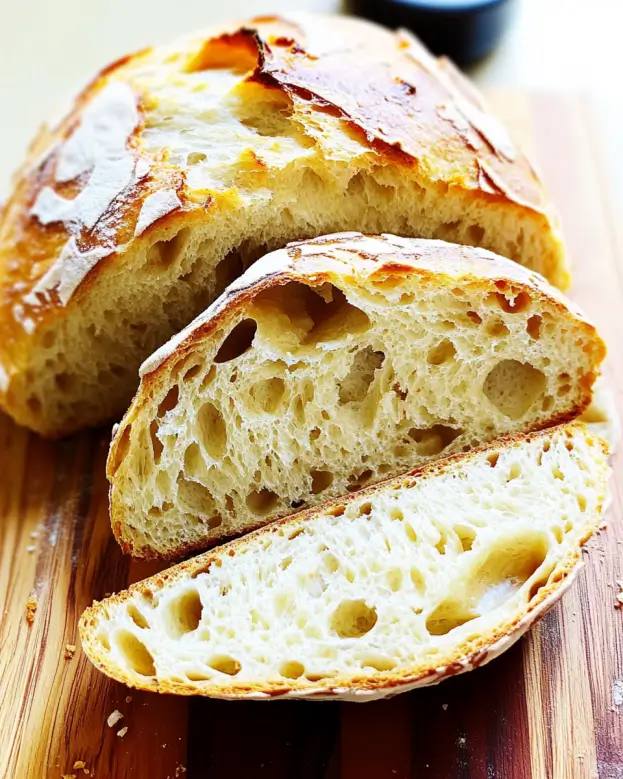
No-Knead Artisan Bread Recipe, a few cooking notes can help ensure your success. These tips will guide you through the process and help you achieve that perfect loaf every time.
110°F, is crucial for activating the yeast. If the water is too hot, it can kill the yeast, preventing your bread from rising. On the other hand, if it’s too cold, the yeast will not activate properly, leading to a dense loaf.
Next, remember that the rising times can vary based on your kitchen’s temperature. In a warm environment, the dough may rise faster, while in a cooler space, it may take longer. Always look for visual cues: the dough should be bubbly and roughly double in size. Trust your instincts rather than strictly adhering to the clock.
Additionally, when shaping your dough, be gentle. Overworking the dough can deflate the air bubbles that have formed during the rise. This can lead to a denser bread. Instead, handle it with care to maintain that airy texture.
30 minutes is essential. This cooling period helps the interior set properly and enhances the flavor. Cutting into the bread too soon can result in a gummy texture.
By keeping these cooking notes in mind, you’ll be well on your way to mastering the art of no-knead bread. Enjoy the process, and soon you’ll be savoring the delightful taste of your homemade artisan loaf!
Serving Suggestions for No-Knead Artisan Bread Recipe
No-Knead Artisan Bread, it’s time to think about how to enjoy it! This bread is versatile and can be served in many delightful ways. Here are some serving suggestions to elevate your bread experience.
Pairing with Dips and Spreads
Your freshly baked no-knead bread pairs wonderfully with a variety of dips and spreads. Consider serving it with:
- Olive Oil and Balsamic Vinegar: A classic combination! Drizzle some high-quality olive oil and balsamic vinegar on a plate for dipping. The flavors complement the bread beautifully.
- Hummus: This creamy chickpea dip adds a nutritious twist. Spread it on a slice of bread for a tasty snack or appetizer.
- Cheese Spread: Soft cheeses like goat cheese or cream cheese can be spread on warm bread. Add herbs or spices for extra flavor.
- Guacamole: For a fun twist, serve your bread with guacamole. The creamy texture and zesty flavor make it a hit!
These pairings not only enhance the taste of your bread but also make for a delightful appetizer or snack for gatherings.
Using in Sandwiches or Toasts
No-knead artisan bread is also perfect for making sandwiches or toasts. Here are some ideas:
- Classic Sandwich: Use your bread to create a classic sandwich with deli meats, cheese, and fresh veggies. The crusty exterior and soft interior make for a satisfying bite.
- Avocado Toast: Top a slice of toasted bread with smashed avocado, a sprinkle of salt, and a dash of pepper. Add a poached egg for a hearty breakfast!
- French Toast: Transform your leftover bread into a delicious breakfast by making French toast. Dip slices in a mixture of eggs and milk, then cook until golden brown.
- Bruschetta: Toast slices of bread and top them with diced tomatoes, basil, and a drizzle of olive oil for a fresh appetizer.
No-Knead Artisan Bread Recipe. Whether you’re enjoying it with dips or turning it into a meal, this bread is sure to impress!
Tips for Perfecting Your No-Knead Artisan Bread Recipe
No-Knead Artisan Bread Recipe turns out perfectly every time, it’s essential to be aware of common mistakes and how to store any leftovers. Here are some helpful tips to guide you through the process.
Common Mistakes to Avoid
Even though this recipe is simple, there are a few pitfalls to watch out for:
- Using the Wrong Water Temperature: As mentioned earlier, using lukewarm water is crucial. If the water is too hot, it can kill the yeast. If it’s too cold, the yeast won’t activate properly. Aim for around 110°F.
- Not Allowing Enough Rise Time: Patience is key! If you rush the rising process, your bread may turn out dense. Always let the dough rise until it’s bubbly and has doubled in size.
- Overworking the Dough: When shaping the dough, be gentle. Overworking can deflate the air bubbles that help create a light texture. Handle it with care to maintain its airy quality.
- Skipping the Cooling Time: Allow your bread to cool on a wire rack for at least 30 minutes before slicing. Cutting too soon can lead to a gummy texture.
By avoiding these common mistakes, you’ll be well on your way to baking a perfect loaf of no-knead bread every time!
Storing Leftover Bread
No-Knead Artisan Bread, you may have some leftovers. Proper storage will help keep your bread fresh:
- Room Temperature: If you plan to eat the bread within a few days, store it at room temperature. Place it in a paper bag or wrap it in a clean kitchen towel. Avoid plastic bags, as they can make the crust soggy.
- Freezing: For longer storage, freeze your bread. Slice it first, then wrap it tightly in plastic wrap and place it in a freezer bag. This way, you can take out individual slices as needed.
- Reheating: To enjoy your bread again, reheat it in the oven. Preheat your oven to 350°F, wrap the bread in foil, and heat for about 10-15 minutes. This will help restore its crusty exterior.
By following these storage tips, you can enjoy your homemade no-knead bread for days to come!
Breakdown of Time for No-Knead Artisan Bread Recipe
No-Knead Artisan Bread Recipe is essential for planning your baking day. While the process may seem lengthy, most of the time is hands-off, allowing you to go about your day while the dough does its magic. Here’s a breakdown of the time involved:
Prep Time
15 minutes mixing the ingredients and shaping the dough. This includes whisking together the flour, salt, and yeast, as well as incorporating the lukewarm water. Once mixed, you’ll let the dough rise overnight, which is where the real magic happens!
Cooking Time
45 to 50 minutes in total. This includes:
- 30 minutes of baking with the lid on the Dutch oven.
- 15 to 20 minutes of baking with the lid off to achieve that golden, crispy crust.
Total Time
12 to 18 hours due to the long fermentation period. However, most of this time is passive, allowing you to enjoy your day while the dough rises. Here’s a quick summary:
- Prep Time: 15 minutes
- Cooking Time: 45 to 50 minutes
- Total Time: 12 to 18 hours (including rising time)
No-Knead Artisan Bread Recipe is not only simple but also fits seamlessly into your day, making it a delightful addition to your baking repertoire!
Nutritional Information for No-Knead Artisan Bread Recipe
No-Knead Artisan Bread Recipe can help you make informed choices about your diet. This bread is not only delicious but also provides essential nutrients. Here’s a breakdown of the key nutritional components per serving:
Calories
150 calories. This makes it a satisfying option for a snack or as part of a meal. The calorie count is relatively low, especially considering the rich flavor and texture of the bread. Enjoying a slice can be a delightful way to indulge without overdoing it!
Protein
4 grams per serving. While it may not be a high-protein food, it does contribute to your daily intake. Pairing your bread with protein-rich toppings, like cheese or hummus, can enhance its nutritional value. This way, you can enjoy a balanced meal or snack that keeps you feeling full and satisfied.
Sodium
150 milligrams. This amount is reasonable, especially for homemade bread. By controlling the salt in your recipe, you can adjust the sodium levels to suit your dietary needs. If you’re watching your sodium intake, consider using less salt or pairing the bread with low-sodium spreads.
No-Knead Artisan Bread Recipe is a nutritious option that fits well into a balanced diet. With its moderate calorie count, decent protein content, and manageable sodium levels, you can enjoy this bread guilt-free. Whether you’re savoring it on its own or using it as a base for delicious toppings, this bread is sure to please your taste buds while providing essential nutrients!
FAQs about No-Knead Artisan Bread Recipe
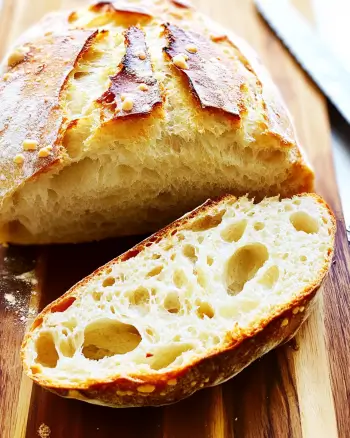
Can I use whole wheat flour in the No-Knead Artisan Bread Recipe?
No-Knead Artisan Bread Recipe. To do this, simply replace half of the all-purpose flour with whole wheat flour. This substitution will give your bread a nuttier flavor and added nutrients. However, keep in mind that whole wheat flour absorbs more water, so you may need to adjust the amount of water slightly. Start with the original amount and add a little more if the dough seems too dry. This way, you can enjoy a healthier version of your delicious bread!
How long can I store No-Knead Artisan Bread?
No-Knead Artisan Bread can be stored at room temperature for up to three days. To keep it fresh, place it in a paper bag or wrap it in a clean kitchen towel. Avoid using plastic bags, as they can make the crust soggy. If you want to store it for a longer period, consider freezing it. Slice the bread first, then wrap it tightly in plastic wrap and place it in a freezer bag. This way, you can enjoy individual slices whenever you like!
What is the best way to reheat No-Knead Artisan Bread?
No-Knead Artisan Bread, preheat your oven to 350°F. Wrap the bread in aluminum foil to help retain moisture and prevent it from getting too hard. Heat it in the oven for about 10 to 15 minutes. This method will restore the crusty exterior and warm the soft interior, making it taste freshly baked again. Enjoy your bread warm, and it will be just as delightful as the day you made it!
Can I make No-Knead Artisan Bread without a Dutch oven?
No-Knead Artisan Bread without one. If you don’t have a Dutch oven, you can use a baking stone or a heavy baking sheet. Preheat your oven with the stone or sheet inside. Place a shallow pan filled with water on the bottom rack to create steam. This will help your bread rise and develop a nice crust. Just keep an eye on the baking time, as it may vary slightly without the Dutch oven.
Conclusion on No-Knead Artisan Bread Recipe
No-Knead Artisan Bread Recipe is a fantastic way to enjoy homemade bread without the hassle of traditional kneading. This simple yet rewarding process allows anyone, regardless of baking experience, to create a delicious loaf with a crispy crust and soft interior. The long fermentation time not only enhances the flavor but also makes the bread incredibly easy to prepare.
As you’ve learned, the recipe requires just a few basic ingredients, and the steps are straightforward. With minimal hands-on time, you can let the dough rise while you go about your day. Plus, the variations you can explore—like adding herbs, cheese, or even trying whole wheat flour—make this recipe versatile and customizable to your taste.
Whether you’re serving it with dips, using it for sandwiches, or simply enjoying a slice with butter, this bread is sure to impress. Remember to follow the tips for perfecting your loaf and avoid common mistakes to achieve the best results. With practice, you’ll become a pro at baking this delightful bread.
No-Knead Artisan Bread. Your kitchen will be filled with the irresistible aroma of freshly baked bread, and your taste buds will thank you for it!


