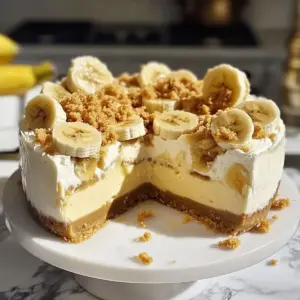
As I stood in my kitchen, surrounded by the sweet aroma of ripe bananas, I couldn’t help but feel a wave of nostalgia wash over me. There’s something magical about combining the flavors of Banana Pudding Cheesecake—it’s like a warm hug on a plate. This dessert seamlessly blends classic cheesecake richness with the delightful creaminess of banana pudding, making it a showstopper for any gathering or just a little indulgence during the week. Not only is this Banana Pudding Cheesecake a crowd-pleaser, but it’s also surprisingly straightforward to whip up—perfect for anyone looking to escape the fast-food rut. With a crunchy crust and a lusciously smooth filling, it’s bound to become a go-to in your culinary repertoire. Curious about how to create this slice of bliss? Let’s dive into the recipe!
Why is this cheesecake so irresistible?
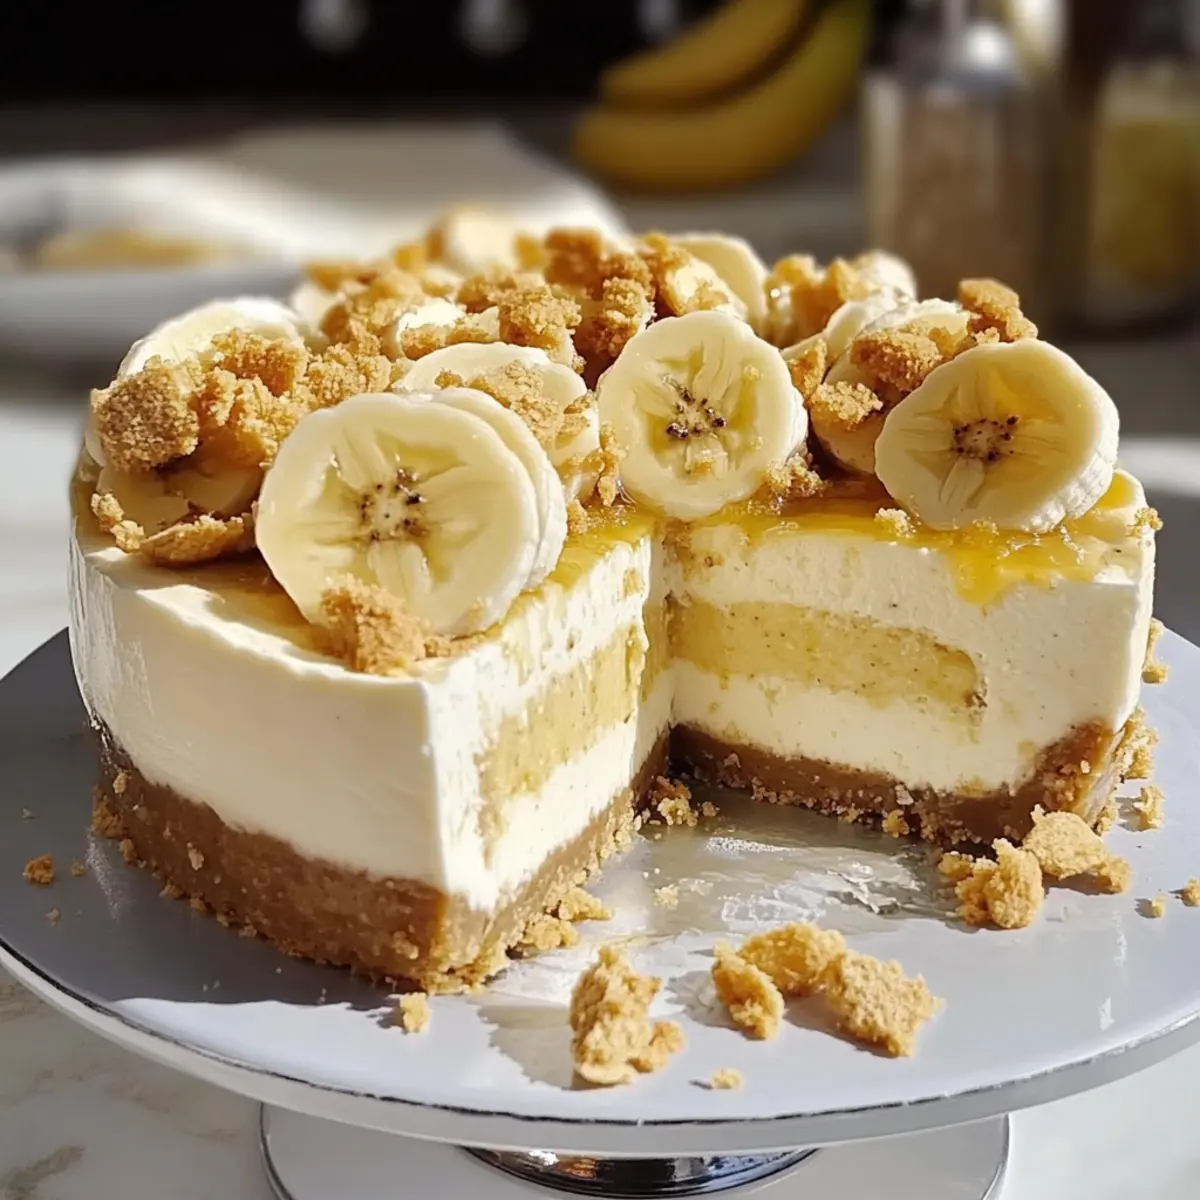
Decadent Delight: This Banana Pudding Cheesecake is a showstopper that combines the best of both worlds—the richness of cheesecake with the comforting essence of banana pudding.
Easy to Make: With simple ingredients and clear steps, you can create this masterpiece at home without any fuss.
Crowd-Pleasing Flavor: Friends and family will rave about this dessert, making it a perfect choice for celebrations or weeknight treats. Pair it with a dollop of whipped cream for even more indulgence!
Versatile Variations: Want to switch things up? Try using graham crackers for the crust or drizzle caramel on top—endless possibilities await!
Perfect Texture: The creamy inner layer and crunchy outer crust create a delightful contrast that satisfies every palate, ensuring it will become your go-to dessert for any occasion. Dive into this amazing recipe and discover all the joy it brings!
Banana Pudding Cheesecake Ingredients
• A delicious culmination of flavors awaits!
For the Crust
- Crushed Vanilla Wafers – This forms the base for the crust; feel free to substitute with graham crackers or shortbread for a unique twist.
- Melted Butter – Binds the crust together beautifully; it’s best to stick with butter for optimal flavor and texture.
For the Filling
- Ripe Bananas (mashed) – Use fresh, ripe bananas for maximum sweetness and flavor in your cheesecake!
- Cream Cheese – The star ingredient that gives this Banana Pudding Cheesecake its rich, creamy texture; ensure it’s softened to blend well.
- Granulated Sugar – Sweetens the cheesecake; you can adjust the amount to fit your taste preference.
- Large Eggs – Provides structure and richness; make sure they’re at room temperature for better mixing.
- Vanilla Extract – Enhances the overall flavor; pure vanilla is recommended for the best taste.
- Heavy Cream – Whipped to create extra creaminess in the filling; no substitutes are suggested for the right texture.
- Banana Pudding Mix – Adds flavor and helps set the cheesecake; a homemade mix may alter the final texture.
For the Garnish
- Sliced Bananas – Adds a fresh touch to the presentation; choose firm bananas for nice slices.
- Additional Vanilla Wafers – Use these to sprinkle on top for that classic touch and crunch.
Get ready to enjoy this delightful Banana Pudding Cheesecake that is sure to be a hit!
Step‑by‑Step Instructions for Decadent Banana Pudding Cheesecake
Step 1: Preheat and Prepare
Preheat your oven to 325°F (163°C) while you prepare a 9-inch springform pan by lightly greasing it with butter. This ensures the cheesecake comes out easily after baking. You can also place a piece of parchment paper at the bottom of the pan for an extra layer of protection against sticking.
Step 2: Make the Crust
In a medium bowl, combine the crushed vanilla wafers with the melted butter, mixing until the crumbs are evenly coated. Press this mixture firmly into the bottom of the prepared springform pan, creating an even layer. Aim for a compact crust, as this will provide a sturdy base for your banana pudding cheesecake.
Step 3: Mix the Cheesecake Filling
In a large mixing bowl, beat the softened cream cheese and granulated sugar together until the mixture is smooth and creamy. Add the eggs one at a time, ensuring each egg is fully incorporated before adding the next. Blend in the mashed ripe bananas and vanilla extract, combining until you have a velvety batter.
Step 4: Whip the Cream
In a separate bowl, whip the heavy cream until soft peaks form, which should take about 3-5 minutes with an electric mixer. Carefully fold in the banana pudding mix, making sure to combine thoroughly without deflating the whipped cream. This whipped cream will add a delightful lightness to your cheesecake filling.
Step 5: Combine Mixtures
Gently fold the banana cream mixture into the cream cheese batter using a spatula. Be careful not to overmix; you want to maintain that light and airy texture for your decadent banana pudding cheesecake. Once fully combined, pour this luscious filling over the prepared crust in the springform pan.
Step 6: Bake the Cheesecake
Transfer the cheesecake to the preheated oven and bake for 50-55 minutes, or until the edges are set, and the center is slightly jiggly but not wet. The top should have a light golden hue, indicating that it’s ready. Baking it slowly at this temperature helps prevent cracks and ensures a creamy texture.
Step 7: Cool and Chill
Remove the cheesecake from the oven, allowing it to cool on a wire rack for about 1 hour. Once it’s at room temperature, cover it with plastic wrap and refrigerate for at least 4 hours, or overnight if possible. Chilling is essential for the flavors to meld and for the cheesecake to set properly.
Step 8: Garnish and Serve
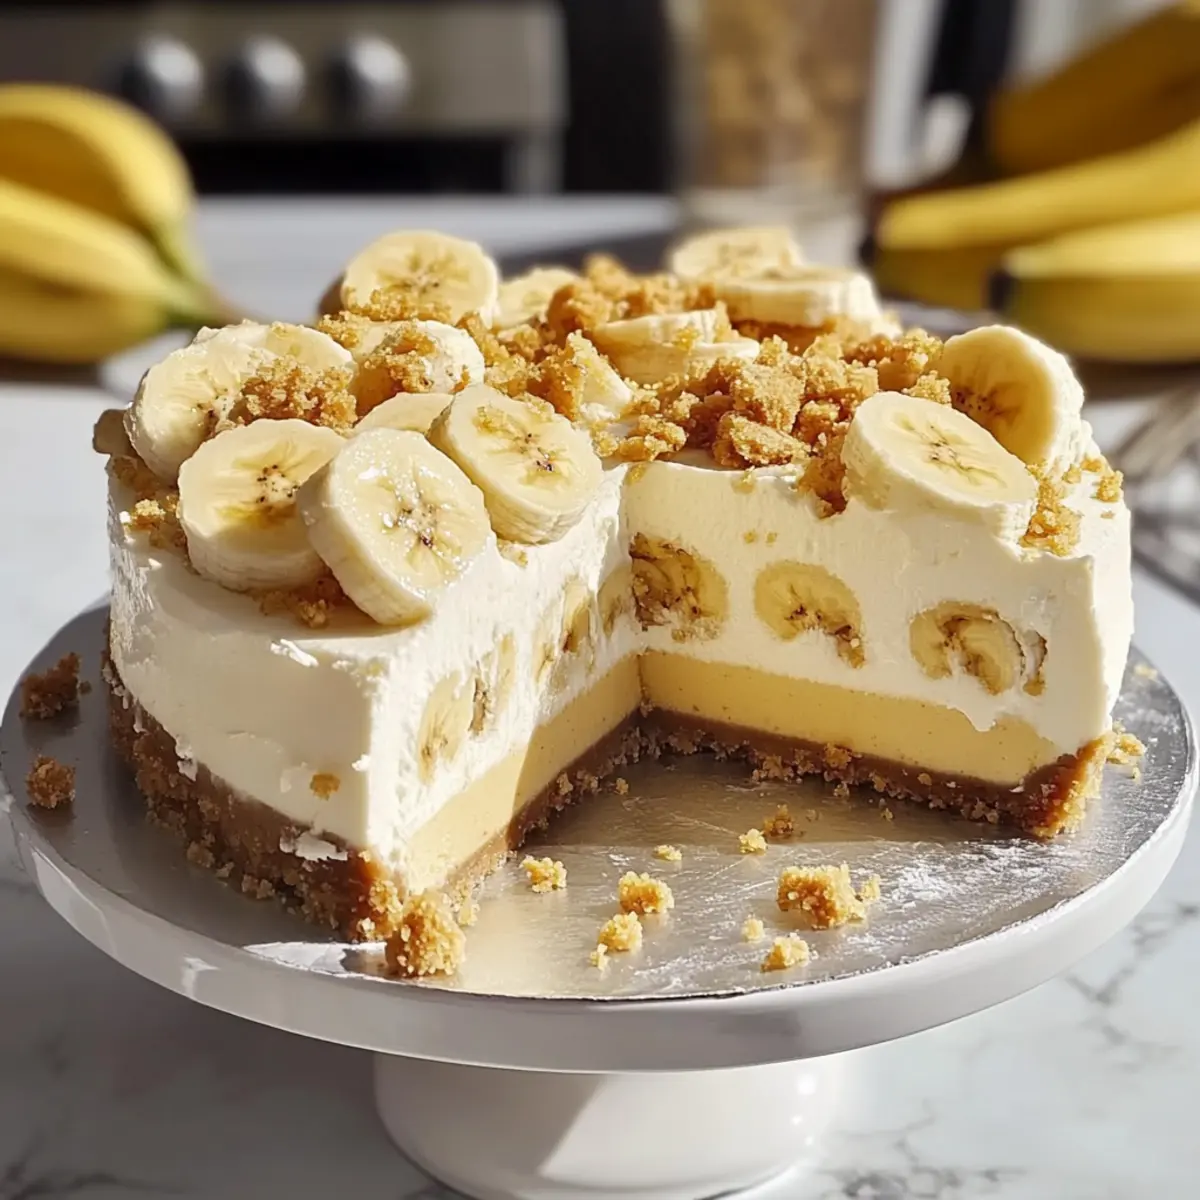
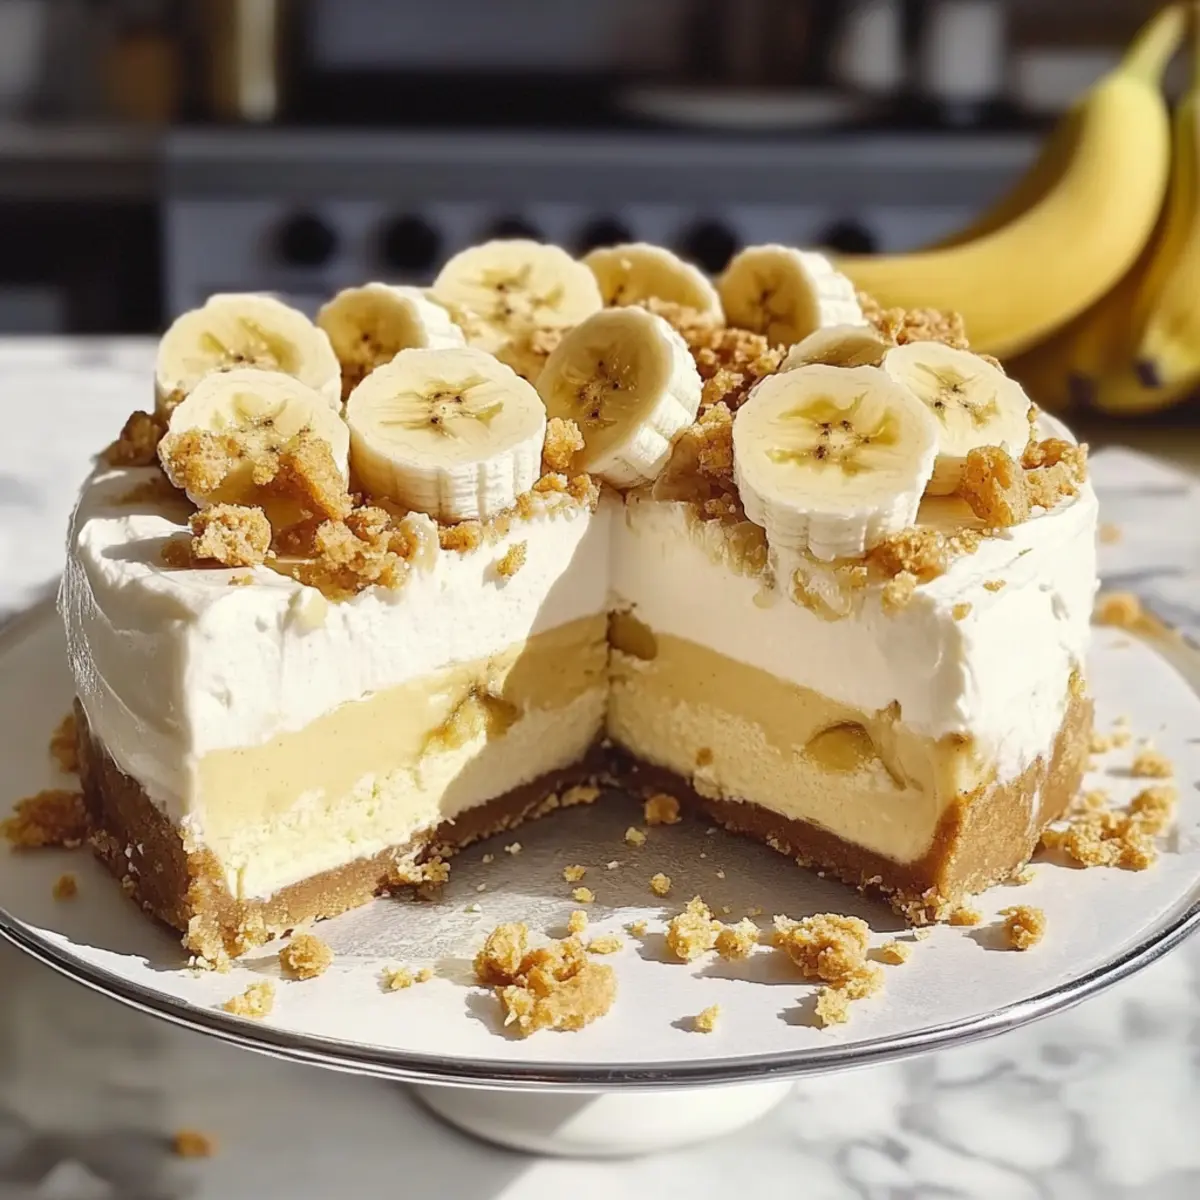
When ready to serve, gently release the sides of the springform pan. Garnish your decadent banana pudding cheesecake with fresh sliced bananas and additional vanilla wafers on top. This adds charm and a pop of color, making the dessert even more inviting for your guests.
What to Serve with Decadent Banana Pudding Cheesecake
Indulging in a slice of creamy banana pudding cheesecake is a true delight, but a well-rounded meal can enhance the experience even more.
-
Creamy Mashed Potatoes: These buttery potatoes create a comforting contrast to the cheesecake’s rich texture, making every bite a warm embrace. The creamy consistency complements the cheesecake beautifully.
-
Fresh Fruit Salad: A bright, refreshing medley of seasonal fruits adds a lightness that sharpens the senses and balances the cheesecake’s sweetness, elevating your dessert experience.
-
Chocolate Drizzle: A drizzle of rich, melted chocolate adds a decadent touch to each slice, making your dessert even more luxurious and visually appealing.
-
Vanilla Ice Cream: Serve alongside a scoop of velvety vanilla ice cream; the cold creaminess pairs perfectly with the warm notes of banana and makes for a delightful contrast.
-
Whipped Cream Topping: Adding a dollop of freshly whipped cream on top not only enhances the cheesecake’s presentation but also brings additional creaminess to each bite.
-
Caramel Sauce: A drizzle of warm caramel sauce enhances the flavor and richness of the cheesecake, providing a sweet and indulgent finish that pairs beautifully with the bananas.
-
Iced Tea: A chilled glass of unsweetened iced tea provides a refreshing counterpoint to the sweet dessert and keeps your palate refreshed.
-
Espresso: For coffee lovers, a shot of rich espresso adds depth to each bite, seamlessly complementing the banana flavors while offering a delightful ending to your meal.
-
Chocolate Chip Cookies: A few homemade chocolate chip cookies on the side bring a nostalgic touch and playful texture, turning dessert into a fun experience for all!
Expert Tips for Banana Pudding Cheesecake
-
Avoid Overmixing: To prevent cracks on the cheesecake surface, mix the filling just until combined; a light touch keeps it fluffy.
-
Water Bath Wisdom: Baking your cheesecake in a water bath creates even heat and minimizes cracking, resulting in a perfectly decadent dessert.
-
Cooling is Key: Let your cheesecake cool completely before refrigerating. This prevents condensation from forming, which could make the crust soggy.
-
Proper Storage: Keep leftovers in an airtight container for 3-4 days. The Banana Pudding Cheesecake is still delicious after a brief chill; just note it will firm up slightly.
-
Variation Possibilities: Don’t be afraid to experiment! Try using different cookie bases for the crust or drizzling chocolate syrup over the slices for a fun twist.
Make Ahead Options
These Banana Pudding Cheesecake preparations are perfect for busy cooks looking to save time without sacrificing flavor! You can prepare the crust and filling up to 24 hours in advance, storing them separately in airtight containers in the refrigerator to maintain quality. The crust can be pressed into the springform pan and kept covered, while the filling should be mixed and kept chilled. When you’re ready to enjoy, simply pour the filling over the crust and bake as directed. This allows you to pull off a stunning dessert with minimal effort on the day you want to serve it, bringing all the creamy decadence just when you need it!
Variations & Substitutions for Banana Pudding Cheesecake
Customize your decadent treat with these fun and flavorful twists that will leave your taste buds dancing!
-
Gluten-Free Crust: Substitute crushed gluten-free cookies for the crust to make this dessert suitable for gluten-sensitive loved ones. It can still deliver that fantastic crunch without sacrificing flavor!
-
Dairy-Free Option: Use dairy-free cream cheese and coconut cream to achieve a creamy yet dairy-free version of your favorite banana pudding cheesecake. The tropical notes of coconut beautifully complement the bananas.
-
Chocolate Lovers: Mix in cocoa powder to the cheesecake filling for a chocolatey version that pairs perfectly with the banana flavor. Each bite offers a delightful burst of chocolate goodness!
-
Extra Nutty: Add chopped nuts such as pecans or walnuts into the crust or sprinkle on top for a crunchy texture contrast. Nuts bring an earthy richness that really enhances the overall flavor.
-
Banana Flavor Boost: For an intensified banana flavor, add an extra mashed banana to the filling or use banana extract along with the regular vanilla. It’s a sweet way to amplify the essence of banana in the dessert!
-
Cinnamon Spice: Introduce warmth to the filling by incorporating a dash of cinnamon or nutmeg. It subtly transforms the flavor profile into a comforting embrace, perfect for cozy nights!
-
Caramel Drizzle: Once baked and chilled, top the cheesecake with a generous drizzle of homemade caramel sauce. The sweetness of caramel elevates the dessert and adds a beautiful sheen.
-
Berry Bliss: Toss in fresh berries like blueberries or strawberries on top as a garnish for a fruity contrast. The tartness in the berries will balance the rich creaminess of your cheesecake beautifully.
Don’t hesitate to explore these variations to create a Banana Pudding Cheesecake that’s truly your own! If you’re interested in more creative twists, check out my delicious Peanut Butter Cheesecake or Lemon Blueberry Cake recipes for even more inspiration.
How to Store and Freeze Banana Pudding Cheesecake
Fridge: Store leftover Banana Pudding Cheesecake in an airtight container for up to 3-4 days. It will maintain its delicious texture, though it may firm up slightly over time.
Freezer: Want to save some for later? Wrap individual slices tightly in plastic wrap and aluminum foil to prevent freezer burn. They can be frozen for up to 2-3 months.
Thawing: When you’re ready to enjoy, move the frozen slices to the fridge and let them thaw overnight. This keeps the flavors intact and brings back that creamy decadence.
Reheating: If you’d like a warm slice, gently reheat in the microwave for about 15-20 seconds. Be careful not to overheat, as it can alter the texture of the cheesecake.
Banana Pudding Cheesecake Recipe FAQs
What kind of bananas should I use for this recipe?
Absolutely! Choose fresh, ripe bananas with a few speckles on the skin for maximum sweetness and flavor. Avoid overripe bananas that have dark spots all over, as they can create a mushy texture in your cheesecake.
How should I store leftover Banana Pudding Cheesecake?
You can store any leftover cheesecake in an airtight container in the refrigerator for 3-4 days. While the texture may become firmer over time, the flavor remains delicious! For the best experience, enjoy it within the first couple of days.
Can I freeze Banana Pudding Cheesecake?
Yes, you can freeze it! Wrap individual slices tightly in plastic wrap and aluminum foil. They will keep well in the freezer for up to 2-3 months. When you’re ready to enjoy, simply thaw them overnight in the refrigerator for the best texture and taste.
What causes cracks in the cheesecake, and how can I avoid them?
Very good question! Cracks typically happen from overmixing or baking at too high a temperature. To prevent this, gently mix the ingredients until just combined. Baking in a water bath can also help maintain an even temperature and minimize cracking.
Is this Banana Pudding Cheesecake suitable for those with allergies?
If you or your guests have allergies, it’s essential to consider your ingredients. The cheesecake contains eggs and dairy (cream cheese and heavy cream), which are common allergens. For a dairy-free option, you might try using a plant-based cream cheese, but keep in mind the flavor and texture may vary.

Decadent Banana Pudding Cheesecake You'll Crave Again and Again
Ingredients
Equipment
Method
- Preheat your oven to 325°F while greasing a 9-inch springform pan with butter.
- Combine crushed vanilla wafers and melted butter in a medium bowl and press into the bottom of the springform pan.
- In a large mixing bowl, beat cream cheese and sugar until smooth, then add eggs one at a time, followed by mashed bananas and vanilla until blended.
- Whip heavy cream until soft peaks form, then gently fold in the banana pudding mix.
- Fold the whipped cream mixture into the cream cheese batter and pour onto the crust.
- Bake in the preheated oven for 50-55 minutes until the edges are set, and the center is slightly jiggly.
- Remove and let cool on a wire rack for 1 hour, then refrigerate for at least 4 hours or overnight.
- Garnish with sliced bananas and additional vanilla wafers before serving.