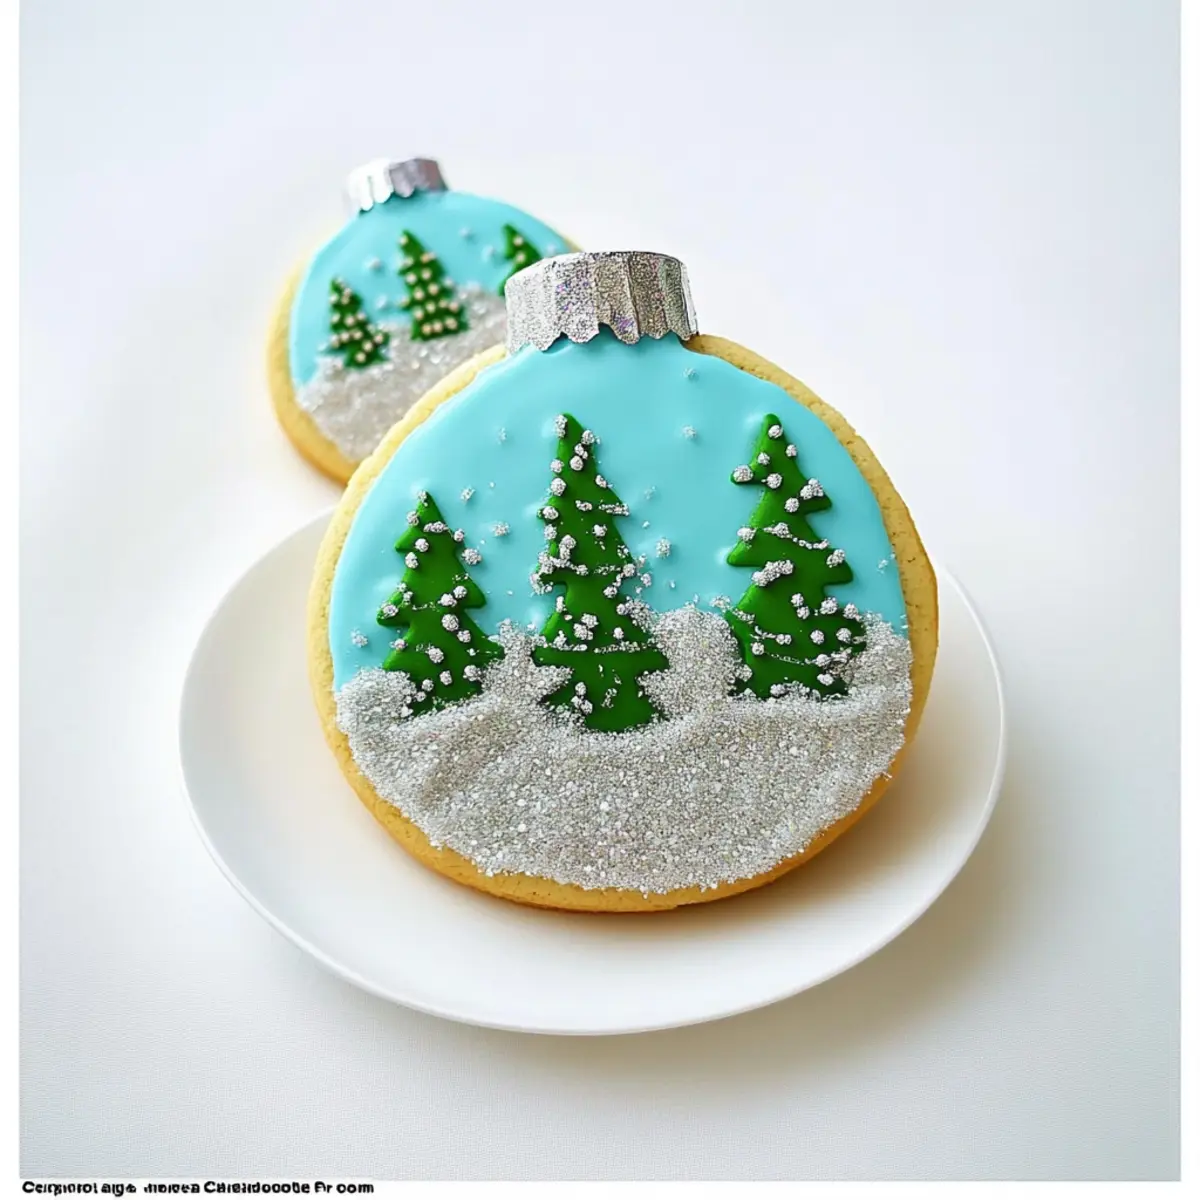
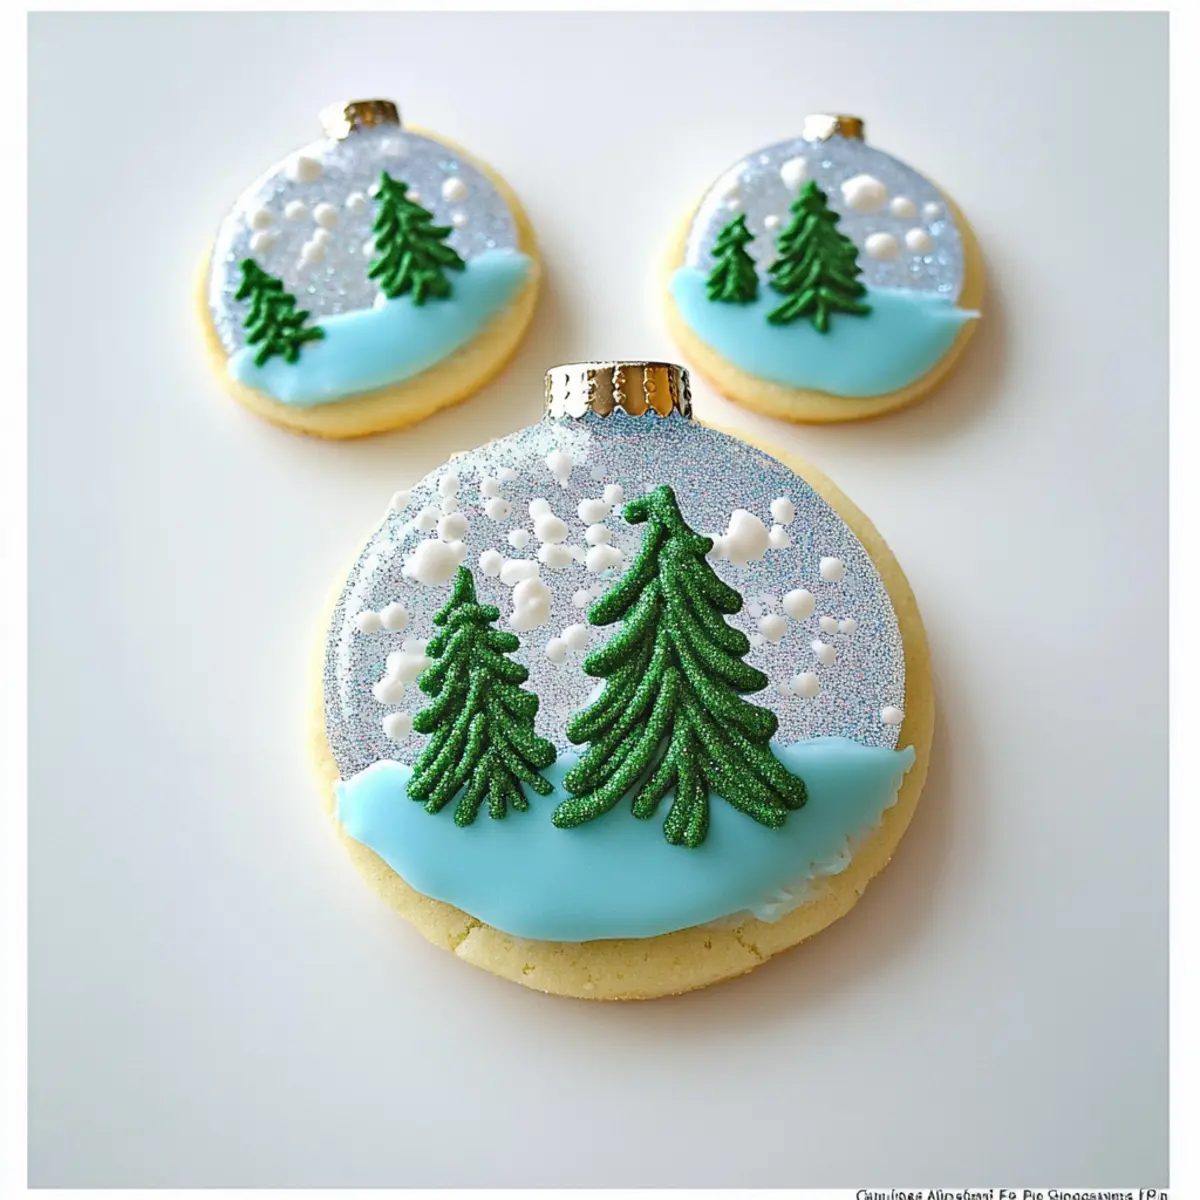
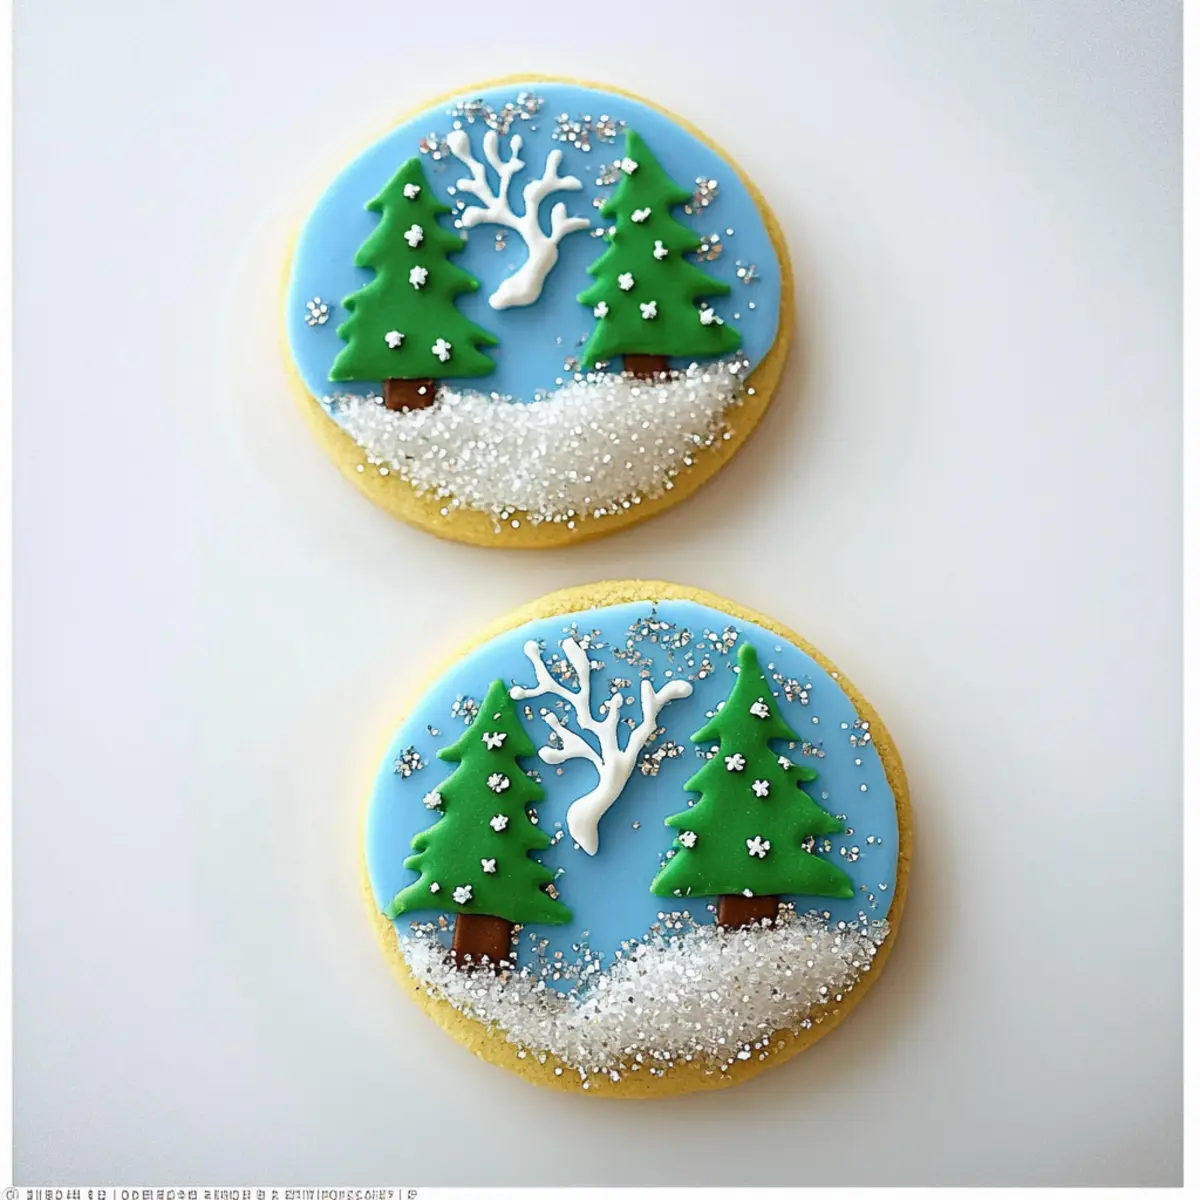
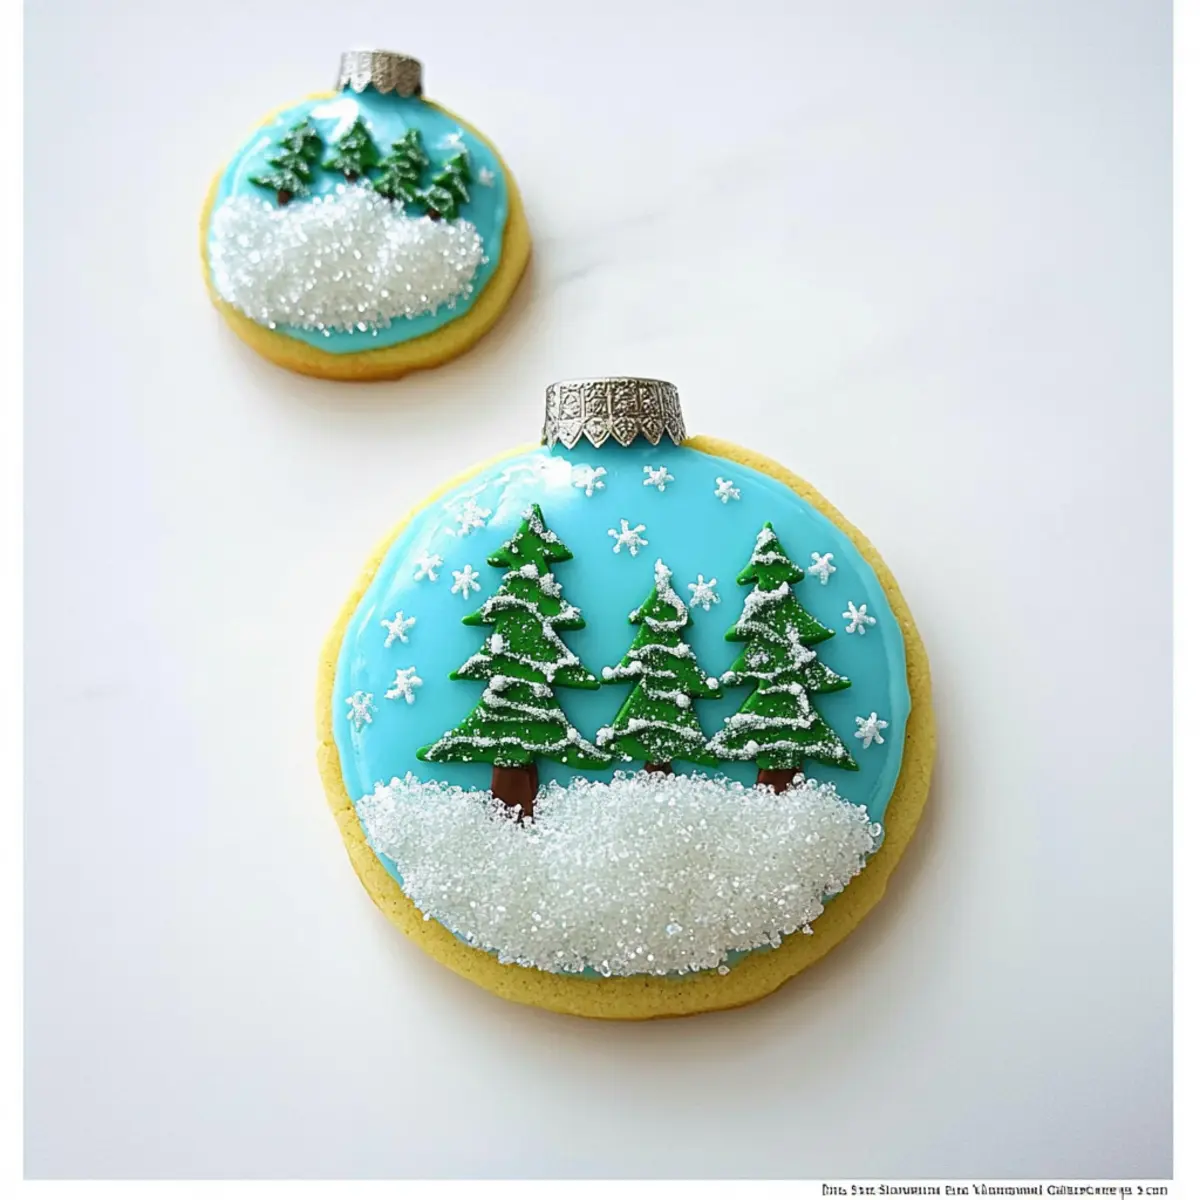
As I stood in my kitchen, the scent of vanilla mingling with the chill of winter air, I couldn’t help but smile at the thought of creating Glittery Snow Globe Cookies. This recipe not only transforms simple sugar cookies into festive masterpieces but also provides the joy of crafting something beautiful and delicious for friends and family. The Snow Globe Cookies come together quickly, making them a perfect choice for holiday gatherings or gift-giving that showcases your baking skills. With their delightful sweetness and eye-catching decoration, these cookies are bound to captivate everyone at your table. So, are you ready to sprinkle some holiday magic into your next baking session?
Why Are These Snow Globe Cookies Special?
Magical Appearance: The stunning glaze and sparkling decorations make these cookies look like they belong in a winter wonderland.
Fun to Decorate: Get creative with fondant trees and edible glitter, turning a baking session into a festive art project.
Versatile Options: Swap colors or flavors to match your holiday theme or personal taste, so everyone can enjoy a cookie tailored just for them.
Quick and Easy: With simple steps and common ingredients, even beginner bakers can whip up these beauties in no time.
Perfect for Gifting: Imagine the smiles when you hand over a tin of these delightful treats, making them ideal for holiday exchanges.
Share the Joy: These cookies aren’t just delicious; they’re a fun way to bring friends and family together. For more inspired treats, check out my guide on holiday cookie exchanges.
Snow Globe Cookies Ingredients
Elevate your holiday baking with these exquisite Snow Globe Cookies!
For the Cookie Dough
- Sugar – Sweetness and structure; substitute with brown sugar for a richer flavor.
- Butter – Provides moisture and flavor; opt for unsalted butter for the best taste control.
- Eggs – Acts as a binding agent and adds richness; can replace with a flax egg for a vegan option.
- All-Purpose Flour – The main structural ingredient; consider gluten-free flour as a substitute.
- Baking Powder – A critical leavening agent for a light and airy texture; no substitutes advised here.
- Vanilla Extract – Enhances flavor; almond extract can also be used for a unique twist.
For the Glaze
- Powdered Sugar – Essential for the glaze; simple syrup can serve as an alternative if needed.
- Gel Food Color – Adds vibrancy to the icing; natural food dyes are an option for healthier baking.
For Decorating
- Non-Pareils – Decorative elements that add sparkle and color to your cookies.
- Sugar Crystals – Enhance the cookies’ visual appeal; consider using edible glitter for added sparkle.
These Snow Globe Cookies are not just about taste; their stunning decorations and holiday spirit will surely impress your guests!
Step‑by‑Step Instructions for Snow Globe Cookies
Step 1: Cookie Dough Preparation
Start by creaming 1 cup of unsalted butter and 1 cup of granulated sugar together in a mixing bowl until the mixture is light and fluffy, taking about 3-5 minutes. Add 2 eggs and 2 teaspoons of vanilla extract, mixing until well combined. Gradually incorporate 3 cups of all-purpose flour and 1 teaspoon of baking powder, mixing until a sticky dough forms.
Step 2: Chill Dough
Wrap the cookie dough in plastic wrap and refrigerate it for at least 1 hour; this helps firm the dough and makes it easier to roll out. While the dough chills, you can prepare your cookie cutters and baking sheets, ensuring everything is ready for when you’re back to tackle making your Snow Globe Cookies.
Step 3: Cut Cookies
Once the dough is chilled, preheat your oven to 350°F (175°C). On a lightly floured surface, roll out the dough to about 1/4 inch thick. Use an extra-large snow globe cookie cutter to cut shapes, placing them on a lined baking sheet. Gather leftover dough, re-roll, and cut additional cookies until all dough is used.
Step 4: Bake
Bake the cookies in your preheated oven for 8-10 minutes or until the edges are lightly golden. Keep a close eye on them to ensure they don’t overbake, as you want soft, tender cookies for your Snow Globe Cookies. Once done, remove from the oven and allow them to cool completely on a wire rack.
Step 5: Prepare Glaze
In a mixing bowl, combine 2 cups of powdered sugar with enough milk (about 2-4 tablespoons) to achieve a smooth, spreadable consistency. Separate the glaze into several smaller bowls and add gel food coloring to create your desired colors—two-thirds could be blue for a beautiful winter effect while keeping the rest white for accents.
Step 6: Decorate Cookies
Using a piping bag or squeeze bottle, outline the edges of the cooled cookies with your icing, then fill in the centers with another layer of glaze. While the glaze is still wet, generously sprinkle non-pareils and sugar crystals on top for that eye-catching sparkle. Allow the cookies to dry for about 4 hours in a cool area.
Step 7: Fondant Decorations
Roll out fondant to about 1/4 inch thick, then cut out small trees or other festive shapes to place on top of your dried cookies. Once the cookies are dry, apply the fondant trees using a dab of additional glaze, and use more glaze to create snow-capped effects by adding sugar crystals as desired.
Step 8: Finish Drying
For the best results, leave your finished Snow Globe Cookies out to dry overnight. This ensures that the glaze and decorations harden properly for maintaining their beautiful designs. Once completely dried, store them in an airtight container for up to a week or gift them in decorative tins to share the holiday cheer!
Tips for the Best Snow Globe Cookies
Chill Dough Properly: Make sure to chill the cookie dough for at least one hour; this prevents the cookies from spreading too much during baking.
Avoid Overbaking: Keep a close eye on your cookies while baking. They should be lightly golden at the edges, ensuring a soft, chewy texture inside.
Precision Decorating: Use a squeeze bottle for better control when adding glaze; this helps to create neat outlines and designs on your Snow Globe Cookies.
Drying Time Matters: Allow sufficient drying time for the glaze—about 4 hours—before stacking or storing to prevent any smudging of the decorations.
Store Wisely: Keep your finished Snow Globe Cookies in an airtight container at room temperature to maintain their freshness and magical appearance for up to a week.
Make Ahead Options
These Glittery Snow Globe Cookies are perfect for meal prep enthusiasts looking to save time during the busy holiday season! You can prepare the cookie dough up to 3 days in advance; simply wrap it tightly in plastic wrap and refrigerate. When you’re ready to bake, roll it out and cut your shapes, then continue with the baking process. As for the decorations, you can also make the glaze a day ahead and store it in an airtight container in the fridge. Just give it a quick stir before using! After glazing, allow your cookies to dry overnight for gorgeous results that are just as delightful as when freshly made—saving time without compromising on quality!
Snow Globe Cookies: Variations & Substitutions
Unleash your creativity by customizing these charming Snow Globe Cookies to suit your tastes and festive themes!
-
Vegan Option: Replace eggs with a flax egg (1 tablespoon flaxseed meal + 2.5 tablespoons water). This makes the cookies suitable for vegan diets while keeping them deliciously rich!
-
Gluten-Free: Use a gluten-free all-purpose flour blend instead of regular flour. These cookies will maintain their festive cheer without the gluten, ensuring everyone can enjoy them.
-
Natural Sweeteners: Swap sugar for coconut sugar or honey, giving your cookies a caramel-like flavor that’s as delightful as it is unique. Just remember to adjust the liquid ingredients when using honey!
-
Flavor Infusion: Incorporate different extracts such as peppermint or orange for a twist that matches your holiday theme. The subtle bursts of flavor will keep everyone guessing!
-
Alternative Icing: Instead of traditional glaze, try using royal icing for a more intricate decoration. This thicker icing can hold its shape beautifully for elaborate designs.
-
Themed Sprinkles: Change non-pareils to themed sprinkles depicting holiday shapes, like stars or candy canes, enhancing your cookie decoration and adding a textural crunch.
-
Choco-Love: Fold in mini chocolate chips into the dough for a touch of decadence. The chocolate’s richness pairs beautifully with the sweet glaze, making each bite celebration-worthy.
-
Dairy-Free: Use coconut oil in place of butter for a deliciously dairy-free version. This exchange won’t sacrifice flavor while catering to those with dairy intolerances.
Feel free to mix and match these variations to create your own uniquely enchanting Snow Globe Cookies! Need more ideas? Check out my post on creative cookie decorating for even more inspiration!
What to Serve with Snow Globe Cookies
Delight in the festive flavors of the season as you pair these charming treats with perfectly complementary dishes.
-
Creamy Hot Chocolate: The rich, creamy texture of hot chocolate enhances the sweetness of the cookies, making each bite a cozy embrace on chilly winter days.
-
Peppermint Bark: This classic treat’s cool mint flavor contrasts beautifully with the cookies’ sweetness, adding a refreshing touch to your holiday spread.
-
Gingerbread Lattes: The hints of cinnamon and nutmeg in a warm gingerbread latte harmonize with the cookies, creating a comforting seasonal drink.
-
Whipped Cream Cheese Dip: Serve with seasonal fruit for a delightful contrast of tangy and sweet flavors that elevate the cookies to a new level of indulgence.
-
Sparkling Cider: Whether alcoholic or non-alcoholic, the bubbly sweetness of sparkling cider pairs perfectly, bringing the festivities to life with joy!
-
Vanilla Ice Cream: A scoop of vanilla ice cream balances the sugar from the cookies, providing a cool, creamy texture that everyone will love.
Imagine a holiday gathering where these Snow Globe Cookies shine alongside these delectable accompaniments, making every moment a cherished memory!
How to Store and Freeze Snow Globe Cookies
Room Temperature: Store your Snow Globe Cookies in an airtight container at room temperature for up to one week. Keep them away from direct sunlight to maintain their vibrant colors.
Fridge: If you’d like to extend their freshness, refrigerate the cookies in an airtight container for up to 10 days. Just be aware that chilling may slightly alter their texture.
Freezer: To freeze, place cooled cookies in a single layer on a baking sheet until firm, then transfer to a freezer-safe container. They’ll maintain their quality for up to 3 months.
Reheating: Before enjoying frozen Snow Globe Cookies, thaw them in the refrigerator or at room temperature for a few hours. If desired, briefly warm them in the oven at 300°F (150°C) for 5-10 minutes to regain some of their original softness.
Snow Globe Cookies Recipe FAQs
How do I select the best ingredients for my Snow Globe Cookies?
Choosing high-quality ingredients is key! Look for unsalted butter for better flavor control, and ensure your eggs are fresh with clean shells. When it comes to sugar, granulated white sugar yields a classic sweetness, but brown sugar will deepen the flavor beautifully. For gluten-free options, use a 1:1 gluten-free flour blend, which works wonders in maintaining texture.
How should I store my Snow Globe Cookies after decorating?
Absolutely! To keep your Snow Globe Cookies fresh, store them in an airtight container at room temperature. They’ll last for up to one week. Avoid stacking the cookies on top of each other until they are fully dried to preserve those beautiful decorations. If you’d like to prolong their shelf life, refrigerate them for up to ten days.
Can I freeze Snow Globe Cookies, and if so, how?
Yes, you can freeze them! Here’s how: once your cookies have cooled completely, place them in a single layer on a baking sheet to freeze for about an hour. Afterward, transfer the cookies to a freezer-safe container, separating them with parchment paper, and store for up to 3 months. When you’re ready to enjoy, simply thaw at room temperature or in the refrigerator overnight.
What are some common issues when baking Snow Globe Cookies?
One common issue is spreading during baking, which can be avoided by ensuring the dough is well-chilled for at least an hour before cutting. If your cookies spread too much, they might lose their shape. If that happens, don’t worry! You can still decorate them as snow globes—just think of it as a snow-covered landscape! Also, ensure your oven is properly preheated to avoid uneven baking.
Are there any dietary considerations for my Snow Globe Cookies?
Definitely! To make the cookies vegan, replace the eggs with a flax egg (1 tablespoon ground flaxseed mixed with 2.5 tablespoons water, let sit for 5 minutes). For nut allergies, ensure that the vanilla extract used is pure and nut-free. When using alternative food coloring, check for any allergens if you’re serving to a crowd with dietary restrictions.
Snow Globe Cookies That Spark Joy This Holiday Season
Ingredients
Equipment
Method
- Cream together unsalted butter and granulated sugar until light and fluffy, about 3-5 minutes.
- Add eggs and vanilla extract, mixing until well combined.
- Gradually incorporate all-purpose flour and baking powder until a sticky dough forms.
- Wrap the cookie dough in plastic wrap and refrigerate for at least 1 hour.
- Preheat your oven to 350°F (175°C). Roll out the dough to about 1/4 inch thick.
- Cut shapes with a snow globe cookie cutter and place them on a lined baking sheet.
- Bake for 8-10 minutes until edges are lightly golden; cool completely on a wire rack.
- Combine powdered sugar with enough milk to achieve a smooth consistency, then separate and color as desired.
- Outline the edges with icing, fill in centers, and sprinkle decorations on top.
- Allow to dry for about 4 hours.
- Cut out small shapes from rolled fondant and attach to cookies with additional glaze.
- Leave cookies to dry overnight to ensure the glaze hardens properly.