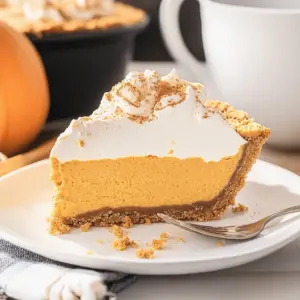
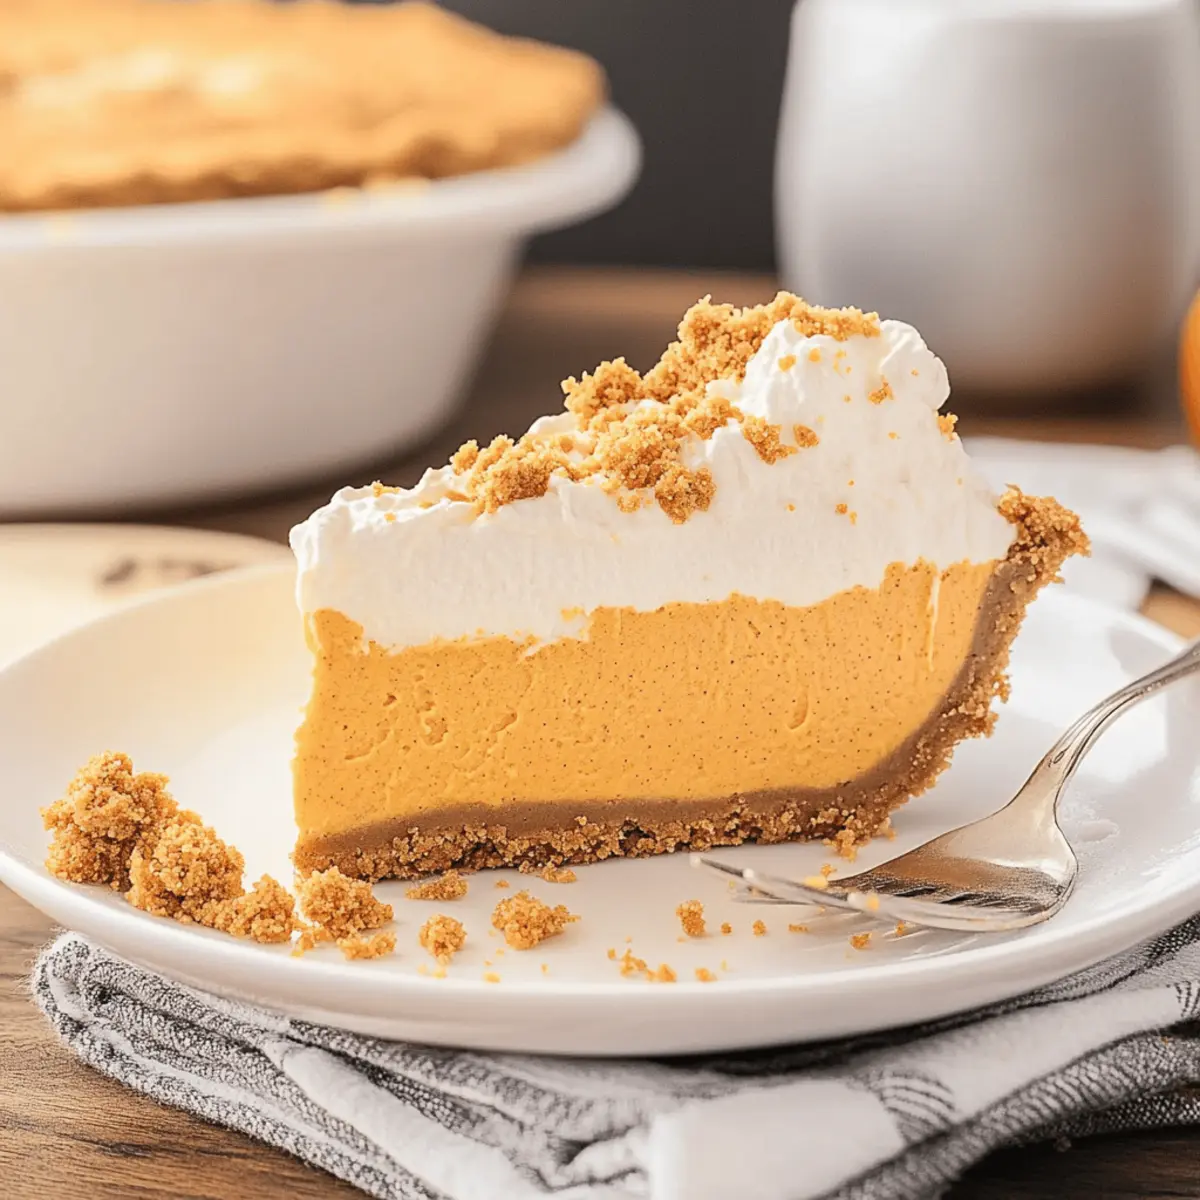
As the comforting aroma of spiced pumpkin fills the air, I can’t help but feel a wave of nostalgia—it’s the essence of fall. This No-Bake Pumpkin Mousse Pie takes that classic seasonal flavor and elevates it into a silky, dreamy dessert perfect for any gathering. The beauty of this recipe lies not just in its creamy texture, but also in its easy preparation; no baking required means more time spent enjoying the festivities and less stress in the kitchen! Ideal as a Thanksgiving dessert, this pie combines familiar tastes with a refreshing twist, making it an instant crowd-pleaser. Ready to impress your family and friends with a treat that captures the spirit of the season? Let’s dive in!
Why is this pumpkin mousse pie special?
Irresistible Creaminess: Each slice of this pie is delightfully smooth, thanks to a rich combination of cream cheese and pumpkin puree.
Effortless Preparation: No baking means anyone can whip this dessert together quickly, perfect for busy schedules.
Seasonal Flavors: The warm spices and pumpkin essence evoke the cozy vibes of autumn, making it an ideal Thanksgiving treat.
Versatile Serving Options: Elevate the presentation with caramel drizzle or fresh berries—your guests will love it! If you’re looking for more comforting fall recipes, you might enjoy my Hearty Shepherds Pie or Savory Braised Pie.
Crowd-Pleasing Delight: Everyone from kids to adults can’t resist this airy alternative to traditional pie, ensuring it’ll be a hit at any gathering!
Pumpkin Mousse Pie Ingredients
For the Crust
• Graham Crackers – Provides the crust structure; consider gluten-free options if needed.
• Salted Butter – Binds the crust together; make sure it’s melted for the best texture.
• Sugar – Adds sweetness; feel free to use brown sugar for a richer flavor if desired.
For the Mousse
• Cream Cheese – Creates a creamy base for the mousse; substitute with whipped mascarpone for a lighter option.
• Pumpkin Puree – Essential for that iconic pumpkin flavor; use canned for convenience or homemade if you prefer.
• Brown Sugar – Enhances sweetness and depth; white sugar can also work as an alternative.
• Vanilla Extract – Adds flavor complexity; opt for pure vanilla to elevate taste.
• Pumpkin Pie Spice – Infuses warm spice notes into the mousse; a mix of cinnamon, nutmeg, and ginger can substitute if needed.
• Whipped Topping – Provides lightness and can also be a garnish; ensure it’s chilled until serving for optimal fluffiness.
For Garnish
• Ground Cinnamon – Use as an optional sprinkle on top for a lovely finish.
Indulging in this Pumpkin Mousse Pie means treating yourself and your loved ones to a creamy, dreamy dessert that’s sure to delight!
Step‑by‑Step Instructions for No-Bake Pumpkin Mousse Pie
Step 1: Prepare the Pie Dish
Start by lightly spraying a 9-inch pie dish with non-stick cooking spray. This ensures your delicious Pumpkin Mousse Pie will slide out smoothly when it’s ready to serve. Set the dish aside as you prepare the crust.
Step 2: Make the Crust
In a food processor, pulse the graham crackers until you achieve a fine crumb texture, about 30 seconds. Add melted butter and sugar to the crumbs, then pulse again until the mixture resembles wet sand. This creates the buttery base for your pie.
Step 3: Form the Crust
Press the crumb mixture firmly into the bottom and up the sides of the prepared pie dish. Use your fingers or the back of a measuring cup to create an even layer. Once it’s compacted, place the crust in the freezer for about 15 minutes to set.
Step 4: Mix the Mousse Base
In a mixing bowl, combine the softened cream cheese and pumpkin puree. Using an electric mixer on low speed, blend until the mixture is smooth and well combined. This creamy base is essential for that luxurious texture you want in your Pumpkin Mousse Pie.
Step 5: Add Sweetness and Spice
Sprinkle in the brown sugar, vanilla extract, and pumpkin pie spice. Mix on low speed until everything is well incorporated. The sweet and spiced flavors will enhance the pumpkin, making your mousse irresistibly delicious.
Step 6: Fold in Whipped Topping
Gently fold 2 cups of whipped topping into the pumpkin mixture using a spatula. Be careful not to deflate the mixture; you want to keep it light and airy. This step adds fluffiness, transforming your filling into a mousse-like consistency.
Step 7: Assemble the Pie
Pour the pumpkin mousse filling into the chilled graham cracker crust, spreading it evenly with a spatula. Cover the pie tightly with plastic wrap, then refrigerate for at least 6 hours or overnight. This allows the flavors to meld and the mousse to set perfectly.
Step 8: Prepare for Serving
When ready to serve, take the pie out of the fridge and remove the plastic wrap. Gently spread the remaining whipped topping over the mousse to create a fluffy layer on top. Optionally, dust with ground cinnamon for a lovely finish before slicing.
Step 9: Serve and Enjoy
Slice your No-Bake Pumpkin Mousse Pie into wedges and serve chilled. It pairs beautifully with caramel drizzle or fresh berries, making it a delightful dessert that will impress your friends and family at any gathering!

Make Ahead Options
Preparing this No-Bake Pumpkin Mousse Pie is a dream come true for busy home cooks! You can assemble the entire pie and refrigerate it up to 3 days ahead of time, allowing for effortless entertaining. To prep in advance, make the crust and mousse filling, then combine them and refrigerate the covered pie. This not only allows the flavors to meld beautifully, but it also saves you precious time on the day of your gathering. Just before serving, spread the remaining whipped topping over the mousse for that airy lift, and dust with ground cinnamon. Trust me, it will be just as delicious as when made fresh!
What to Serve with No-Bake Pumpkin Mousse Pie
As your guests marvel at the creamy perfection of this dessert, consider these delightful accompaniments that enhance every bite and create a complete meal experience.
-
Caramel Sauce:
A warm drizzle of caramel adds a rich, buttery sweetness that perfectly complements the pumpkin’s spiced flavor. -
Fresh Berries:
Bright, tangy berries, like raspberries or blueberries, provide a refreshing contrast and beautiful color to your presentation. -
Whipped Cream:
Serve alongside a dollop of homemade whipped cream for an additional touch of creamy indulgence; it perfectly lightens the overall dessert. -
Chilled Apple Cider:
An ice-cold glass of spiced apple cider echoes the fall flavors, offering guests a festive, cozy sip that pairs beautifully with the pie. -
Chocolate Shavings:
Sprinkle some dark chocolate shavings on top for an extra touch of decadence. The richness of chocolate beautifully offsets the pie’s sweetness. -
Pecan Pie Bars:
For an indulgent dessert spread, serve a few pecan pie bars. Their nutty crunch is a fantastic textural contrast against the fluffy mousse. -
Ginger Snap Cookies:
These crisp cookies have a spicy bite that resonates with the pumpkin spice, creating a delightful combination each time you savor them together.
Each of these suggestions will not only complement the delightful tastes of the No-Bake Pumpkin Mousse Pie but also provide a rich tapestry of flavors and textures your loved ones will relish this holiday season!
Expert Tips for Pumpkin Mousse Pie
-
Chill Time Matters: To achieve the best texture, refrigerate the pie for at least 6 hours. Overnight is even better for flavors to meld beautifully.
-
Room Temperature Ingredients: Ensure the cream cheese and pumpkin puree are at room temperature before mixing. This helps create a smooth, lump-free mousse, resulting in a perfect Pumpkin Mousse Pie.
-
Customize Your Sweetness: If you prefer a less sweet dessert, adjust the sugar levels. Taste the mousse before pouring it into the crust to find your ideal sweetness balance.
-
Avoid Deflation: When folding in the whipped topping, be gentle! Over-mixing can deflate the airy texture that makes this pie so delightful.
-
Garnish Wisely: For extra appeal, add a sprinkle of ground cinnamon or a drizzle of caramel right before serving. It enhances both taste and presentation.
Pumpkin Mousse Pie Variations
Feel free to get creative with this pumpkin mousse pie and tailor it to your tastes or dietary needs!
-
Gluten-Free Crust: Swap graham crackers for gluten-free options like almond flour or gluten-free cookies for a delicious crust.
-
Chocolate Twist: Use crushed chocolate cookies in place of graham crackers for a rich and decadent flavor that complements the pumpkin beautifully.
-
Nutty Addition: Add finely chopped pecans or walnuts to the crust for a delightful crunch and extra flavor.
-
Dairy-Free Delight: Substitute cream cheese and whipped topping with coconut cream and dairy-free cream cheese for a dreamy, plant-based version.
-
Maple Flavor Boost: Incorporate pure maple syrup instead of brown sugar for a unique sweetness that pairs wonderfully with pumpkin.
-
Spicy Kick: Mix in a pinch of cayenne or a dash of ground ginger to the mousse for an unexpected heat that adds depth.
-
Pumpkin Spice Overload: Double the amount of pumpkin pie spice for a more pronounced flavor that’s sure to satisfy pumpkin spice lovers.
-
Cheesecake Style: Blend in a bit of ricotta cheese with the cream cheese for a richer filling that gives it a cheesecake-like texture.
Feeling inspired? This flexible recipe allows you to explore delightful variations, making it perfect for any occasion! And if you enjoy fall flavors, check out my Hearty Shepherds Pie or Savory Braised Pie for more comforting recipes.
How to Store and Freeze Pumpkin Mousse Pie
Fridge: Store your pumpkin mousse pie in an airtight container or tightly covered with plastic wrap for up to 2-3 days. This keeps the creamy texture intact and prevents it from absorbing other fridge odors.
Freezer: While it’s best fresh, you can freeze individual slices of the pumpkin mousse pie in a freezer-safe container for up to 1 month. Wrap each slice with plastic wrap to protect its fluffy structure.
Thawing: When ready to enjoy, transfer the frozen slices to the fridge to thaw overnight. This way, the mousse will regain its creamy consistency.
Serving Tips: For the best flavor experience, serve the thawed pie chilled, and consider adding a fresh layer of whipped topping before serving!

No-Bake Pumpkin Mousse Pie Recipe FAQs
What should I look for in ripe pumpkin puree?
Absolutely! When selecting pumpkin puree, opt for a brand that uses 100% pure pumpkin without any added sugars or spices. If you’re making it at home, choose sugar pumpkins, which are smaller, sweeter, and more flavorful than carving pumpkins. Look for rich, vibrant orange color and a thick consistency that won’t be too watery.
How long does the pie last in the fridge?
Very! Your no-bake pumpkin mousse pie will stay fresh in the refrigerator for up to 2 to 3 days. Make sure it’s covered with plastic wrap or stored in an airtight container to keep it from soaking up any fridge odors and to maintain that delightful creamy texture.
Can I freeze this pumpkin mousse pie, and if so, how?
Yes, you can freeze it! To freeze individual slices, wrap each piece tightly in plastic wrap and place them in a freezer-safe container. The pie can be frozen for up to 1 month. When you’re ready to enjoy, simply thaw the slices in the refrigerator overnight. This method helps maintain the mousse’s consistency, keeping it creamy when served.
What if my mousse doesn’t set correctly?
Not to worry! If your mousse is too soft upon serving, it might need more chilling time. Make sure it has been refrigerated for at least 6 hours or overnight. If you notice your mousse is still too loose, check if all ingredients were at room temperature before mixing, as this can affect the blending process. Next time, consider slightly increasing the cream cheese to ensure a firmer texture.
Are there any dietary considerations I should keep in mind?
Definitely! If you’re making this pie for guests with dietary restrictions, you can easily swap out graham crackers for gluten-free options for those with gluten sensitivities. Also, be cautious with sugar substitutes if you’re catering to diabetics; options like stevia or erythritol could work, but make sure to accommodate for sweetness levels. Lastly, avoid any toppings that may contain allergens for your guests.
Can I make this pie ahead of time?
Absolutely! This no-bake pumpkin mousse pie is ideal for making in advance. You can prepare it 1 to 2 days ahead of your gathering. Just remember to add the whipped topping just before serving to keep it fluffy and light, ensuring your guests enjoy the best texture!

Creamy No-Bake Pumpkin Mousse Pie You'll Fall in Love With
Ingredients
Equipment
Method
- Start by lightly spraying a 9-inch pie dish with non-stick cooking spray.
- In a food processor, pulse the graham crackers until fine crumbs form, about 30 seconds. Add melted butter and sugar, pulse until resembling wet sand.
- Press the crumb mixture into the bottom and sides of the prepared pie dish. Freeze for about 15 minutes to set.
- In a mixing bowl, combine softened cream cheese and pumpkin puree. Mix on low speed until smooth and well combined.
- Sprinkle in brown sugar, vanilla extract, and pumpkin pie spice. Mix on low speed until well incorporated.
- Gently fold in 2 cups of whipped topping into the pumpkin mixture using a spatula.
- Pour the pumpkin mousse filling into the chilled crust, spreading it evenly. Cover with plastic wrap and refrigerate for at least 6 hours or overnight.
- Before serving, gently spread the remaining whipped topping over the mousse and dust with ground cinnamon if desired.
- Slice the pie into wedges and serve chilled, optionally drizzling with caramel or serving with fresh berries.