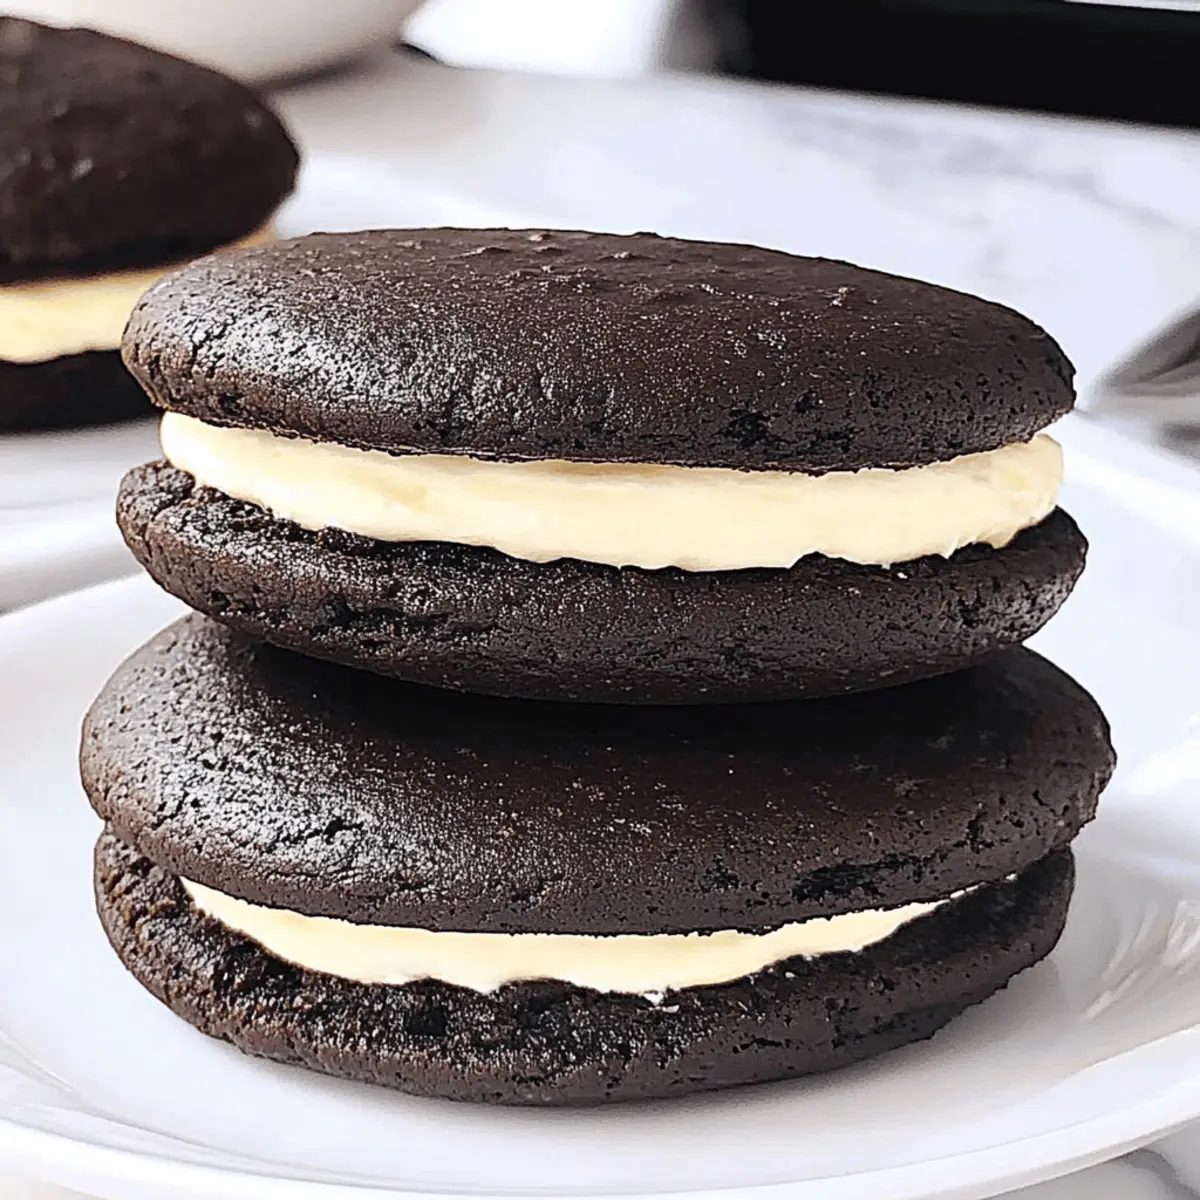
There’s a delightful nostalgia that wraps around a Classic Whoopie Pie, isn’t there? The memory of soft chocolate cookies sandwiched around fluffy marshmallow buttercream can transport us back to warm family kitchens and cozy gatherings. These easy whoopie pies aren’t just a treat for the taste buds; they’re a celebration of comfort food that brings people together. In just a few simple steps, you can whip up a batch that melts in your mouth, making them perfect for parties or a delightful weekend snack. Whether you’re an experienced home chef or just starting your culinary journey, this recipe offers you quick prep and an irresistible payoff that everyone will enjoy. So, why not dive in and explore the joy of making your own Classic Whoopie Pies? What unique twist will you add to this timeless classic?

Why Are Classic Whoopie Pies So Irresistible?
Nostalgic flavors will take you back to simpler times, where treats like these were the highlight of family gatherings. Easy to make, even novice bakers can enjoy the process and the delightful outcome. Customizable with various cake flavors and fillings, these whoopie pies can be tailored to suit any palate, making them suitable for any occasion. Crowd-pleasers by nature, they’re perfect for parties, bringing smiles with every bite. Dive into the joy of these delightful sweets reminiscent of childhood, and consider serving them alongside your favorite beverage, just like with a delicious Hearty Shepherds Pie!
Classic Whoopie Pies Ingredients
• Time to gather what you need to create those Classic Whoopie Pies!
For the Cookies
- All Purpose Flour – Structure for the whoopie pie cookies; you can swap with whole wheat flour for a healthier option (may alter texture).
- Cocoa Powder – Provides a deep chocolate flavor; use Dutch-processed for the best taste and color.
- Baking Powder – Helps the cookies rise; essential for proper texture.
- Baking Soda – Works alongside baking powder to add lift.
- Salt – Enhances flavor and balances sweetness.
- Soft Light Brown Sugar – Adds sweetness and moisture, contributing to a tender texture; substitute with white sugar plus a bit of molasses.
- Vegetable Oil – Adds moisture and tenderness; melted coconut oil can be used for a subtle flavor.
- Egg – Acts as a binder and adds richness; substitute with a flax egg for a vegan option.
- Vanilla Extract – Flavor enhancer; opt for pure vanilla for the best taste.
- Instant Coffee Powder (Optional) – Amplifies the chocolate intensity; omit if you desire a straightforward chocolate flavor.
- Whole Milk – Creates a smooth batter and adds moisture; dairy-free milk (like almond milk) works as a substitute.
For the Marshmallow Buttercream Filling
- Unsalted Butter – The base for the frosting; vegan butter can substitute it for a dairy-free version.
- Powdered Sugar – Sweetens and thickens the frosting; adjust for your sweetness preferences.
- Marshmallow Fluff – Provides a creamy filling element with a light texture; cream cheese frosting can be used for a tangy alternative.
- Vanilla Extract (for buttercream) – Adds a delicious flavor to the filling.
Step‑by‑Step Instructions for Classic Whoopie Pies
Step 1: Preheat Your Oven
Begin by preheating your oven to 180°C (350°F). While the oven heats up, prepare your baking sheets by lining them with parchment paper to prevent sticking. This step ensures that the environment is just right for your Classic Whoopie Pies to bake evenly and rise beautifully.
Step 2: Combine Dry Ingredients
In a mixing bowl, sift together the all-purpose flour, cocoa powder, baking powder, baking soda, and salt. Whisk these dry ingredients thoroughly until they are well combined and free of lumps. This process guarantees that your chocolate flavor will be evenly distributed throughout the whoopie pie cookies, ensuring a deliciously rich taste.
Step 3: Mix Wet Ingredients
In a separate bowl, whisk together the soft light brown sugar, vegetable oil, egg, vanilla extract, and instant coffee powder until the mixture is smooth and well incorporated. The sugar should dissolve, creating a moist and rich base for your Classic Whoopie Pies. This step sets the foundation for the cookie’s delightful texture.
Step 4: Make the Batter
Gently fold the dry ingredients into the wet mixture until just combined, being careful not to overmix. Then, pour in the hot milk, stirring until the batter is smooth and has a silky consistency. This final mixing step is crucial for achieving the perfect texture in your whoopie pies, ensuring they are soft and tender.
Step 5: Portion Dough
Using a cookie scoop or spoon, drop rounded tablespoons of batter onto the prepared baking sheets, spacing them about two inches apart. If necessary, shape the edges with a spatula for a neat appearance. This method will create uniform cookie sizes, resulting in perfectly matching whoopie pies once baked.
Step 6: Bake the Cookies
Place one tray of cookies in the preheated oven and bake for 10 minutes, or until the cookies are firm to the touch and spring back slightly when pressed. Keep an eye on the cookies, as oven temperatures can vary; you should aim for a soft, cake-like texture that is slightly chewy.
Step 7: Cool the Cookies
After baking, allow the cookies to cool on the baking sheets for about 15 minutes. This resting period is critical for firmness. Then, transfer them to wire racks to cool completely, ensuring they are cool enough to frost without melting your filling.
Step 8: Prepare the Buttercream
In a mixing bowl, beat the unsalted butter and powdered sugar together until the mixture is light and fluffy. Gradually add the marshmallow fluff and vanilla extract while mixing, being careful not to overmix. This step creates a luscious, creamy filling that will perfectly complement your Classic Whoopie Pies.
Step 9: Assemble Whoopie Pies
Take half of the cooled cookies and spread a generous amount of the marshmallow buttercream filling on the flat side. Place another cookie on top, flat side down, and gently press together to create a sandwich. This final step brings your Classic Whoopie Pies to life, ensuring that each bite is filled with creamy goodness.
Classic Whoopie Pies Variations & Substitutions
Ready to explore exciting alternatives for your Classic Whoopie Pies? Let your creativity run wild with these delightful twists!
-
Gluten-Free:
Substitute all-purpose flour with a gluten-free blend for a lighter option that still holds its soft texture. -
Vegan:
Use a flax egg for the binder and replace the butter with vegan butter. You won’t miss any richness in this plant-based version! -
Pumpkin Spice:
Swap cocoa powder for pumpkin puree and add in pumpkin spice for a seasonal change that celebrates fall flavors in every bite. -
Nutty Flavor:
Stir in finely chopped nuts, like walnuts or hazelnuts, into the cookie batter for added crunch and a delicious depth of flavor. -
Mini Whoopie Pies:
Make bite-sized cookies using a teaspoon for portioning, creating adorable mini whoopie pies perfect for parties or children! -
Coffee Lover’s Delight:
Enhance your batter with espresso powder along with the optional instant coffee powder for a richer chocolate experience. This twist is perfect for any coffee aficionado! -
Marshmallow Variations:
Instead of marshmallow fluff, try using a rich chocolate ganache or a fruity filling to add a different flavor profile to your whoopie pies.
Feel inspired to mix and match flavors? Don’t forget to check out these creative alternatives while making your delicious Hearty Shepherds Pie for a flavorful dinner companion!
Make Ahead Options
Classic Whoopie Pies are a fantastic option for meal prep, allowing busy cooks to save time during their week! You can prepare the cookie batter up to 24 hours in advance by mixing the dry and wet ingredients separately, then refrigerate them until you’re ready to bake. This method keeps the batter fresh and prevents any loss of texture. Additionally, the baked cookies can be stored in an airtight container at room temperature for up to 3 days. Just remember to wait until they are completely cool before assembling them with the marshmallow buttercream. When you’re ready to enjoy your whoopie pies, simply frost them, and you’ll have a delightful treat that’s just as delicious as when freshly made!
How to Store and Freeze Classic Whoopie Pies
Room Temperature: Keep your whoopie pies in an airtight container for up to 3 days to maintain their soft texture and prevent them from drying out.
Fridge: For longer shelf life, place the whoopie pies in an airtight container and refrigerate them for up to 1 week. This will keep them fresh, although they may lose some of their softness.
Freezer: Freeze assembled whoopie pies in an airtight container for up to 3 months. Place parchment paper between layers to avoid sticking. Thaw at room temperature before serving.
Reheating: If desired, you can warm them in the microwave for about 10-15 seconds to refresh their softness, bringing that delightful Classic Whoopie Pie experience back to life!
What to Serve with Classic Whoopie Pies?
Indulging in a Classic Whoopie Pie is a mesmerizing treat in itself, but pairing it perfectly can elevate the experience even more.
-
Fresh Berries: The tartness of fresh raspberries or strawberries contrasts beautifully with the sweetness of whoopie pies, adding a refreshing touch.
-
Creamy Vanilla Ice Cream: A scoop of vanilla ice cream harmonizes with the chocolatey flavors, creating a delightful dessert duo that’s a true crowd-pleaser.
-
Rich Hot Chocolate: Enjoying these treats alongside a warm cup of rich hot chocolate enhances the comfort factor, perfect for chilly evenings.
-
Decadent Coffee: A robust cup of coffee complements the chocolate nicely, balancing the sweetness and making for a cozy afternoon snack.
-
Chocolate Milkshake: For a luxuriously sweet experience, serve whoopie pies with a thick chocolate milkshake—smooth, rich, and utterly delightful.
-
Zesty Lemonade: The brightness of fresh lemonade provides a refreshing contrast, cutting through the sweetness of the pies for a well-rounded dessert.
-
Caramel Sauce: Drizzling warm caramel over the pies adds a new layer of flavor, blending buttery richness with chocolatey goodness, creating a blissful treat.
These pairings not only enhance your whoopie pie experience but also set the stage for delightful moments with family and friends!
Expert Tips for Classic Whoopie Pies
-
Measure Accurately: Use a kitchen scale for precise ingredient measurements to achieve the best texture in your Classic Whoopie Pies.
-
Cool Completely: Always let the cookies cool completely before frosting; this prevents the filling from melting and spilling out.
-
Watch the Bake Time: Check cookies at the 8-minute mark, as oven temperatures can vary. Look for a firm, springy texture.
-
Experiment with Flavors: Don’t shy away from customizing your whoopie pies; try different cake flavors and fillings for unique variations that suit your tastes.
-
Shape with Care: Use a cookie scoop for uniform size and shape. This ensures even baking and creates perfect sandwiches for your whoopie pies.
Classic Whoopie Pies Recipe FAQs
What type of cocoa powder should I use?
Using Dutch-processed cocoa powder will give your Classic Whoopie Pies a rich, deep chocolate flavor and beautiful color. Regular unsweetened cocoa powder can be used as well, but the flavor and color may not be as robust.
How should I store leftover whoopie pies?
Keep your whoopie pies in an airtight container at room temperature for up to 3 days for the best texture. If you want to prolong their freshness, store them in the refrigerator for up to 1 week. Just be mindful that refrigeration might slightly alter their soft texture.
Can I freeze whoopie pies? If so, how?
Absolutely! You can freeze assembled whoopie pies for up to 3 months. Just place parchment paper between layers in an airtight container to prevent sticking. When you’re ready to enjoy them, simply thaw them at room temperature for a few hours. For an extra treat, warm them in the microwave for 10-15 seconds to refresh their softness!
Are there any common troubleshooting tips for whoopie pies?
One common issue is cookies that spread too much while baking. This can happen if the dough is too warm or if the butter is overly soft. I recommend chilling the dough for about 15-20 minutes before baking to help them maintain their shape. Additionally, make sure you’re measuring your ingredients accurately, as chemical leaveners can also affect how the cookies rise and hold their form.
What if someone has food allergies; are these whoopie pies safe?
If you’re accommodating someone with food allergies, you can easily adapt this recipe. Use a flax egg to substitute for the egg to make it vegan, opt for dairy-free butter and milk, and swap in gluten-free flour if needed. Always read packaging labels for potential allergens, like nuts or shared equipment.
Can I customize the fillings for my whoopie pies?
Yes, whoopie pies are wonderfully customizable! You can experiment with different fillings like cream cheese frosting, flavored buttercreams, or even jam for a tart twist. Just ensure the filling is stable enough to maintain its texture and taste alongside the soft cookies.
Classic Whoopie Pies: Indulge in This Nostalgic Delight
Ingredients
Equipment
Method
- Preheat your oven to 180°C (350°F). Line baking sheets with parchment paper.
- Sift together flour, cocoa powder, baking powder, baking soda, and salt in a mixing bowl.
- Whisk brown sugar, vegetable oil, egg, vanilla, and coffee powder in a separate bowl.
- Fold dry ingredients into wet mixture gently, then stir in hot milk until smooth.
- Drop tablespoons of batter onto baking sheets, spacing them two inches apart.
- Bake for 10 minutes until firm. Check for springiness.
- Cool cookies on baking sheets for 15 minutes, then transfer to racks.
- Beat butter and powdered sugar until fluffy; add fluff and vanilla, mix gently.
- Spread buttercream on half the cookies, sandwich with remaining cookies.