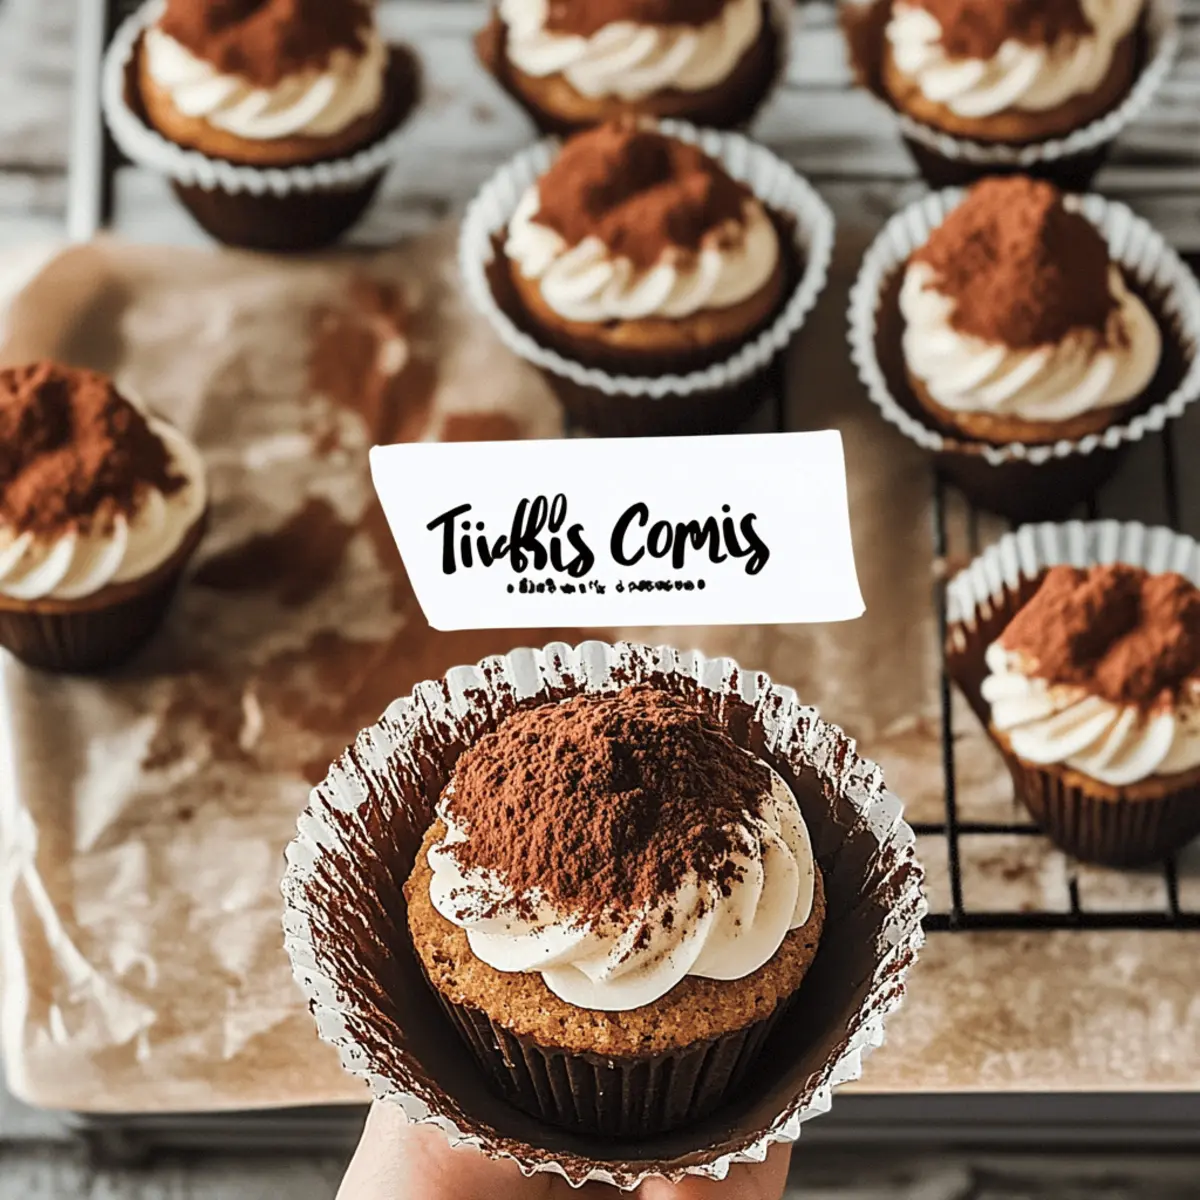
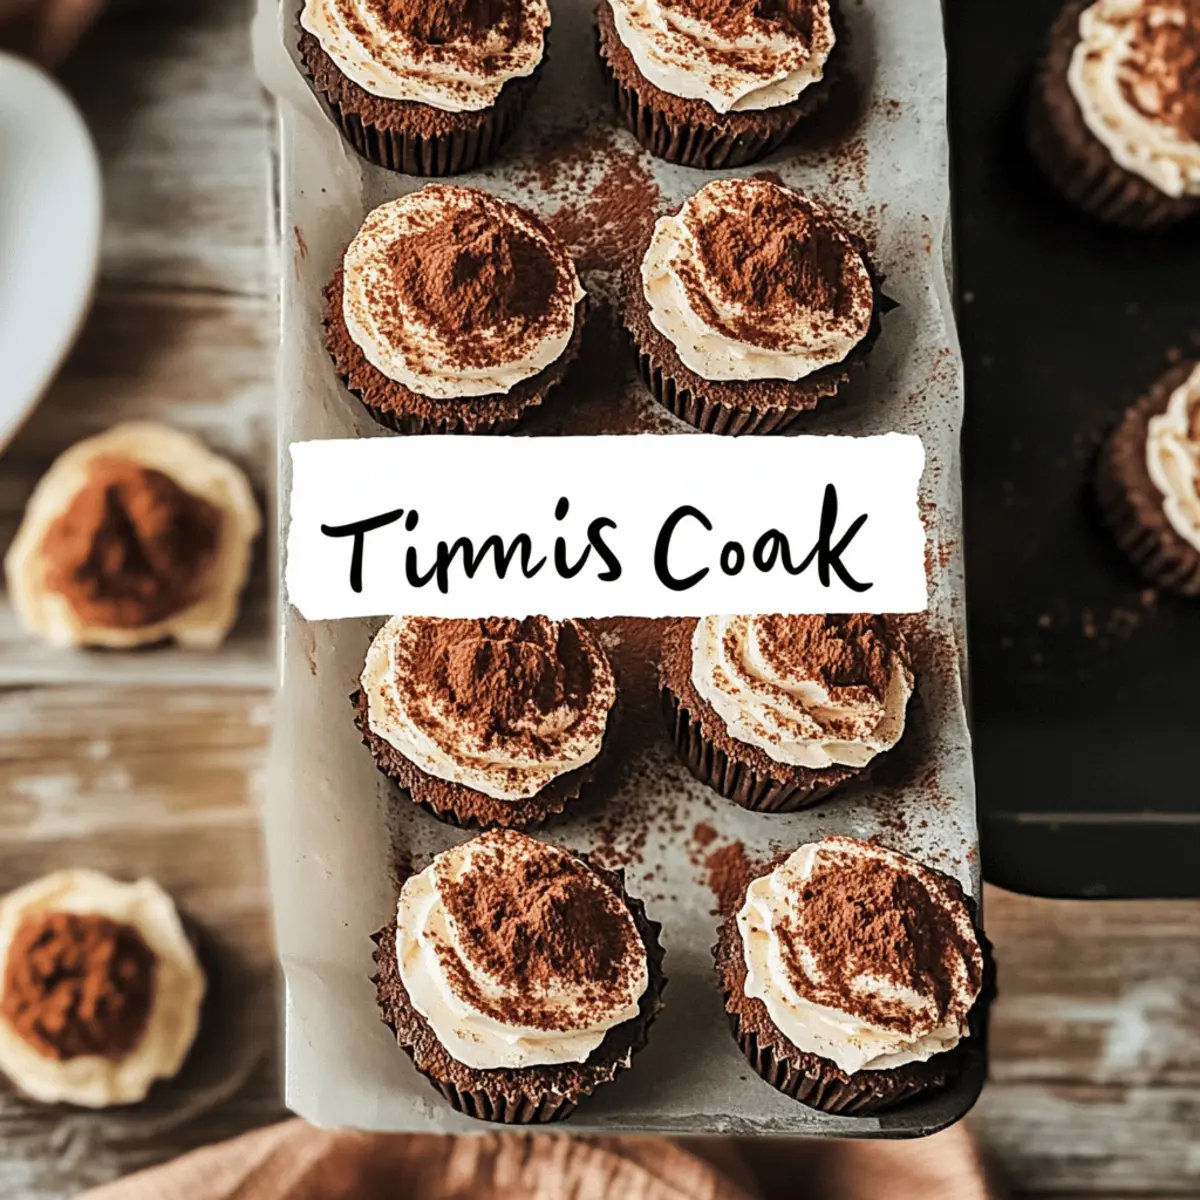
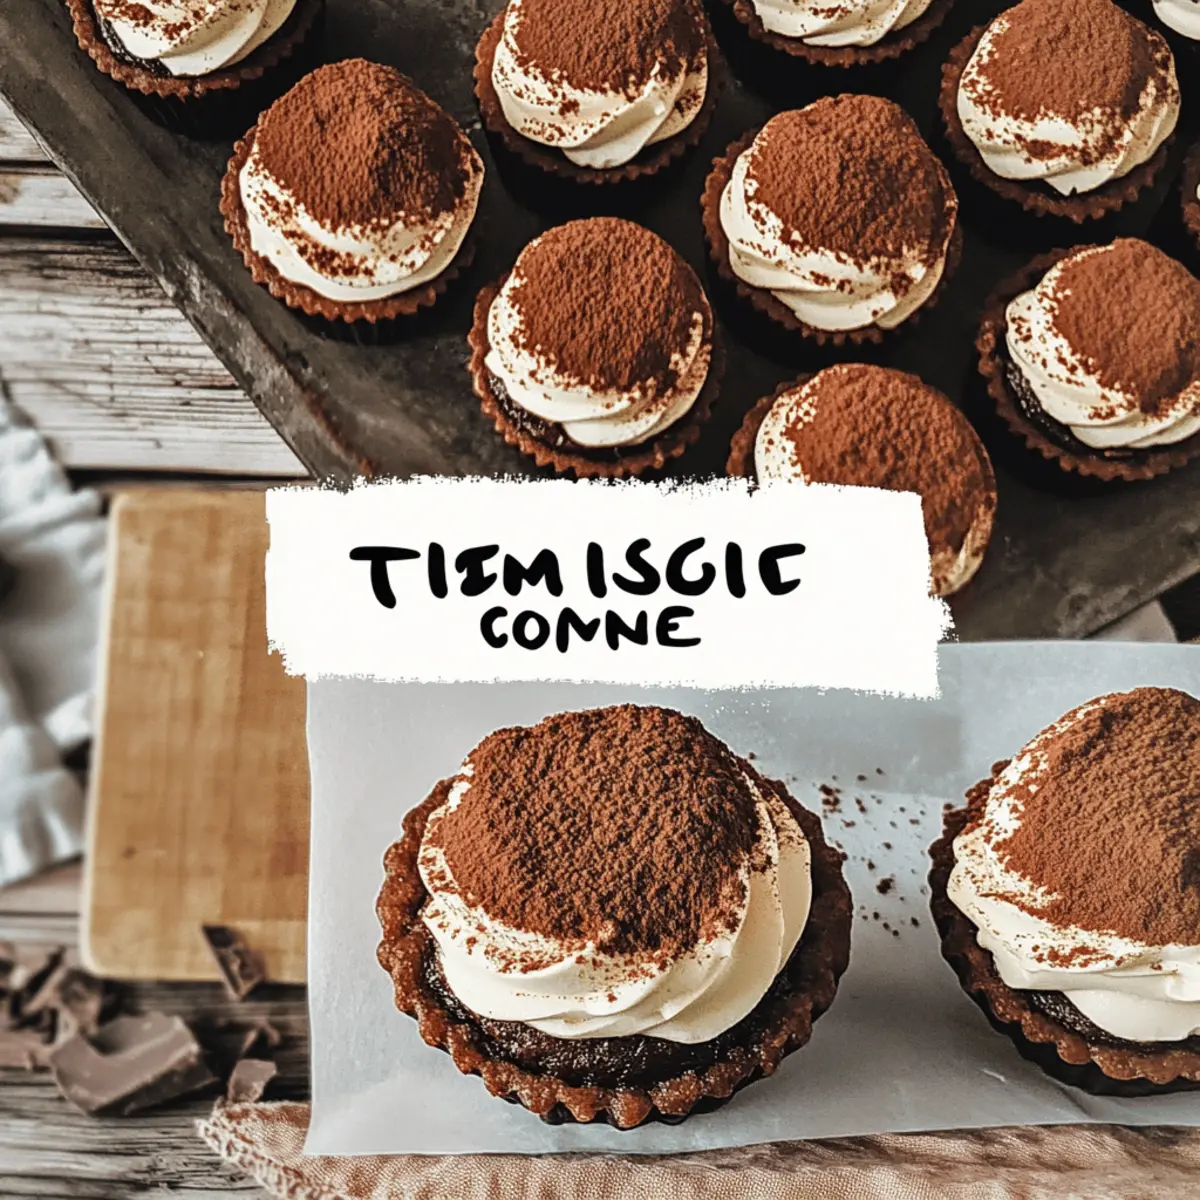
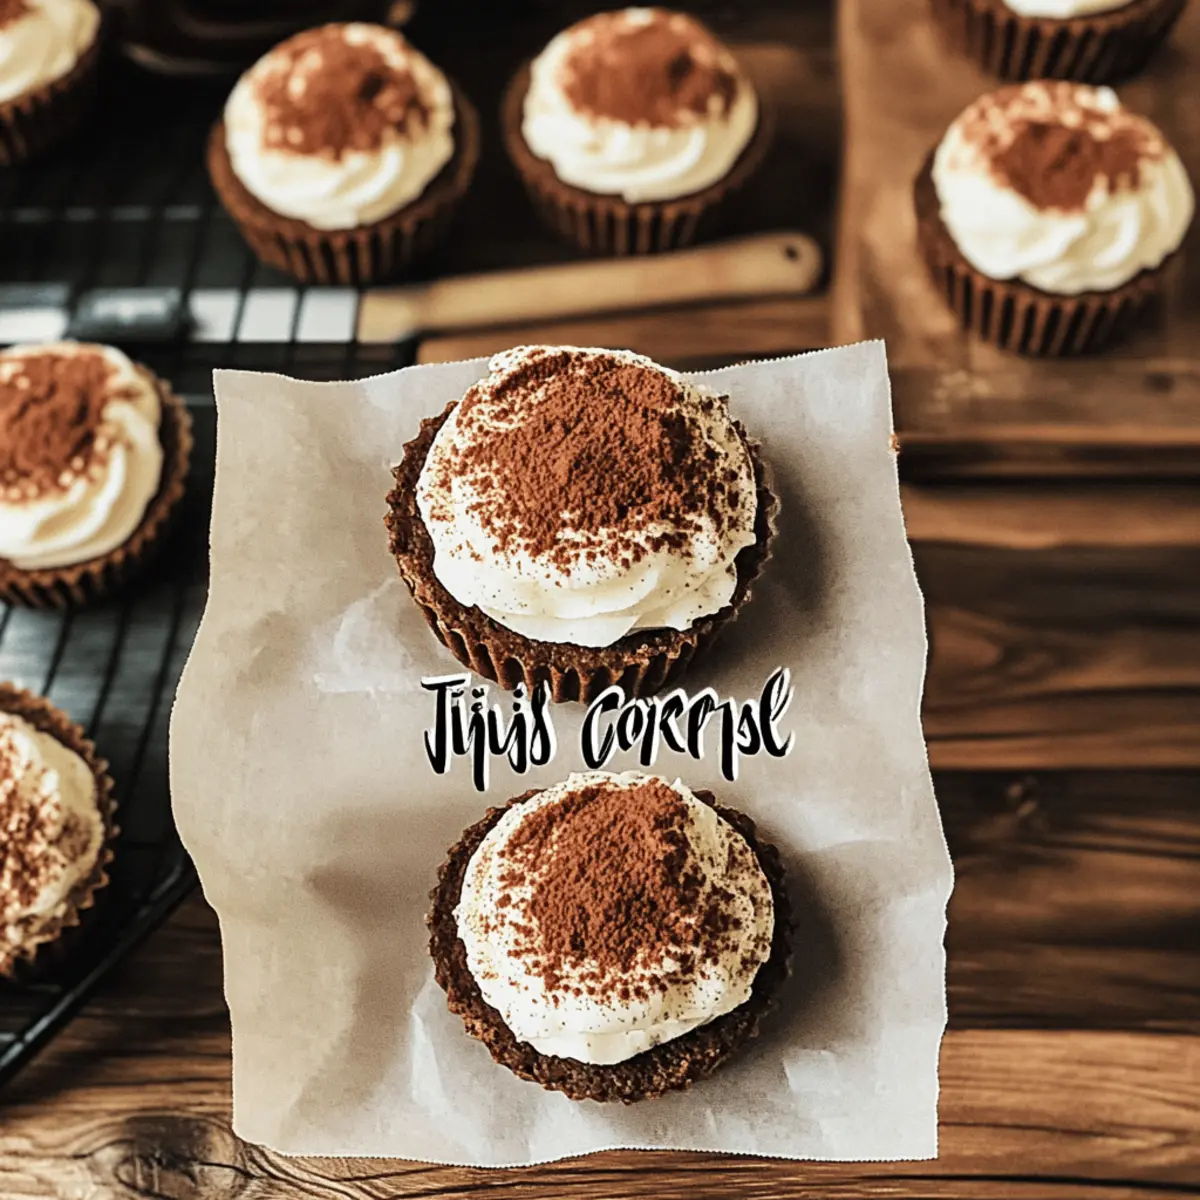
The aroma of coffee wafting through the kitchen transports me back to that quaint little café I stumbled upon in Rome, where I first experienced the enchanting layers of tiramisu. Today, I’m thrilled to share my Tiramisu Cookie Cups Recipe—a playful twist on the beloved classic that turns an indulgent dessert into delightful, individual servings! These charming cookie cups marry the rich flavors of espresso and creamy mascarpone with a crunchy chocolate cookie base, making them not only visually stunning but also incredibly customizable for any occasion. Whether you prefer a stronger coffee kick or a non-alcoholic version, this recipe allows you to tailor it to your taste. Plus, they’re freezer-friendly and perfect for gatherings, ensuring everyone gets a sweet taste of this Italian delight. Ready to impress your friends and family with these scrumptious treats? Let’s dive in and create something magical together!
Why are Tiramisu Cookie Cups irresistible?
Decadent Layering: Each cup showcases distinct layers of rich espresso filling, fluffy mascarpone cream, and a crunchy cookie base, making every bite an unforgettable treat.
Personalization: Whether you enjoy a bold coffee flavor or prefer a lighter, non-alcoholic experience, this recipe lets you adjust ingredients to suit your preferences.
Visually Stunning: These cookie cups are not only delicious but also perfect for showcasing at any gathering, impressing guests with their elegant presentation. Pair them with a cup of fresh espresso or complement them by serving alongside Butter Chicken Bites for an unforgettable culinary experience!
Quick Setup: Perfect for busy home cooks, these cookie cups can be prepared in advance and stored—allowing flavors to develop further—making hosting stress-free!
Fun Twist: This playful take on classic tiramisu transforms a beloved dessert into individual portions, offering a unique way to enjoy the timeless Italian flavors we all love.
Tiramisu Cookie Cups Recipe Ingredients
For the Cookie Base
- Crushed Chocolate Cookies – Provides the crunchy base; you can use Oreos or any chocolate wafer cookies as a substitute.
- Melted Butter – Binds the cookie crumbs together; essential for texture—no substitutions here.
For the Coffee Layer
- Strong Brewed Espresso – Adds depth and flavor to the filling; for a milder taste, substitute with strong brewed coffee.
- Coffee Liqueur – Enhances coffee flavor; you can omit this for a non-alcoholic version.
- Semi-Sweet Chocolate Chips – Contributes richness and chocolate flavor; for a more intense taste, try dark chocolate chips.
For the Cream Layer
- Heavy Cream – Creates a smooth, pudding-like filling; essential—no substitution recommended.
- Cornstarch – Necessary for thickening the chocolate mixture to achieve the right consistency.
- Mascarpone Cheese – Key to the creamy layer; there’s no direct substitute, though cream cheese works if you’re okay with a different taste.
- Powdered Sugar – Adds sweetness to the mascarpone layer; can use granulated sugar, but it won’t dissolve as smoothly.
- Vanilla Extract – Enhances overall flavor; while you can omit it, substituting with almond extract is an option.
For Garnishing
- Unsweetened Cocoa Powder or Chocolate Shavings – Used for dusting or garnishing; chocolate shavings can add an extra decorative touch.
Step‑by‑Step Instructions for Tiramisu Cookie Cups Recipe
Step 1: Preheat the Oven
Begin by preheating your oven to 350°F (175°C). While the oven heats, line a standard muffin tin with cupcake wrappers to create the perfect molds for your Tiramisu Cookie Cups. This step ensures an easy release and tidy presentation for your delightful treats.
Step 2: Prepare the Cookie Base
In a medium bowl, mix crushed chocolate cookies with melted butter until it resembles damp sand. Press this cookie mixture firmly into the base and up the sides of each cupcake wrapper, making sure the layer is compact. Bake in the preheated oven for about 5 minutes, then remove and let cool completely.
Step 3: Melt Chocolate Mixture
In a small saucepan, melt semi-sweet chocolate chips and butter over low heat, stirring continuously until smooth and fully combined. This rich chocolate mixture will form a luxurious layer in your Tiramisu Cookie Cups. Once melted, remove from heat and allow it to cool slightly.
Step 4: Thicken the Chocolate Filling
In a separate bowl, whisk together heavy cream and cornstarch until smooth. Gradually pour this mixture into the melted chocolate while stirring constantly over medium heat. Cook until the mixture thickens, which should take about 5-7 minutes. This will create a luscious, velvety filling for your dessert.
Step 5: Mix the Mascarpone Cream
In another bowl, combine room temperature mascarpone cheese with powdered sugar and vanilla extract. Use a hand mixer to blend the mixture until smooth and creamy, ensuring there are no lumps. This step is crucial for achieving that light, fluffy layer that complements the rich chocolate filling.
Step 6: Whip the Heavy Cream
In a clean mixing bowl, whip heavy cream until stiff peaks form. This should take about 3-5 minutes. Be careful not to over-whip the cream, as you’ll want a silky texture that will mix beautifully with the mascarpone layer while still maintaining volume.
Step 7: Combine Cream Layers
Gently fold the whipped heavy cream into the mascarpone mixture, taking care to maintain the airy texture. This lightens the mixture and creates that indulgent, creamy layer perfect for your Tiramisu Cookie Cups.
Step 8: Assemble the Layers
Start layering your Tiramisu Cookie Cups by adding a spoonful of the chocolate filling into each cookie base, smoothing it out evenly. Follow with a generous layer of the mascarpone cream. Repeat the layers, making sure the last layer is the mascarpone mixture. Allow each layer to set for about 10 minutes in the refrigerator.
Step 9: Chill and Set
Once assembled, dust the top of each Tiramisu Cookie Cup with unsweetened cocoa powder or chocolate shavings for an elegant finish. Then, refrigerate your assembled cups for at least 4 hours or overnight. This chilling period allows the flavors to meld beautifully, making each bite a delightful experience.
Make Ahead Options
These Tiramisu Cookie Cups are perfect for busy home cooks looking to save time while still delivering an impressive dessert! You can prepare the cookie base and chocolate filling up to 24 hours in advance. Simply cool the cookie bases completely after baking, then layer them with the chocolate filling and mascarpone cream when ready to serve. Make sure to cover them well with plastic wrap to prevent drying out. Once assembled, refrigerate the cups for at least 4 hours or overnight to let the flavors develop. With this make-ahead strategy, you’ll have mouthwatering Tiramisu Cookie Cups ready to enjoy, making entertaining easier and stress-free!
Expert Tips for Tiramisu Cookie Cups
-
Room Temperature Mascarpone: Make sure your mascarpone cheese is at room temperature for easier blending into the creamy filling, ensuring a smooth texture.
-
Avoid Over-Whipping: When whipping the heavy cream, stop as soon as stiff peaks form. Over-whipping can lead to graininess and a less airy cream layer.
-
Customize Coffee Strength: Adjust the strength of your espresso according to your preference for a milder or bolder flavor in your Tiramisu Cookie Cups recipe.
-
Layering Strategy: Ensure each layer sets for about 10 minutes before adding the next one to prevent mixing and maintain distinct layers.
-
Topping Ideas: For a decorative touch, get creative with your garnishing—consider using chocolate shavings, fresh berries, or even a sprinkle of cinnamon atop your assembled cups.
What to Serve with Tiramisu Cookie Cups
Elevate your dessert experience by pairing these delightful treats with complementary sides that enhance their rich flavors.
-
Fresh Espresso: A classic partner to tiramisu, it enhances the coffee notes while providing a bold contrast to the sweet layers.
-
Whipped Cream: Light and fluffy, it adds a creamy element that beautifully balances the rich chocolate layers without overwhelming the palate.
-
Chocolate-Covered Strawberries: These fruity bites lend a refreshing sweetness that cuts through the richness of the cookie cups, creating a perfect flavor harmony.
-
Chilled Moscato: This light, sweet wine complements the coffee flavor beautifully, adding a fragrant floral note to your dessert experience.
-
Almond Biscotti: The crunchiness of biscotti makes for a delightful contrast, inviting you to dip it into your espresso alongside the cookie cups.
-
Salted Caramel Drizzle: A warm caramel sauce adds a luxurious touch, its sweet-salty notes enhancing every layer of your Tiramisu Cookie Cups.
-
Coconut Macaroons: These chewy little delights introduce a tropical flavor that contrasts wonderfully with the coffee and chocolate, diversifying your dessert table.
Indulging in these pairings will surely create a memorable dining experience, celebrating the allure of Tiramisu Cookie Cups!
Tiramisu Cookie Cups Recipe Variations
Feel free to explore these delightful twists to make your Tiramisu Cookie Cups uniquely yours!
-
Dairy-Free: Substitute mascarpone with coconut cream and use dairy-free chocolate chips for a creamy yet indulgent treat.
-
Gluten-Free: Swap the chocolate cookies for gluten-free varieties or almond meal to create a crumbly, delightful base that everyone can enjoy.
-
Non-Alcoholic: Omit the coffee liqueur and replace with vanilla extract, maintaining the rich flavor profile without the alcohol.
-
Flavor Boost: Add a dash of espresso powder to the mascarpone layer for an even more robust coffee flavor that will tantalize your taste buds.
-
Texture Twist: Incorporate crushed nuts, such as pistachios or almonds, between layers for an added crunch and a unique twist on the classic texture.
-
Fruit Infusion: Layer in fresh raspberries or strawberries for a fruity accent that complements the rich coffee and chocolate flavors beautifully.
-
Spicy Kick: For a unique flavor twist, sprinkle a pinch of cinnamon or a dash of chili powder in the chocolate layer to awaken your senses.
-
Mini Treats: Use mini cupcake wrappers and adjust baking time for bite-sized versions that are perfect for parties or gatherings, alongside a side of Sausage Rigatoni Dish.
These variations not only cater to diverse dietary needs but also bring a touch of personal flair to your Tiramisu Cookie Cups. Enjoy experimenting with these options!
Storage Tips for Tiramisu Cookie Cups
Fridge: Store your Tiramisu Cookie Cups in an airtight container in the refrigerator for up to 3 days. Allowing them to sit for a day lets the flavors meld beautifully.
Freezer: If you’d like to keep them longer, freeze the assembled cups for up to 2 months. Be sure to wrap them tightly in plastic wrap and then place them in a freezer-safe container.
Reheating: For the best experience, enjoy your cookie cups cold rather than reheating. Simply remove them from the fridge or freezer and allow them to thaw at room temperature for about 30 minutes before serving.
Flavor Enhancement: The flavors of your Tiramisu Cookie Cups will become more pronounced after a day in the fridge, making them an ideal make-ahead dessert for gatherings!
Tiramisu Cookie Cups Recipe FAQs
How do I choose the right coffee for my Tiramisu Cookie Cups?
Absolutely! For the perfect coffee flavor, I recommend using strong brewed espresso to give your cookie cups that authentic kick. If you prefer a milder profile, you can easily substitute it with strong brewed coffee. Just keep in mind that the intensity of your Tiramisu Cookie Cups will largely depend on the espresso strength you choose.
What’s the best way to store Tiramisu Cookie Cups?
Store your Tiramisu Cookie Cups in an airtight container in the refrigerator for up to 3 days. If you can resist the temptation, letting them sit for a day will help the flavors meld beautifully, truly enhancing the taste!
Can I freeze Tiramisu Cookie Cups? How?
Of course! To freeze your Tiramisu Cookie Cups, wrap each one tightly in plastic wrap and place them in a freezer-safe container. They can be stored for up to 2 months. When you’re ready to enjoy them, simply allow them to thaw at room temperature for about 30 minutes before serving!
What should I do if my mascarpone is too thick to mix?
Ah, the common mascarpone dilemma! If your mascarpone cheese is too thick, it’s important to ensure it’s at room temperature before mixing. If it still feels too dense, you can gently whisk it in a bowl before adding it to the other ingredients. This will help to create that silky smooth consistency essential for your cream layer.
Are there any dietary considerations I should be aware of when making Tiramisu Cookie Cups?
Great question! This recipe contains dairy and gluten, so those with allergies should take caution. You can substitute the mascarpone cheese with cream cheese if you need a variation, but this might slightly alter the flavor. For a gluten-free option, choose gluten-free chocolate cookies for the base.
What can I do if my whipped cream doesn’t reach stiff peaks?
No worries! If you find your whipped cream hasn’t reached stiff peaks, ensure that your mixing bowl and beaters are clean and dry. Sometimes, just whipping a little longer will do the trick—keep an eye on it to avoid over-whipping, which can lead to graininess. If you’re in a hurry, you can add a spoonful of cornstarch while whipping; it can help stabilize the cream.
Delight in Tiramisu Cookie Cups Recipe for Sweet Perfection
Ingredients
Equipment
Method
- Preheat your oven to 350°F (175°C) and line a muffin tin with cupcake wrappers.
- Mix crushed chocolate cookies with melted butter in a bowl and press into cupcake wrappers. Bake for about 5 minutes and let cool.
- Melt semi-sweet chocolate chips and butter over low heat in a saucepan until smooth. Remove from heat and let cool slightly.
- In a bowl, whisk heavy cream and cornstarch together until smooth. Gradually pour into the melted chocolate over medium heat. Cook until thickened (5-7 minutes).
- Combine mascarpone cheese, powdered sugar, and vanilla in a bowl and blend until smooth.
- Whip heavy cream in a clean mixing bowl until stiff peaks form (3-5 minutes).
- Fold the whipped cream into the mascarpone mixture gently.
- Layer each cup with the chocolate filling and mascarpone cream, letting each set for 10 minutes in the refrigerator.
- Dust the tops with cocoa powder or chocolate shavings and refrigerate for at least 4 hours or overnight.