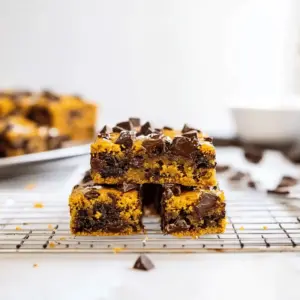
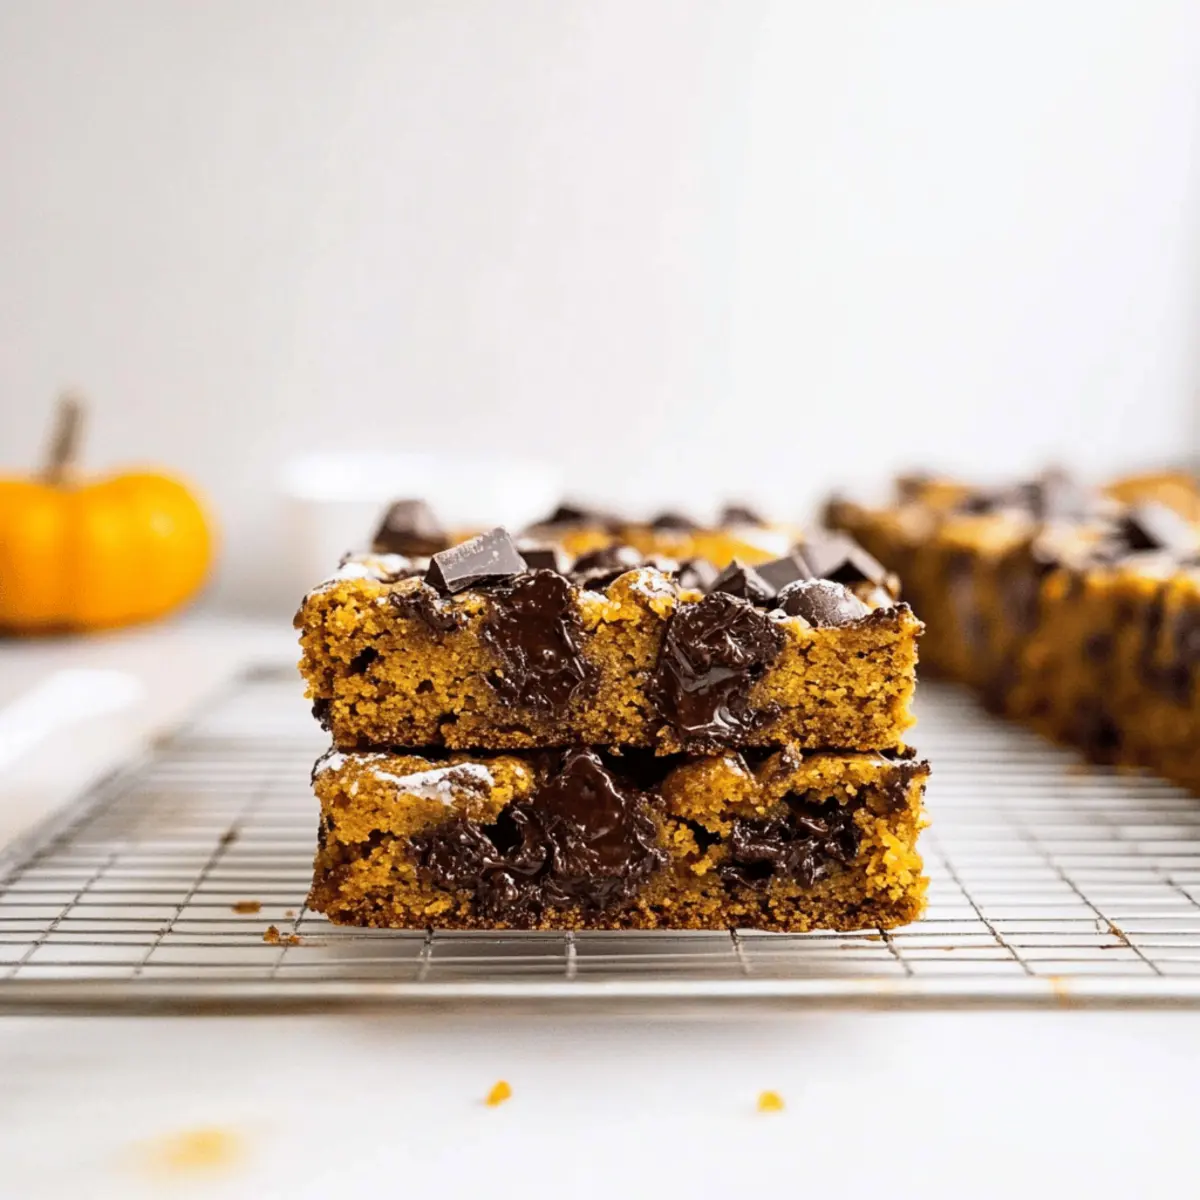
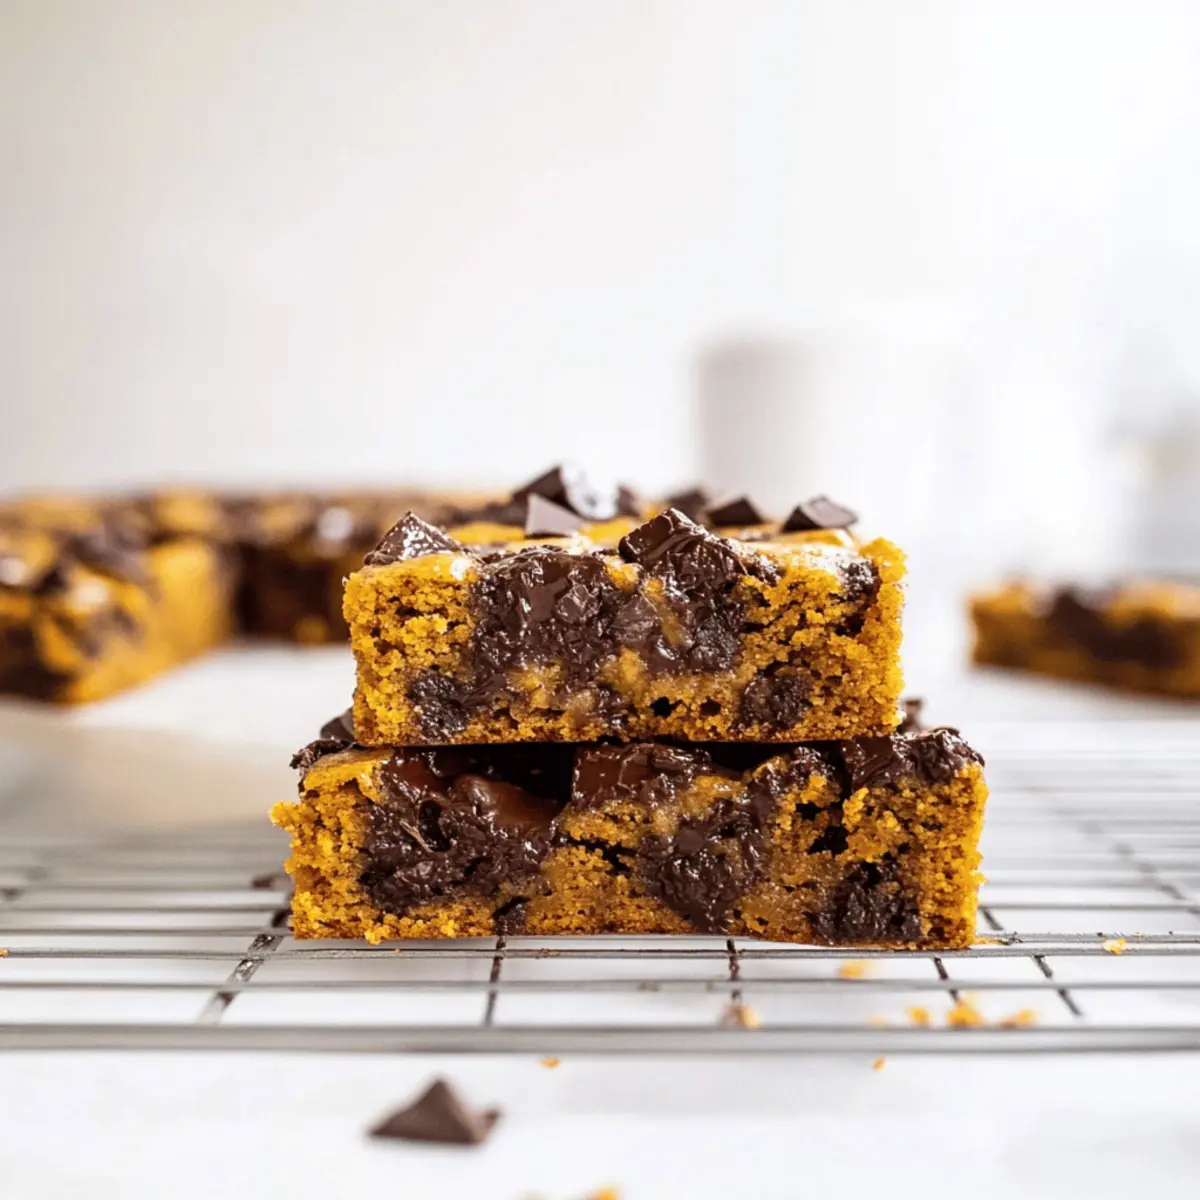
As the crispness of autumn settles in, I find myself reaching for cozy recipes that capture the season’s essence. Enter my Easy Homemade Pumpkin Chocolate Chunk Bars—these bars are not just a dessert; they embody the warm comfort of fall baking. With a few simple ingredients, this recipe transforms canned pumpkin into moist, fudgy bars that practically melt in your mouth. Not only are they quick to whip up, but the gooey chocolate chunks elevate each bite, making them a guaranteed crowd-pleaser. Whether you’re hosting a fall gathering or craving a sweet treat for yourself, these bars will undoubtedly bring smiles to your kitchen. Curious about how to make these delightful morsels? Let’s dive in!
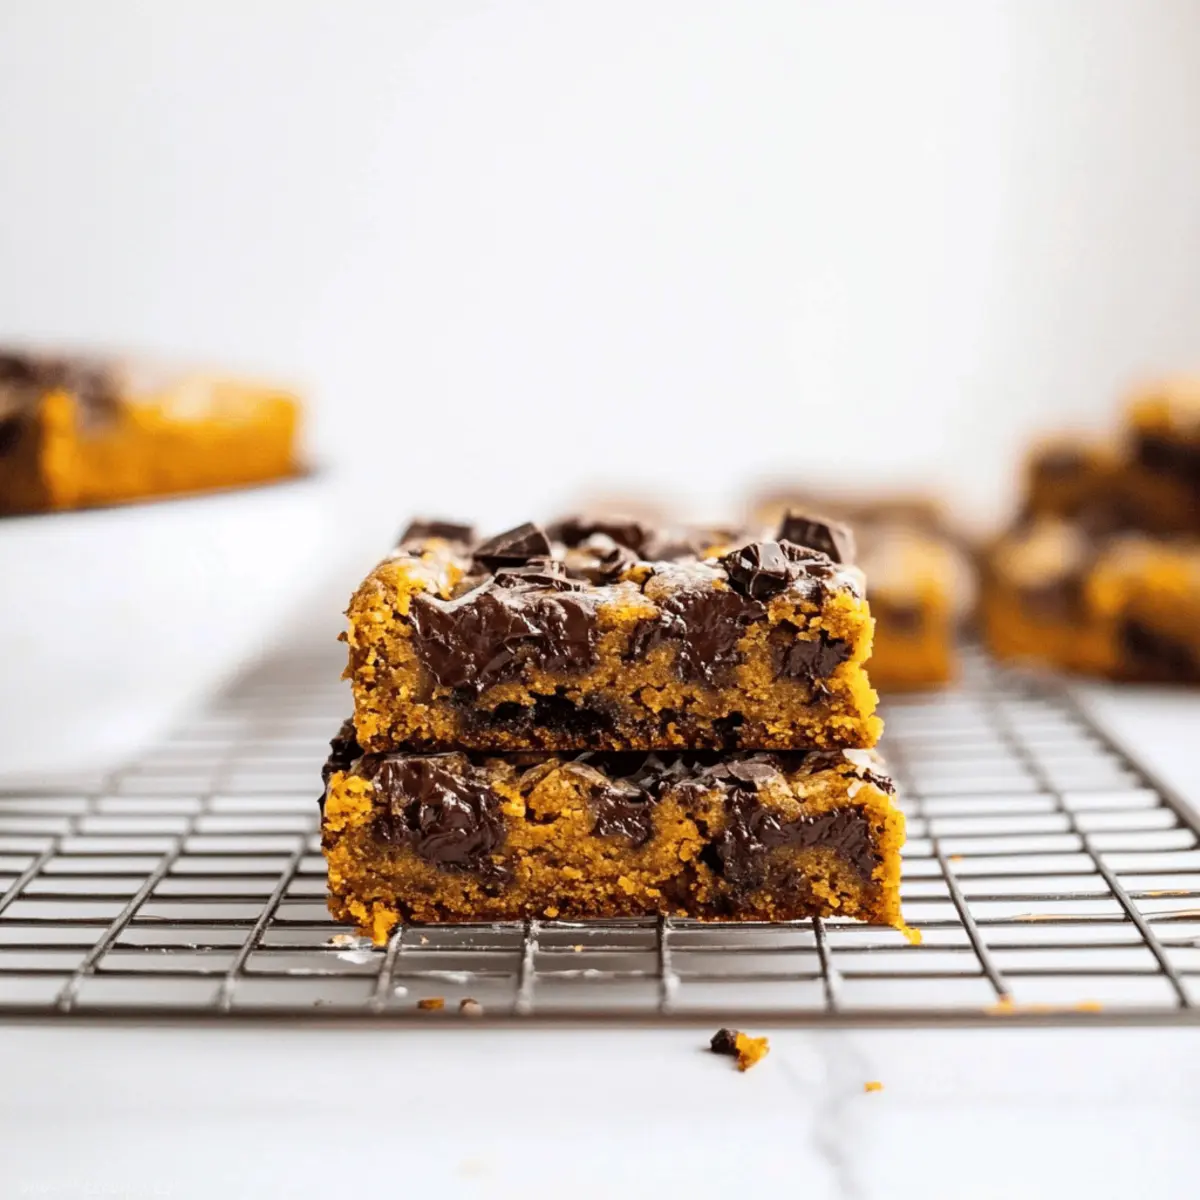
Why are These Pumpkin Bars Irresistible?
Simplicity at its finest: With just a few pantry staples, you’ll have these delectable bars ready in no time.
Moist and Fudgy: Thanks to the pumpkin puree, every bite is soft and bursting with flavor.
Chocolate Lovers Unite: Gooey chocolate chunks intermingle with spiced pumpkin for an incredibly satisfying dessert.
Versatile Treat: Customize with nuts or dried fruits for a personal touch—perfect for all taste preferences!
Crowd-Pleasing Delight: Whether for a family gathering or cozy nights in, these bars never fail to impress.
Homemade Pumpkin Bars Ingredients
For the Batter
• Butter – Provides richness and moisture; use unsalted for better control over salt levels.
• Sugar – Sweetens the bars and contributes to browning; light brown sugar enhances flavor, but granulated works too.
• Egg – Binds ingredients and adds moisture; replace with a flax egg for a vegan option.
• Vanilla Extract – Adds depth of flavor; pure vanilla extract is preferable for the best taste.
• Pumpkin Puree – The star of homemade pumpkin bars, offering moisture and flavor; canned pumpkin puree is recommended for ease.
• All-Purpose Flour – Provides structure; substitute with a 1:1 gluten-free flour blend if desired.
• Baking Powder – Helps the bars rise; ensure it’s fresh for best results.
• Spices (cinnamon, nutmeg, ginger, etc.) – Infused with classic pumpkin flavors; adjust to your taste for a personalized touch.
• Chocolate Chunks – Adds sweetness and texture; substitute with chocolate chips or omit for a less sweet bar.
Optional Topping
• Cream Cheese Frosting – Elevates these bars with added decadence; check the frosting recipe for a delightful finishing touch.
Step‑by‑Step Instructions for Homemade Pumpkin Bars
Step 1: Preheat the Oven and Prepare the Pan
Begin by preheating your oven to 350°F (175°C). While it warms, take a square baking pan (9×9 inches works well) and line it with parchment paper, allowing some overhang for easy removal later. This preparation step will ensure your homemade pumpkin bars bake evenly and release smoothly after cooling.
Step 2: Cream Butter and Sugar
In a mixing bowl, combine softened unsalted butter and light brown sugar, using an electric mixer on medium speed. Beat until the mixture becomes light and fluffy, about 2-3 minutes. This creaming process is vital as it incorporates air into the batter, contributing to the moist texture of your pumpkin bars.
Step 3: Add Eggs and Vanilla
Next, incorporate one large egg and a teaspoon of pure vanilla extract into the creamed butter and sugar mixture. Mix on low speed until everything is smoothly combined, taking care to scrape down the sides of the bowl if necessary. This step enriches the flavors of your homemade pumpkin bars.
Step 4: Mix in Pumpkin Puree
Now it’s time to add one cup of canned pumpkin puree to your mixture. Blend everything together on low speed until you achieve a completely smooth consistency. The pumpkin puree not only adds flavor but also enhances the moist texture we all love in pumpkin bars.
Step 5: Whisk Dry Ingredients
In another bowl, whisk together one cup of all-purpose flour, one teaspoon of baking powder, and your favorite pumpkin pie spices (like cinnamon and nutmeg) until evenly combined. This ensures that your dry ingredients are well mixed, preventing any clumps in the batter and allowing for a uniform rise in your homemade pumpkin bars.
Step 6: Combine Wet and Dry Ingredients
Gradually fold the dry mixture into the wet ingredients using a silicone spatula, being careful not to overmix. Stir until just combined; the batter should be thick and slightly lumpy. This gentle folding technique helps maintain the lightness in your homemade pumpkin bars while ensuring every bite is flavorful.
Step 7: Stir in Chocolate Chunks
Fold in approximately one cup of chocolate chunks into the batter, reserving a small handful for topping. The chocolate will provide delightful bursts of sweetness throughout your bars. Ensure an even distribution of chocolate to create that beloved contrast in texture and flavor within your pumpkin bars.
Step 8: Pour and Spread the Batter
Pour the thick batter into your prepared baking pan, using a spatula to spread it evenly across the bottom. Sprinkle the reserved chocolate chunks on top for an extra chocolatey finish. This step gives your homemade pumpkin bars a pleasing appearance and enhances their flavor as the chocolate melts during baking.
Step 9: Bake the Bars
Place the pan in the preheated oven and bake for about 30 minutes. Start checking for doneness a few minutes earlier by inserting a toothpick into the center; it should come out with a few moist crumbs, but not wet batter. This visual cue indicates that your homemade pumpkin bars are perfectly baked.
Step 10: Cool and Slice
Once baked, remove the pan from the oven and allow the bars to cool completely in the pan. This cooling allows them to firm up, making slicing easier. Once cool, use the parchment overhang to lift the bars out, then cut them into squares or rectangles according to your preferred serving size.
Expert Tips for Homemade Pumpkin Bars
-
Pumpkin Mix Caution: Always check that your canned pumpkin is pure pumpkin, not pumpkin pie mix, which contains added spices and sugars.
-
Parchment Paper Magic: Line your baking pan with parchment paper overhang to make lifting your homemade pumpkin bars out of the pan a breeze.
-
Toothpick Test: When checking for doneness, aim for the toothpick to come out with a few moist crumbs, ensuring the bars remain delectably moist.
-
Avoid Overmixing: Gently fold wet and dry ingredients together just until combined. Overmixing can lead to dense bars rather than the desired soft texture.
-
Extra Flavor Options: For added depth, consider incorporating a dash of maple syrup into the batter or adding a pinch of sea salt on top before baking to enhance sweetness.
Homemade Pumpkin Bars Variations
Feel free to make these delightful pumpkin bars your own with various twists and substitutions.
-
Nutty Crunch: Add a cup of chopped walnuts or pecans for a delightful crunch and added heartiness.
-
Dried Fruit: Toss in some dried cranberries or raisins to bring a burst of sweetness and chewiness to the bars. They complement the pumpkin beautifully!
-
Gluten-Free Option: Substitute all-purpose flour with a 1:1 gluten-free flour blend for a celiac-friendly version that doesn’t compromise on taste.
-
Vegan Delight: Replace the egg with a flax egg (1 tablespoon ground flaxseed mixed with 2.5 tablespoons water) for a delicious vegan adaptation without losing any moisture.
-
Chocolate Swap: Experiment with different types of chocolate—dark, milk, or even white chocolate—to alter the flavor profile to your liking. Each variety adds a unique twist!
-
Spice It Up: Add a pinch of cayenne pepper or a dash of cardamom to the spice mix for an unexpected kick that warms the palate.
-
Frosted Goodness: Top your bars with a simple cream cheese frosting for a lavish finish. This sweet topping takes the bars to a whole new level—just like a slice of pumpkin cake!
-
Caramel Drizzle: Drizzle homemade or store-bought caramel sauce over the cooled bars for an indulgent sweet touch that’s perfect for special occasions.
Now that you know how to customize your pumpkin bars, get creative in the kitchen and let your taste buds soar! If you love the festive flavors of fall, you might also enjoy trying out seasonal favorites like Homemade Apple Crisp or a comforting batch of Pumpkin Spice Cookies. Happy baking!
How to Store and Freeze Homemade Pumpkin Bars
Room Temperature: Keep your homemade pumpkin bars in an airtight container for up to 3 days. This prevents them from drying out while still allowing you to enjoy their deliciousness.
Fridge: For longer freshness, store the bars in the refrigerator for up to a week. Ensure they are covered to maintain their moist texture.
Freezer: Freeze your pumpkin bars by slicing them and wrapping each piece tightly in plastic wrap, then placing them in a zip-top bag. They can be stored for up to 3 months, making it easy to treat yourself later!
Reheating: When you’re ready to enjoy your frozen bars, simply thaw them in the fridge overnight or pop them in the microwave for a few seconds until warm. Perfect for a cozy treat!
What to Serve with Easy Homemade Pumpkin Chocolate Chunk Bars?
Indulge in a fall-inspired feast alongside these moist pumpkin bars that are sure to warm your heart and tantalize your taste buds.
- Whipped Cream: A light and fluffy topping can elevate the pumpkin bars, adding a delightful contrast to their dense texture.
- Vanilla Ice Cream: Creamy ice cream melts into the warm bars, creating a dreamy dessert experience that’s perfect for crisp autumn evenings.
- Spiced Chai Latte: The warm spices of chai beautifully complement the flavors in the pumpkin bars, creating an aromatic and cozy pairing.
- Maple Pecan Topping: A sprinkle of toasted pecans with a drizzle of maple syrup adds crunch and enhances the autumnal flavors, making each bite even more decadent.
- Caramel Sauce: Drizzling a bit of caramel over the pumpkin bars adds a sweet, buttery finish that perfectly balances the richness of the chocolate.
- Bourbon Hot Chocolate: For an adult twist, serve these bars with a rich, spiked hot chocolate—a warm hug in a mug on chilly nights.
- Coconut Whipped Cream: For a dairy-free option, this adds a subtle tropical flair, enhancing the pumpkin flavors while keeping it light and airy.
- Chocolate Mint Tea: The fresh mint notes against rich chocolate and spiced pumpkin make for an invigorating drink that ties the meal together beautifully.
Make Ahead Options
These Easy Homemade Pumpkin Chocolate Chunk Bars are perfect for meal prep enthusiasts! You can prepare the batter up to 24 hours in advance by mixing together the wet and dry ingredients separately and storing them in the refrigerator. To prevent browning, keep the components airtight. When you’re ready to bake, simply combine the wet and dry mixtures, fold in the chocolate chunks, pour into the prepared pan, and bake. Additionally, the baked bars can be stored in an airtight container at room temperature for up to 3 days or refrigerated for up to a week. This way, you’ll have these delicious homemade pumpkin bars on hand whenever you need a sweet treat!
Homemade Pumpkin Bars Recipe FAQs
What type of pumpkin is best for this recipe?
Absolutely! For these homemade pumpkin bars, I recommend using canned pumpkin puree rather than fresh pumpkin. Canned pumpkin is consistent in texture and flavor, ensuring your bars turn out moist and delicious every time. Just be sure it’s pure pumpkin and not pumpkin pie filling, which contains added sugars and spices that can alter the flavor of your bars.
How should I store leftover pumpkin bars?
You can store your homemade pumpkin bars in an airtight container at room temperature for up to 3 days. If you want them to last longer, transfer them to the refrigerator where they can stay fresh for up to a week. Just be sure to keep them covered to maintain that wonderful moisture!
Can I freeze my pumpkin bars?
Yes, you can definitely freeze these homemade pumpkin bars for later enjoyment! Start by cutting them into individual portions and wrapping each slice tightly in plastic wrap. Place the wrapped pieces in a zip-top freezer bag and freeze them for up to 3 months. To thaw, just leave them in the fridge overnight or pop them in the microwave for a few seconds until warm.
What should I do if my pumpkin bars are too dry?
If your homemade pumpkin bars turn out drier than expected, it could be due to overbaking or not enough moisture in the batter. Always test for doneness around the 30-minute mark using a toothpick; it should come out with a few moist crumbs, not completely dry. For next time, try adding a little bit more pumpkin puree or checking your oven temperature to ensure accurate baking.
Are there any allergy considerations with this recipe?
Absolutely! Be mindful of allergies when making these homemade pumpkin bars. This recipe contains common allergens like eggs and gluten (from the all-purpose flour). If you need a gluten-free version, I recommend using a 1:1 gluten-free flour blend. For egg allergies, you can replace the egg with a flax egg—simply mix 1 tablespoon of ground flaxseed with 2.5 tablespoons of water and let it sit for a few minutes until it thickens!
Can my pumpkin bars be made vegan?
Very! You can easily make these homemade pumpkin bars vegan. Simply substitute the egg with a flax egg as mentioned above, and use vegan butter instead of regular butter. This way, you can enjoy all the spiced goodness without any animal products!

Irresistibly Moist Homemade Pumpkin Bars with Chocolate Chunks
Ingredients
Equipment
Method
- Preheat your oven to 350°F (175°C) and prepare a 9x9 inch square baking pan with parchment paper.
- In a mixing bowl, cream together unsalted butter and light brown sugar until fluffy, about 2-3 minutes.
- Add the egg and vanilla extract to the mixture, and mix until well combined.
- Blend in the canned pumpkin puree until the mixture is smooth.
- In a separate bowl, whisk together flour, baking powder, and pumpkin pie spices.
- Gradually fold the dry ingredients into the wet mixture until just combined.
- Fold in the chocolate chunks, reserving some for topping.
- Pour the batter into the prepared pan, spreading evenly and sprinkling reserved chocolate chunks on top.
- Bake in the preheated oven for about 30 minutes, checking for doneness with a toothpick.
- Allow to cool completely in the pan before lifting out and slicing into bars.